1. Produk verbyview
The Omezizy D450BT is a compact Bluetooth thermal label printer designed for efficient label printing in various settings, including small businesses and home offices. It supports both Bluetooth and USB connectivity, offering versatility for different operating systems.
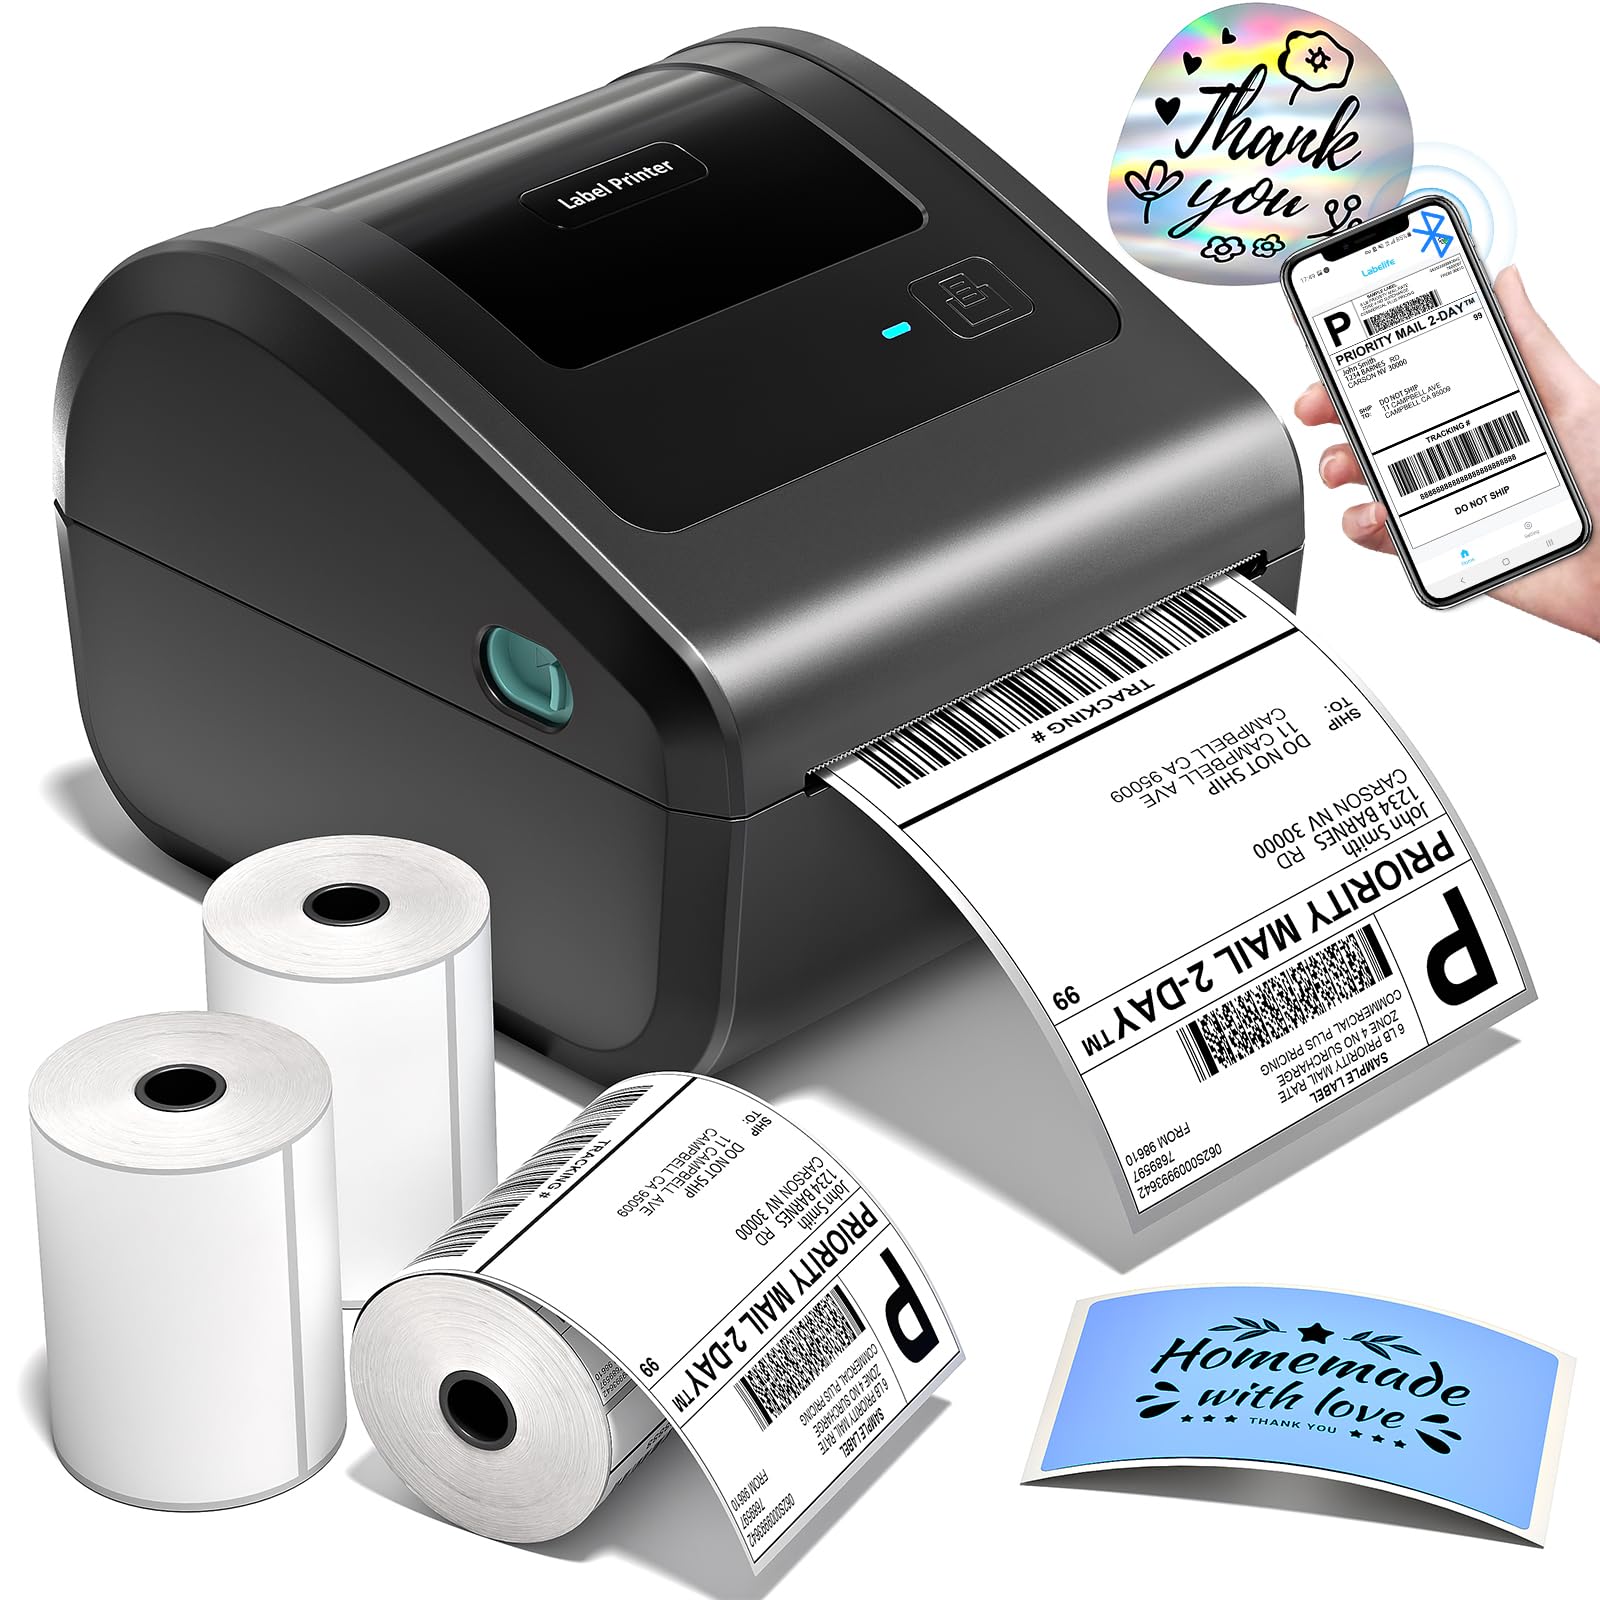
Figure 1: Omezizy D450BT Thermal Label Printer (Grey)
Wat is in die boks

Figure 2: Contents of the Omezizy D450BT printer box. Includes the printer, power adapter, USB cable, and label rolls.
Die pakket sluit gewoonlik in:
- Omezizy D450BT Thermal Label Printer
- Kragadapter en kabel
- USB kabel
- Label Rolls (quantity may vary)
- Vinnige Begingids
Drukker kenmerke

Figure 3: D450BT Bluetooth Label Printer highlighting multi-platform compatibility.
- Kompakte ontwerp: Space-saving dimensions of 7.3"D x 6.3"W x 5.35"H.
- Built-in Paper Bin: For internal roll paper and rear folded paper, eliminating the need for external holders.
- Dubbele verbinding: Supports Bluetooth for wireless printing and USB for stable wired connections across Android, iOS, Windows, macOS, Linux, and ChromeOS.
- Hoëspoed drukwerk: Up to 72 labels per minute (127mm/s).
- Hoë resolusie: 203 DPI vir duidelike en skerp afdrukke.
- Veelsydige etiketondersteuning: Accommodates label widths from 1 to 4.6 inches, suitable for shipping, mailing, barcode, and various other labels.
- Inklose termiese drukwerk: Uses thermal labels, requiring no ink or toner.
2. Opstelling en installering
2.1 Koppel die drukker
The D450BT printer offers both Bluetooth and USB connection options.
USB Connection (PC)
- Attach the power cord to the adapter, then connect the adapter cable to the printer.
- Connect the USB Type-C cable from the printer to your computer.
- Turn on the power switch (I: On; O: Off) located at the rear of the printer. The indicator light on the printer will turn blue.
- Install the printer driver on your computer. Refer to the included software CD or download the latest driver from the Omezizy webwebwerf.
Bluetooth Connection (PC/Mobile)
For Bluetooth connection, you will need to download the "Labelife" app from Google Play or the App Store for mobile devices, or use the Labelife software for PC.
- Ensure the printer is powered on and the indicator light is blue.
- On your device (PC or mobile), open the Labelife application.
- Navigate to the printer connection settings within the app.
- Select "Wireless connection" (Bluetooth).
- Choose your printer from the list of available devices and click "Connect".
- Once connected, the app will confirm the connection status. You can view device information to confirm the Bluetooth connection.
Video 1: Demonstrates connecting the Omezizy D450BT printer via Bluetooth to a computer using the Labelife software.
Video 2: Shows how to download the Labelife app, connect the printer via Bluetooth, and crop/print a PDF from a mobile device.
2.2 Laai van etikette
The D450BT supports both roll labels (internal compartment) and fan-fold labels (rear feed).
Roll Labels Loading
- Press the release latches on both sides of the printer to open the top cover.
- Disassemble the paper roll holder and install the label roll onto it. Ensure the print side of the labels faces upward.
- Insert the assembled label roll into the internal paper compartment.
- Pull the leading edge of the labels through the paper guide until it extends slightly out of the printer's front slot. Ensure the label is straight and smooth.
- Adjust the paper guides to fit the label width snugly.
- Maak die drukkerdeksel toe totdat dit in plek klik.
Fan-Fold Labels Loading
- Maak die boonste deksel van die drukker oop.
- Place the fan-fold labels into the rear feed slot. Ensure the print side of the labels faces upward.
- Pull the leading edge of the labels through the paper guide until it extends slightly out of the printer's front slot. Ensure the label is straight and smooth.
- Adjust the paper guides to fit the label width snugly.
- Maak die drukkerdeksel toe totdat dit in plek klik.
Video 3: Comprehensive guide on printer PC connection, paper loading for both roll and fan-fold labels, automatic label recognition, printing a test page, pausing/resuming printing, and restoring factory settings.
3. Bediening van die drukker
3.1 Automatic Label Recognition
The printer features an automatic label recognition function to detect label size. This is crucial when changing label types or sizes.
- Ensure the label is inserted straight and smooth.
- When the printer's indicator light is blue (standby mode), press and hold the Feed Button for approximately 3 seconds.
- Release the Feed Button. The printer will automatically feed a few labels to learn the size.
Let wel: Every time the continuous paper is changed to another type of paper roll, the automatic label recognition function needs to be manually operated to learn the labels.
3.2 Druk van 'n toetsbladsy
To verify printer functionality and label alignment:
- Ensure the label is inserted correctly and the printer is in standby mode (blue light).
- Double-click the Feed Button. The printer will print a test page.
3.3 Pausing and Resuming Printing
During a print job, you can pause and resume printing:
- Om pouse printing: When the printer is actively printing, press the Feed Button once. The printing will stop.
- Om hervat printing: When the printer is paused, press the Feed Button once again. Printing will continue from where it left off.
4. Onderhoud
Gereelde onderhoud verseker optimale werkverrigting en verleng die lewensduur van u drukker.
4.1 Skoonmaak van die drukkop
Clean the print head if print quality degrades (e.g., faint lines, missing dots).
- Skakel die drukker af en trek die kragkabel uit.
- Maak die boonste deksel oop.
- Use an alcohol swab (70% isopropyl alcohol) to gently wipe the print head surface.
- Laat die drukkop heeltemal droog word voordat u die deksel toemaak en die drukker aanskakel.
4.2 Cleaning the Platen Roller
Clean the platen roller if labels are not feeding smoothly or if there are adhesive residues.
- Skakel die drukker af en trek die kragkabel uit.
- Maak die boonste deksel oop.
- Use an alcohol swab to clean the platen roller, rotating it manually to clean the entire surface.
- Allow it to dry completely before closing the cover and turning on the printer.
5. Probleemoplossing
Hierdie afdeling spreek algemene probleme aan wat jy mag teëkom.
5.1 Algemene kwessies
- Geen krag: Ensure the power adapter is securely connected to both the printer and a working power outlet. Check the power switch is in the 'On' position.
- Drukker koppel nie: For USB, ensure the cable is properly connected and drivers are installed. For Bluetooth, verify Bluetooth is enabled on your device, the printer is discoverable, and you've connected through the Labelife app/software.
- Blank Labels or Faint Prints: Check if the thermal labels are loaded with the print side facing up. Clean the print head as described in the maintenance section. Ensure you are using thermal labels.
- Etikette word nie korrek ingevoer nie: Ensure labels are inserted straight and the paper guides are adjusted to the label width. Perform automatic label recognition. Clean the platen roller if necessary.
- Printer Stops Mid-Print: Check for paper jams or low label supply. If paused, press the Feed Button to resume.
5.2 Herstel van fabrieksinstellings
If you experience persistent issues, restoring factory settings may help.
- Skakel die drukker af.
- Press and hold the Feed Button.
- While holding the Feed Button, turn on the printer.
- Continue holding the Feed Button until the red indicator light flashes 5 times.
- Release the Feed Button. The printer will reset to factory defaults.
6. Spesifikasies
| Kenmerk | Spesifikasie |
|---|---|
| Handelsmerk | Omezizy |
| Model Naam | D450-BT |
| Verbindingstegnologie | Bluetooth, USB |
| Druk tegnologie | Termies |
| Spesiale kenmerk | Bluetooth and USB Connection, Compatible with Mobile Phone & PC, Thermal Printing, No ink No toner, Auto Detection, Built-in Paper Bin |
| Kleur | Grys |
| Drukker Uitset | Monochroom |
| Max Printspeed Monochroom | 72 dpm (127 mm/s) |
| Item gewig | 0.97 kilogram |
| Produk afmetings | 7.3" D x 6.3" B x 5.35" H |
7. Waarborg en Ondersteuning
For warranty information, technical support, or further assistance, please refer to the official Omezizy webwebwerf of kontak hul kliëntediens direk. Bewaar u aankoopbewys vir waarborgeise.