Inleiding
Thank you for choosing the AVID POWER 20V Brushless Power Drill Set. This manual provides essential information for the safe operation, maintenance, and troubleshooting of your new drill. Please read this manual thoroughly before first use and keep it for future reference.
Algemene Veiligheidsinstruksies
Volg altyd basiese veiligheidsmaatreëls om die risiko van brand, elektriese skok en persoonlike besering te verminder.
- Werksarea veiligheid: Hou jou werkarea skoon en goed belig. Oorvol of donker areas nooi ongelukke uit. Moenie elektriese gereedskap in plofbare atmosfere gebruik nie, soos in die teenwoordigheid van vlambare vloeistowwe, gasse of stof.
- Elektriese veiligheid: Kraggereedskapproppe moet by die aansluiting pas. Moet nooit die prop op enige manier verander nie. Vermy liggaamskontak met geaarde oppervlaktes soos pype, verkoelers, stowe en yskaste.
- Persoonlike veiligheid: Always wear eye protection. Use hearing protection when operating the drill for extended periods. Dress properly; avoid loose clothing or jewelry. Secure long hair.
- Gereedskap gebruik en versorging: Moenie die kraggereedskap forseer nie. Gebruik die korrekte kraggereedskap vir u toepassing. Ontkoppel die prop van die kragbron en/of verwyder die batterypak voordat u enige aanpassings maak, bykomstighede verander of kraggereedskap bêre.
- Gebruik en versorging van die batterypak: Recharge only with the charger specified by the manufacturer. Do not use battery packs with any other power tools. When the battery pack is not in use, keep it away from other metal objects.
Produk verbyview
The AVID POWER 20V Brushless Power Drill Set includes the drill, a 2.0Ah lithium-ion battery, a charger, 10 drill bits, 10 screwdriver bits, a flexible shaft, and an extension bar.

Beeld: Oorview of the AVID POWER 20V Brushless Power Drill Set, showing the drill, battery, charger, and various accessories.
Sleutel kenmerke
- Borsellose motor: Delivers up to 355 In-lbs (40 Nm) of torque, offering extended runtime, reduced heat, and longer tool life.
- Metal Chuck: Ensures durability, superior grip, and precise bit retention for heavy-duty drilling.
- 2-spoed ratkas: Allows seamless switching between 0-400 RPM for screwdriving and 0-1400 RPM for drilling.
- 25+1 Koppelaarinstellings: Provides exact torque control to prevent stripping screws or damaging surfaces.
- Flexible Shaft: Enables access to hard-to-reach areas.
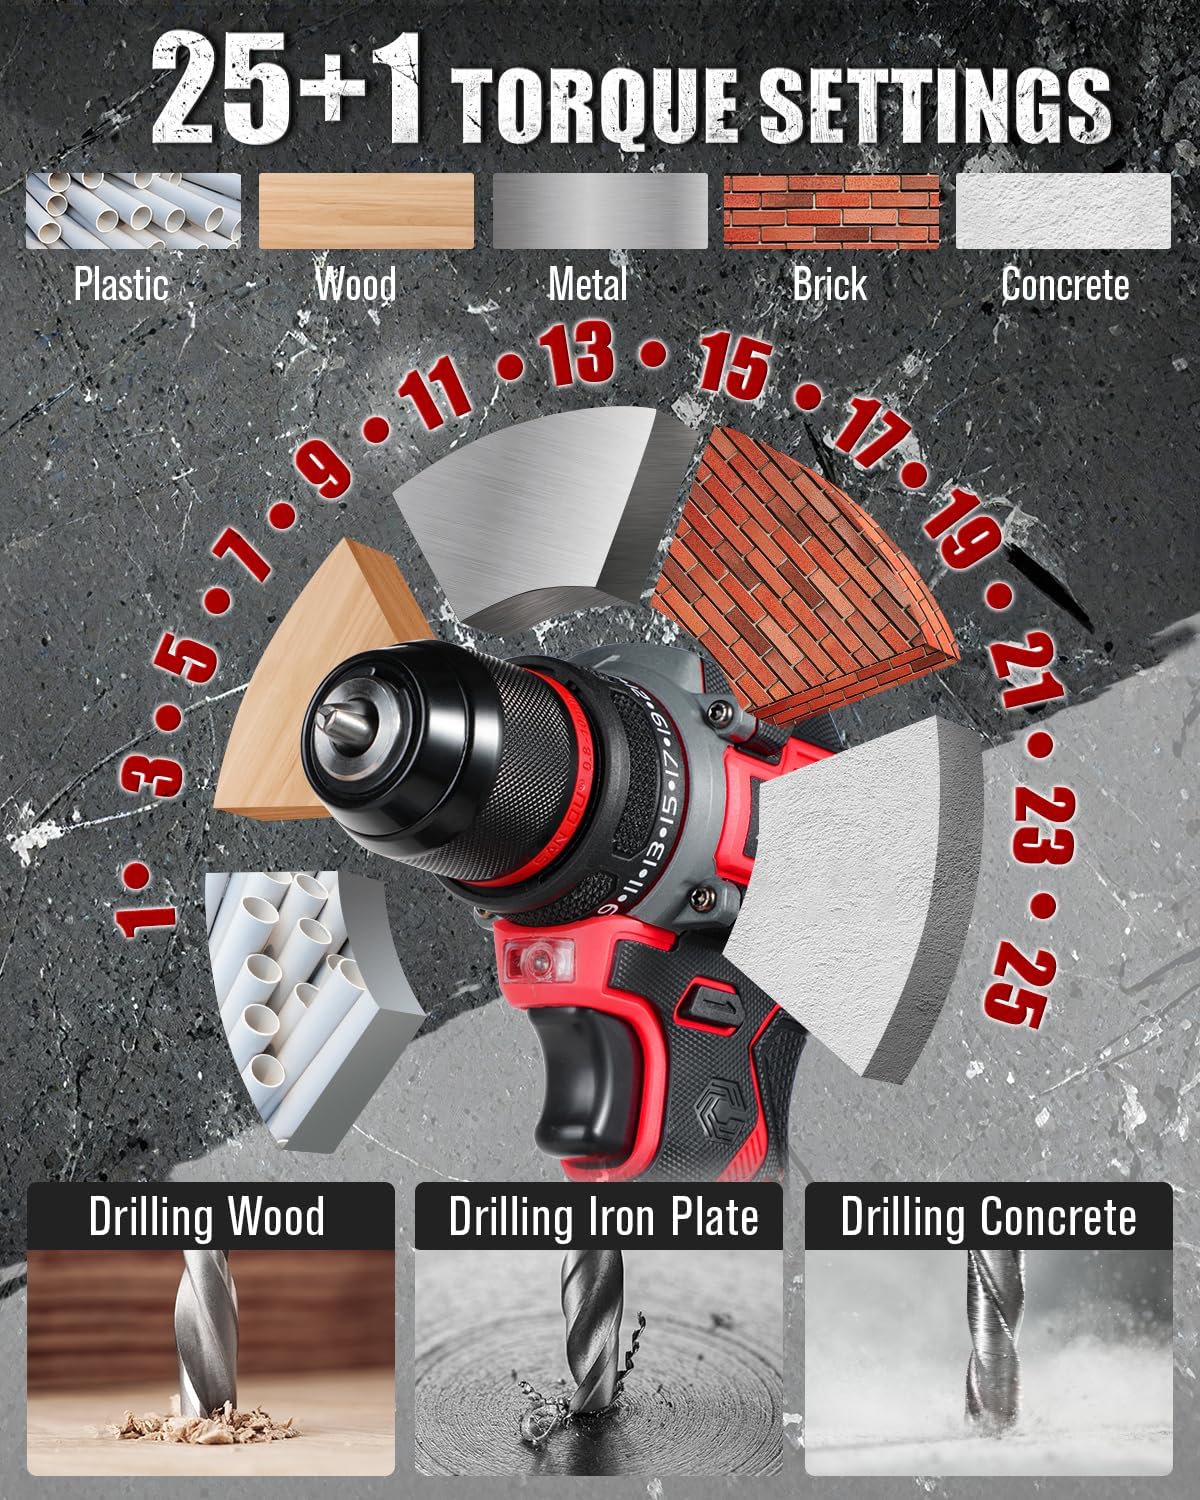
Image: Illustration of the brushless motor, highlighting its benefits including 40 N.M max torque, 1400 RPM max speed, and improved lifetime, power, reduced spark, and noise.
Opstelling
1. Laai die battery
- Connect the charger to a standard home power supply.
- Insert the 20V MAX Lithium-Ion battery into the charger. The charger's LED indicator will turn red, indicating charging is in progress.
- When the battery is fully charged, the LED indicator will turn green. Charging typically takes 3-5 hours.

Image: The battery charger connected to a power strip with the battery inserted, showing the charging process and various protection features like over-charger, over-heating, over-discharge, short circuit, over-current, and over-voltage beskerming.

Image: Close-up of the charger's LED indicator, showing red for 'Charging' and green for 'Fully Charged or No Load'.
2. Die battery installeer/verwyder
- Om te installeer: Rig die batterypak met die basis van die boorhandvatsel en skuif dit in totdat dit stewig in plek klik.
- Om te verwyder: Press the battery release button (usually located on the sides of the battery pack) and slide the battery out.
3. Boorpunte installeer/verwyder
- Ensure the drill is off and the battery is removed for safety.
- Draai die klauwplaat antikloksgewys om die kake oop te maak.
- Plaas die verlangde boorpunt of skroewedraaierpunt in die boorkop en maak seker dat dit gesentreer is.
- Rotate the chuck clockwise to tighten the jaws firmly around the bit. Ensure the bit is secure before operation.
- Om te verwyder, draai die boorkop antikloksgewys om die kake los te maak en trek die boorpunt uit.
Bedryfsinstruksies
1. Skakel aan/af
Press the trigger switch to turn the drill on. Release the trigger switch to turn it off.
2. Spoedaanpassing
The drill features a 2-speed gearbox for versatile applications.
- Lae spoed (0-400 opm): Ideal for controlled screwdriving and applications requiring higher torque.
- Hoë spoed (0-1 750 opm): Suitable for fast drilling into various materials.
Use the speed selector switch, located on top of the drill, to switch between low and high speeds.

Image: The drill demonstrating its 2-speed adjustment feature, showing the low speed (0-400 RPM) and high speed (0-1400 RPM) settings.
3. Torque Adjustment (25+1 Clutch Settings)
The torque adjustment ring allows you to select the appropriate torque setting for your task, preventing over-driving screws or damaging materials.
- Rotate the torque adjustment ring to select one of the 25 torque settings. Lower numbers are for smaller screws and softer materials; higher numbers are for larger screws and harder materials.
- The drill icon setting (marked as '+1') is for drilling applications, providing maximum torque.

Image: The drill's 25+1 torque settings dial, illustrating appropriate settings for different materials such as plastic, wood, metal, brick, and concrete, along with examples of drilling into wood, iron plate, and concrete.
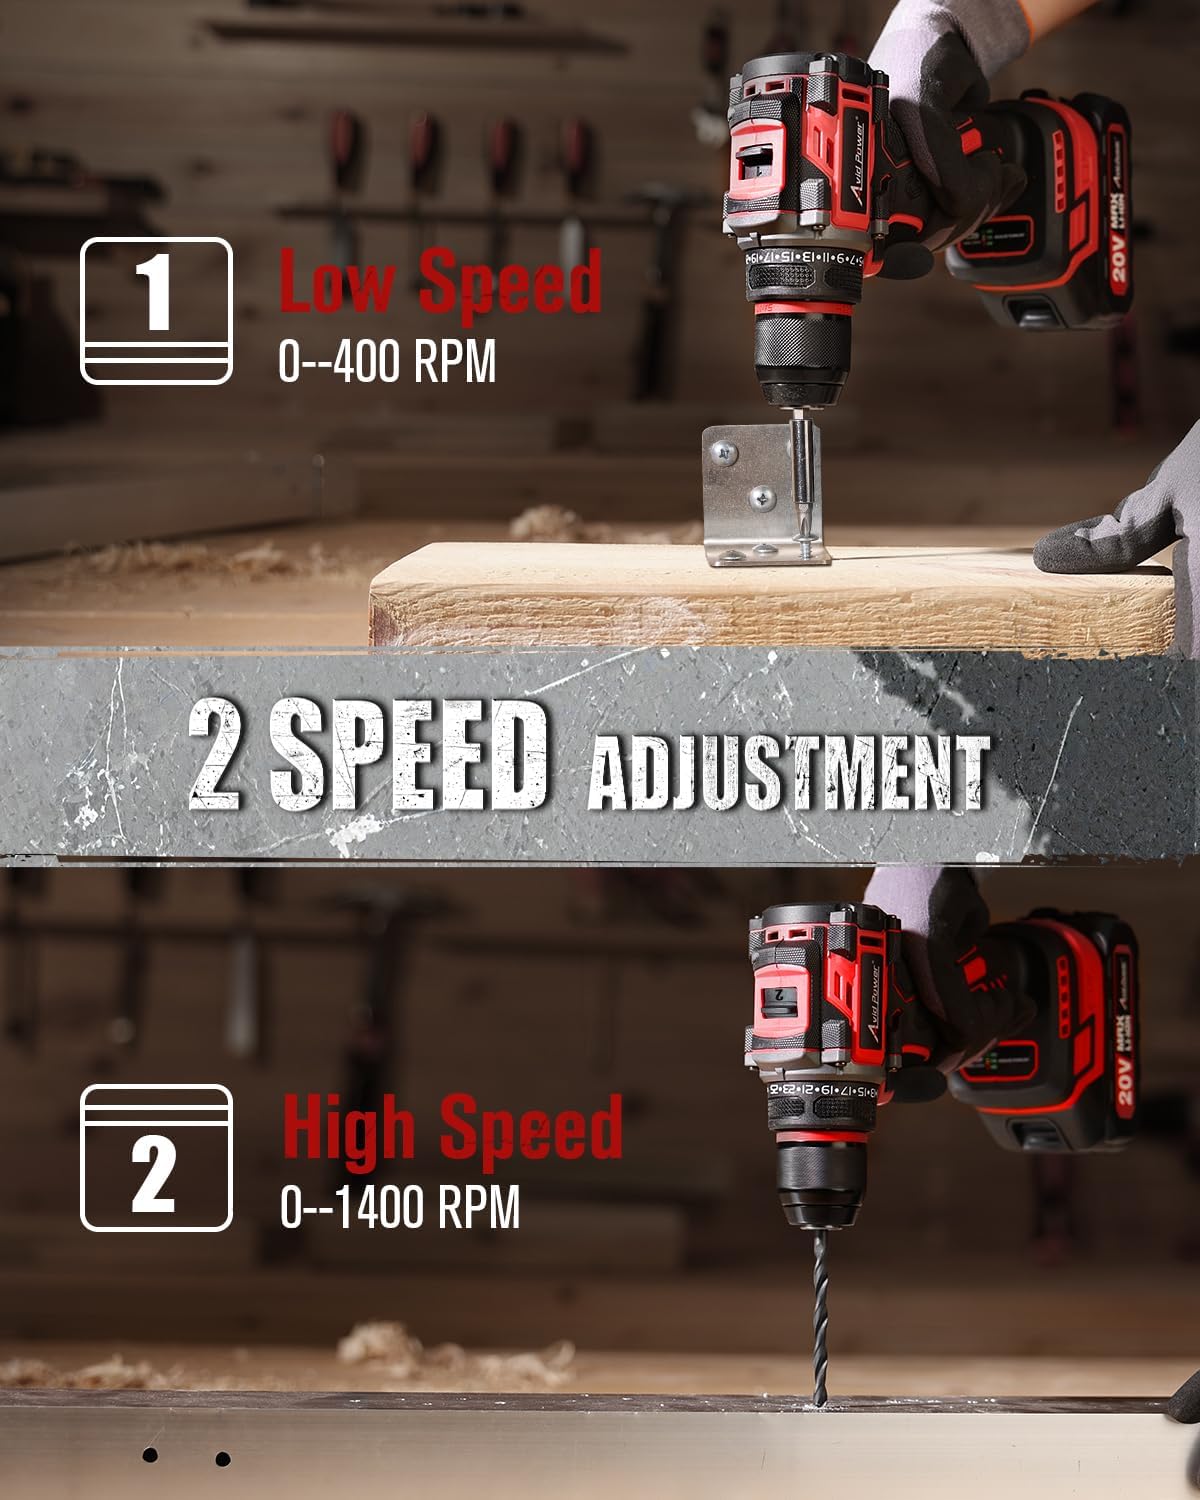
Image: The drill being used to drill into a concrete-like surface, demonstrating its 355 in-lbs (40 N.M) max torque capability.
4. Using the Flexible Shaft
The included flexible shaft is designed for reaching fasteners in tight or awkward spaces.
- Insert the flexible shaft into the drill chuck as you would a regular bit. Tighten the chuck securely.
- Insert the desired screwdriver bit into the end of the flexible shaft.
- Maneuver the flexible shaft to access the desired screw or fastener.

Image: A user operating the drill with the flexible shaft attached, reaching into a confined space to drive a screw, demonstrating its utility for hard-to-reach areas.
5. Battery Power Display
The battery pack features an integrated power display to indicate the remaining charge level.
- Press the button on the battery pack to activate the LED indicators.
- Multiple illuminated LEDs indicate a higher charge level (e.g., 3 LEDs for 100%, 2 LEDs for 70%, 1 LED for 30%).
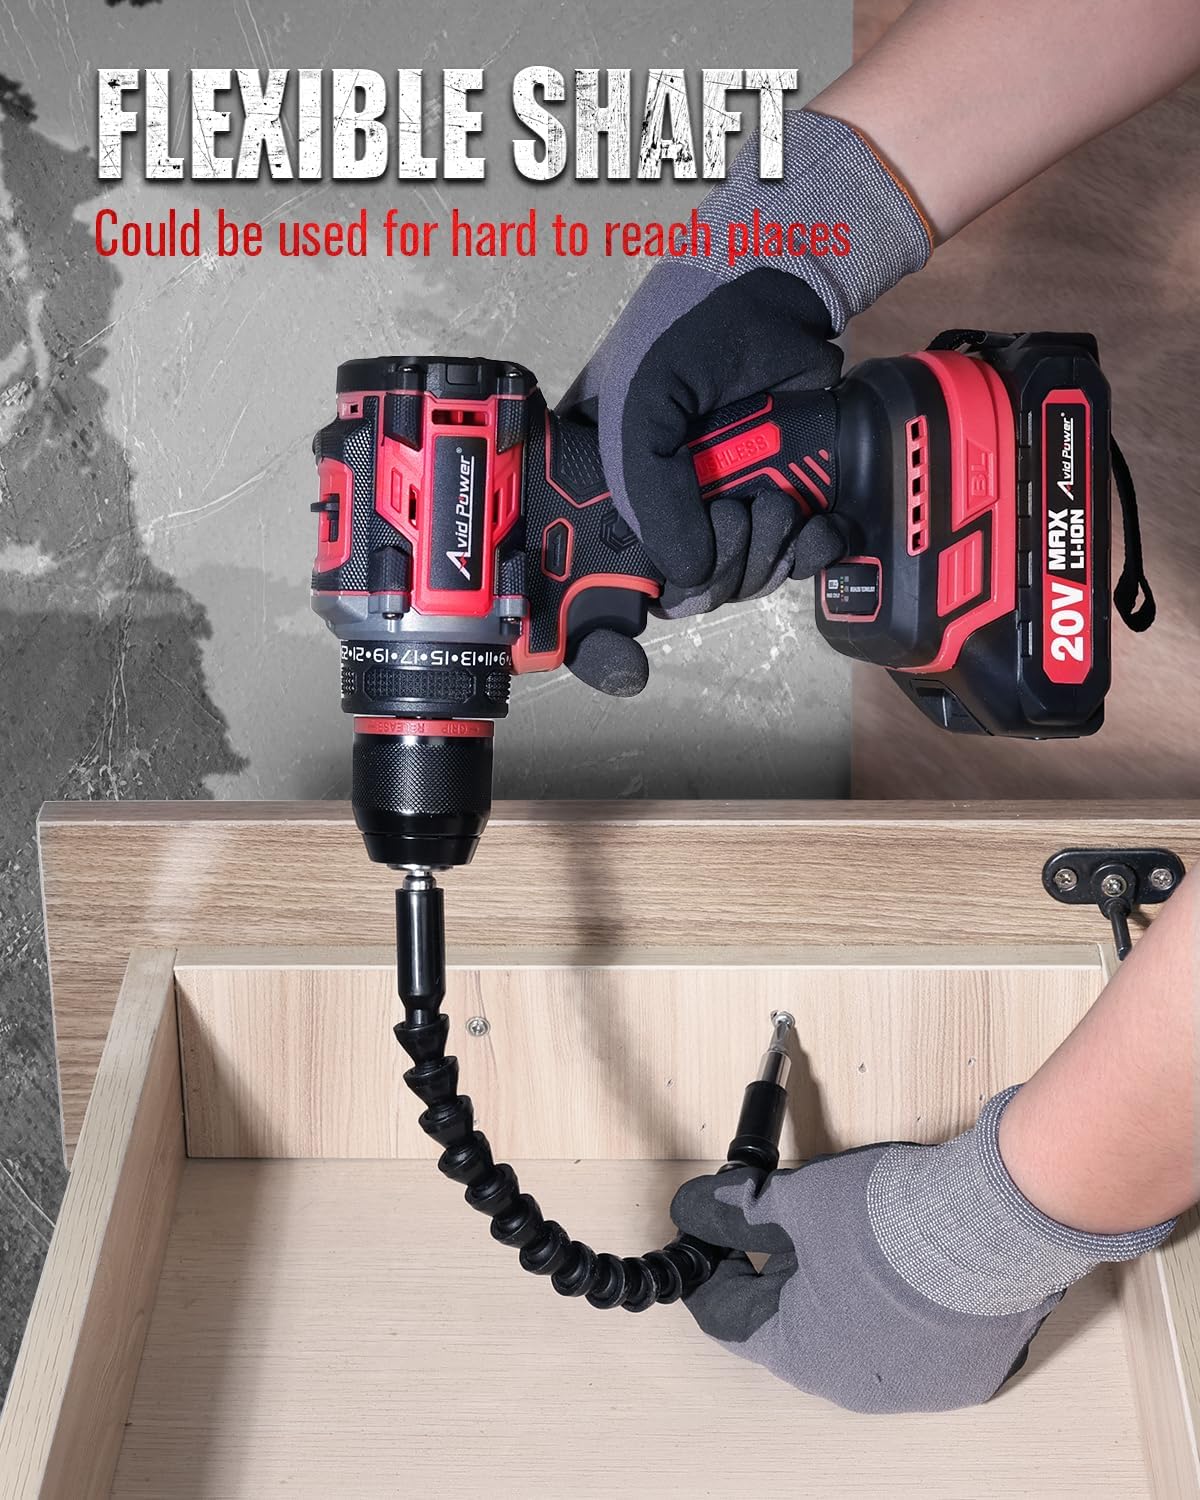
Image: The 20V MAX Li-ion battery pack with its power display, showing different charge levels (30%, 70%, 100%) indicated by the number of illuminated LED segments.
Onderhoud
- Skoonmaak: Regularly clean the ventilation openings of the drill to prevent dust accumulation. Use a soft, damp lap. Moenie harde chemikalieë of skuur skoonmaakmiddels gebruik nie.
- Berging: Store the drill, battery, and charger in a cool, dry place, away from direct sunlight and moisture. Ensure the battery is partially charged before long-term storage.
- Batterysorg: Do not store the battery in a discharged state. Recharge it periodically if not used for extended periods.
Probleemoplossing
| Probleem | Moontlike oorsaak | Oplossing |
|---|---|---|
| Boor begin nie | Battery nie gelaai of verkeerd geïnstalleer nie | Laai die battery volledig. Maak seker dat die battery stewig vasgeklik is. |
| Verminderde krag of spoed | Lae batterylading | Herlaai die battery. |
| Die boorpunt gly in die klauwplaat | Die boorkop is nie voldoende vasgedraai nie, of die boorsteen is vuil. | Ensure the chuck is tightened firmly. Clean the bit shank before insertion. |
| Charger LED remains red or off | Charger or battery fault, or no power supply | Check power outlet. Ensure battery is correctly inserted. If problem persists, contact support. |
Spesifikasies
- Model: ACD138
- Voltage: 20V MAKS
- Motor tipe: Borselloos
- Maksimum wringkrag: 355 In-lbs (40 Nm)
- Geen laai spoed:
- Low: 0-400 RPM
- High: 0-1400 RPM
- Koppelaar instellings: 25+1
- Chuck tipe: Heelmetaal
- Battery kapasiteit: 2.0Ah litium-ioon
- Laai tyd: 3-5 uur
Waarborg en Ondersteuning
For warranty information or technical support, please refer to the documentation included with your purchase or visit the official AVID POWER webwebwerf. Bewaar u aankoopbewys as bewys van aankoop vir enige waarborgeise.
For further assistance, you may contact AVID POWER customer service via their official webwebwerf: AVID POWER Store on Amazon.