1. Belangrike veiligheidsinligting
Read and understand all instructions before operating the lawn mower. Failure to follow all instructions listed below may result in electric shock, fire, and/or serious personal injury.
Algemene veiligheidswaarskuwings:
- Dra altyd gepaste persoonlike beskermende toerusting, insluitend oogbeskerming en stewige skoene.
- Hou kinders en troeteldiere weg van die snyarea.
- Moenie die grassnyer in nat toestande of reën gebruik nie.
- Inspekteer die area vir voorwerpe wat deur die lem gegooi kan word voordat jy maai.
- Ontkoppel altyd die krag voordat u enige onderhoud of skoonmaak uitvoer.
- Ensure all guards and safety devices are in place and functioning correctly.
2. Opstelling en samestelling
2.1 Uitpak
Verwyder alle komponente versigtig uit die verpakking. Maak seker dat alle onderdele wat in die paklys gelys word, teenwoordig is. Bewaar verpakking vir toekomstige berging of vervoer.
2.2 Handvatsel
The mower features a fold-over handle for convenient storage. To assemble for use, unfold the handle and secure it in the upright position using the provided knobs or levers. Ensure the handle is firmly locked to prevent movement during operation.

Figuur 1: oorview of the PowerSmart DB8015 Electric Lawn Mower, highlighting the fold-over handle, 12.5 AMP motor, 2-in-1 function (bagging & mulching), 10-gallon grass collection bag, and adjustable height setting with 6 options.
2.3 Grass Collection Bag Attachment
Attach the grass collection bag to the rear discharge opening of the mower. Ensure it is securely fastened to prevent grass clippings from escaping during operation.

Figure 2: A person emptying the 40L grass collection bag, demonstrating its capacity for less frequent emptying.
2.4 Kragverbinding
Connect the mower to a standard 120V, 60Hz electrical outlet using an appropriate outdoor-rated extension cord. Ensure the extension cord is in good condition and rated for the mower's 12.5 AMP power requirement.
3. Operasie
3.1 Begin van die grassnyer
To start the mower, first press the safety lock button, then pull the switch handle towards you. Release the safety lock button once the mower starts. To stop, release the switch handle.
3.2 Aanpassing van snyhoogte
The mower offers 6 height adjustments, ranging from 1.0 inches to 3.0 inches. To adjust, locate the height adjustment lever on the mower deck and move it to the desired position. Ensure all wheels are set to the same height for an even cut.

Figure 3: Visual representation of the 6 cutting height adjustments available on the mower, ranging from 1.0 to 3.0 inches.
3.3 Maaitegnieke
Operate the mower in a push-style manner. For best results, mow in straight, overlapping lines. Avoid overloading the motor by cutting excessively long or wet grass. The mower's 7-inch rear wheels and 5.5-inch front wheels contribute to easy maneuverability.

Figure 4: The mower in use, demonstrating its easy maneuverability due to its wheel design.
3.4 2-in-1 Function: Bagging and Mulching
This mower offers both bagging and mulching capabilities. When the grass collection bag is attached, clippings are collected. For mulching, remove the grass bag and ensure the mulching plug (if included) is properly inserted to circulate clippings back into the lawn.
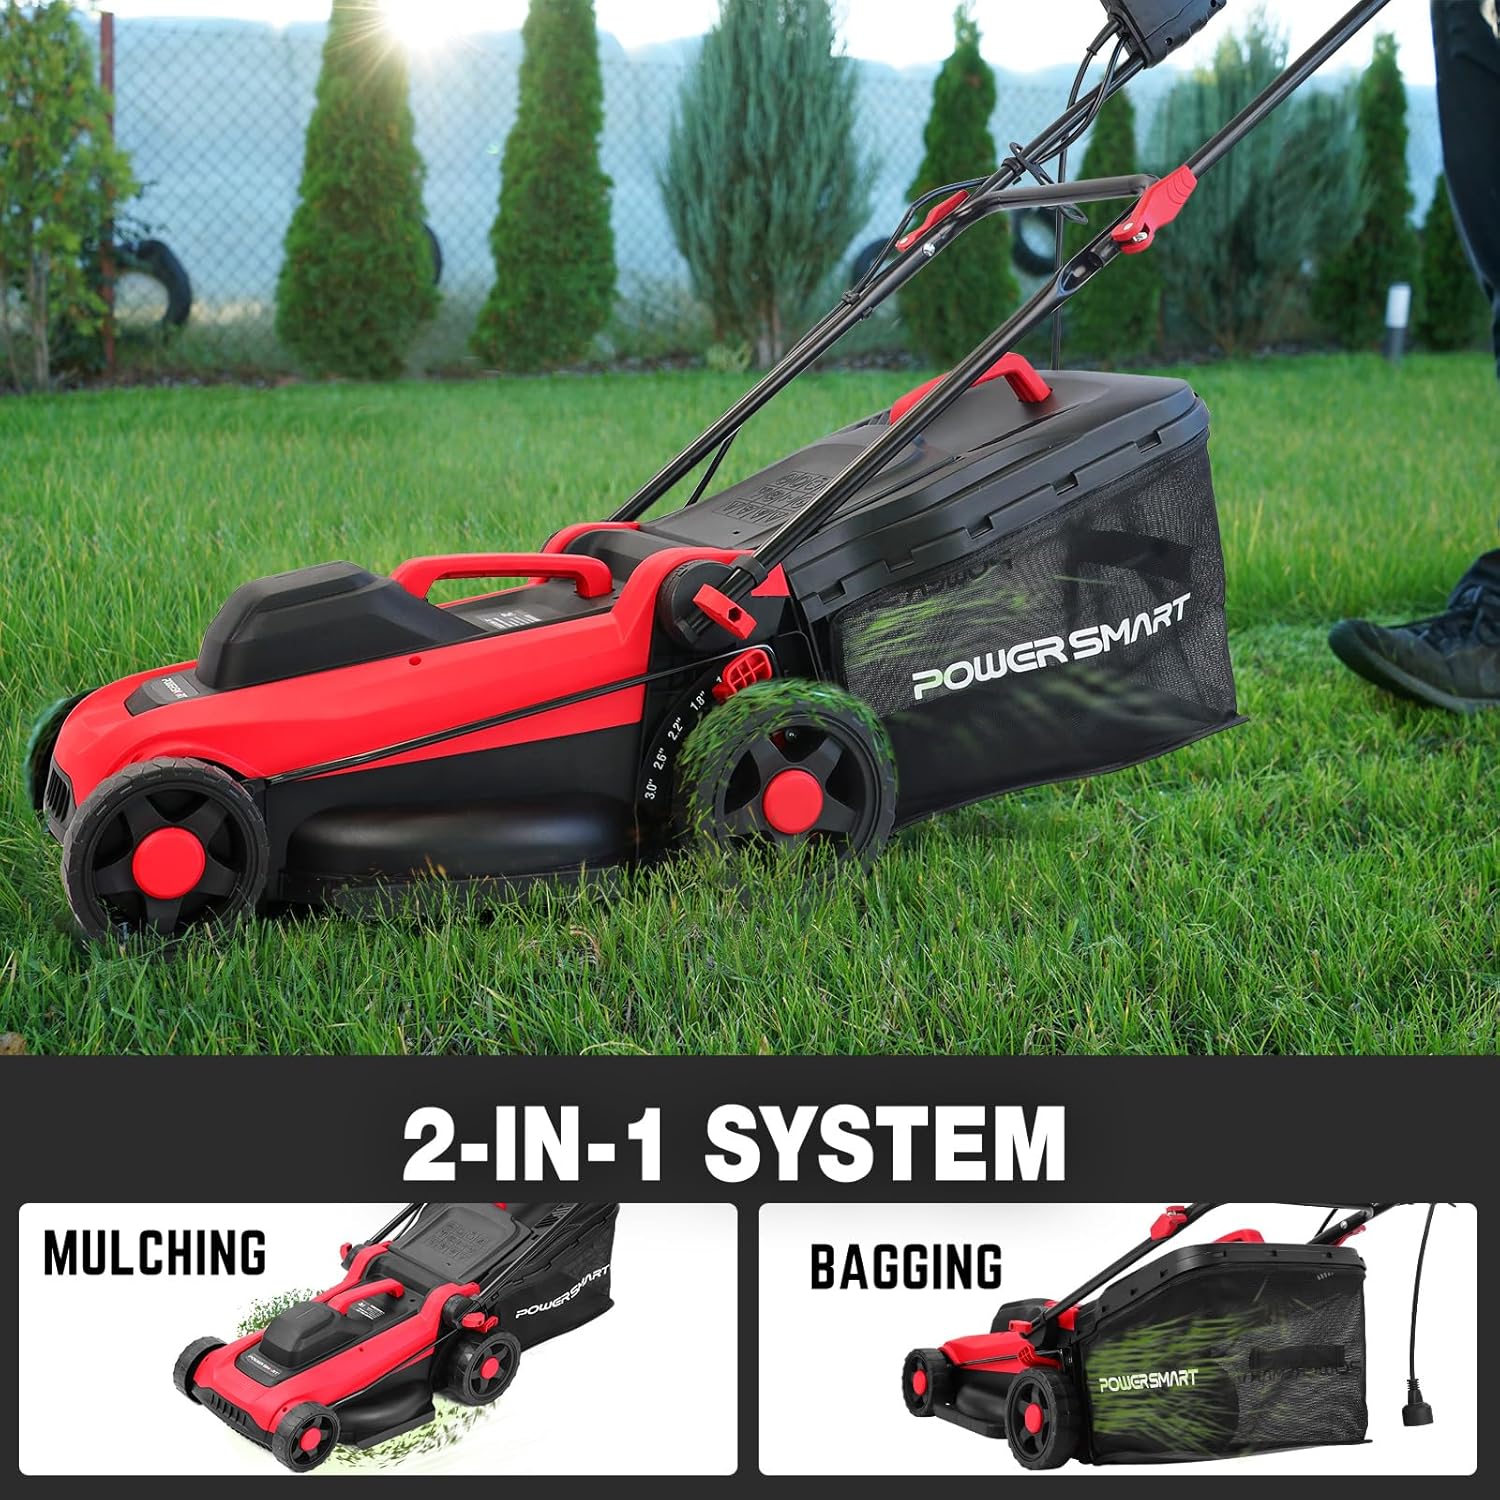
Figure 5: The 2-in-1 system, illustrating the mower's mulching and bagging configurations.
3.5 Operasionele video
Video 1: Demonstration of the PowerSmart Electric Mower in operation, showcasing its low noise and lightweight design suitable for residential yards.
4. Onderhoud
Gereelde onderhoud verseker optimale werkverrigting en verleng die lewensduur van u grassnyer. Ontkoppel altyd die kragtoevoer voordat u enige onderhoud uitvoer.
4.1 Skoonmaak
After each use, clean the mower deck and exterior with a damp cloth. Remove any accumulated grass clippings from the underside of the deck and around the blade. Do not use a pressure washer or hose directly on the motor or electrical components.
4.2 Leminspeksie en -vervanging
Regularly inspect the cutting blade for sharpness and damage. A dull or damaged blade can lead to poor cutting performance and strain the motor. Replace the blade with a genuine PowerSmart replacement blade if it is dull, bent, or cracked. Refer to the specifications for the correct blade type.
4.3 Grass Bag Cleaning
Empty and clean the grass collection bag periodically to maintain proper airflow and collection efficiency. Wash with water and mild soap, then allow it to dry completely before reattaching.
4.4 Berging
Store the mower in a dry, protected area. The foldable handle design allows for vertical storage, saving up to 70% of storage space. Ensure the mower is clean and dry before storing for extended periods.

Figure 6: The mower in its folded, vertical storage position, illustrating how it saves space in a garage or shed.
5. Probleemoplossing
Voordat u kliëntediens kontak, hersienview die volgende algemene probleme en oplossings:
| Probleem | Moontlike oorsaak | Oplossing |
|---|---|---|
| Die grassnyer begin nie | No power supply; Safety switch not engaged; Overload protection activated | Check power cord and outlet; Ensure safety lock button and switch handle are fully engaged; Allow motor to cool down, then restart. |
| Swak snyprestasie | Dull or damaged blade; Cutting height too low; Wet or excessively long grass | Sharpen or replace blade; Adjust cutting height; Mow when grass is dry and not excessively long. |
| Oormatige vibrasie | Bent or unbalanced blade; Loose components | Inspect and replace blade if bent; Tighten all fasteners. |
| Grass bag not filling | Grass chute clogged; Grass bag full or improperly attached | Clear any blockages; Empty and reattach grass bag securely. |
6. Spesifikasies
The following are the technical specifications for the PowerSmart DB8015 Electric Lawn Mower:
| Kenmerk | Spesifikasie |
|---|---|
| Modelnommer | DB8015 |
| Kragbron | Elektries |
| Motor | 12.5 AMP, 120V, 60HZ |
| Sny breedte | 14 duim |
| Snyhoogte-aanpassing | 6 positions (1.0" - 3.0") |
| Kapasiteit vir grasversamelsak | 10 Gallonne (ongeveer 40 Liter) |
| Bedryfsmodus | Druk |
| Item gewig | 32 pond |
| Produk Afmetings (D x B x H) | 26" x 13.2" x 16.6" |

Figure 7: The mower's motor, highlighting its 3400 RPM speed for efficient cutting.
7. Waarborg en Ondersteuning
7.1 Waarborginligting
This PowerSmart product is covered by a manufacturer's warranty. Please refer to the warranty card included with your purchase for specific terms, conditions, and duration. Keep your proof of purchase for warranty claims.
7.2 Kliëntediens
For technical assistance, replacement parts, or warranty inquiries, please contact PowerSmart customer support. Contact details can typically be found on the product packaging, the official PowerSmart webwebwerf, of u aankoopdokumentasie.