1. Inleiding
The Olvy 2-in-1 Jump Starter and Power Bank (Model QS001) is a versatile and essential device designed to provide reliable emergency starting power for a wide range of 12V vehicles, including cars, trucks, motorcycles, SUVs, vans, and heavy-duty engines. Beyond its powerful jump-starting capability, it also functions as a high-capacity portable power bank and a multi-mode LED flashlight, making it an indispensable tool for any driver.
Engineered for performance in extreme conditions, this device operates effectively in temperatures ranging from -20°C to +60°C. It incorporates 9 layers of intelligent protection to ensure maximum safety and peace of mind during use.

Image: The Olvy Jump Starter is designed to operate reliably in extreme temperatures, from -20°C to +60°C, ensuring functionality in diverse climates.
2. Produkkenmerke
- Kragtige Springaanjaer: Delivers up to 1500A peak current to start 12V diesel and gasoline vehicles, including cars, trucks, motorcycles, SUVs, vans, and heavy-duty engines.
- Veilig en betroubaar: Equipped with 9 levels of intelligent protection, including reverse polarity, short circuit, overcurrent, overload, over-temperature, and over-discharge protection.
- Alle-weer-operasie: Designed to function in extreme conditions from -20°C to +60°C, ensuring reliable starts in cold or hot climates.
- Multi-functional Emergency Light: Integrated LED flashlight with 3 modes: bright light, strobe, and SOS signal for roadside safety and emergencies.
- Draagbare kragbank: Dual USB and Type-C outputs with 8,000 mAh / 10,000 mAh capacity for charging smartphones, tablets, and other electronic devices on the go.

Image: The Olvy Jump Starter is suitable for a wide range of 12V vehicles, including sedans, motorcycles, SUVs, and even heavy-duty engines.
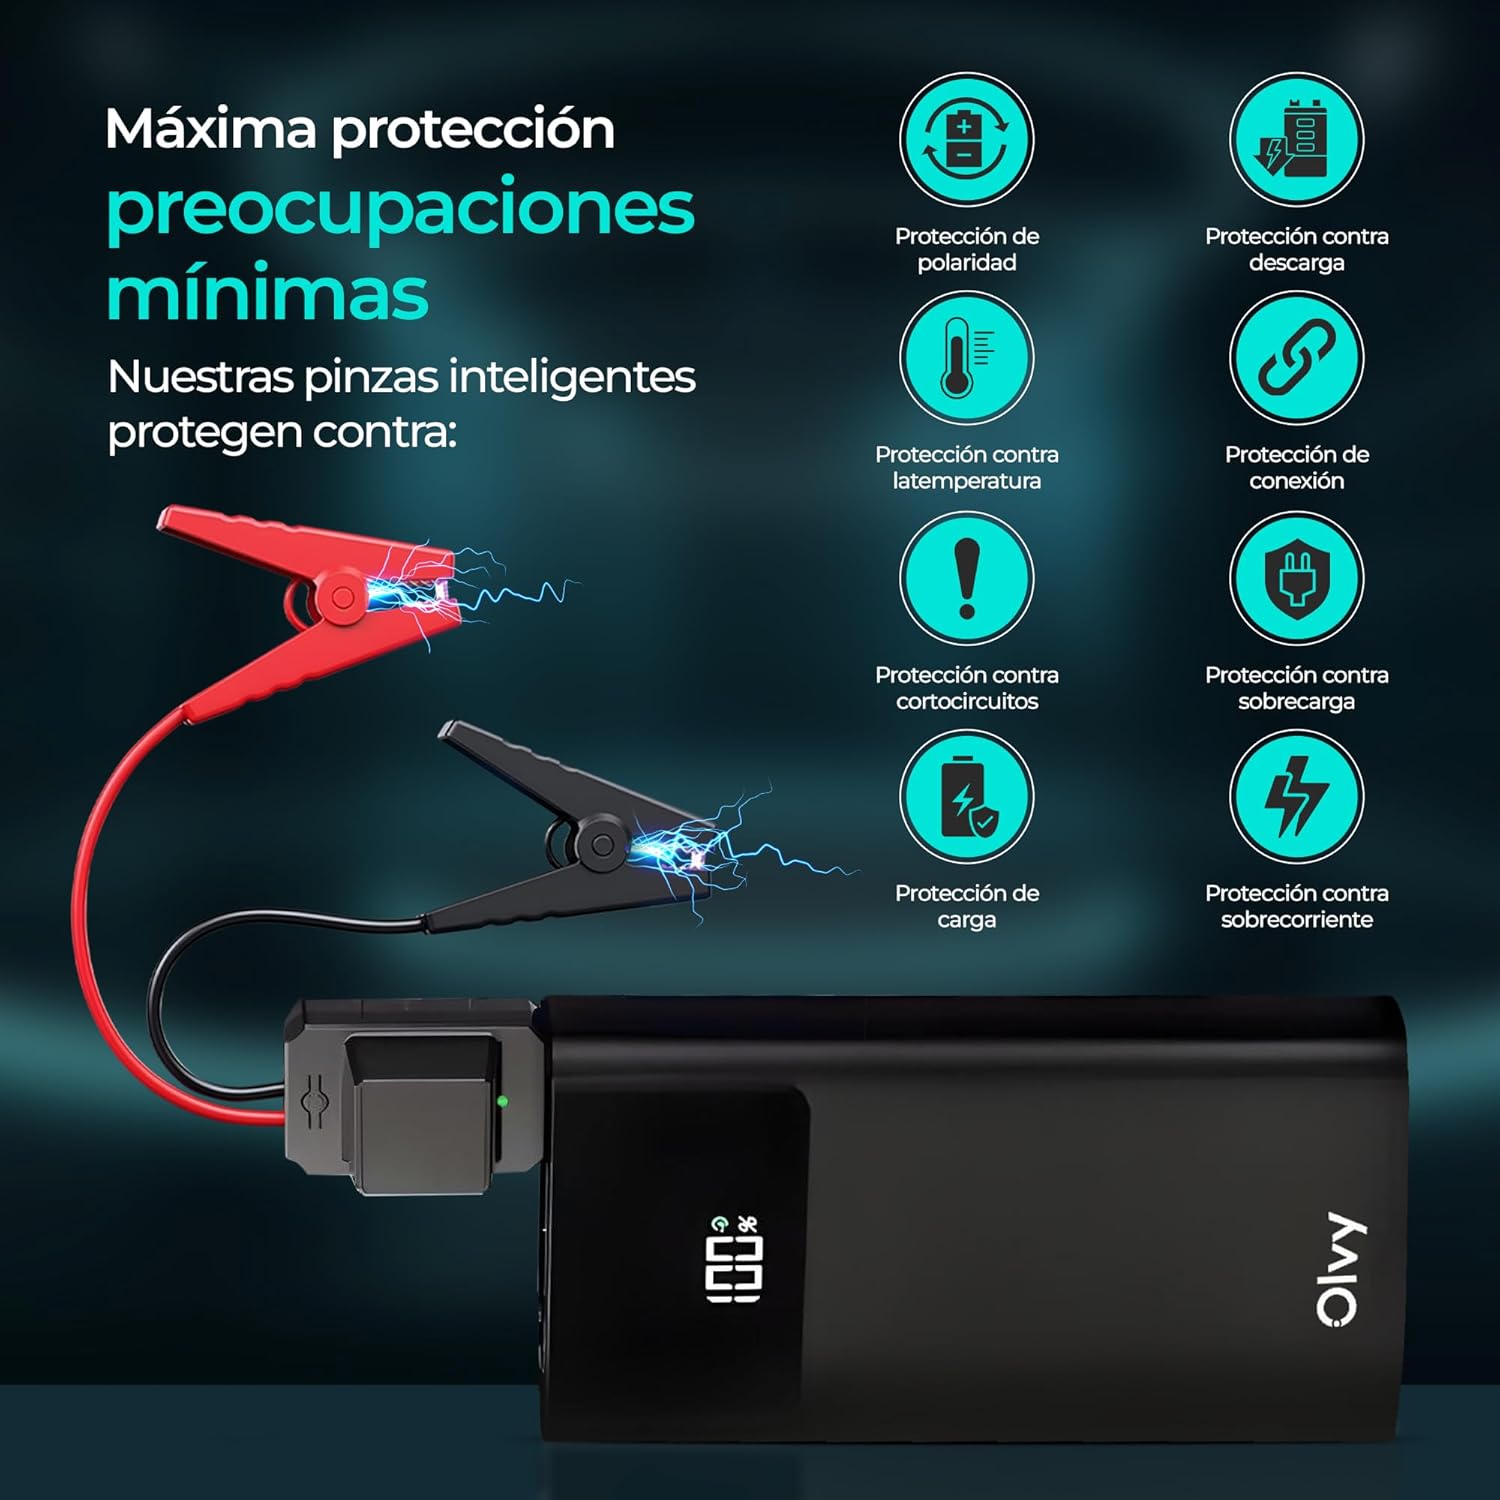
Image: The device features multiple intelligent protections, such as polarity protection, discharge protection, temperature protection, connection protection, short-circuit protection, overload protection, charge protection, and overcurrent protection.

Image: This compact and portable jump starter provides 1500A peak current and includes smart cables for safe and efficient operation.
3. Opstelling
3.1. Pakketinhoud
Maak asseblief seker dat alle items in die verpakking teenwoordig is voor die eerste gebruik:
- 1x Olvy Jump Starter and Power Bank
- 1x Smart Battery Clamps
- 1x USB-laaikabel
- 1x stoor sak
- 1x Gebruikershandleiding

Image: The complete package includes the Olvy 2-in-1 Jump Starter, smart battery clamps, a USB charging cable, a storage bag, and a user manual.
3.2. Aanvanklike laai
Fully charge the Olvy Jump Starter before its first use. Connect the provided USB charging cable to the device's Type-C input port and a suitable USB power adapter (not included). The LCD screen will display the charging progress. Disconnect once fully charged.
4. Bedryfsinstruksies
4.1. Aansit van 'n Voertuig
- Ensure the jump starter is sufficiently charged (at least 50% recommended).
- Koppel die slim battery clamps na die springaanjaer se toegewyde poort.
- Heg die rooi (+) clamp na die positiewe terminaal van die voertuig se battery.
- Heg die swart (-) clamp to the negative terminal of the vehicle's battery. Ensure a secure connection. The smart clamps will indicate a correct connection (e.g., a green light).
- Begin die voertuig se enjin.
- Once the engine starts, immediately remove the smart clamps from the vehicle battery, then disconnect them from the jump starter.

Image: Simple 4-step process for jump starting: 1. Connect the smart clamps to the jump starter. 2. Clamp to the car battery. 3. Start the car. 4. Disconnect the clamps.
4.2. Gebruik as 'n draagbare kragbank
The Olvy Jump Starter can charge your electronic devices:
- Connect your device's USB or Type-C charging cable to the corresponding output port on the jump starter.
- Die aansitter sal outomaties jou toestel begin laai.
- Monitor the charging status on your device and the jump starter's LCD screen.

Image: The device doubles as a power bank with Type-C and USB outputs, offering 8,000 mAh capacity to charge mobile devices.
4.3. Gebruik van die LED-flitslig
The integrated LED flashlight offers three modes for various situations:
- Helder lig: Press and hold the flashlight button to turn on the bright light.
- Strobemodus: Press the button again to switch to strobe mode for increased visibility.
- SOS -sein: Press the button a third time for the SOS signal, useful in emergencies.
- Press and hold the button to turn off the flashlight.
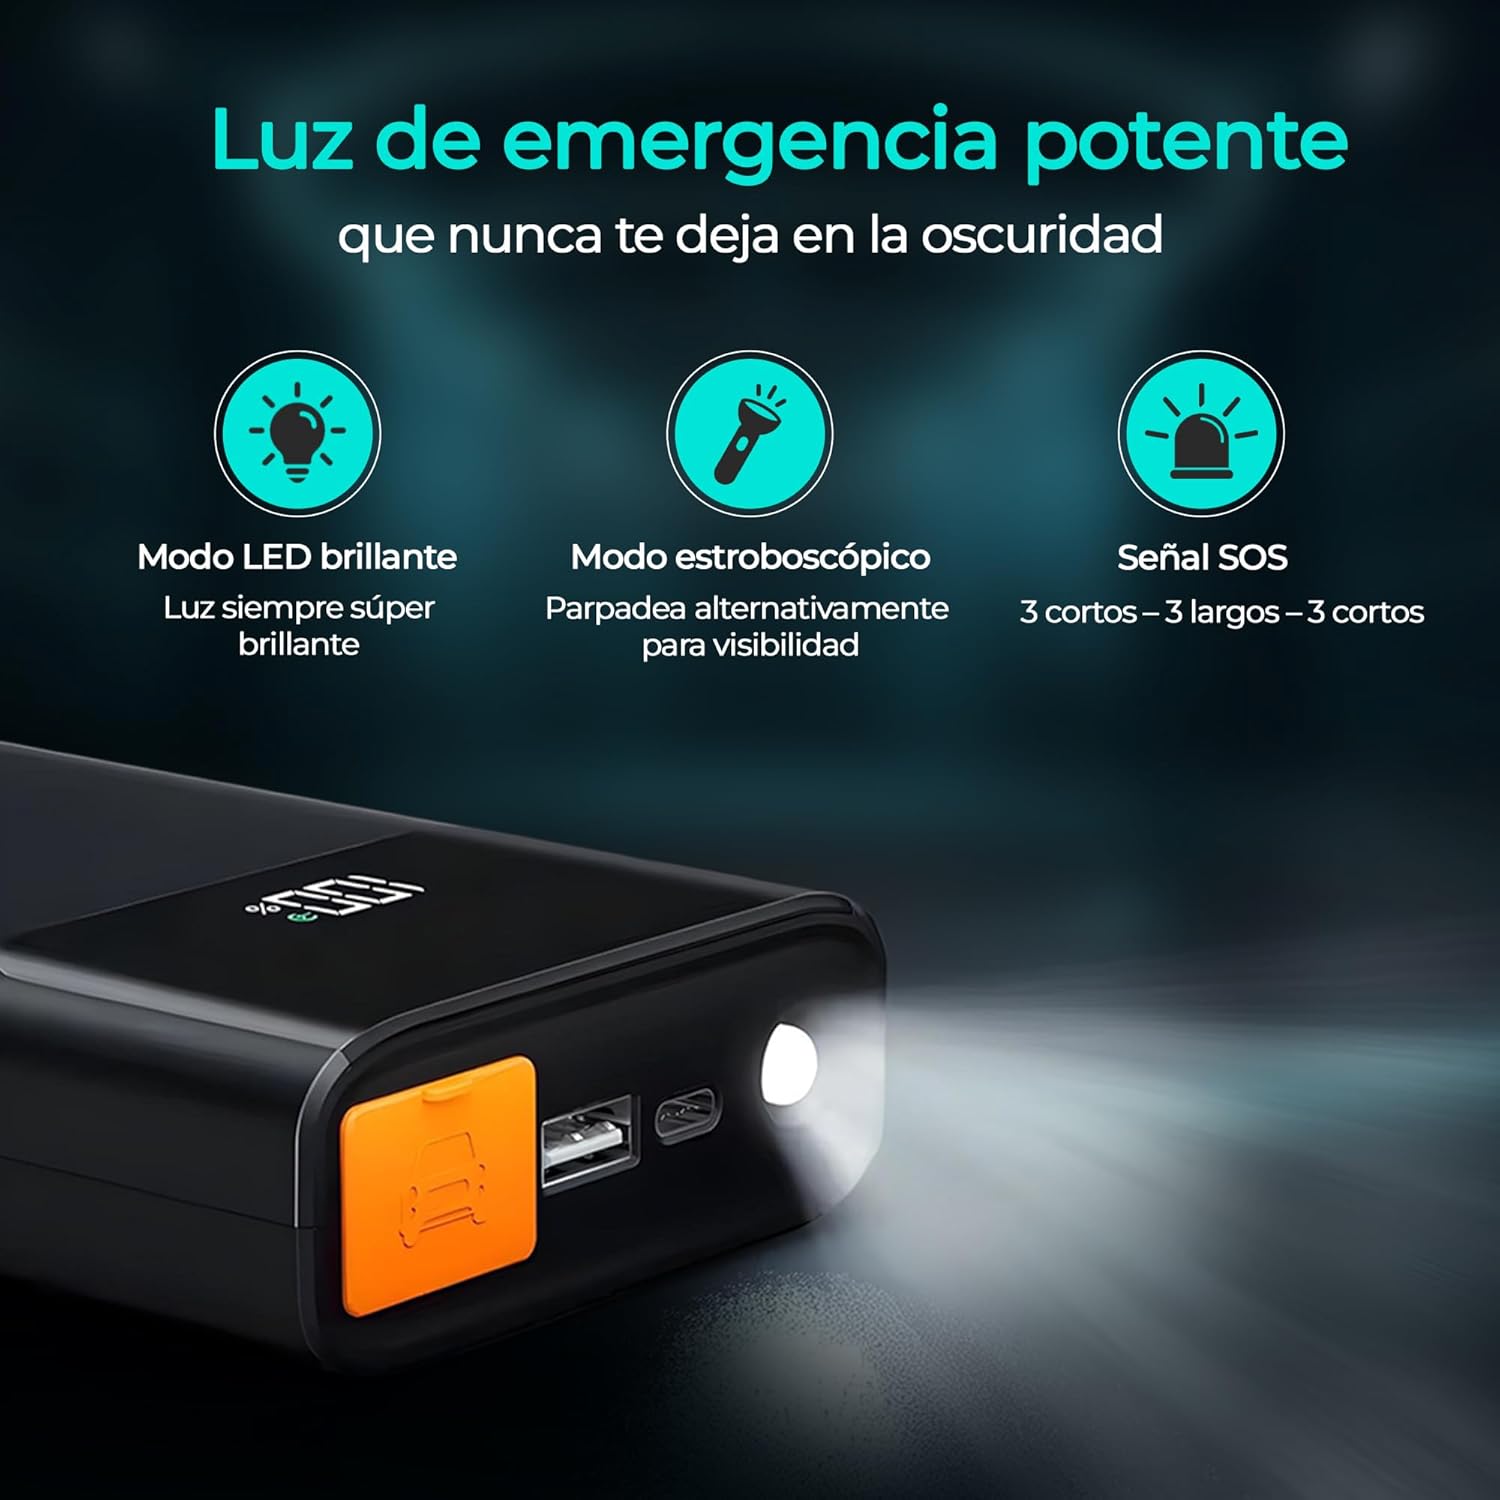
Image: The powerful emergency light features a super bright LED mode, an alternating strobe mode for visibility, and an SOS signal (3 short, 3 long, 3 short flashes).
5. Veiligheidsinligting
Lees en verstaan asseblief alle veiligheidswaarskuwings en instruksies voordat u hierdie produk gebruik. Versuim om hierdie instruksies te volg, kan lei tot elektriese skok, brand en/of ernstige besering.
- Do not short-circuit the smart clamps.
- Moenie die produk blootstel aan reën of nat toestande nie.
- Do not disassemble the product. Refer all servicing to qualified service personnel.
- Hou buite bereik van kinders.
- Use only the provided smart clamps en laaikabel.
- Ensure proper polarity when connecting to a vehicle battery (red to positive, black to negative). The smart clamps have built-in reverse polarity protection.
- Moenie 'n gevriesde battery aan die gang sit nie.
- Moenie die aansitter gebruik as die kabels of sluiting dieamps is beskadig.
- Verwyder die clamps from the vehicle battery immediately after the engine starts.
6. Onderhoud
- Bêre die springaanjaer op 'n koel, droë plek weg van direkte sonlig en uiterste temperature.
- Laai die toestel elke 3-6 maande, selfs al word dit nie gebruik nie, om die battery se gesondheid te handhaaf.
- Maak die buitekant skoon met 'n sagte, damp lap. Moenie harde chemikalieë of skuurmateriaal gebruik nie.
- Keep the smart clampis skoon en vry van korrosie.
7. Probleemoplossing
7.1. Toestel skakel nie aan nie
- Ensure the device is charged. Recharge if the battery level is low.
- Druk en hou die aan/af-knoppie vir 'n paar sekondes in om seker te maak dit is nie net 'n vinnige druk nie.
7.2. Vehicle Not Starting
- Maak seker dat die slimfoonamps are securely connected to the vehicle battery terminals with correct polarity.
- Ensure the jump starter has sufficient charge.
- The vehicle battery might be severely discharged or damaged. Consult a professional mechanic.
- As die slimfoonamps indicate an error (e.g., red light), refer to the smart clamp's specific error codes in the full user manual.
7.3. Toestel laai nie
- Ensure the USB charging cable is properly connected to both the device and the power adapter.
- Probeer 'n ander USB-kragadapter of laaikabel.
8. Spesifikasies
| Handelsmerk | Olvy |
| Model | QS001 |
| Piekstroom | 1500 Amperes |
| Battery kapasiteit | 8000 mAh (10000 mAh variant also mentioned) |
| Battery sel samestelling | Litiumioon |
| Voltage | 12 Volt (DC) |
| Bedryfstemperatuur | -20°C tot +60°C |
| Afmetings | 19 x 12.7 x 9 cm |
| Gewig | 1.5 kg |
| USB-uitset | Ja |
| Tipe C-uitset | Ja |
9. Waarborg en Ondersteuning
For detailed warranty information and customer support, please refer to the warranty card included in your product package or visit the official Olvy webwebwerf. Bewaar u aankoopbewys as bewys van aankoop vir enige waarborgeise.