
1. Wat is in die boks
Verify all components are present before proceeding with installation.
- 4K Front Dash Camera (Main Unit)
- 1080P-agterkamera
- Motorlaaieradapter
- Tipe C-kabel
- Kleefkussings
- Car Wire Trim Tool
- 19.6 voet Agterkamera-kabel
- Elektrostatiese plakker (x2)
- 64GB geheue kaart
- Gebruikershandleiding

Image: All included components of the dash cam system.
2. Produk verbyview
The HUPEJOS V100-2CH dash cam features a main front unit with a 4-inch touch screen and a separate rear camera. Key ports and controls are located on the main unit for easy access.
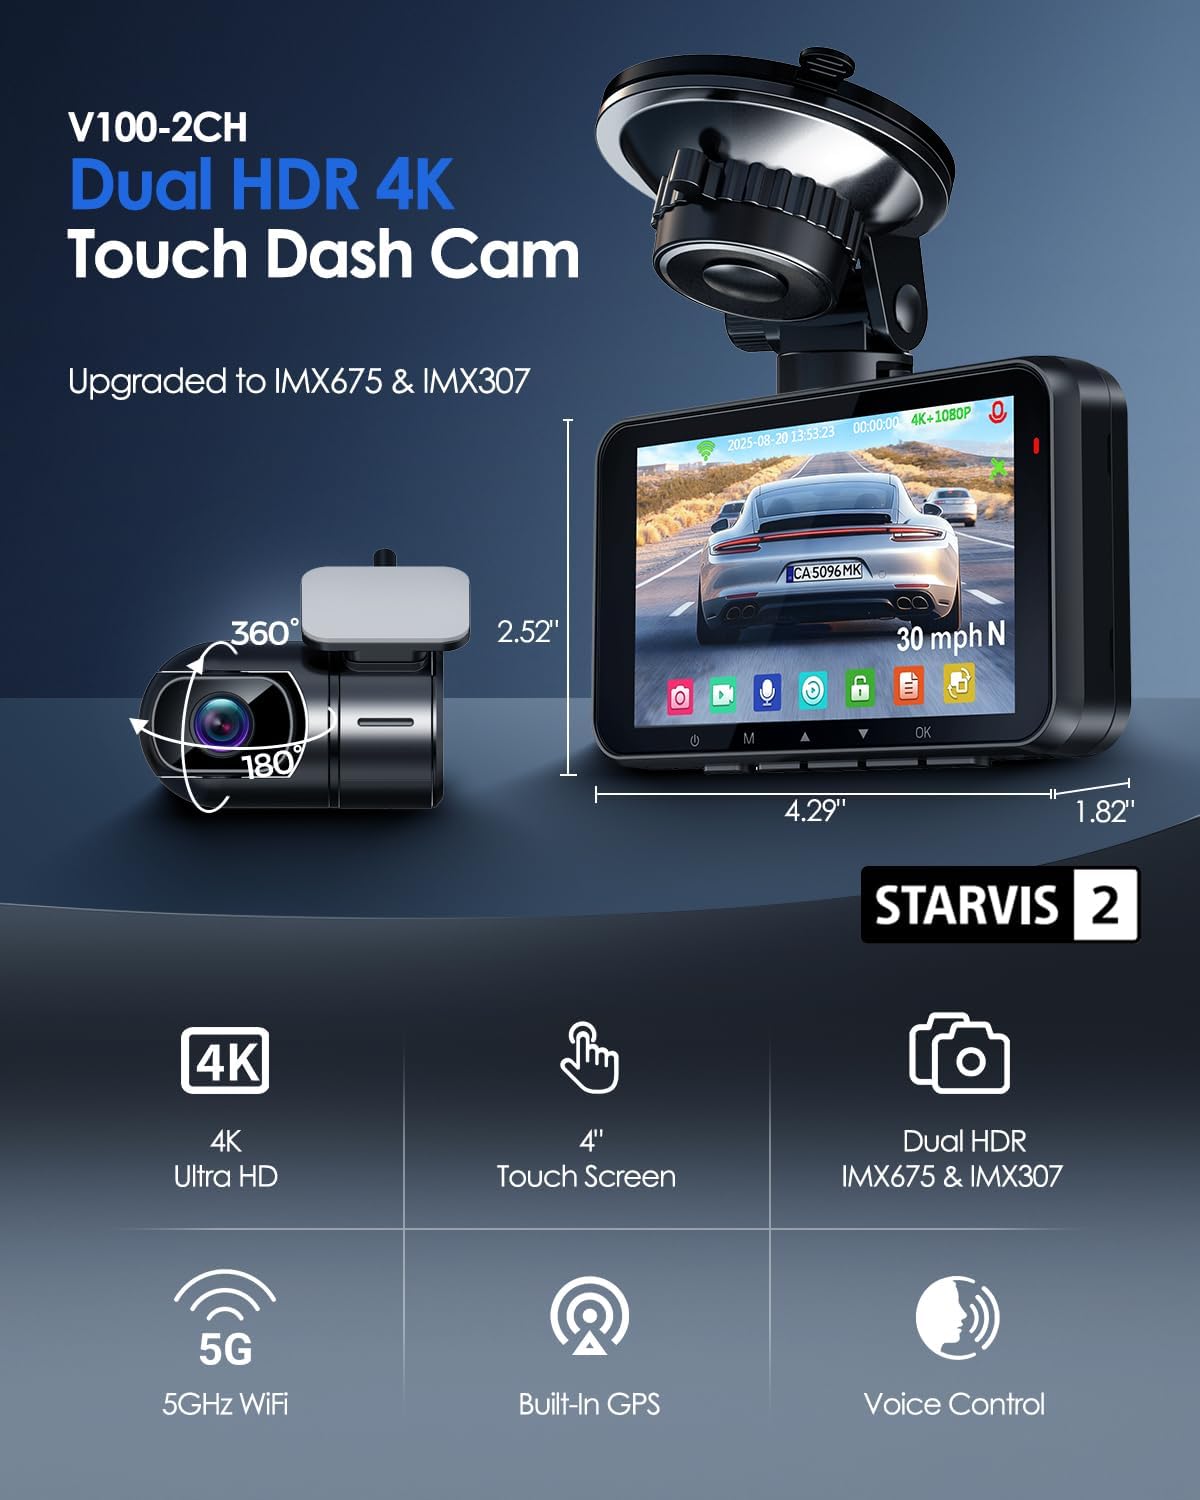
Image: Main dash cam unit and rear camera with dimensions.

Beeld: Gedetailleerd view of the main unit's ports and slots.
3. Opstelling en installering
Follow these steps for proper installation and initial setup of your dash cam.
- Berei die voorruit voor: Clean the chosen area on your windshield thoroughly. Apply an electrostatic sticker to the desired mounting spot to protect your windshield and ensure easy removal.
- Monteer die hoofeenheid: Attach the suction cup mount to the electrostatic sticker. Secure the main dash cam unit to the mount. Adjust the camera angle as needed.
- Installeer agterkamera: Mount the rear camera on the rear windshield using an electrostatic sticker and adhesive pad. Ensure the camera has a clear view.
- Koppel agterkamera: Connect the 19.6ft rear camera cable to the 'REAR' port on the main unit and route the cable discreetly along the vehicle's interior trim using the provided trim tool.
- Kragverbinding: Insert the 64GB memory card into the SD card slot. Connect the car charger adapter to your vehicle's 12V power outlet and the Type-C cable to the 'POWER' port on the main unit. Route the power cable neatly.
- Initial Power On & Format SD Card: Once powered, the dash cam will turn on. Navigate to the settings menu via the touch screen and format the SD card before first use.

Image: Visual guide for dash cam installation steps.
Video: A seller-provided guide demonstrating the unboxing and basic setup of the V100 dash cam, including menu navigation.
4. Bedryfsinstruksies
4.1. 4" Touch Screen Operation
The 4-inch IPS touch screen provides intuitive control over the dash cam's functions. Tap icons to access menus, adjust settings, and review footage direk op die toestel.

Image: Touch screen interface for easy navigation.
4.2. Stembeheer
Control your dash cam hands-free using simple voice commands. This feature enhances safety by allowing you to manage recording without taking your hands off the wheel.
- "Neem foto"
- "Video Stop"
- "Skakel WiFi aan"
- "Video Start"
- "Turn on Screen"
- "Wys voorkamera"

Image: Voice control commands for hands-free operation.
4.3. 5G WiFi & App Control
Connect your dash cam to your smartphone via built-in 5G WiFi for seamless footage transfer and management using the dedicated app. The Wi-Fi range is 6-7 meters.
- View leef footage
- Download recorded videos
- Pas kamera-instellings aan
- Deel kostage onmiddellik

Image: Smartphone app interface for 5G WiFi control.
4.4. GPS-opsporing
The integrated GPS module accurately records your vehicle's location, speed, and route data, providing crucial evidence for accident documentation and insurance claims. You can view GPS data on Google Maps via the app or the free GXPlayer on PC (Windows and Mac).

Image: Built-in GPS tracking visualization.
4.5. Lusopname en G-sensor
The dash cam features intelligent loop recording, which automatically overwrites the oldest unlocked files when the memory card is full, ensuring continuous recording. The built-in G-sensor detects sudden impacts or collisions, automatically locking and saving the current footage om te verhoed dat dit oorskryf word.

Image: G-Sensor and Loop Recording functionality.
4.6. 24H Parking Surveillance Mode
For round-the-clock vehicle security, the 24-hour parking surveillance mode activates automatically upon detecting motion or impact. This feature requires a separate hardwire kit (ASIN: B0DBVDDT73) for continuous power supply.

Image: 24/7 Parking Surveillance Mode options.
5. Night Vision Capabilities
Equipped with STARVIS 2 sensors (IMX675 front, IMX307 rear) and Dual HDR technology, the dash cam delivers superior night vision, capturing clear and detailed footage even in low-light conditions for reliable evidence.

Image: Night vision comparison with STARVIS 2 and HDR.
6. Spesifikasies
| Kenmerk | Detail |
|---|---|
| Model Naam | V100-2CH |
| Video-opname-resolusie | 4K Voor + 1080P Agter |
| Sensor aan die voorkant | IMX675 (STARVIS 2) |
| Agterste kamera sensor | IMX307 |
| Vertoon | 4" aanraakskerm |
| Verbindingstegnologie | Wireless USB (5GHz WiFi) |
| GPS | Built-in Location Capture |
| Spesiale kenmerke | 4K UHD Recording, Dual HDR, APP Control, G-Sensor Lock, Loop Recording, 24/7 Radar Parking Mode, WDR, Super Night Vision, F1.6 Aperture, 6-Layer Optics, Voice Control, Audio Recording |
| Ingesluite geheuekaart | 64GB SD-kaart |
| Maksimum SD-kaartondersteuning | 512 GB |
| Montage tipe | Windshield Mount (Suction Cup) |
| Veld van View | 150 grade |
| Produk afmetings | 1.82 x 4.29 x 2.52 duim |
| Item gewig | 4.5 onse |
7. Onderhoud
To ensure the longevity and optimal performance of your dash cam, regular maintenance is recommended:
- Skoon lense: Regularly clean the front and rear camera lenses with a soft, lint-free cloth to prevent blurry footage.
- Formateer SD-kaart: Format the SD card monthly to maintain optimal recording performance and prevent data corruption. This can be done through the dash cam's settings menu.
- Gaan verbindings na: Maak gereeld seker dat alle kabels en monteerstukke stewig gekoppel is.
8. Probleemoplossing
As jy enige probleme ondervind, probeer die volgende stappe:
- Dashcam skakel nie aan nie: Kontroleer die motorlaaierverbinding en maak seker dat die voertuig se kragaansluiting werk.
- Opname kwessies: Ensure the SD card is properly inserted and formatted. If issues persist, try a different compatible SD card.
- Swak videogehalte: Clean the camera lenses. Ensure the camera is securely mounted and not vibrating.
- Wi-Fi-verbindingsprobleme: Ensure Wi-Fi is enabled on the dash cam and your smartphone. Check the Wi-Fi range (6-7 meters).
- GPS nie dopgehou nie: Maak seker dat die paneelbordkamera 'n duidelike view van die lug vir satellietontvangs.
- System Freeze/Unresponsive: Use a thin object (like a paperclip) to press the reset button located on the main unit.
9. Waarborg en Ondersteuning
Your HUPEJOS 4K Dual Dash Cam V100-2CH comes with an 18-month guarantee. For any questions, technical support, or warranty claims, please contact HUPEJOS customer support.
- E-pos: support@hupejos.com
- Webwebwerf: www.hupejos.com