1. Inleiding
Thank you for choosing the AIRPLUS Air Purifier Model KJ260. This device is designed to improve indoor air quality by effectively removing airborne particles, odors, and allergens. Please read this manual thoroughly before operating the appliance and retain it for future reference.

Image 1.1: The AIRPLUS Air Purifier Model KJ260, showcasing sy kompakte en moderne ontwerp.
2. Belangrike veiligheidsinstruksies
Om die risiko van brand, elektriese skok of besering te verminder, neem asseblief die volgende veiligheidsmaatreëls in ag:
- Lees alle instruksies voordat u die toestel gebruik.
- Moenie die lugsuiweraar met 'n beskadigde koord of prop gebruik nie.
- Do not place the appliance near heat sources such as stoves, ovens, or radiators.
- Keep the air intake and outlet clear of obstructions.
- Moenie die toestel in water of ander vloeistowwe dompel nie.
- Ontkoppel die lugsuiweraar voordat u skoonmaak of enige onderhoud uitvoer.
- Hierdie toestel is nie bedoel vir gebruik deur persone (insluitend kinders) met verminderde fisiese, sensoriese of geestelike vermoëns, of 'n gebrek aan ervaring en kennis nie, tensy hulle toesig of instruksies oor die gebruik van die toestel gegee is deur 'n persoon wat verantwoordelik is vir hul veiligheid. .
- Kinders moet onder toesig wees om te verseker dat hulle nie met die toestel speel nie.
3. Pakketinhoud
Merk asseblief die blokkie vir die volgende items:
- AIRPLUS Air Purifier Unit (Model KJ260)
- 3-in-1 Composite Filter (pre-installed)
- Gebruikershandleiding
4. Produk verbyview
The AIRPLUS Air Purifier Model KJ260 features a multi-stage filtration system and intuitive controls for optimal air purification.
4.1 Komponente

Beeld 4.1: Bo view of the control panel, indicating various functions.
- Beheerpaneel: Located on the top of the unit for easy access to all functions.
- Luguitlaat: Top grille where purified air is released.
- Lug inlaat: Perforated lower section for 360-degree air intake.
- Filterkompartement: Located at the bottom, housing the 3-in-1 composite filter.
4.2 Filtrasiestelsel
The AIRPLUS Air Purifier utilizes a 3-in-1 composite filter designed to capture various airborne pollutants.

Image 4.2: Illustration of the 3-in-1 filter's multi-layer design and target pollutants.
- Wasbare voorfilter: Captures large particles such as dust, lint, fibers, and pet fur. This layer is washable for extended use.
- Ware HEPA-filter: Traps at least 99.97% of airborne particles 0.3 microns in size, including pollen, dust mites, and pet dander.
- Geaktiveerde koolstoffilter: Absorbs odors from pets, cooking, smoke, and harmful VOCs (Volatile Organic Compounds).
5. Opstelling
- Pak uit: Verwyder die lugsuiweraar versigtig uit sy verpakking.
- Verwyder filterverpakking: Before first use, turn the unit upside down. Twist the base counter-clockwise to unlock and remove the filter cover. Take out the 3-in-1 composite filter and remove all plastic packaging.
- Herinstalleer filter: Place the unwrapped filter back into the unit. Ensure the filter is oriented correctly.
- Veilige Dekking: Plaas die filterdeksel terug en draai dit kloksgewys om dit stewig vas te maak.
- Plasing: Place the air purifier on a firm, level surface. Ensure there is at least 15 inches (38 cm) of clearance on all sides for optimal air circulation.
- Kragverbinding: Steek die kragkabel in 'n geaarde elektriese aansluiting.
6. Bedryfsinstruksies
Familiarize yourself with the control panel buttons to operate your AIRPLUS Air Purifier.
- Kragknoppie (⏻): Druk om die lugsuiweraar AAN of AF te skakel.
- Waaierspoedknoppie (☯): Press repeatedly to cycle through fan speeds: Low, Medium, High.
- Slaapmodus-knoppie (💤): Activates Sleep Mode, reducing fan speed to the lowest setting and dimming/turning off display lights for quiet operation (approx. 24 dB). Press again to exit Sleep Mode.
- Timer-knoppie (⏲): Press to set the operating timer for 2, 4, 8, or 12 hours. The unit will automatically turn off after the selected time.
- Kinderslotknoppie (🔒): Press and hold for 3 seconds to activate or deactivate Child Lock. When active, all other buttons are disabled to prevent accidental changes.
- Light Switch Button (💡): Press to turn the display lights ON or OFF.
- Filter Reset Indicator (🏭): This indicator will illuminate when it's time to check or replace the filter. After replacing the filter, press and hold the Filter Reset button for 3 seconds to reset the indicator.

Image 6.1: The air purifier operating in a bedroom, demonstrating its quiet performance in Sleep Mode.
7. Onderhoud
Gereelde onderhoud verseker optimale werkverrigting en verleng die lewensduur van jou lugsuiweraar.
7.1 Cleaning the Washable Pre-Filter
The outer mesh pre-filter is washable and should be cleaned regularly, approximately every 2-4 weeks depending on air quality and usage.
- Ontkoppel die lugreiniger uit die kragaansluiting.
- Turn the unit upside down and remove the filter cover.
- Carefully remove the 3-in-1 composite filter.
- Separate the washable pre-filter mesh from the main filter body.
- Rinse the pre-filter under running water until clean.
- Allow the pre-filter to air dry completely before reassembling. Do not use a dryer or heat.
- Once dry, reattach the pre-filter to the main filter, insert the filter back into the unit, and secure the cover.
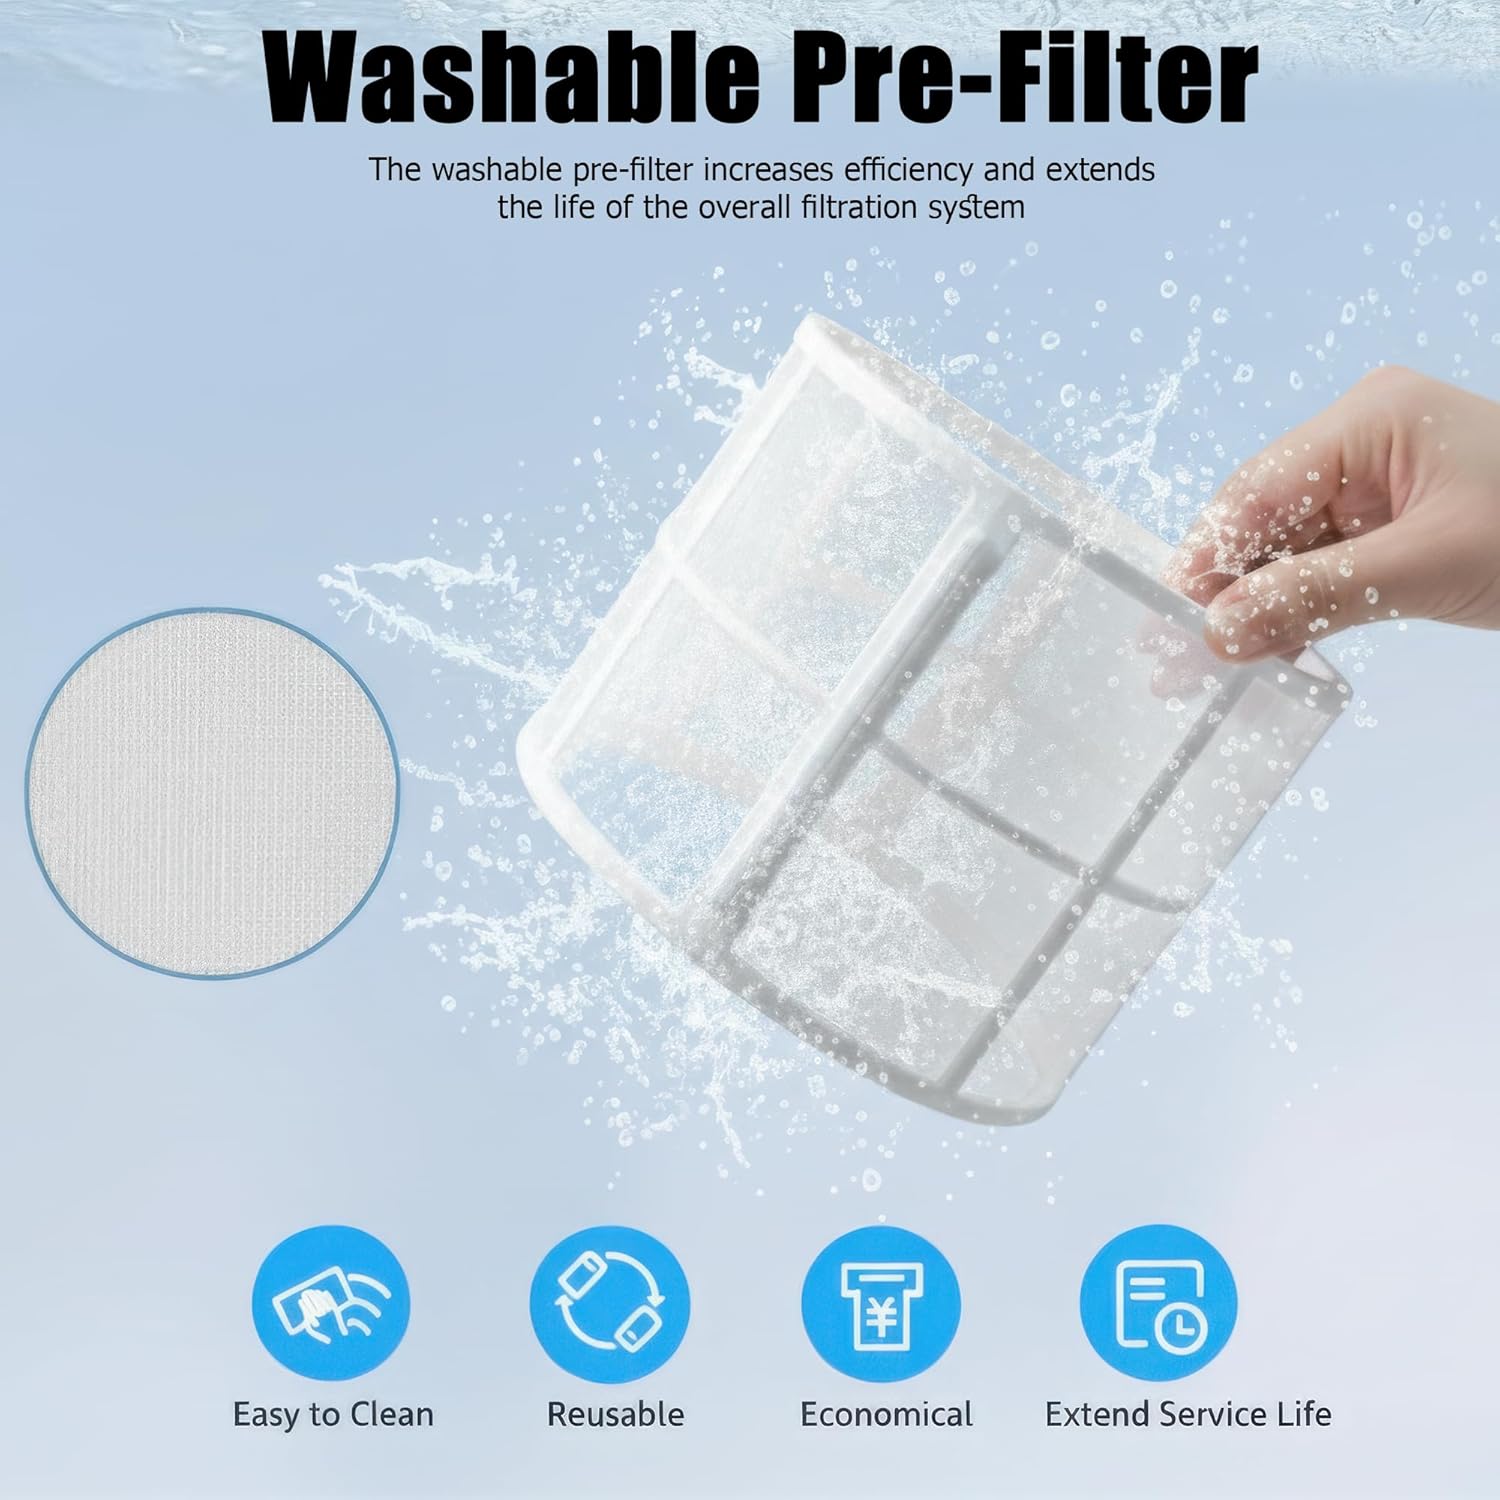
Image 7.1: Cleaning the washable pre-filter under running water.
7.2 Replacing the Composite Filter
The 3-in-1 composite filter (HEPA and Activated Carbon layers) is not washable and should be replaced every 6-8 months, or when the Filter Reset indicator illuminates, depending on usage and air quality.
- Ontkoppel die lugreiniger.
- Remove the filter cover and the old composite filter.
- Gooi die ou filter verantwoordelik weg.
- Unpack a new genuine AIRPLUS replacement filter (Model KJ260F, sold separately).
- Insert the new filter into the unit, ensuring correct orientation.
- Replace and lock the filter cover.
- Plug in the air purifier. Press and hold the Filter Reset button for 3 seconds until the indicator light turns off.
Let wel: Use only genuine AIRPLUS replacement filters to ensure optimal performance and maintain warranty validity.
7.3 Buite Skoonmaak
Vee die buitekant van die lugsuiweraar af met 'n sagte, droë lap. Moenie skuurmiddels of oplosmiddels gebruik nie.
8. Probleemoplossing
Indien u probleme met u lugsuiweraar ondervind, verwys asseblief na die volgende algemene probleme en oplossings:
| Probleem | Moontlike oorsaak | Oplossing |
|---|---|---|
| Eenheid skakel nie aan nie | Nie ingeprop nie; Krag aftage; Child Lock active | Ensure plug is securely in outlet; Check power supply; Deactivate Child Lock by pressing and holding the Child Lock button for 3 seconds. |
| Reduced airflow or poor purification | Filter clogged; Filter packaging not removed; Air intake/outlet blocked | Clean washable pre-filter or replace composite filter; Ensure all filter packaging is removed; Clear any obstructions around the unit. |
| Ongewone geraas | Filter not installed correctly; Foreign object inside; Unit on uneven surface | Reinstall filter correctly; Unplug and check for foreign objects (if safe); Place unit on a stable, level surface. |
| Filter Reset indicator remains on after filter replacement | Indicator not reset | Press and hold the Filter Reset button for 3 seconds until the light turns off. |
9. Spesifikasies
| Kenmerk | Spesifikasie |
|---|---|
| Modelnommer | KJ260 |
| Handelsmerk | AIRPLUS |
| Gegradeerde krag | 25 W |
| Dekkingsgebied | Tot 1073 XNUMX vt² |
| Afmetings (D x B x H) | 9" x 9" x 13.4" (22.86 cm x 22.86 cm x 34.04 cm) |
| Gewig | 5.95 lbs (2.7 kg) |
| Geraasvlak | 24 dB (Slaapmodus) |
| Filter tipe | 3-in-1 Composite (Pre-filter, HEPA, Activated Carbon) |
| Tipe beheerder | Knoppie beheer |
10. Waarborg en Ondersteuning
AIRPLUS provides a limited warranty for this product. For detailed warranty information, please refer to the warranty card included with your purchase or visit the official AIRPLUS webwebwerf.
For technical support, troubleshooting assistance, or to purchase genuine replacement filters, please contact AIRPLUS customer service through the contact information provided on the official webwebwerf of jou aankoopplatform.
Please have your model number (KJ260) and purchase date ready when contacting support.