Inleiding
Thank you for choosing the Generic Twin Size Loft Bed. This manual provides essential information for the safe assembly, operation, and maintenance of your new loft bed. Please read all instructions carefully before beginning assembly and retain this manual for future reference.
Veiligheidswaarskuwing:
- Volg altyd die monteerinstruksies noukeurig.
- Maak seker dat alle verbindings stewig vasgedraai is voor gebruik.
- Do not allow children to play unsupervised on or around the loft bed.
- Use only the recommended mattress size for the twin bed.
- Periodically check all bolts and screws to ensure they remain tight.
Pakketinhoud
Before assembly, verify that all components listed below are present and undamaged. If any parts are missing or damaged, please contact customer support immediately.
- Loft Bed Frame Components (Headboard, Footboard, Side Rails, Slats)
- Integrated Desk Unit
- 7 Laaie-eenhede
- 2 Shelf Units
- Staircase/Ladder Components
- Hardware Pack (Screws, bolts, nuts, Allen wrench, etc.)
- Monteringsinstruksiesblad
Opstel- en monteringsinstruksies
Assembly requires two adults. Please clear a spacious area for assembly. Tools are included in the hardware pack.
Step 1: Prepare the Area and Unpack
Unpack all components and lay them out on a soft, clean surface to prevent scratches. Identify each part using the provided assembly diagram.
Step 2: Assemble the Main Bed Frame
Begin by connecting the headboard and footboard to the side rails using the provided bolts and nuts. Ensure all connections are finger-tight at this stage.

Image: Basic frame assembly showing the bed structure and integrated desk space.
Stap 3: Installeer Bedlatte
Carefully place and secure the bed slats onto the side rails. Ensure they are evenly spaced and firmly attached to provide adequate support for the mattress. This bed does not require a box spring.

Image: Detail of the bed slats and their attachment points.
Step 4: Assemble and Attach the Desk Unit
Assemble the desk unit according to the separate desk instructions. Once assembled, attach it securely to the main bed frame using the designated connection points.
Step 5: Assemble and Integrate Drawers and Shelves
Assemble the 7 drawers and 2 shelves. Integrate them into their respective positions within the loft bed structure, ensuring smooth operation for the drawers.

Prent: View of the staircase with integrated drawers, highlighting storage.
Step 6: Attach the Staircase/Ladder
Assemble the staircase and attach it firmly to the bed frame. Ensure all steps are level and secure.
Step 7: Final Tightening and Inspection
Once all components are assembled, go back and fully tighten all bolts and screws using the provided Allen wrench. Do not overtighten. Perform a final inspection to ensure the bed is stable and all parts are correctly installed.

Image: Dimensional diagram of the loft bed, showing overall and component measurements.
Bedryfsinstruksies
Gebruik van die solderbed
The top bunk is designed for a twin-size mattress. Ensure the mattress fits snugly within the frame and does not exceed the maximum recommended thickness to maintain guardrail safety height. Always use the staircase for access to the top bunk.
Gebruik van die lessenaar
The integrated desk provides a dedicated workspace. Keep the desk clear of excessive weight and ensure proper posture when using it.

Image: The loft bed in a room setting, showcasing the desk area with a chair and lamp.
Gebruik van die laaie en rakke
The 7 drawers and 2 shelves offer ample storage. Distribute weight evenly within the drawers and shelves. Avoid overloading to ensure smooth operation and prevent damage.
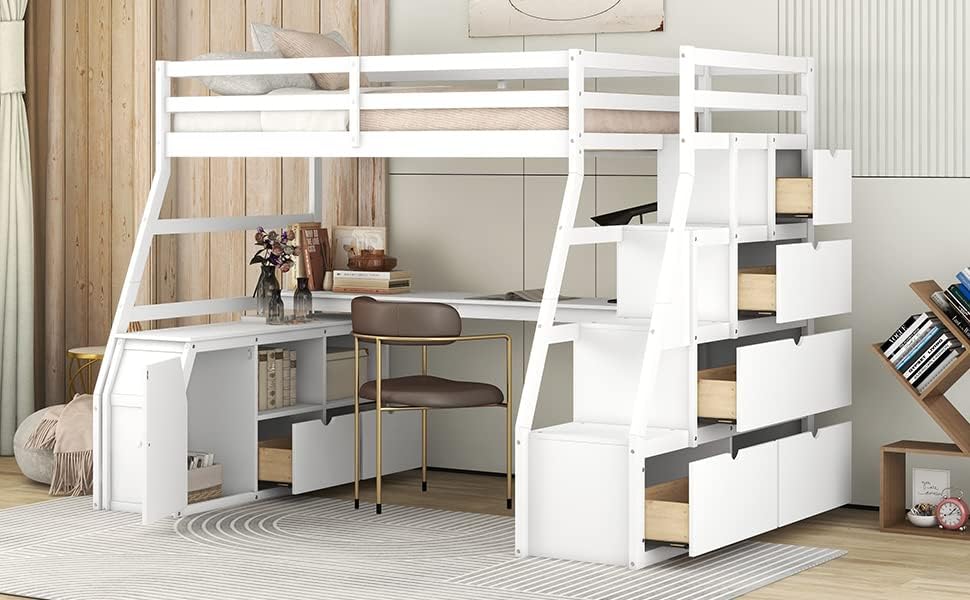
Image: The loft bed with some drawers and shelves open, demonstrating the storage capacity.
Onderhoud
Skoonmaak
Vee oppervlaktes af met 'n sagte, damp cloth. Avoid harsh chemicals or abrasive cleaners that may damage the finish. For stubborn marks, a mild soap solution can be used, followed by drying with a clean cloth.
Gereelde inspeksie
Periodically (e.g., every 3-6 months) inspect all bolts, screws, and connections to ensure they are tight. Re-tighten any loose hardware to maintain the bed's stability and safety. Check for any signs of wear or damage to the wood or hardware.
Probleemoplossing
- Piepende geluide: If the bed squeaks, check all bolts and screws for tightness. Loose connections are a common cause of squeaking. Ensure the bed is on a level surface.
- Laaie plak: If drawers are difficult to open or close, check for obstructions in the tracks. Ensure the drawer slides are clean and free of debris. Verify that the drawer was assembled correctly and is aligned properly.
- Onstabiliteit: If the bed feels wobbly, immediately stop using it. Re-check all assembly steps and ensure every bolt and screw is securely tightened. Confirm the bed is placed on a flat, even floor.
Spesifikasies
| Produkafmetings (L x B x H) | 94.7" x 56.8" x 68.3" |
| Materiaal tipe | Plywood, Pine Wood, MDF |
| Kleur | Wit |
| Bed Grootte | Tweeling |
| Aantal laaie | 7 |
| Aantal rakke | 2 |
| Vergadering benodig | Ja |
Waarborg inligting
Specific warranty details for this Generic product are not provided in the product listing. Please refer to your purchase documentation or contact the retailer/seller directly for information regarding warranty coverage and terms.
Ondersteuning
For any questions, missing parts, or assistance with assembly, please contact the seller or retailer from whom you purchased this product. Ensure you have your order number and product model information ready when contacting support.