Spectra Projection Helios
Spectra Projection Helios Fresnel ALR Projector Screen (120-inch) User Manual
Model: Helios
Inleiding
This manual provides comprehensive instructions for the setup, operation, maintenance, and troubleshooting of your Spectra Projection Helios Fresnel ALR Projector Screen. Designed for ultra short throw (UST) projectors, this 120-inch screen utilizes advanced Fresnel Ambient Light Rejecting (ALR) technology to deliver bright and vivid images even in well-lit environments.
Please read this manual thoroughly before installation and use to ensure optimal performance and longevity of your projector screen.
Opstelling en installasie
1. Uitpak
- Maak die verpakking versigtig oop en verwyder al die komponente.
- Inspect the screen and frame for any signs of damage. If damage is found, contact customer support immediately.
- Ensure all parts listed in the packing list (refer to your product packaging) are present.
2. Muurmontering
The Spectra Projection Helios screen is designed for wall mounting. Professional installation is recommended due to the size and precision required for optimal viewing.
- Kies ligging: Choose a flat wall surface free from obstructions. Ensure the wall can support the screen's weight (approximately 30 pounds).
- Meet en merk: Determine the desired height and center point for the screen. Use a level to mark the positions for the mounting brackets according to the provided template (if included) or measurements in the assembly guide.
- Installeer hakies: Securely attach the wall mounting brackets to the marked positions using appropriate hardware for your wall type (e.g., wall anchors for drywall, screws for studs).
- Assemble Frame (if required): Follow the separate assembly instructions for the screen frame.
- Attach Screen Material: Carefully attach the screen material to the frame, ensuring it is taut and wrinkle-free.
- Monteer skerm: With assistance, lift the assembled screen and carefully hook it onto the installed wall brackets. Ensure it is securely seated and level.

Figure 1: The Spectra Projection Helios screen installed with a UST projector.
3. Projektorplasing
This screen is specifically designed for Ultra Short Throw (UST) projectors. The projector must be placed directly below the screen, very close to the wall, projecting upwards onto the screen surface. Refer to your projector's manual for exact placement distances and keystone correction settings.
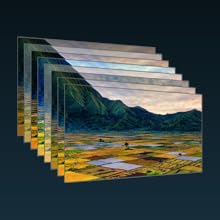
Figure 2: Simulated surface detail of the Fresnel ALR screen, illustrating its light-directing properties.
Bedryfsinstruksies
The Spectra Projection Helios screen is a passive display surface. Its operation is directly linked to your Ultra Short Throw projector. Ensure your projector is correctly aligned and calibrated for the best viewondervinding.
Ambient Light Rejection (ALR) Technology
The screen features advanced Fresnel ALR technology. This specialized optical surface is engineered to reflect light from the UST projector directly to the viewer while absorbing or deflecting ambient light from other angles. This results in a bright, high-contrast image even in rooms with significant ambient light, making it suitable for daytime viewing.

Figure 3: Illustration of Fresnel ALR technology, showing light paths.
8-Layer Optical Surface Structure
The screen's performance is enhanced by an 8-layer optical surface structure. Each layer contributes to image quality, color accuracy, and durability. These layers include anti-glare, color plane, diffusion, columnar, speckle diffusion, Fresnel, reflecting, and blackened layers, working in concert to optimize the projected image.

Figuur 4: Gedetailleerd view of the 8-layer optical surface structure.
Onderhoud
Cleaning the Screen Surface
- Stofverwydering: Gently wipe the screen surface with a soft, dry, lint-free microfiber cloth to remove dust.
- Skoonmaak: For smudges or fingerprints, lightly dampen a clean microfiber cloth with distilled water. Wipe the affected area gently in one direction. Do not rub vigorously.
- Vermy chemikalieë: Never use harsh chemicals, solvents, alcohol-based cleaners, or abrasive materials on the screen surface, as these can damage the optical layers.
- Druk: Do not apply excessive pressure when cleaning, as this can cause permanent damage or distortion to the screen material.
Algemene Sorg
- Avoid touching the screen surface directly with bare hands.
- Keep the screen away from direct sunlight or strong heat sources when not in use, if possible, to prevent material degradation.
- Ensure the screen is not exposed to sharp objects that could scratch or puncture the surface.
Probleemoplossing
| Probleem | Moontlike oorsaak | Oplossing |
|---|---|---|
| Image appears dim or washed out. | Incorrect projector placement; excessive ambient light; projector settings. |
|
| Image has hot spots or uneven brightness. | Projector misalignment; screen not perfectly flat. |
|
| Visible lines or patterns on the screen. | Moiré effect (interaction between projector pixels and screen texture); screen damage. |
|
| Dust or smudges on the screen. | Accumulated dust; accidental touching. |
|
If the problem persists after attempting these solutions, please contact Spectra Projection customer support.
Spesifikasies
| Kenmerk | Detail |
|---|---|
| Handelsmerk | Spectra Projection |
| Model Naam | Helios |
| Vertoon afmetings | 120 duim |
| Produk Afmetings (B x H) | 104.6"B x 49"H |
| Materiaal | Fresnel (Ambient Light Rejecting) |
| Montage tipe | Muurmontering |
| Item gewig | 30 pond |
| Verenigbaarheid | Ultra Short Throw (UST) Projectors |
Waarborg inligting
For detailed warranty information regarding your Spectra Projection Helios Fresnel ALR Projector Screen, please refer to the warranty card included with your product or visit the official Spectra Projection webwebwerf. Waarborgbepalings en -voorwaardes kan per streek en kleinhandelaar verskil.
Kliënte ondersteuning
If you require assistance, have questions about your product, or need technical support, please contact Spectra Projection customer service. Contact details can typically be found on the manufacturer's webwebwerf of op die produkverpakking.
Aanlyn hulpbronne: Besoek die Spectra Projection brand page on Amazon vir bykomende produkinligting en ondersteuning.
Ask a question about this manual
Ask about setup, troubleshooting, compatibility, parts, safety, or missing instructions. Manuals+ will review the question and use this page’s manual context to help answer it.