1. Inleiding
The PGST WiFi Home Alarm Security System (Model PG108-4GUS-F) is a comprehensive wireless security solution designed to protect your home or apartment. This system supports both 2.4GHz WiFi and 2G/3G/4G cellular networks, providing reliable alerts and control. It is compatible with popular smart home platforms like Amazon Alexa and Google Home for convenient voice control. The system is designed for easy DIY installation and offers expandability with up to 100 wireless accessories.

Image: The PGST WiFi Home Alarm Security System main unit with various connected accessories like motion sensors, door sensors, remote controls, and RFID tags.
2. Pakketinhoud
Die 24-delige stel bevat die volgende komponente:
- Alarm system PG-108 (Main Control Panel) x 1
- Wireless PIR Detector (Motion Sensor) x 5
- Door Sensor x 10
- PE-513 Siren x 1
- Afstandbeheer x 3
- RFID Tag x 3
- SOS Button x 1
- Type C cable + Adapter x 1

Image: Visual representation of the 24-piece kit contents, including the main panel, motion sensors, door sensors, remote controls, RFID tags, en sirene.
3. Opstelling
3.1 Aanvanklike aanskakeling en netwerkverbinding
- Connect the alarm host to a power source using the provided Type C cable and adapter. The system includes a backup battery.
- For WiFi connection: Download the 'Smart Life' or 'Tuya' app on your smartphone. Follow the in-app instructions to connect the alarm host to your 2.4GHz WiFi network. (Note: 5G WiFi is not supported).
- For 4G/GSM connection: Insert a compatible GSM SIM card (not included) into the alarm host. This enables phone calls and SMS alerts.

Image: The alarm panel connected to a WiFi router and a diagram showing SIM card insertion for 4G/GSM connectivity.
3.2 Setting Keypad Lock Password
To set or change the keypad lock password:
- Navigeer na Spyskaart > Instellings > Wagwoord > Gebruiker.
- Enter your desired 4-digit password.
- Bevestig die wagwoord.
To turn the keypad lock on or off:
- Navigeer na Spyskaart > Instellings > Skakel oor > Toetsbordslot.
- Select 'on' or 'off' as desired.
Video: Instructions on how to set the keypad lock password and enable/disable the keypad lock feature on the PGST alarm system.
3.3 Koppeling van Toebehore
The PGST system allows pairing of various wireless accessories. Follow these general steps for pairing:
Video: Detailed guide on connecting various accessories like remote controls, RFID cards, infrared sensors, door magnetic sensors, and smoke alarms to the PGST alarm system.
3.3.1 Afstandsbedieningparing
- On the main panel, navigate to Spyskaart > Sensors > Afgeleë > Voeg by.
- Press any button on the remote control. The panel will confirm successful learning.

Image: A white remote control with four buttons: lock, unlock, home, and SOS.
3.3.2 RFID-kaartparing
- On the main panel, navigate to Spyskaart > Sensors > RFID > Voeg by.
- Tap the RFID card against the RFID reader area on the main panel. The panel will confirm successful learning.

Image: Two black RFID tags with metal keyrings, used for arming/disarming the system.
3.3.3 Infrared Motion Sensor Pairing
- Turn on the infrared sensor switch. Wait approximately 30 seconds for the red light to flash rapidly twice.
- On the main panel, navigate to Spyskaart > Sensors > Sensor > Voeg by.
- Select 'System Alarm' or 'Stay Arm Active' for the sensor type.
- Trigger the motion sensor (e.g., by moving in front of it). The panel will confirm successful learning.

Image: A white wireless PIR motion detector mounted on a wall, illustrating its 32ft (10m) range and 110-degree field of view.
3.3.4 Door Magnetic Sensor Pairing
- Maak die skakelaar op die deur se magnetiese sensor oop.
- On the main panel, navigate to Spyskaart > Sensors > Sensor > Voeg by.
- Select 'Door Alarm' or 'Stay Arm Active' for the sensor type.
- Separate the two parts of the door sensor. The panel will confirm successful learning.

Image: A white door magnetic sensor installed on a door and its frame, designed to trigger an alarm when the door is opened.
3.3.5 Smoke Alarm Pairing
- On the main panel, navigate to Spyskaart > Sensors > Sensor > Voeg by.
- Select 'Fire Alarm' or '24 Hours Active' for the sensor type.
- Press the test button on the smoke alarm. The panel will confirm successful learning.
4. Bedryfsinstruksies
4.1 Die Stelsel Bewapen en Deaktiveer
The system can be armed or disarmed using the main control panel, remote control, RFID tags, of die mobiele toepassing.
- Arm: Activates all sensors. Any triggered sensor will initiate an alarm.
- Ontwapen: Deactivates the alarm system.
- Huisarm: Activates perimeter sensors (e.g., door/window sensors) while allowing free movement within the property (motion sensors are typically inactive in this mode).
4.2 SOS-noodfunksie
In an emergency, press the SOS button on the main panel or the remote control. The system will immediately trigger an alarm and send alerts to pre-configured contacts.
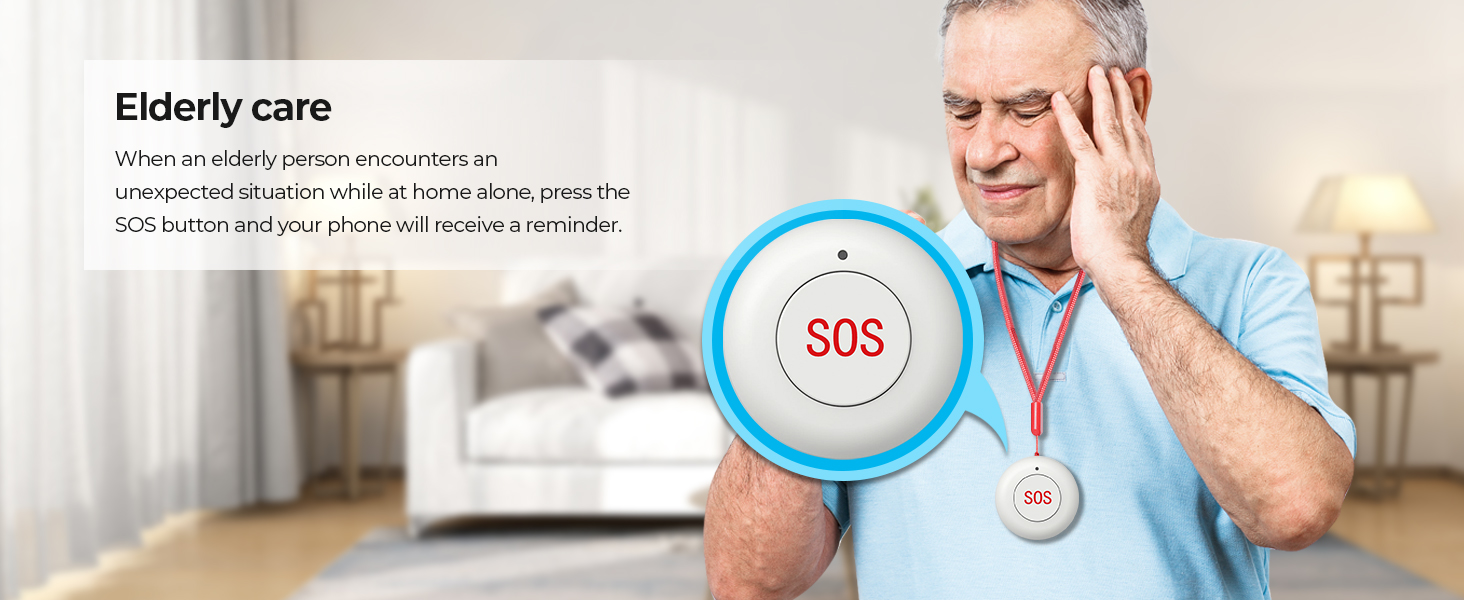
Image: An elderly person with an SOS pendant, highlighting the emergency alert feature.
4.3 Mobiele toepassingbeheer
Use the 'Smart Life' or 'Tuya' app to remotely control your alarm system. This includes arming/disarming, receiving notifications, checking sensor status, and adjusting settings from anywhere.

Image: A smartphone showing the 'Smart Life' app, demonstrating remote control and monitoring capabilities.
4.4 Stembeheer-integrasie
The system is compatible with Amazon Alexa and Google Home. Link your alarm system to these platforms to enable voice commands for arming and disarming.
- Example command: "Alexa, arm my home!"
- Example command: "OK Google, disarm the alarm system."

Image: Two children using a smart speaker to control the alarm system with voice commands, illustrating smart home integration.
4.5 Gesinsdeling
The system supports linking up to 5 phone numbers to share alerts and control with family members, ensuring everyone is informed and can manage the system.

Image: An illustration depicting multiple family members connected to and receiving notifications from the alarm system.
5. Onderhoud
5.1 Algemene sorg
- Keep the main control panel and sensors clean by wiping them with a soft, dry cloth. Avoid using abrasive cleaners or solvents.
- Ensure all components are installed in dry environments, away from direct sunlight, extreme temperatures, and high humidity.
- Regularly check that all sensors are securely mounted and free from obstructions.
5.2 Battery-onderhoud
- The main control panel has a built-in backup lithium polymer battery. Ensure it is regularly charged by keeping the panel connected to AC power.
- Wireless sensors are battery-powered. Replace batteries promptly when low battery alerts are received to ensure continuous protection.
6. Probleemoplossing
6.1 System Not Connecting to WiFi
- Ensure your WiFi network is 2.4GHz. The system does not support 5G WiFi.
- Kontroleer jou WiFi-wagwoord vir akkuraatheid.
- Move the alarm host closer to your WiFi router to improve signal strength.
- Herbegin jou router en die alarmgasheer.
6.2 Sensors Not Triggering Alarm
- Verify that the sensors are correctly paired with the main panel (refer to Section 3.3).
- Check the battery level of the sensors. Replace if necessary.
- Ensure the main panel is armed in the correct mode (e.g., 'Arm' for all sensors, 'Home Arm' for perimeter sensors).
- For door/window sensors, ensure the two parts are aligned correctly and within the specified gap.
- For motion sensors, ensure there are no obstructions in its field of view.
6.3 Geen toepassingkennisgewings nie
- Ensure the alarm host is connected to WiFi or has an active 4G/GSM SIM card.
- Check your smartphone's notification settings for the 'Smart Life' or 'Tuya' app to ensure notifications are enabled.
- Verifieer dat jou foon 'n aktiewe internetverbinding het.
6.4 Vals alarms
- Review sensor placement. Motion sensors should be placed away from heat sources, direct sunlight, and areas with pets if not pet-immune.
- Ensure door/window sensors are firmly attached and not easily dislodged.
- Adjust sensor sensitivity if applicable (check individual sensor manuals).
7. Spesifikasies
| Kenmerk | Detail |
|---|---|
| Handelsmerk | PGST |
| Modelnommer | PG108-4GUS-F |
| Kragbron | AC power with battery backup |
| Battery sel tipe | Litium polimeer |
| Verbindingstegnologie | Wireless (2.4GHz WiFi, 2G/3G/4G) |
| Versoenbare toestelle | Slimfoon, tablet, persoonlike rekenaar |
| Slimhuisversoenbaarheid | Smart Home Compatible (Alexa, Google Home) |
| Beheer metode | App, Remote, Keypad |
| Alerttipe | Motion, Door/Window Open, Fire |
| Item Dimensions (Main Unit) | 2.3 x 2 x 1.8 duim |
| Installasie metode | Inskroef |
| Unit Count (for 24-Kits-F) | 24.0 Tel |
8. Ondersteuning
8.1 Tegniese Ondersteuning
PGST is committed to providing reliable products and services. We offer lifetime technical support for our products. If you encounter any issues or have questions regarding your PGST WiFi Home Alarm Security System, please contact our support team.
8.2 Kliëntediens
Our customer service team aims for quick response within 365 days to address your inquiries and concerns. For assistance, please refer to the contact information provided with your product packaging or visit the official PGST webwebwerf.

Image: Icons representing PGST's commitment to a professional team, lifetime technical support, and quick response times.