P00OF96HNT8D53332PAY8VPRIIP3
Generic Fuel Line Set Instruction Manual
For FX-LB, LB126, LBS126, 133T, SPL450N Leaf Blower Models
Inleiding
This manual provides essential instructions for the installation, operation, and maintenance of your new Generic Fuel Line Set. This set is designed as a direct aftermarket replacement for various leaf blower models, including FX-LB, LB126, LBS126, 133T, and SPL450N. Proper installation and care will ensure reliable performance and extend the life of your leaf blower's fuel system components.
The Generic Fuel Line Set provides replacement components for your leaf blower's fuel system, ensuring proper fuel delivery.
Veiligheidsinligting
Always observe the following safety precautions when working with fuel systems and power equipment:
- Ontkoppel die vonkprop: Before performing any maintenance or installation, always disconnect the spark plug wire to prevent accidental engine startup.
- Werk in 'n goed geventileerde area: Fuel fumes can be hazardous. Ensure adequate ventilation.
- Geen oop vlamme: Keep all sources of ignition, such as sparks, open flames, or hot surfaces, away from fuel and fuel system components.
- Dra beskermende toerusting: Gebruik gepaste persoonlike beskermende toerusting, insluitend handskoene en oogbeskerming.
- Handle Fuel Carefully: Store fuel in approved containers and clean up any spills immediately.
- Refer to Blower Manual: Always consult your specific leaf blower's owner's manual for additional safety guidelines and detailed instructions.
Pakketinhoud
Verifieer dat alle komponente in jou pakket teenwoordig is:
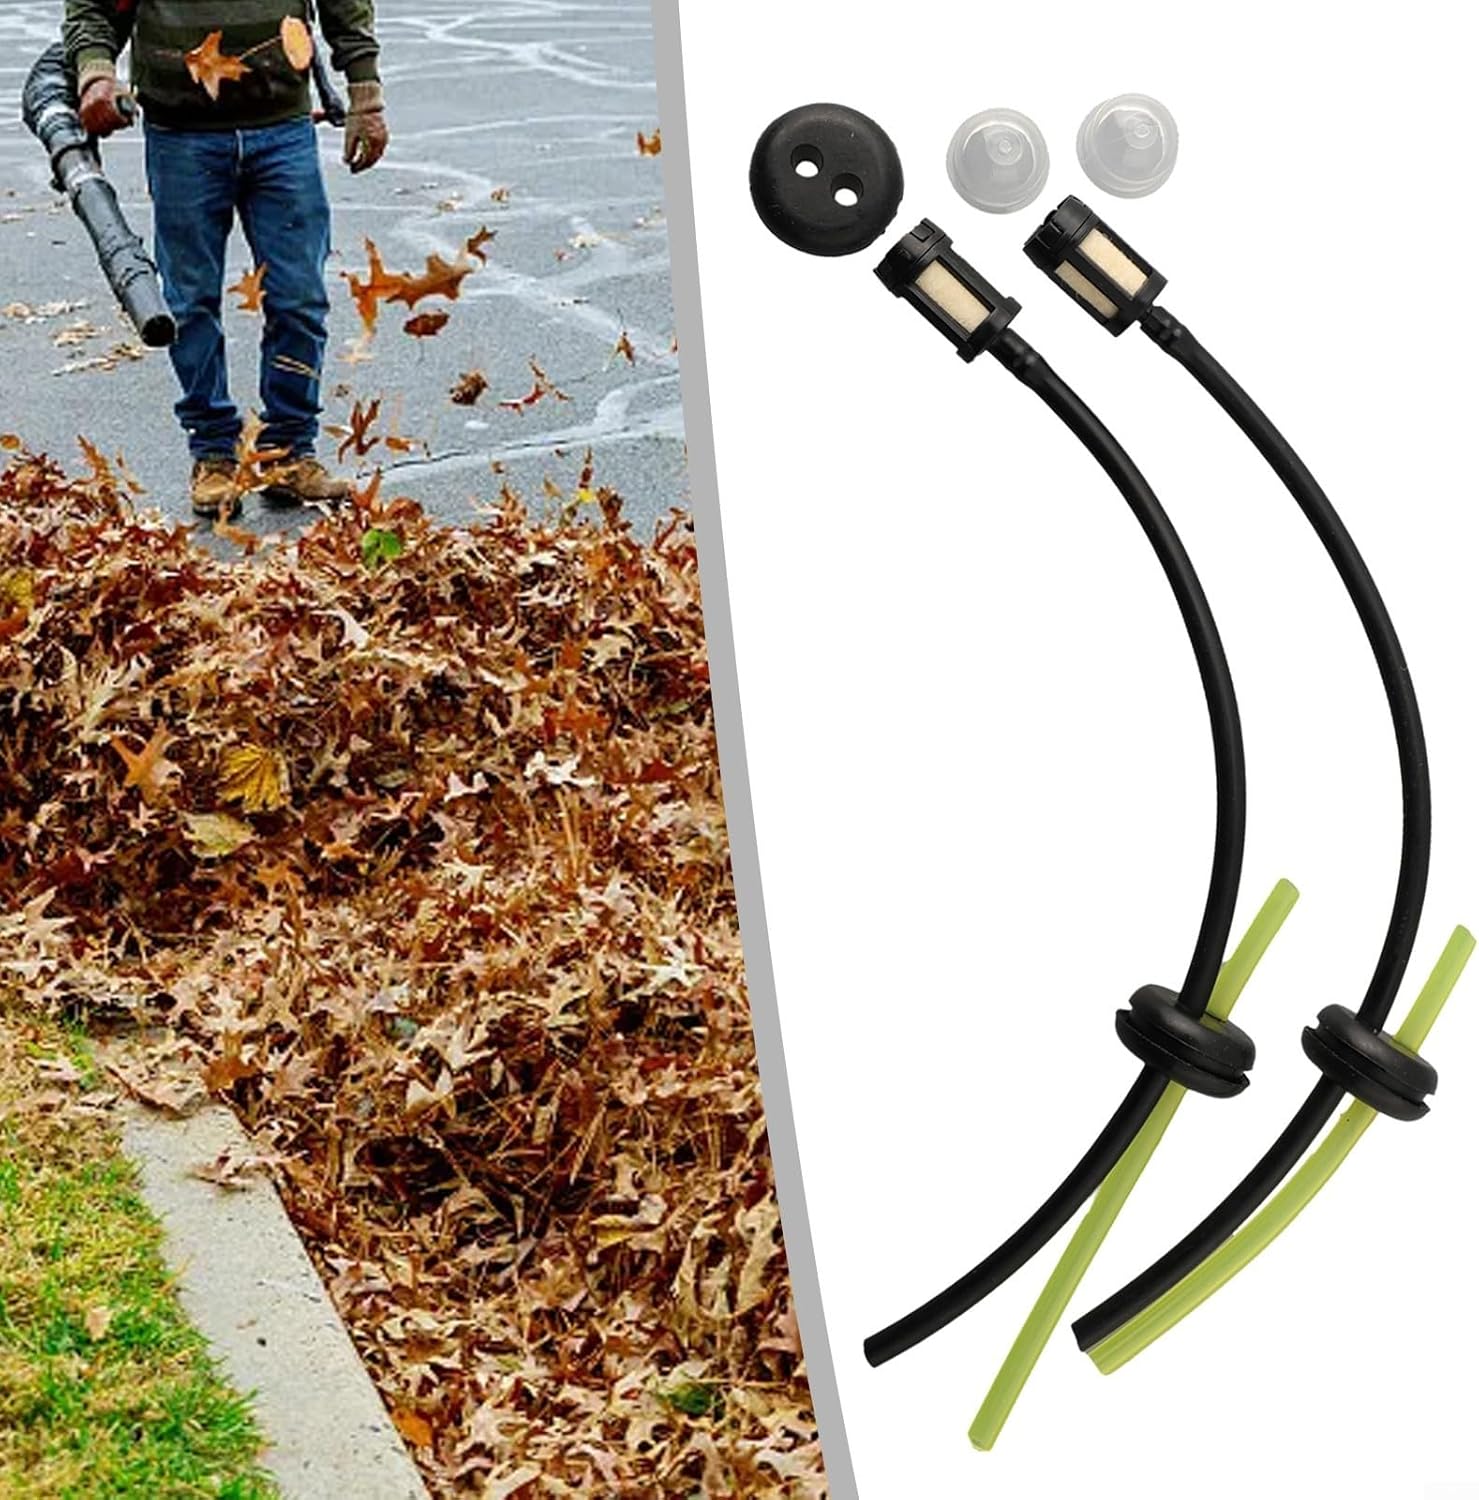
- 2 x Fuel Hoses with Fuel Filters
- 2 x Primer Pumps
- 1 x Rubber Grommet

The complete fuel line set includes fuel hoses with filters, primer pumps, and a rubber grommet.

Detail of the rubber grommet and primer pumps included in the set.

The two fuel hose assemblies, each with an integrated fuel filter and grommet.
Installasie-instruksies
This fuel line set is designed for straightforward installation. Follow these general steps for replacement. Always refer to your specific leaf blower's service manual for detailed, model-specific instructions.
- Prepare the Blower: Ensure the leaf blower is turned off and cool. Disconnect the spark plug wire to prevent accidental starting.
- Dreineer brandstof: Carefully drain any remaining fuel from the fuel tank into an approved container.
- Access Fuel System: Depending on your blower model, you may need to remove covers or panels to access the fuel tank and lines.
- Verwyder ou komponente: Disconnect and remove the old fuel lines, fuel filter, primer bulbs, and rubber grommet from the fuel tank and carburetor. Note the routing of the lines for correct reinstallation.
- Install New Grommet: Insert the new rubber grommet into the fuel tank opening. Ensure it forms a tight seal.
- Install Fuel Lines: Carefully feed the new fuel lines through the grommet. One line typically goes to the fuel filter inside the tank (fuel pick-up line), and the other serves as the return line. Connect the appropriate ends to the carburetor and primer bulbs as per your blower's original configuration.
- Install Primer Pumps: Replace the old primer pumps with the new ones. Ensure they are securely seated and connected to the correct fuel lines.
- Verifieer verbindings: Double-check all connections to ensure they are secure and free from kinks or leaks.
- Reassemble Blower: Reattach any covers or panels that were removed.
- Herkoppel die vonkprop: Sluit die vonkpropdraad weer aan.
Operating After Installation
After installing the new fuel line set, follow these steps before operating your leaf blower:
- Add Fresh Fuel: Fill the fuel tank with the correct fuel mixture (gasoline and 2-stroke oil, if applicable) as specified by your leaf blower's manufacturer.
- Voorbereid die stelsel: Press the primer bulb several times until fuel is visible in the bulb and flows freely, indicating that the fuel system is primed and air-free.
- Kyk vir lekkasies: Visually inspect all new connections for any signs of fuel leakage. Address any leaks immediately before starting the engine.
- Begin enjin: Follow your leaf blower's standard starting procedure.
- Monitor prestasie: Allow the engine to run for a few minutes and observe its performance. Ensure smooth operation and no unusual noises or fuel smells.
Onderhoud
Regular maintenance of your fuel system components ensures optimal performance and longevity:
- Inspekteer brandstoflyne: Periodically check fuel lines for cracks, hardening, or signs of wear. Replace them if any damage is observed.
- Check Fuel Filter: The fuel filter should be inspected regularly and replaced if it appears clogged or dirty. A clogged filter can restrict fuel flow and affect engine performance.
- Examine Primer Bulbs: Ensure primer bulbs are pliable and not cracked. Replace them if they lose their elasticity or show signs of damage.
- Clean Fuel Tank: Occasionally clean the fuel tank to remove any sediment or debris that could clog the fuel filter.
- Use Fresh Fuel: Always use fresh, clean fuel. Stale fuel can cause deposits and damage fuel system components.
Probleemoplossing
If you encounter issues after installing the fuel line set, consider the following common problems and solutions:
| Probleem | Moontlike oorsaak | Oplossing |
|---|---|---|
| Engine not starting or hard to start |
|
|
| Brandstoflekkasies |
|
|
| Die enjin loop swak of staan stil |
|
|
Spesifikasies
| Kenmerk | Detail |
|---|---|
| Handelsmerk | Generies |
| Modelnommer | P00OF96HNT8D53332PAY8VPRIIP3 |
| Itemafmetings (L x B x H) | 5.12 x 4.33 x 1.18 duim |
| Item gewig | 41 gram |
| Vervaardiger | ZWDZ |
| ASIN | B0DXF4FLNC |
Waarborg en Ondersteuning
For any questions regarding this product, including warranty information or technical support, please contact the seller or manufacturer directly through your purchase platform. Keep your purchase receipt as proof of purchase.
Ask a question about this manual
Ask about setup, troubleshooting, compatibility, parts, safety, or missing instructions. Manuals+ will review the question and use this page’s manual context to help answer it.