1. Inleiding
This manual provides essential information for the safe and effective operation of your Longer RAY5 10W Laser Engraver. Please read it thoroughly before assembly and use to ensure optimal performance and safety.
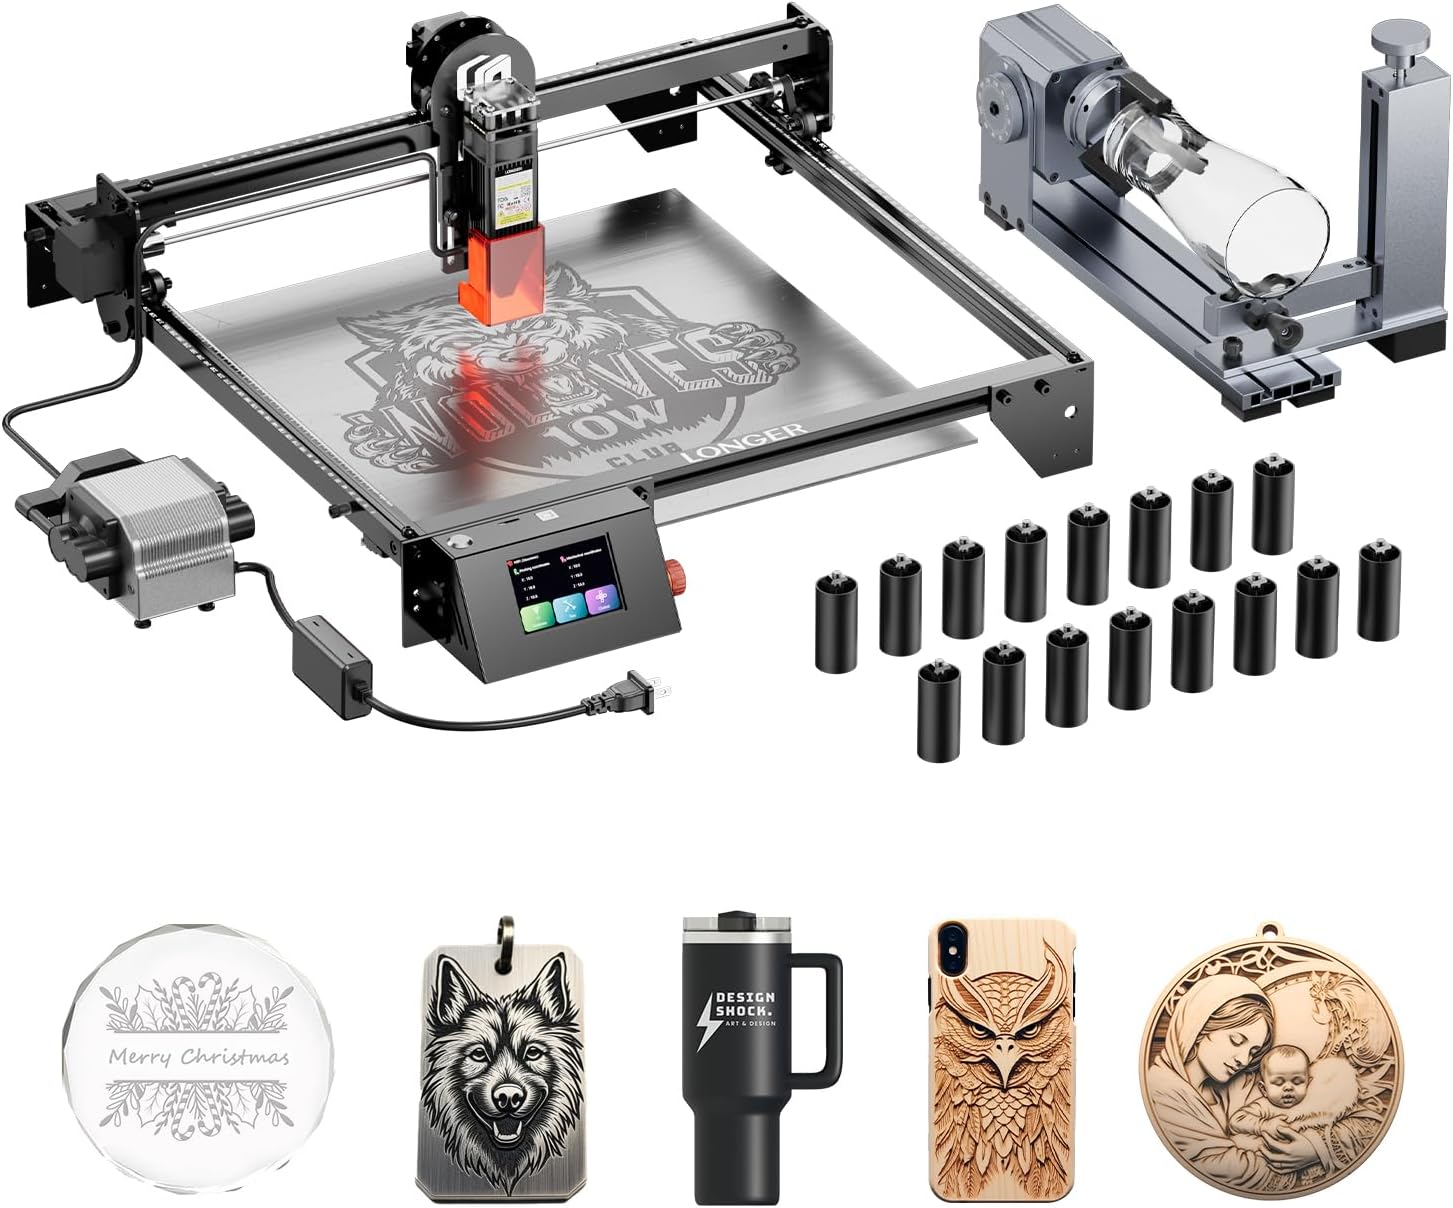
Image 1.1: The Longer RAY5 10W Laser Engraver with included accessories.
2. Veiligheidsinligting
WARNING: Laser radiation can cause eye damage and skin burns. Always wear appropriate laser safety goggles during operation. Never look directly into the laser beam.
- Operate the laser engraver in a well-ventilated area to dissipate fumes and smoke.
- Hou 'n brandblusser naby.
- Moenie die masjien sonder toesig laat tydens werking nie.
- Maak seker dat die werkarea vry is van vlambare materiale.
- Keep children and pets away from the operating machine.
- Ontkoppel die krag voordat enige onderhoud of aanpassings uitgevoer word.
3. Opstelling
3.1 Uitpak en monteer
Carefully unpack all components and verify against the packing list. Follow the included assembly guide for step-by-step instructions to construct the main frame and attach the laser module.
3.2 Air Assist Kit Installation
The Air Assist Kit helps to remove smoke and debris during engraving and cutting, resulting in cleaner edges and preventing yellowing. Connect the air pump to the designated port on the laser module and secure the air nozzle.
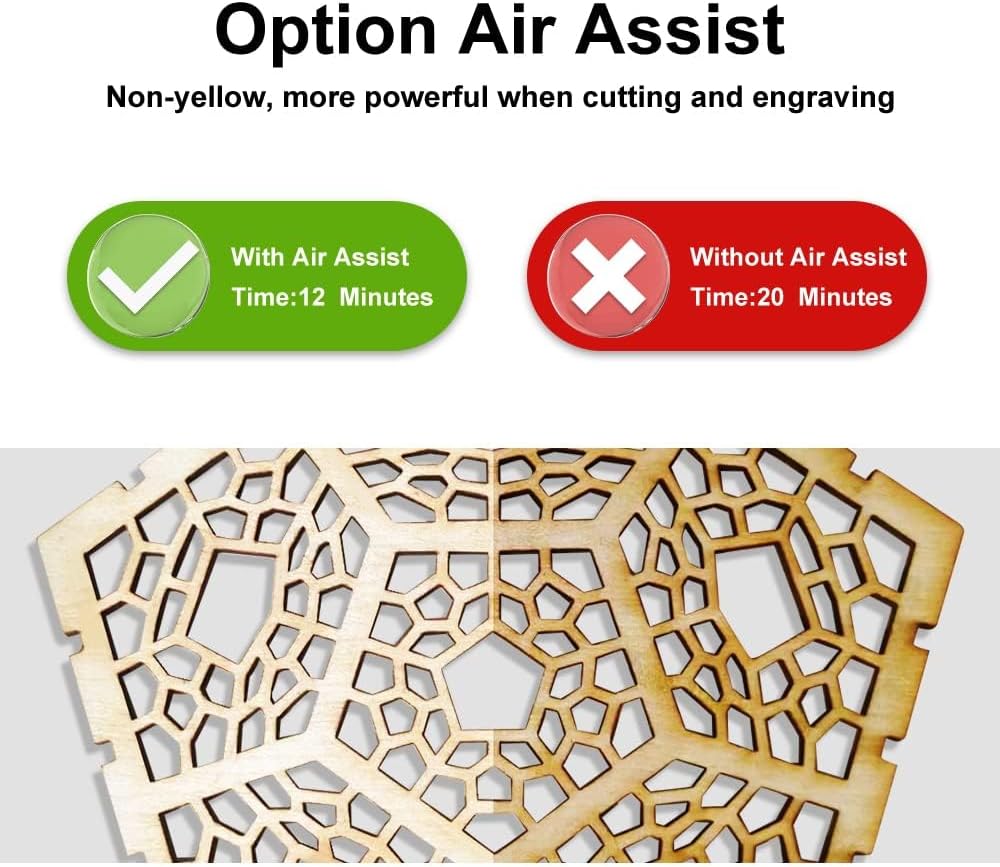
Image 3.1: Engraving results showing the benefit of using the Air Assist Kit.
3.3 4-in-1 Rotary Roller Setup
The 4-in-1 Rotary Roller is designed for engraving cylindrical, wine glass, and irregular objects. Attach the rotary roller to the engraver's base as per the separate rotary roller manual. Select the appropriate jaw set for your object.

Image 3.2: The 4-in-1 Rotary Roller with L-shaped, Ladder, and Hexagonal jaws.

Beeld 3.3: Voorbeeldamples of objects being engraved using the Rotary Roller.
3.4 Riser Pads Installation
The 16 Riser Pads increase the working height of the engraver, allowing for engraving on taller objects. Place the riser pads under the engraver's feet to elevate the machine.

Image 3.4: The 16 Riser Pads.

Image 3.5: The laser engraver with riser pads installed, providing additional working height.
4. Bedryfsinstruksies
4.1 Power On and Connection
Connect the power adapter and turn on the machine. The RAY5 10W supports App Offline Control, allowing you to operate it without a constant computer connection once the file is gelaai.
4.2 Material Preparation
Place your material (metal, glass, wood, etc.) securely on the engraving bed. Ensure it is flat and properly aligned. Adjust the laser focus according to the material thickness.
4.3 Engraving and Cutting
The 10W laser module provides strong cutting power and ultra-fine engraving capabilities with a laser spot as small as 0.06mm*0.06mm. This allows for high precision and detail in your projects.

Image 4.1: Detail comparison illustrating the ultra-fine engraving capability of the RAY5 10W.

Image 4.2: The 10W Laser Module demonstrating its cutting power on various materials.
4.4 Speed and Efficiency
Equipped with dual-beam technology, the machine can achieve an engraving speed of up to 10,000mm per minute, significantly improving work efficiency.

Image 4.3: Speed comparison highlighting the efficiency of the RAY5 10W.
4.5 Videodemonstrasie
Watch this video for a visual guide on operating the Longer RAY5 10W Laser Engraver.
Video 4.1: Official product video demonstrating features and operation of the Longer RAY5 10W Laser Engraver.
5. Onderhoud
5.1 Cleaning the Laser Lens
Regularly clean the laser lens with a soft, lint-free cloth and lens cleaning solution to ensure optimal laser performance and prevent power loss. Ensure the machine is powered off before cleaning.
5.2 Rail and Belt Inspection
Check the linear rails and belts for any debris or wear. Clean the rails and lubricate them periodically. Ensure belts are properly tensioned to maintain engraving accuracy.
5.3 Algemene Skoonmaak
Keep the entire machine free from dust and debris. Use compressed air to clean hard-to-reach areas. A clean machine operates more efficiently and prolongs its lifespan.
6. Probleemoplossing
6.1 Laser Not Firing
- Kontroleer of die kragkabel stewig gekoppel is.
- Verify the laser module is properly seated and connected.
- Ensure the safety switch or emergency stop button is not engaged.
- Confirm software settings for laser power and mode are correct.
6.2 Swak Graveerkwaliteit
- Adjust the laser focus.
- Maak die laserlens skoon.
- Reduce engraving speed or increase laser power for deeper marks.
- Ensure the material is flat and stable.
- Check for loose belts or mechanical components.
6.3 Verbindingsprobleme
- Restart the engraver and your control device (computer/app).
- Check USB or Wi-Fi connections.
- Ensure correct drivers are installed for computer connection.
7. Spesifikasies
| Kenmerk | Detail |
|---|---|
| Vervaardiger | LANGER |
| Modelnommer | 20240624 |
| Laser krag | 10 W |
| Laservlekgrootte | 0.06mm*0.06mm |
| Maksimum Gravure Spoed | 10,000 mm/min |
| Produk afmetings | 24 x 12.5 x 5.9 duim |
| Beheer metode | App Offline Control, CNC |
| Bykomstighede ingesluit | Air Assist Kit, 4-in-1 Rotary Roller, 16 Pcs Riser Pads |
8. Waarborginligting
The Longer RAY5 10W Laser Engraver comes with a 1 jaar waarborg from the date of purchase. This warranty covers manufacturing defects and malfunctions under normal use. Please retain your proof of purchase for warranty claims. For detailed terms and conditions, refer to the official Longer webwebwerf of kontak kliëntediens.
9. Kliëntediens
For technical assistance, troubleshooting, or any product-related inquiries, please contact Longer's customer support team:
- Tegniese Ondersteuning Telefoon: +1 888-575-9099
- Operating Hours (Mon-Fri): 9:00am-6:00pm (EST, UTC-5)
- Operating Hours (Sun-Thu): 8:30pm-7:00am (EST, UTC-5)
Our customer service team is professionally trained to provide timely and effective help for any product issues.