1. Inleiding en oorview
The GOCHIFIX Auto Hat Heat Press Machine is designed for efficient and precise heat transfer applications on various headwear and small items. Featuring automatic operation, precise temperature and timer control with four memory modes, and a curved heat plate, this machine simplifies the heat transfer process for professional and hobbyist use.
Its compact and versatile design makes it suitable for home use, small businesses, or portable crafting at events. The machine is equipped with enhanced safety features and interchangeable hat pads to accommodate different hat styles and sizes.
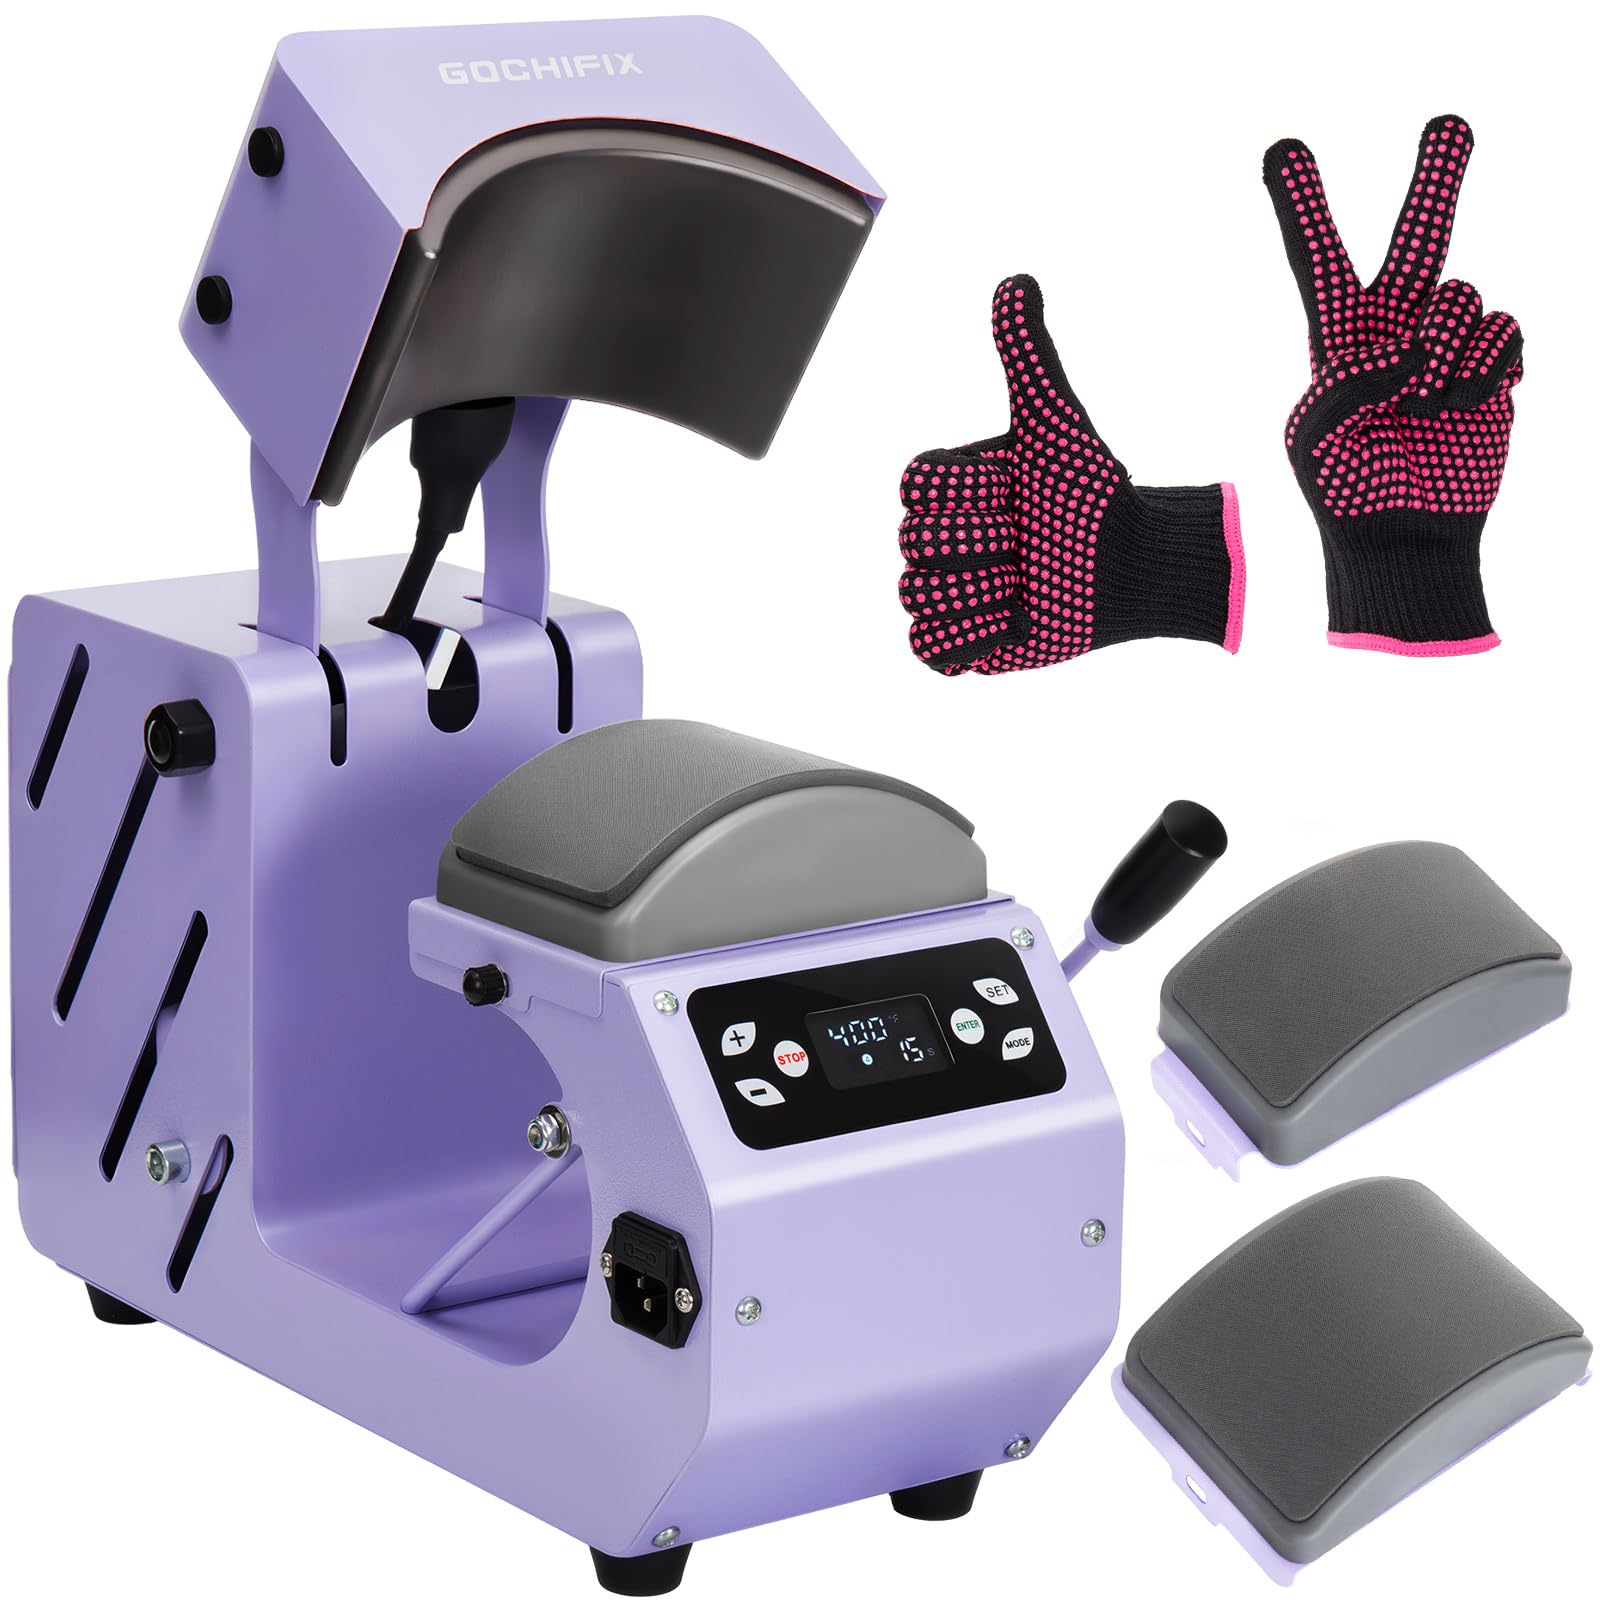
Figure 1: GOCHIFIX Auto Hat Heat Press Machine
2. Veiligheidsinstruksies
Please read and understand all safety instructions before operating the machine to prevent injury or damage.
- Elektriese veiligheid: Ensure the machine is plugged into a grounded outlet with the correct voltage (110 Volts). Do not operate with wet hands or in damp voorwaardes.
- Warm oppervlaktes: The heat plate reaches high temperatures (up to 400°F/200°C). Always wear the provided high-temperature gloves when handling hot parts or materials. Avoid direct contact with the heating elements.
- Noodstop: Press the 'Stop' button on the control panel to immediately interrupt operation in case of an emergency.
- Oorverhittingbeskerming: The machine includes a built-in fuse that will automatically activate if overheating occurs. Two spare fuses are included for replacement.
- Stabiliteit: Place the machine on a stable, flat, and heat-resistant surface. Anti-slip pads are provided to prevent shaking during operation.
- Ventilasie: Verseker voldoende ventilasie rondom die masjien tydens gebruik.
- Kinders en Troeteldiere: Keep children and pets away from the operating machine.
3. Produkkomponente
Your GOCHIFIX Auto Hat Heat Press Machine package includes the following items:
- Auto Hat Heat Press Machine (Main Unit)
- Curved Heat Plate (6.54"x3.84")
- Interchangeable Hat Pads:
- Large Pad: 5.59" × 3.78" (for adult hats)
- Small Pad: 4.94" × 2.95" (for children's hats)
- Power Cord (Wire length: 59.06")
- 1 Pair Silicone Heat-Resistant Gloves
- 2 Spare Fuses
- Instruksie Handleiding

Figure 2: Main components and accessories of the heat press machine.
4. Opstelling
- Pak die masjien uit: Verwyder alle komponente versigtig uit die verpakking. Bewaar die verpakking vir toekomstige berging of vervoer.
- Plaas op 'n stabiele oppervlak: Position the heat press machine on a flat, sturdy, and heat-resistant workbench or table. Ensure there is adequate space around the machine for safe operation.
- Koppel krag: Insert the power cord into the machine's power interface and then plug it into a standard 110V grounded electrical outlet.
- Attach Hat Pad: The machine comes with two interchangeable hat pads. Select the appropriate size (adult or child) and securely attach it to the lower platen. To change pads, simply rotate the nuts on both sides to release and secure the desired pad.
5. Bedryfsinstruksies
Follow these steps for successful heat transfer:
- Krag aan: Flip the red power switch located on the side of the machine to the 'ON' position. The digital display will illuminate.
- Stel temperatuur en tyd in:
- Press the 'SET' button to enter temperature/time setting mode.
- Use the '+' and '-' buttons to adjust the desired temperature (46-400°F / 8-200°C) and time (0-999 seconds).
- Druk weer 'SET' om elke instelling te bevestig.
- To switch between Celsius and Fahrenheit, press and hold the '+' button to enter the password screen, adjust the display value to 88, and click 'SET' to toggle.
- Utilize Memory Modes: The machine features 4 memory modes to save frequently used temperature and time settings. Press the 'MODE' button to cycle through and select a saved mode for quick setup.
- Voorverhit: Allow the machine to reach the set temperature. The display will show the current temperature rising.
- Berei hoed voor: Place the hat onto the lower hat pad. Use the adjustable hat stretcher to ensure the cap is smooth and wrinkle-free, creating a flat pressing surface.
- Position Transfer Material: Carefully place your sublimation, vinyl, or heat transfer material onto the hat in the desired position. Use heat-resistant tape to secure it if necessary.
- Start Pressing: Once the machine reaches the set temperature, press the 'ENTER' button. The curved heat plate will automatically lower and apply pressure. A countdown timer will begin.
- Automatic Release: When the countdown finishes, a buzzer will sound, and the heat plate will automatically rise and release, freeing your hands.
- Verwyder Produk: Carefully remove the hat using the provided heat-resistant gloves. Allow the transfer to cool before peeling off any backing material (if applicable).

Figure 3: Visual guide for easy operation.
Amptelike produkvideo's:
Video 1: How To Use GOCHIFIX Hat Press Machine For Beginners. This video provides a detailed walkthrough for new users on operating the heat press machine.
Video 2: Hands-Free GOCHIFIX Heat Press for Hassle-Free Creations! Demonstrates the automatic pressing and release features of the machine.
6. Onderhoud
- Skoonmaak: After each use, ensure the heat plate has cooled down. Wipe the curved heat plate with a soft, damp lap om enige oorskot te verwyder. Moenie skuurmiddels gebruik nie.
- Sekering vervanging: If the machine unexpectedly shuts off due to overheating, the fuse may need replacement. Unplug the machine, locate the fuse holder, and replace the blown fuse with one of the provided spare fuses.
- Berging: Berg die masjien in 'n droë, stofvrye omgewing wanneer dit nie gebruik word nie.
7. Probleemoplossing
- Masjien word nie aangeskakel nie: Check if the power cord is securely plugged into both the machine and the wall outlet. Ensure the power switch is in the 'ON' position. Verify the electrical outlet is functional.
- Heat Plate Not Heating: Confirm that the temperature is set correctly on the digital panel. Allow sufficient time for the machine to reach the set temperature. If the issue persists, check the fuse.
- Uneven Transfers or Wrinkles: Ensure the hat is stretched smoothly and securely on the lower platen using the hat stretcher. Verify that the transfer material is properly positioned and secured with heat-resistant tape. Adjust pressure if necessary.
- Buzzer Not Sounding: Check the timer settings to ensure it is not set to 0.
8. Spesifikasies
| Kenmerk | Spesifikasie |
|---|---|
| Modelnommer | BG-CH2310-2 |
| Produk afmetings | 7.13 cm L x 15.35 cm B x 11.1 cm H |
| Item gewig | 18.7 pond |
| Voltage | 110 Volt |
| Wattage | 500 watt |
| Temperatuurreeks | 46-400 ° F / 8-200 ° C |
| Time Control Range | 0-999 sekondes |
| Verhit plaat grootte | 6.54"x3.84" |
| Hat Pad Sizes | 5.59" × 3.78" (Large), 4.94" × 2.95" (Small) |
| Materiaal | Aluminum, Metal, Silicone |
| Kleur | Pers |
9. Waarborg en Ondersteuning
For warranty information, technical support, or service inquiries, please refer to the warranty card included in your product packaging or contact GOCHIFIX customer service directly. Keep your purchase receipt as proof of purchase.