1. Inleiding
The Daitsu Aral ADD-12XB Dehumidifier is designed to efficiently remove excess moisture from indoor environments, helping to prevent mold, mildew, and musty odors. This manual provides essential information for the safe and effective operation, maintenance, and troubleshooting of your dehumidifier. Please read it thoroughly before first use and retain it for future reference.
2. Veiligheidsinstruksies
Om veilige werking te verseker, moet u altyd die volgende voorsorgmaatreëls nakom:
- Maak seker dat die kragtoevoer ooreenstem met die voltagsoos gespesifiseer op die eenheid se graderingsetiket.
- Moenie die ontvochtiger met 'n beskadigde kragkabel of prop gebruik nie.
- Keep the unit upright during transport and operation.
- Maintain at least 20 cm (8 inches) of clearance around the unit for proper airflow.
- Moenie voorwerpe in die luginlaat of -uitlaat steek nie.
- Ontkoppel die eenheid voordat u skoonmaak of enige onderhoud uitvoer.
- Moenie die ontvochtiger gebruik in areas waar vlambare gasse of vloeistowwe gestoor word nie.
- Hierdie toestel is nie bedoel vir gebruik deur persone (insluitend kinders) met verminderde fisiese, sensoriese of geestelike vermoëns, of 'n gebrek aan ervaring en kennis nie, tensy hulle toesig of instruksies oor die gebruik van die toestel gegee is deur 'n persoon wat verantwoordelik is vir hul veiligheid.
3. Produk verbyview
Familiarize yourself with the main components of your Daitsu Aral ADD-12XB Dehumidifier.
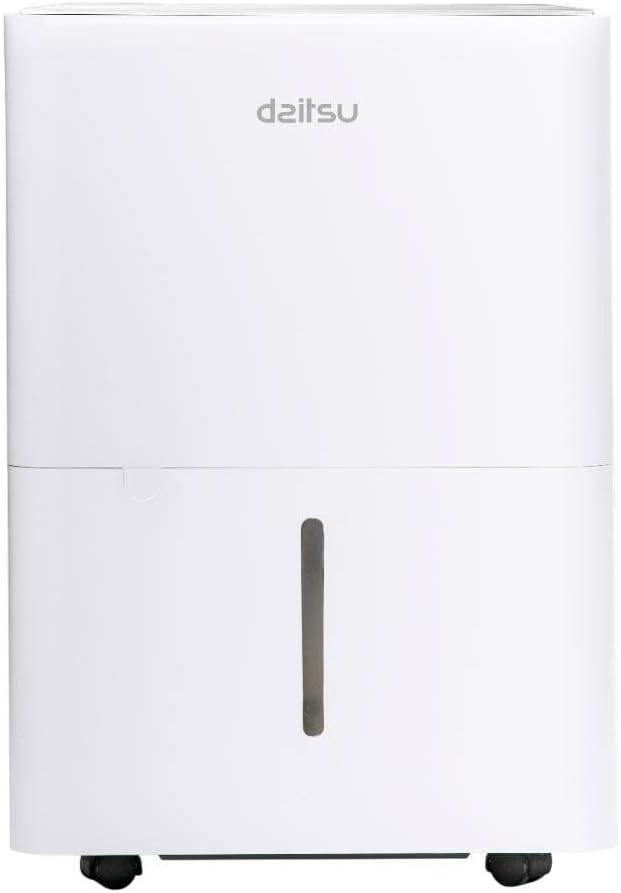
Figuur 1: Voorkant view of the Daitsu Aral ADD-12XB Dehumidifier. This image displays the front of the Daitsu Aral ADD-12XB Dehumidifier, featuring its clean white design and the visible water level indicator on the collection tank.

Figuur 2: Agter view of the Daitsu Aral ADD-12XB Dehumidifier. The rear view of the dehumidifier shows the removable air filter cover for maintenance and the continuous drainage outlet, typically used for connecting a hose for extended operation.

Figuur 3: Control panel of the Daitsu Aral ADD-12XB Dehumidifier. This close-up image shows the top control panel of the dehumidifier, featuring intuitive buttons for power, mode selection (Continuous, Dry, Turbo, Comfort), and timer settings, along with indicator lights.
4. Opstelling
4.1 Uitpak
- Verwyder die ontvochtiger versigtig uit sy verpakking.
- Verwyder alle verpakkingsmateriaal, insluitend enige kleefband of beskermende films.
- Inspekteer die eenheid vir enige tekens van skade. Indien beskadig, moenie dit gebruik nie en kontak kliëntediens.
4.2 Plasing
- Place the dehumidifier on a firm, level surface to minimize vibration and noise.
- Ensure there is at least 20 cm (8 inches) of clear space around the air inlet and outlet to allow for efficient airflow.
- Vermy die plasing van die eenheid naby hittebronne of in direkte sonlig.
- For optimal performance, place the unit in the center of the room where dehumidification is needed most.
4.3 Kragverbinding
Plug the power cord into a grounded electrical outlet. Ensure the outlet meets the electrical requirements specified on the unit's rating label.
5. Bedryfsinstruksies
5.1 Beheerpaneelfunksies
Refer to Figure 3 for the layout of the control panel.
- Kragknoppie: Druk om die eenheid AAN of AF te skakel.
- Modusknoppie: Press to cycle through available operating modes:
- Cont. (Continuous): Die eenheid werk voortdurend, ongeag die omgewing se humiditeitsvlak.
- Droog: Designed for drying clothes or in very humid conditions.
- Turbo: Operates at maximum fan speed for rapid dehumidification.
- Gerief: Maintains a comfortable humidity level automatically.
- Timer-knoppie: Press to set the auto-on or auto-off timer (e.g., 24-hour timer).
- Tenk Vol Aanwyser: Illuminates when the water tank is full and needs to be emptied. The unit will automatically stop operating.
5.2 Maak die watertenk leeg
When the 'Tank Full' indicator lights up, the unit will stop operating. To empty the tank:
- Trek die watertenk versigtig uit die voorkant van die eenheid.
- Dra die tenk versigtig na 'n wasbak of drein.
- Gooi die versamelde water uit.
- Skuif die leë tenk terug in die eenheid totdat dit in plek klik. Die eenheid sal weer begin werk.
5.3 Deurlopende Dreinering (Opsioneel)
For extended operation without needing to empty the water tank, you can set up continuous drainage:
- Locate the continuous drainage outlet at the back of the unit (refer to Figure 2).
- Remove the rubber stopper from the outlet.
- Connect a suitable drain hose (not included) to the outlet. Ensure the connection is secure to prevent leaks.
- Direct the other end of the hose to a floor drain or a large container, ensuring the hose is sloped downwards for gravity drainage.
- The unit will now drain water continuously, bypassing the internal water tank.
6. Onderhoud
Gereelde onderhoud verseker optimale werkverrigting en verleng die lewensduur van jou ontvochtiger.
6.1 Skoonmaak van die lugfilter
Die lugfilter moet elke twee weke of meer gereeld skoongemaak word, afhangende van gebruik en luggehalte.
- Skakel die ontvochtiger af en trek die stekker uit die stopcontact.
- Locate the air filter cover on the back of the unit (refer to Figure 2).
- Remove the filter cover and carefully pull out the air filter.
- Clean the filter using a vacuum cleaner to remove dust and debris. For heavy dirt, wash the filter with lukewarm water and a mild detergent.
- Spoel die filter deeglik af en laat dit heeltemal lugdroog word voordat dit weer teruggeplaas word.
- Place the dry filter back into the unit and close the cover.
6.2 Skoonmaak van die watertenk
Clean the water tank regularly to prevent mold and bacteria growth.
- Verwyder en maak die watertenk leeg.
- Was die tenk met warm water en 'n sagte skoonmaakmiddel.
- Spoel deeglik af en droog af voordat dit terug in die eenheid geplaas word.
6.3 Buite Skoonmaak
Vee die buitekant van die eenheid af met 'n sagte, damp lap. Moenie harde chemikalieë, skuurmiddels of oplosmiddels gebruik nie, aangesien dit die oppervlak kan beskadig.
6.4 Berging
Indien die eenheid nie vir 'n lang tydperk gebruik gaan word nie:
- Empty and clean the water tank and air filter.
- Ontkoppel die eenheid en rol die kragkabel netjies op.
- Bedek die eenheid met 'n plastieksak of lap om dit teen stof te beskerm.
- Bêre die ontvochtiger regop in 'n koel, droë plek.
7. Probleemoplossing
Voordat u kliëntediens kontak, verwys asseblief na die volgende algemene probleme en oplossings:
| Probleem | Moontlike oorsaak | Oplossing |
|---|---|---|
| Eenheid skakel nie aan nie | Geen kragtoevoer Kragkoord nie behoorlik gekoppel nie Watertenk vol | Gaan kragaansluiting na Maak seker dat die kragkabel stewig ingeprop is Maak die watertenk leeg |
| Geen water versamel nie | Kamerhumiditeit te laag Lugfilter verstop Temperatuur te laag Unit in continuous drainage mode | Dehumidification may not be needed Maak die lugfilter skoon Unit may not operate efficiently below 5°C (41°F) Check if continuous drainage hose is connected and draining |
| Die eenheid is raserig | Eenheid nie op 'n gelyke oppervlak nie Lugfilter verstop | Plaas die eenheid op 'n plat, stabiele oppervlak Maak die lugfilter skoon |
| Swak ontvochtiging | Doors/windows open Lugfilter verstop Kamergrootte te groot | Maak alle deure en vensters toe Maak die lugfilter skoon Ensure unit capacity matches room size |
8. Spesifikasies
Technical specifications for the Daitsu Aral ADD-12XB Dehumidifier:
| Kenmerk | Spesifikasie |
|---|---|
| Model Naam | ADD-12XB |
| Handelsmerk | Daitsu |
| Ontvochtigingskapasiteit | 12 Liters/day (at specified conditions) |
| Watertenkvolume | 1.5 liter |
| Afmetings (H x B x D) | 38.6 x 28 x 19.5 cm (ongeveer 15.2 x 11 x 7.7 duim) |
| Produk Gewig | 23.5 kg (ongeveer 51.8 lbs) |
| Voltage | 230 Volt |
| Krag | 2.5 kW (This value seems unusually high for a dehumidifier, typically it would be in Watts, e.g., 250W. Please verify with product label if possible.) |
| Geraasvlak | 54 Desibel |
| Spesiale kenmerke | Automatic Shut-off, Continuous Drainage, Timer |
| Kleur | Wit |
Let wel: Spesifikasies is onderhewig aan verandering sonder kennisgewing. Verwys asseblief na die produketiket vir die akkuraatste inligting.
9. Waarborg en Ondersteuning
9.1 Waarborginligting
This Daitsu product is covered by a manufacturer's warranty. The warranty period and terms may vary by region. Please retain your proof of purchase for warranty claims. For specific warranty details, refer to the warranty card included with your product or contact Daitsu customer service.
9.2 Kliëntediens
If you encounter any issues not covered in the troubleshooting section or require further assistance, please contact Daitsu customer support. Contact information can typically be found on the official Daitsu webwebwerf of op die produkverpakking.