Inleiding
The Pulsar NavStar is a comprehensive set of 10 fast-deployment hazard warning lights designed for rapid and effective signaling in various situations. Housed within a durable polymer carry case, these lights are engineered for portability, organization, and continuous readiness. Each light provides a 360-degree illumination zone and a strong vertical beam, ensuring visibility from distances exceeding 1 kilometer. This manual provides essential information for the proper setup, operation, maintenance, and troubleshooting of your Pulsar NavStar system.

Image: The Pulsar NavStar system, showing the robust orange carry case with multiple lights stored inside, alongside examples of the individual blue, red, and amber lights.
Opstelling
Upon receiving your Pulsar NavStar system, it is recommended to fully charge all units before initial use. The durable polymer carry case doubles as a charging station, ensuring the lights remain charged and organized.
- Uitpak: Carefully remove the Pulsar NavStar case from its packaging.
- Laai: Connect the provided AUS charger to the charging port on the case. Ensure the case is plugged into a suitable power outlet. The lights will begin charging automatically when placed correctly in their slots within the case.
- Laai-aanwysers: Refer to the individual light units for charge status indicators, typically an LED that changes color or state when fully charged.

Image: The Pulsar NavStar carry case, showing the lights securely stored and ready for charging or transport.
Bedryfsinstruksies
The Pulsar NavStar lights feature simple two-button operation for ease of use in critical situations. Each light offers multiple flashing modes and color options to suit various warning requirements.
- Krag aan/af: Press and hold the power button (usually marked with a power symbol) for approximately 2-3 seconds to turn the unit on or off.
- Veranderende modusse: Once powered on, short press the mode button (often marked with an 'M' or a wave symbol) to cycle through the 6 available flashing modes.
- Verander van kleure: The Pulsar NavStar offers 3 light colors: blue, red, and amber. To change the color, press and hold the mode button for approximately 2-3 seconds.
- Ontplooiing: Lights can be placed on the ground, attached to metallic surfaces via their magnetic bases, or used in conjunction with cones for enhanced visibility.

Beeld: Nabyskoot view of the individual Pulsar NavStar lights, showcasing their distinct blue, red, and amber illumination options.

Image: Pulsar NavStar lights in blue mode, deployed on the ground to mark a hazard area near a vehicle at night, demonstrating their effective illumination.

Image: Multiple Pulsar NavStar lights in amber mode, strategically placed in a line on the ground to delineate a warning zone or path.
Onderhoud
Proper maintenance ensures the longevity and optimal performance of your Pulsar NavStar lights.
- Skoonmaak: Wipe the lights and the carry case with a damp cloth. Avoid using abrasive cleaners or solvents that could damage the surfaces.
- Berging: Always store the lights in their designated slots within the carry case. This protects them from damage and ensures they are ready for use.
- Batterysorg: For optimal battery life, it is recommended to fully charge the units regularly, especially if they have been stored for an extended period. Avoid completely depleting the battery before recharging.
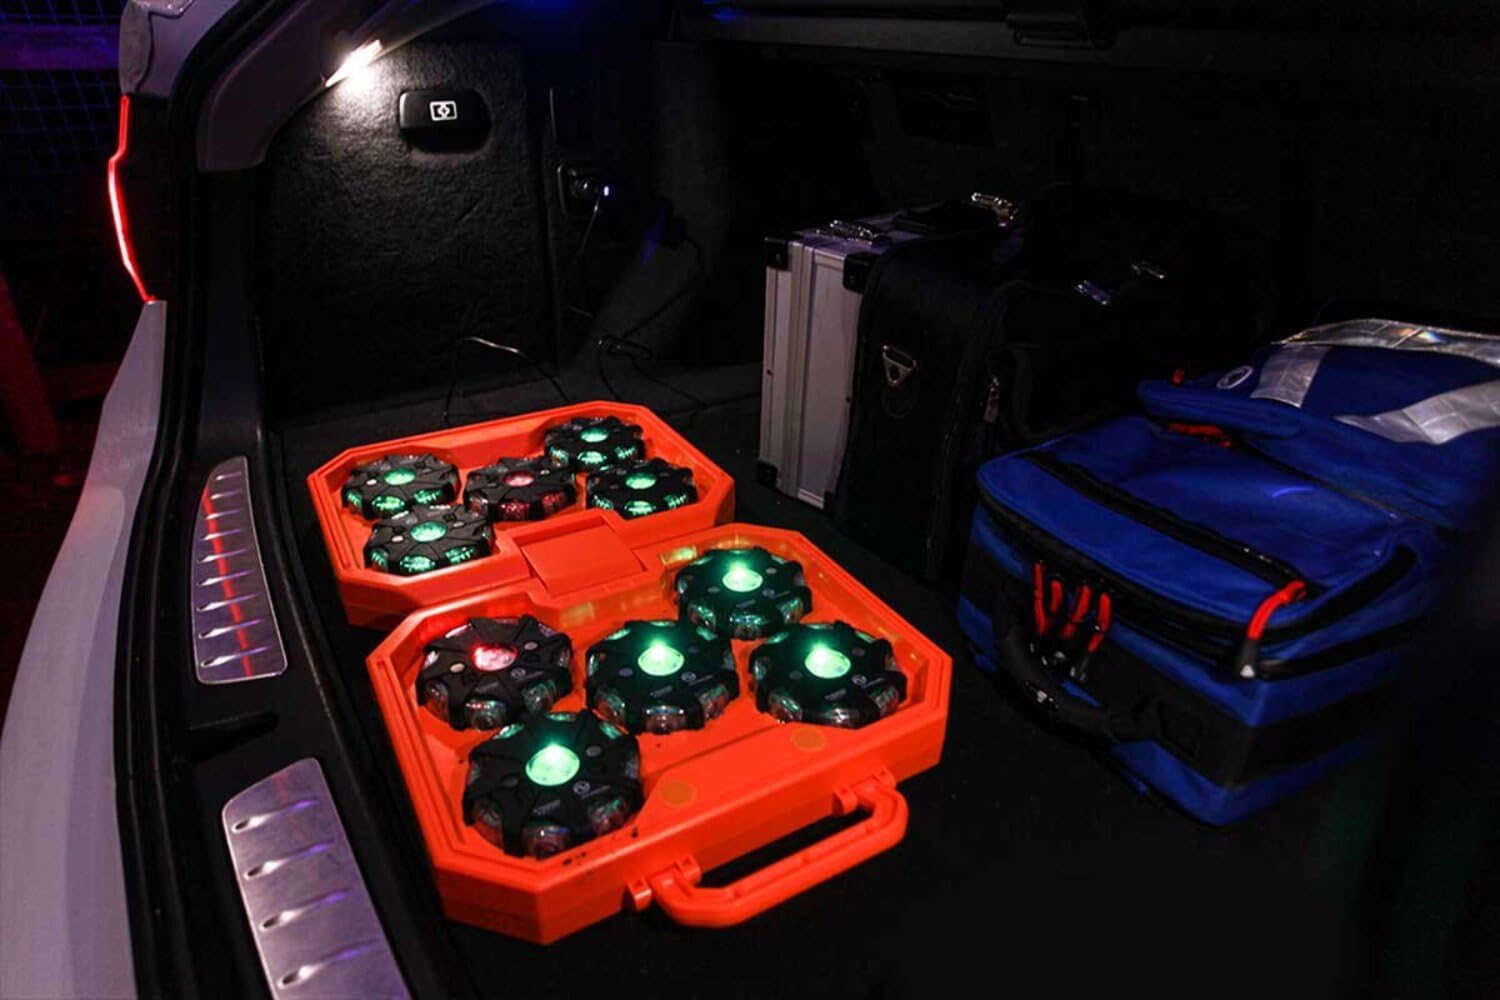
Image: The Pulsar NavStar case, with lights securely stored, demonstrating its compact and portable nature for transport in a vehicle.
Probleemoplossing
If you encounter issues with your Pulsar NavStar lights, try the following common troubleshooting steps:
- Lig gaan nie aan nie: Ensure the unit is fully charged. Place it in the charging case and check the charge indicator. If still unresponsive, try a different charging slot or cable if available.
- Lights Not Charging: Verify that the charging cable is securely connected to both the case and the power outlet. Check if the power outlet is functional. Ensure each light is properly seated in its charging slot.
- Mode/Color Not Changing: Ensure you are using the correct button press duration (short press for mode, long press for color). If the buttons are unresponsive, try turning the unit off and on again.
- Reduced Brightness/Run Time: This may indicate a low battery. Recharge the unit fully. If the issue persists after a full charge, the battery may be nearing the end of its life cycle.
If these steps do not resolve the issue, please contact NightSearcher customer support for further assistance.
Spesifikasies
| Kenmerk | Detail |
|---|---|
| Vervaardiger | Nagsoeker |
| Handelsmerk | Nagsoeker |
| Modelnommer | NSPULSARNAVSTAR-AUS |
| Item gewig | 5 kg |
| Verligting | 360-degree illumination zone, vertical beam |
| Sigbaarheid | Over 1 kilometre |
| Flitsende modusse | 6 modusse |
| Ligte Kleure | 3 colors (Blue, Red, Amber) |
| Operasie | Two-button operation |
| Materiaal van die saak | Durable polymer |
Waarborg en Ondersteuning
For detailed warranty information regarding your Pulsar NavStar lights, please refer to the documentation provided at the time of purchase or visit the official NightSearcher website. Warranty terms typically cover manufacturing defects and material faults for a specified period.
For technical support, spare parts, or any other inquiries, please contact NightSearcher customer service. You can find contact details on their official webwebwerf of deur die kleinhandelaar waar jy die produk gekoop het.
Visit the official NightSearcher store for more information: NightSearcher Store