
1. Inleiding
Thank you for choosing the briidea HRVTC-03A RV Thermostat, Model MK-177. This thermostat is designed to provide reliable and efficient temperature control for your recreational vehicle. It offers a user-friendly interface and is engineered for durability in RV environments. Please read this manual thoroughly before installation and operation to ensure proper use and to maximize the lifespan of your device.
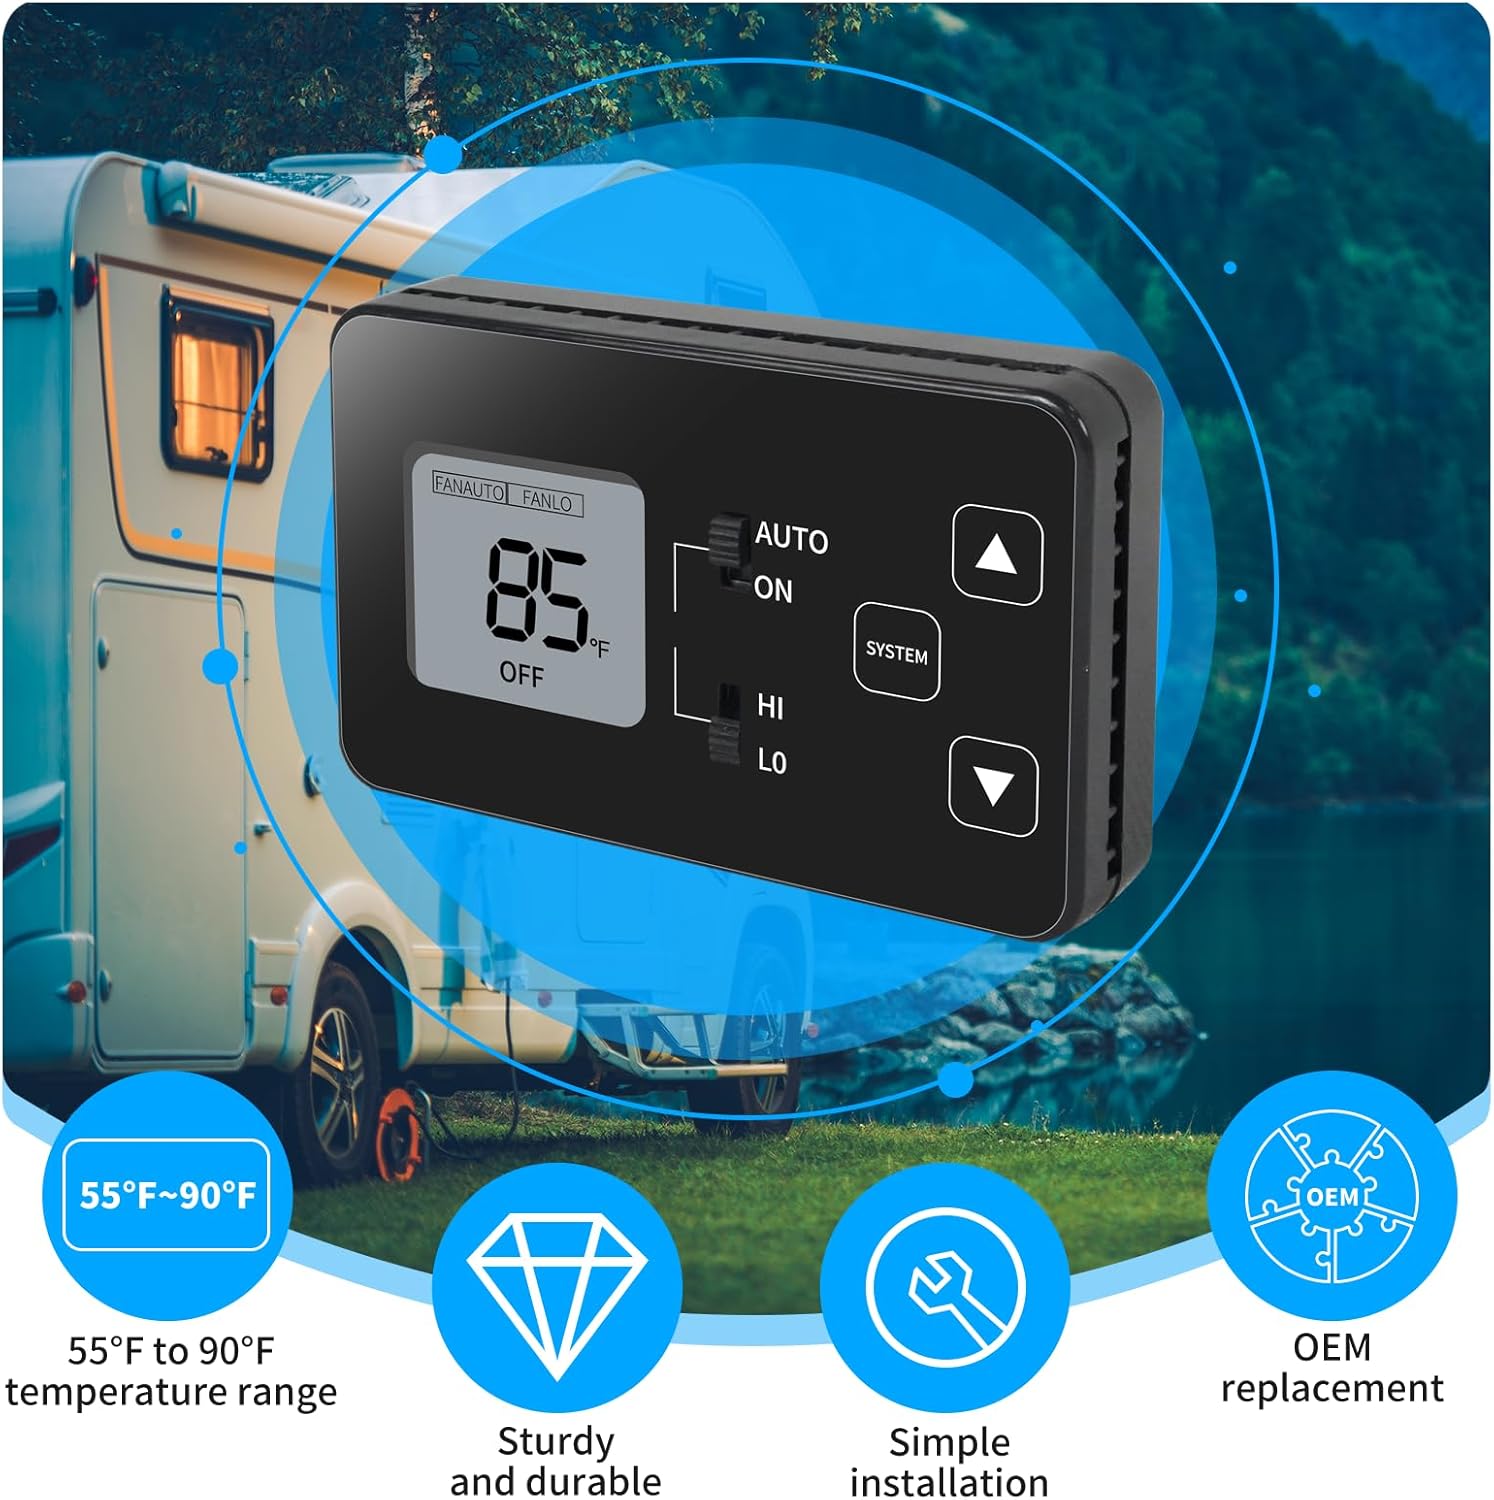
Image 1.1: The briidea HRVTC-03A RV Thermostat, highlighting its 55°F to 90°F temperature range, sturdy design, simple installation, and OEM replacement capability.
2. Veiligheidsinligting
- Elektriese veiligheid: Always disconnect power to the RV's HVAC system before installing or servicing the thermostat to prevent electrical shock.
- Gekwalifiseerde personeel: Installation should be performed by a qualified technician or individuals with experience in RV electrical systems.
- Bedrading: Ensure all wiring connections are secure and comply with local electrical codes and RV manufacturer specifications. Incorrect wiring can damage the thermostat or the RV's electrical system.
- Bedryfsomgewing: Do not expose the thermostat to extreme moisture or temperatures outside its specified operating range.
3. Pakketinhoud
Verifieer dat alle items in die pakket teenwoordig is voordat u met die installasie begin:
- briidea HRVTC-03A RV Thermostat (Model MK-177)
- Mounting Screws (typically 4)
- Wall Anchors (typically 3)
- Wire Nuts (typically 5)
- Klein skroewedraaier

Image 3.1: All accessories included with the briidea HRVTC-03A RV Thermostat, such as mounting hardware and a screwdriver.
4. Opstelling en installering
4.1 Voorinstallasie
- Ontkoppel krag: Turn off all power to your RV's HVAC system at the circuit breaker or fuse panel.
- Verwyder ou termostaat: Carefully remove the cover of your existing thermostat. Note the wiring connections before disconnecting them. It is recommended to take a photo of the existing wiring for reference.
- Verenigbaarheidskontrole: This thermostat is an ideal replacement for Coleman models 7330335 series, 7330385 series, and 7330336 series. Ensure your existing system is compatible.

Image 4.1: The briidea RV Thermostat is designed as an OEM replacement for specific Coleman models, ensuring broad compatibility.
4.2 Bedradingsinstruksies
The briidea HRVTC-03A features user-friendly, color-coded wiring for straightforward installation. Refer to the wiring diagram below and match the wires from your RV to the corresponding terminals on the new thermostat.

Image 4.2: Easy wiring diagram illustrating connections for the upper A/C unit and optional furnace wiring, with color-coded wires for simple installation.
- T-STAT Connections: Connect the wires from your RV's existing thermostat cable to the corresponding terminals on the HRVTC-03A.
- Kleurgekodeerde drade: Match colors (e.g., Yellow to Y, Green to GH, Gray to GL, Blue to B(-)).
- Furnace Wiring (Optional): If your RV has a furnace, connect the White wire to W(+), Red to (+), and Blue to (-).
- Kragtoevoer: Ensure the 12 VDC power supply is correctly connected. A 1A fuse is suggested to protect the wiring leading to the thermostat.
- Veilige verbindings: Use the provided wire nuts to secure all connections.
4.3 Montering van die termostaat
- Position the thermostat on the wall where the old unit was located.
- Use the provided mounting screws to secure the thermostat to the wall. Ensure it is level and firmly attached.
- Once mounted, carefully attach the front cover of the thermostat.
4.4 Aanvanklike opstart
After installation, restore power to your RV's HVAC system. The thermostat display should illuminate, indicating it is ready for operation.
5. Bedryfsinstruksies
The briidea HRVTC-03A RV Thermostat features a clear display and intuitive buttons for easy temperature management.

Image 5.1: The briidea RV Thermostat in an RV interior, showcasing its flexible temperature control, sturdy design, and user-friendly wiring.
5.1 Basiese kontroles
- AAN/UIT -skakelaar: Located on the side or front panel, this switch controls the main power to the thermostat.
- SYSTEM Button: Press this button to cycle through system modes: COOL, HEAT, and OFF.
- FAN AUTO/LO/HI Switch: This switch controls the fan speed. Select AUTO for automatic fan operation, LO for low speed, or HI for high speed.
- Temperatuur Op (▲) / Af (▼) Knoppies: Use these buttons to adjust the desired temperature setting. The temperature range is 55°F to 90°F (13°C to 32°C).

Image 5.2: The briidea RV Thermostat installed and in use within an RV, demonstrating its ease of operation.
5.2 Switching Temperature Units (Fahrenheit/Celsius)
To switch between Fahrenheit (°F) and Celsius (°C) temperature display, locate the small switch or button, often found inside the battery compartment or on the back of the unit, and toggle it to your preferred unit. Refer to the detailed instructions provided on the product packaging or a separate quick-start guide if available.
6. Onderhoud
- Skoonmaak: Vee die buitekant van die termostaat af met 'n sagte, damp lap. Moenie skuur skoonmaakmiddels of oplosmiddels gebruik nie.
- Lugvloei: Ensure that the vents on the thermostat are not obstructed by dust or debris, as this can affect temperature readings.
- Battery vervanging: If your model uses batteries (not explicitly stated for this model, but common for thermostats), replace them annually or when the low battery indicator appears.
7. Probleemoplossing
- Geen krag/leë skerm:
- Check the RV's circuit breaker or fuse for the HVAC system.
- Maak seker dat alle bedradingsverbindings veilig is.
- Verify the 12V DC power supply is active.
- Verkeerde temperatuurlesing:
- Maak seker dat die termostaat nie aan direkte sonlig of trek blootgestel word nie.
- Maak enige stof of puin skoon van die termostaat se vents.
- HVAC-stelsel reageer nie:
- Check the SYSTEM mode setting (COOL, HEAT, OFF).
- Verify the fan setting (AUTO, LO, HI).
- Ensure the set temperature is appropriately above or below the ambient temperature to trigger the system.
- Recheck all wiring connections.
- Geen agtergrondlig nie:
- Some models may not feature a backlight. Refer to product specifications.
8. Spesifikasies
| Handelsmerk | bruid |
| Model Naam | MK-177 |
| Produkmodelnommer | HRVTC-03A |
| Temperatuurreeks | 55°F tot 90°F (13°C tot 32°C) |
| Kragbron | 12 VDC |
| Afmetings (ongeveer) | 4 duim (B) x 2.6 duim (H) x 0.9 duim (D) |
| Gewig (Ongeveer) | 209 g |
| ASIN | B0DNJMYQJR |
9. Waarborg en Ondersteuning
briidea products are manufactured to high-quality standards. This product comes with a limited warranty against defects in materials and workmanship. For specific warranty details, please refer to the warranty card included with your purchase or visit the official briidea webwebwerf.
If you encounter any issues or have questions regarding the installation or operation of your briidea HRVTC-03A RV Thermostat, please contact briidea customer support. Our team is available to assist you with technical support and troubleshooting.
Kontakinligting:
- Webwebwerf: www.briidea.com (Please note: This is a placeholder URL. Refer to your product documentation for the actual support webwebwerf.)
- E-pos: support@briidea.com (Please note: This is a placeholder email. Refer to your product documentation for the actual support email.)