1. Inleiding
This user manual provides comprehensive instructions for the setup, operation, maintenance, and troubleshooting of your Thomson 27-inch QHD Gaming Monitor (Model: M27QG5Y14). This monitor is designed to deliver a superior visual experience with its QHD resolution, 180Hz refresh rate, and IPS panel technology, making it ideal for gaming and multimedia applications.

Beeld 1.1: Voorkant view of the Thomson 27-inch QHD Gaming Monitor, showcasing its sleek design and display area.
2. Veiligheidsinligting
Lees asseblief alle veiligheidsinstruksies sorgvuldig deur voordat u die monitor gebruik. Bewaar hierdie handleiding vir toekomstige verwysing.
- Kragbron: Gebruik slegs die kragadapter wat saam met die monitor voorsien word. Maak seker dat die kragaansluiting behoorlik geaard is.
- Ventilasie: Moenie ventilasie-openinge blokkeer nie. Laat voldoende spasie rondom die monitor vir behoorlike lugvloei om oorverhitting te voorkom.
- Vloeistof en vog: Hou die monitor weg van water, reën of oormatige vog. Moenie voorwerpe gevul met vloeistowwe op die monitor plaas nie.
- Skoonmaak: Disconnect the power cable before cleaning. Use a soft, dry cloth. Do not use liquid cleaners or aerosol cleaners.
- Plasing: Plaas die monitor op 'n stabiele, plat oppervlak. Vermy dit om dit in direkte sonlig of naby hittebronne te plaas.
- Hantering: Hanteer die monitor versigtig. Vermy dit om te laat val of aan harde impakte bloot te stel.
- Diens: Moenie probeer om die monitor self te diens nie. Verwys alle diens na gekwalifiseerde dienspersoneel.
3. Pakketinhoud
Verify that all items are present in the package. If any items are missing or damaged, contact your retailer.
- Thomson 27-inch QHD Gaming Monitor
- Monitorstaander (basis en nek)
- Kragadapter en kragkabel
- HDMI kabel
- DisplayPort (DP) Cable (may vary by region)
- USB-B na USB-A-kabel (vir USB-hub-funksionaliteit)
- Gebruikershandleiding (hierdie dokument)
- Skroewe vir standmontering
4. Opstelling
4.1. Montering van die monitorstaander
- Verwyder die monitor versigtig uit sy verpakking en plaas dit met die gesig na onder op 'n sagte, skoon oppervlak om skrape te voorkom.
- Heg die staandernek aan die monitorpaneel vas met die meegeleverde skroewe.
- Attach the stand base to the stand neck and secure it with the designated screw.
- Once assembled, carefully lift the monitor and place it on a stable desk or table.

Image 4.1: Monitor dimensions and stand assembly overview. The monitor measures approximately 61 cm wide, 54 cm high (with stand), and 24 cm deep (with stand).
4.2. Koppel die monitor
Connect the necessary cables to the monitor's input ports. Refer to the image below for port locations.
- Kragverbinding: Connect the power adapter to the "DC IN" port on the monitor, then plug the power cable into a power outlet.
- Video Input:
- Connect an HDMI cable from your computer's graphics card to an "HDMI 2.1" port on the monitor.
- Alternatively, connect a DisplayPort (DP) cable from your computer's graphics card to a "DP 1.2" port on the monitor.
- USB Hub: To enable the monitor's USB 3.0 ports, connect a USB-B cable from the "USB 3.0 B" port on the monitor to a USB-A port on your computer.
- Oudio-uitvoer: Connect headphones or external speakers to the "Earphone Plug" (3.5mm audio jack) for audio output.

Image 4.2: Rear panel of the monitor displaying the various input and output ports for connectivity.
4.3. Ergonomiese Aanpassings
Die monitorstaander maak voorsiening vir verskeie aanpassings om jou viewtroos:
- Kantel: Adjust the screen's vertical angle (up or down).
- Draai: Rotate the screen horizontally (left or right).
- Spilpunt: Draai die skerm 90 grade vir portretmodus viewing.
- Hoogte verstelling: Lig die monitor op of verlaag dit tot jou voorkeur ooghoogte.
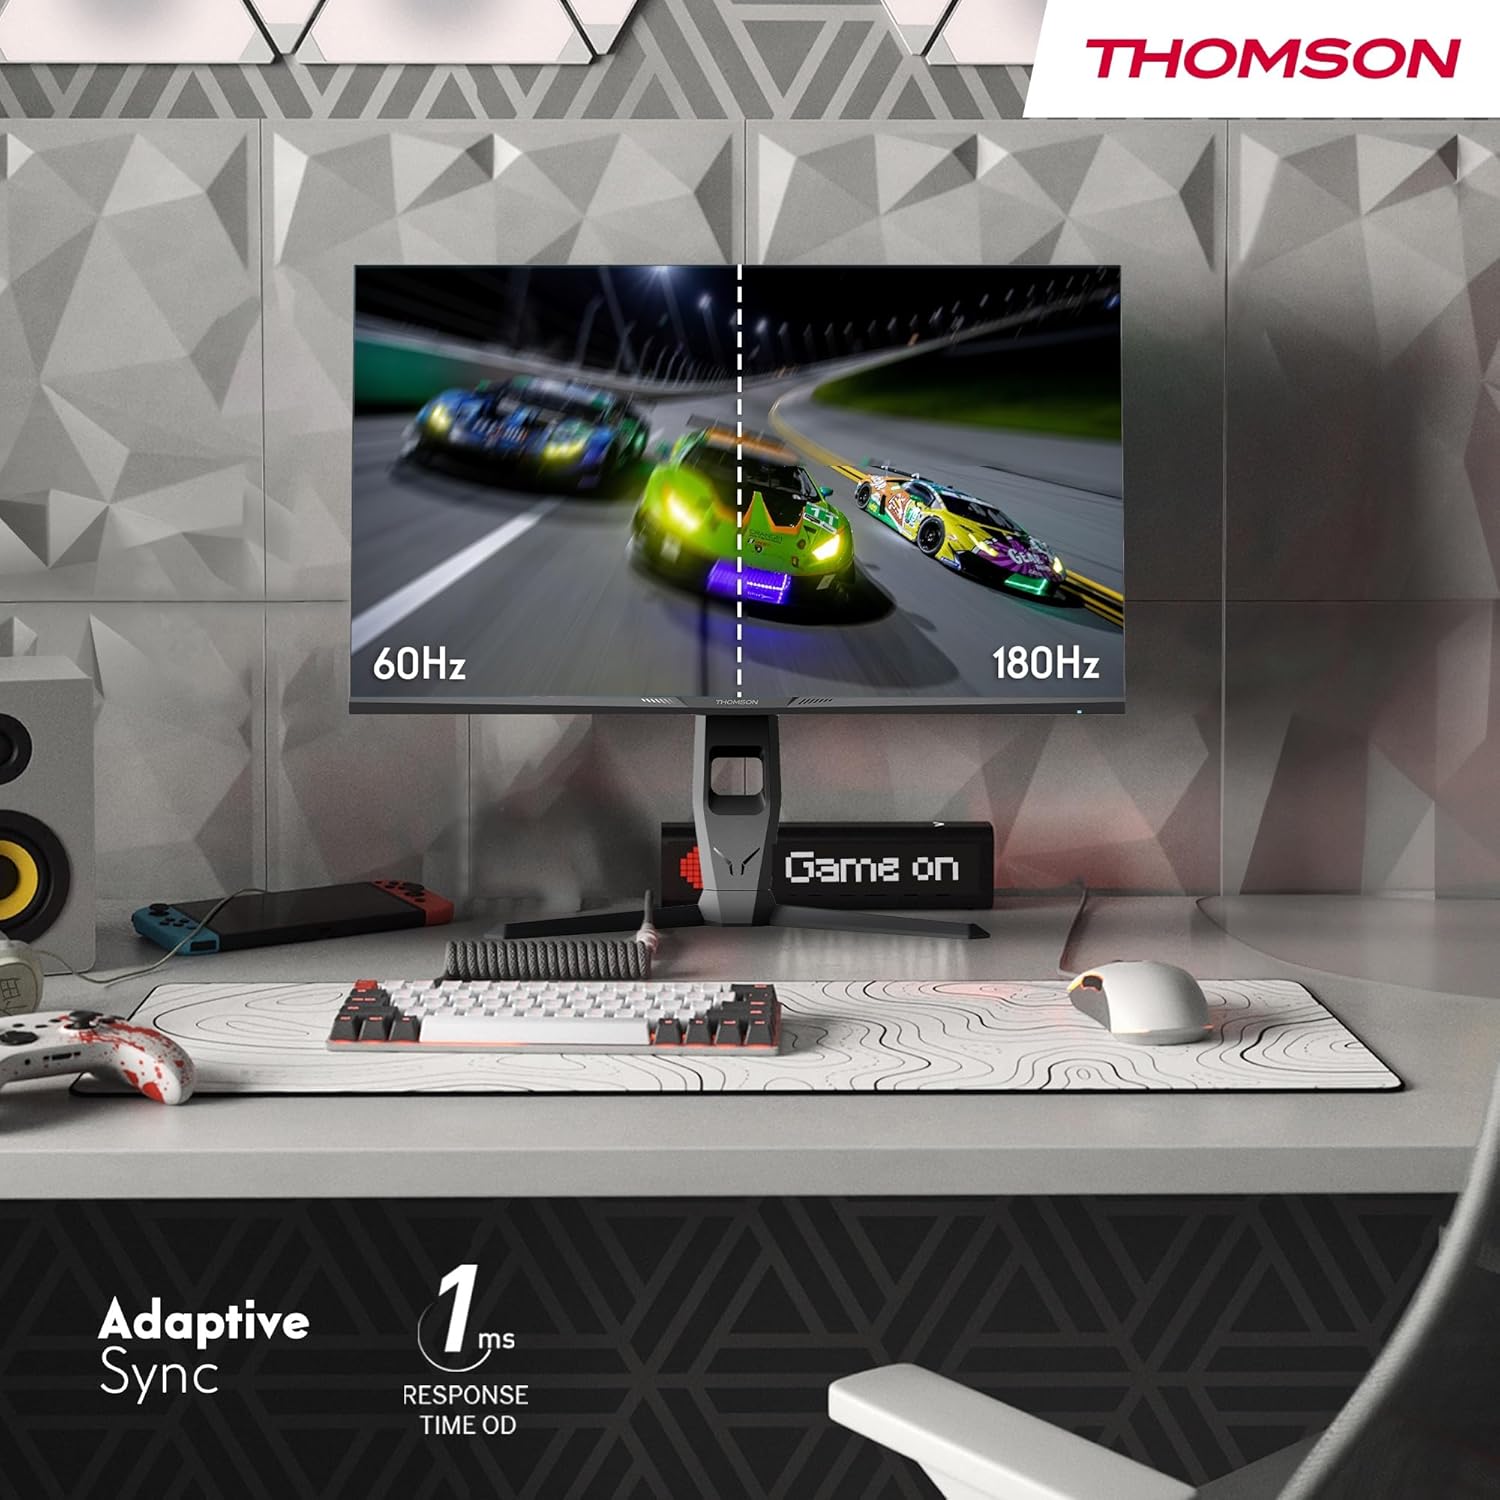
Image 4.3: Demonstrations of the monitor's ergonomic capabilities, including tilt, swivel, and pivot for optimal viewhoeke.
4.4. VESA-montering
The monitor is compatible with VESA 100x100mm mounting standards. To mount the monitor on a wall or an alternative stand, remove the original stand and attach the VESA-compatible mount (sold separately) using appropriate screws.
5. Bedryfsinstruksies
5.1. Skakel aan/af
Press the power button, usually located on the back or bottom of the monitor, to turn it on or off. The power indicator light will illuminate when the monitor is on.
5.2. On-Screen Display (OSD)-kieslys
The OSD menu allows you to adjust various monitor settings. Use the joystick or buttons (location may vary) on the monitor to navigate the menu.
- Prentinstellings: Pas helderheid, kontras, skerpte, kleurtemperatuur en gamma aan.
- Kleurinstellings: Fine-tune RGB levels, saturation, and hue.
- Invoerkeuse: Wissel handmatig tussen HDMI- en DisplayPort-insette.
- Oudio: Pas die volume vir ingeboude luidsprekers of koptelefoonuitvoer aan.
- OSD-instellings: Verander OSD-taal, deursigtigheid en time-out.
- Spelinstellings: Access features like Adaptive Sync, response time (OD), and crosshair overlays.
5.3. Speletjie-kenmerke
- 180Hz opdateringsfrekwensie: Provides smoother motion and reduced input lag, especially beneficial for fast-paced games. Ensure your graphics card and cable support this refresh rate.
- 1ms Response Time (OD): Minimizes motion blur and ghosting for clear, crisp images during rapid movements.
- Aanpasbare sinkronisering: Synchronizes the monitor's refresh rate with your graphics card's frame rate, eliminating screen tearing and stuttering. Enable this feature in the OSD menu and your graphics card control panel.

Image 5.1: Visual comparison illustrating the difference between 60Hz and 180Hz refresh rates, highlighting the smoother motion provided by the higher refresh rate, alongside the Adaptive Sync feature.
5.4. Oogversorgingskenmerke
- Anti-flikkertegnologie: Reduces screen flickering, which can cause eye strain during prolonged use.
- Lae blou lig modus: Filters out harmful blue light emissions to protect your eyes and reduce fatigue. This mode can be activated through the OSD menu.
- Anti-Glare Screen: The matte screen surface minimizes reflections from ambient light, providing clear visuals without distraction.

Image 5.2: Depiction of the monitor's eye comfort features, including an anti-glare screen and technologies like Anti-Flicker and Low Blue Light for reduced eye strain.
5.5. RGB Omgewingsbeligting
The monitor features integrated RGB ambient lighting on the rear. This lighting can be customized via the OSD menu to enhance your gaming environment or match your setup's aesthetics.
6. Onderhoud
6.1. Skoonmaak van die monitor
- Skerm: Vee die skerm liggies af met 'n sagte, pluisvrye lap. Vir hardnekkige merke, vee liggiesampen the cloth with water or a specialized screen cleaner (ensure it's safe for LCD/IPS panels) and wipe gently. Never spray liquid directly onto the screen.
- Casing: Gebruik 'n sagte, droë lap om die monitor af te veeasing. Vermy die gebruik van skuurmiddels of oplosmiddels.
- Ontkoppel altyd die kragkabel voor skoonmaak.
6.2. Berging
Indien die monitor vir 'n lang tydperk gestoor word, ontkoppel alle kabels, pak dit in sy oorspronklike verpakking (indien beskikbaar) en bêre dit op 'n koel, droë plek weg van direkte sonlig en uiterste temperature.
7. Probleemoplossing
Hierdie afdeling spreek algemene probleme aan wat jy mag teëkom. Indien die probleem voortduur, kontak kliëntediens.
| Probleem | Moontlike oorsaak | Oplossing |
|---|---|---|
| Geen krag nie | Power cable not connected; Power outlet faulty; Monitor off. | Ensure power cable is securely connected. Test the power outlet. Press the monitor's power button. |
| Geen sein / Leë skerm | Video cable not connected; Incorrect input selected; Computer not outputting signal. | Check HDMI/DP cable connections. Select the correct input source via OSD. Ensure computer is on and outputting video. |
| Distorted image / Flickering | Incorrect resolution/refresh rate; Faulty cable; Graphics driver issue. | Set display resolution to 2560x1440 and refresh rate to 180Hz. Try a different video cable. Update graphics drivers. |
| Geen klank van luidsprekers/oorfone nie | Volume te laag; Oudiokabel nie gekoppel nie; Verkeerde oudio-uitvoer op rekenaar gekies. | Increase monitor volume via OSD. Ensure headphones/speakers are connected. Select monitor as audio output device in PC settings. |
8. Spesifikasies
Detailed technical specifications for the Thomson M27QG5Y14 monitor.
| Kenmerk | Spesifikasie |
|---|---|
| Handelsmerk | Thomson |
| Model | M27QG5Y14 |
| Skerm grootte | 27 duim |
| Paneel tipe | IPS |
| Resolusie | 2560 x 1440 (QHD) |
| Herlaaitempo | 180 Hz |
| Reaksie Tyd | 1 Millisecond (OD) / 5 Milliseconds (GtG) |
| Helderheid | 350 netjies |
| Kontrasverhouding | 1200:1 |
| Viewing Hoek | 178 Degrees (Horizontal/Vertical) |
| Kleur Omvang | 120% sRGB |
| HDR Ondersteuning | HDR10 (10-bit) |
| Aanpasbare sinkronisering | Ja |
| Konnektiwiteit | 2x HDMI 2.1, 1x DisplayPort 1.2, 1x USB 3.0 Type-B (upstream), 3x USB 3.0 Type-A (downstream), 1x Earphone Plug (3.5mm) |
| Ingeboude luidsprekers | Ja (2x2W) |
| VESA Mount Verenigbaarheid | 100x100 mm |
| Produk Afmetings (met staander) | 61 x 54 x 24 cm (B x H x D) |
| Gewig (met staander) | 7.3 kg |
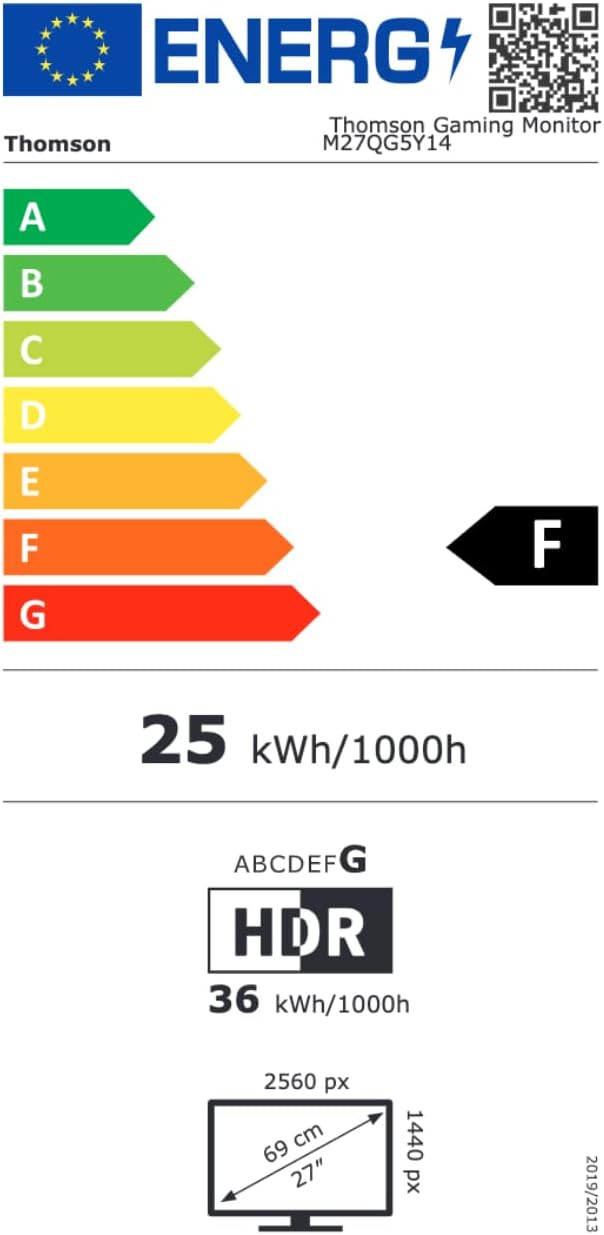
Image 8.1: EU Energy Label for the Thomson M27QG5Y14 monitor. For more details, visit the EPREL-databasis.
9. Waarborg en Ondersteuning
Thomson products are designed for reliability and performance. This monitor typically comes with a 3 jaar waarborg vanaf die aankoopdatum, wat vervaardigingsfoute dek. Bewaar asseblief u bewys van aankoop vir waarborgeise.
For technical assistance, troubleshooting beyond this manual, or warranty inquiries, please contact Thomson customer support or your local retailer. Refer to the official Thomson website or your product packaging for specific contact details.
You can also visit the official Thomson store on Amazon for more information: Thomson Store.