1. Belangrike voorsorgmaatreëls
Please read these instructions carefully before using your Salter Retro 4-Slice Toaster. Keep this manual for future reference.
- Moenie aan warm oppervlaktes raak nie. Gebruik altyd handvatsels of knoppe.
- Om teen elektriese skok te beskerm, moenie die koord, proppe of broodrooster in water of ander vloeistof dompel nie.
- Noukeurige toesig is nodig wanneer enige toestel deur of naby kinders gebruik word.
- Trek uit die stopcontact wanneer dit nie gebruik word nie en voor skoonmaak. Laat afkoel voor jy dele aan- of afhaal.
- Moenie enige toestel gebruik met 'n beskadigde koord of prop, of nadat die toestel wanfunksioneer of op enige manier beskadig is nie.
- Moenie buite gebruik nie.
- Moenie dat koord oor die rand van tafel of toonbank hang, of aan warm oppervlaktes raak nie.
- Moenie op of naby 'n warm gas- of elektriese brander, of in 'n verhitte oond plaas nie.
- Moenie die toestel vir ander as die bedoeling gebruik nie.
- Oversize foods, metal foil packages, or utensils must not be inserted into a toaster as they may involve a risk of fire or electric shock.
- 'n Brand kan voorkom as broodroosters bedek is of aan vlambare materiaal raak, insluitend gordyne, gordyne, mure en dies meer, wanneer dit in werking is.
- Moenie probeer om kos weg te gooi wanneer die broodrooster ingeprop is nie.
- Always unplug the toaster before cleaning the crumb tray.
2. Produk verbyview
The Salter Retro 4-Slice Toaster is designed for efficient and convenient toasting. It features four wide slots, allowing you to toast various bread types, including bagels and crumpets. With 6 browning levels and dedicated functions for defrosting, reheating, and canceling, you can achieve your desired toast consistency every time.
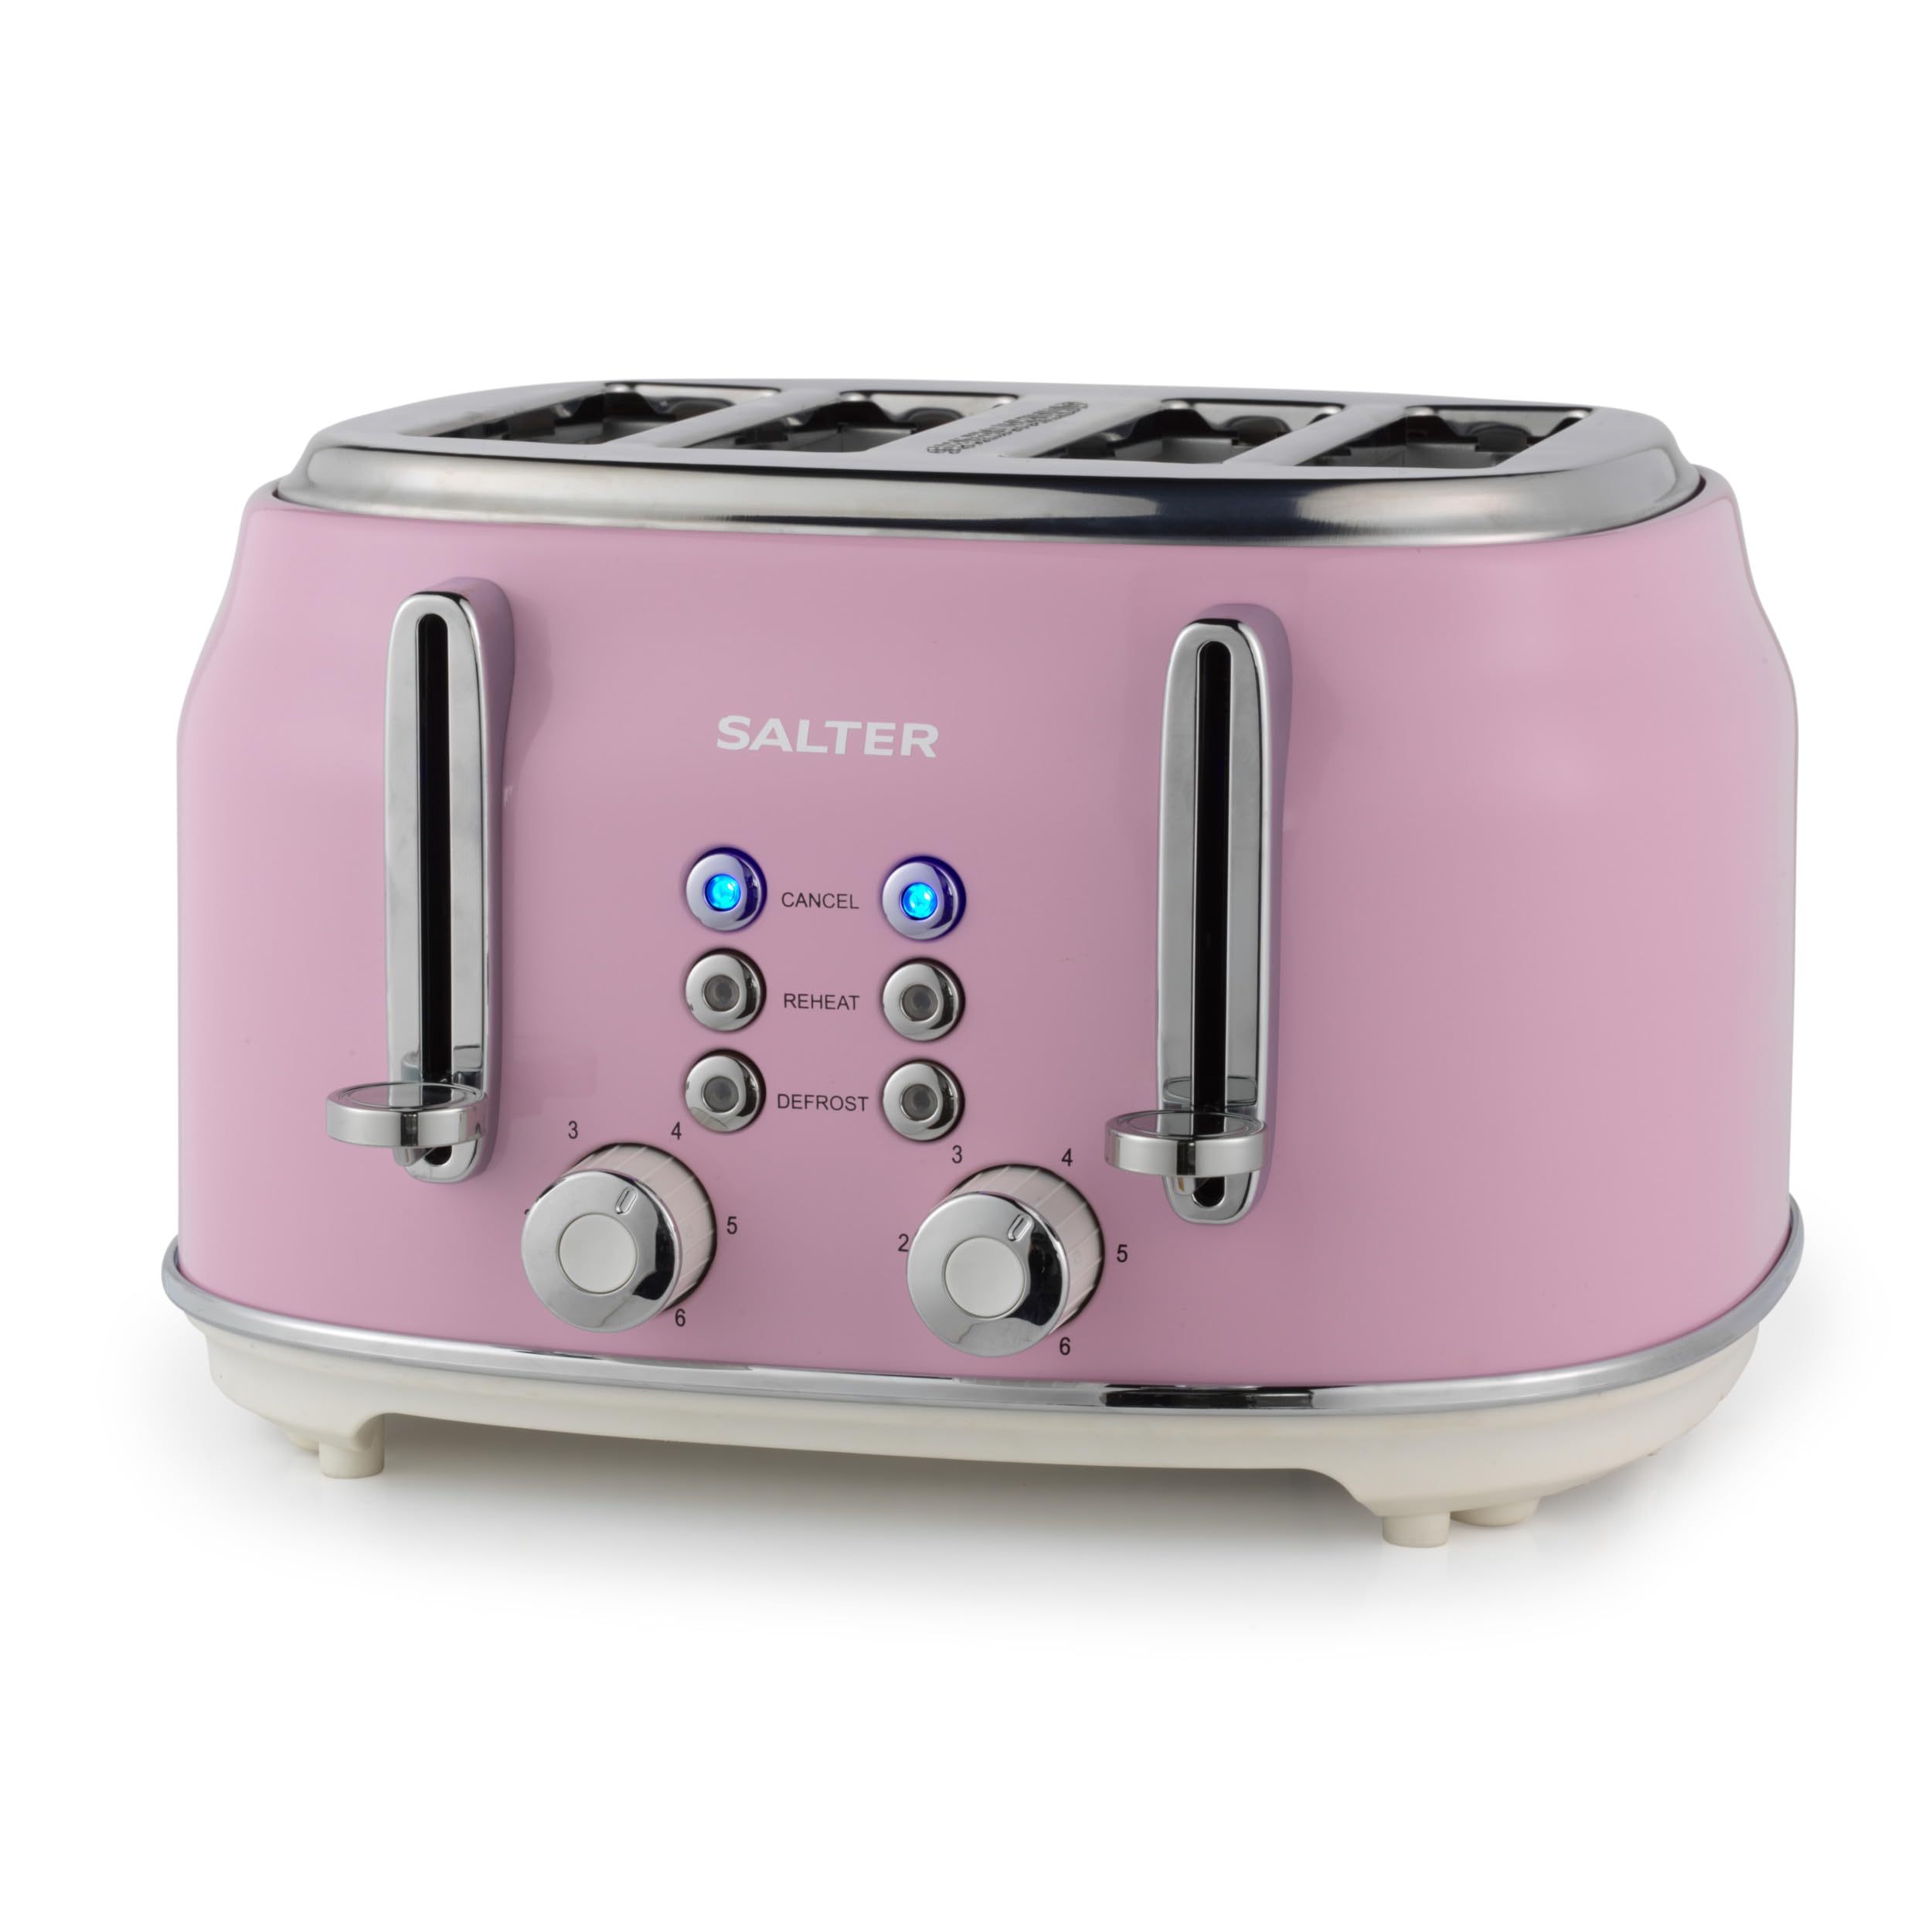
Image: The Salter Retro 4-Slice Toaster in a stylish pink finish, featuring chrome levers and control knobs, positioned on a kitchen counter.
3. Opstelling
- Pak die broodrooster uit en verwyder alle verpakkingsmateriaal.
- Plaas die broodrooster op 'n stabiele, hittebestande en droë oppervlak, weg van vlambare materiale.
- Ensure the crumb tray is correctly inserted at the bottom of the toaster.
- Before first use, operate the toaster without bread on the highest browning setting to burn off any manufacturing residues. This may produce a slight odor and smoke, which is normal. Ensure adequate ventilation.
4. Bedryfsinstruksies
4.1. Toasting Bread
- Insert up to four slices of bread into the toaster slots. The wide slots accommodate various bread types.
- Select your desired browning level using the browning control dial (1-6). Level 1 is for light toast, and Level 6 is for dark toast.
- Press down the toast lever until it locks into place. The indicator light will illuminate, and the toasting cycle will begin.
- Once the toasting cycle is complete, the toast will automatically eject, and the lever will return to its original position.

Image: Close-up of the toaster's control panel, showing the browning level dial and the 'Cancel', 'Reheat', and 'Defrost' buttons.
4.2. Spesiale funksies
The toaster includes three special functions:
- Kanselleer: Press the 'CANCEL' button to stop the toasting cycle at any time. The toast will immediately eject.
- Herverhit: Use the 'REHEAT' button to warm up previously toasted bread without further browning. Insert the toast, press the lever, then press 'REHEAT'.
- Ontdooi: The 'DEFROST' function allows you to toast frozen bread. Insert frozen bread, press the lever, then press 'DEFROST'. The toaster will automatically adjust the toasting time.

Image: The toaster with the 'CANCEL' button glowing blue, indicating the function is active or has been pressed.
4.3. High-Lift Ejection
The high-lift ejection feature allows you to easily retrieve smaller items like crumpets or bagels without burning your fingers. Simply lift the toast lever further up after the toasting cycle is complete.

Image: A hand demonstrating the high-lift function by pushing the toast lever upwards to raise the toast higher from the slots.
5. Onderhoud en Skoonmaak
Gereelde skoonmaak verseker optimale werkverrigting en verleng die lewensduur van jou broodrooster.
5.1. Cleaning the Crumb Tray
- Maak seker dat die broodrooster ontkoppel en heeltemal afgekoel het.
- Trek die verwyderbare krummelbakkie wat onderaan die broodrooster geleë is, uit.
- Gooi opgehoopte krummels weg.
- Vee die skinkbord met advertensie afamp lap en droog deeglik af voordat jy dit weer insit.
- Moet nooit die broodrooster gebruik sonder dat die krummelbak in plek is nie.

Image: A hand pulling out the removable crumb tray from the bottom of the toaster, showing accumulated crumbs.
5.2. Skoonmaak van die buitekant
- Vee die buitekant van die broodrooster af met 'n sagte, damp lap. Moenie skuurskoonmakers of skuursponsies gebruik nie.
- Ensure the toaster is completely dry before plugging it back in.
6. Probleemoplossing
| Probleem | Moontlike oorsaak | Oplossing |
|---|---|---|
| Rooster skakel nie aan nie. | Not plugged in; power outlet faulty; toast lever not fully depressed. | Check power connection; try a different outlet; ensure toast lever is fully locked down. |
| Brood sit in die broodrooster vas. | Bread slice too thick or uneven. | Unplug the toaster and carefully remove the bread using non-metallic tongs. Do not use metal objects. |
| Roosterbrood is te lig/donker. | Die bruiningsvlak-instelling is verkeerd. | Adjust the browning control dial to a higher or lower setting for future use. |
| Rook kom uit die broodrooster. | Crumbs accumulated; food stuck; first use burn-off. | Unplug immediately. Clean crumb tray. Remove any stuck food. If first use, ensure ventilation. |
7. Spesifikasies
- Modelnommer: EK5739PNKVDE
- Handelsmerk: Salter
- Kleur: Roos
- Materiaal: Aluminium
- Krag: 1630 W
- Aantal snye: 4
- Bruininstellings: 6
- Spesiale kenmerke: Wide Slots, Defrost, Reheat, Cancel Functions, Removable Crumb Tray, High-Lift Ejection, Auto-Centering
- Gewig: 3 kilogram
8. Waarborg en Ondersteuning
Your Salter Retro 4-Slice Toaster comes with a standard manufacturer's warranty. For detailed warranty information, product support, or to inquire about replacement parts, please refer to the warranty card included in your product packaging or visit the official Salter website. Do not attempt to repair the appliance yourself, as this may void the warranty and pose a safety risk.