1. Inleiding
Welcome to the user manual for your Tawson 3-Light Convertible Chandelier. This manual provides essential information for safe installation, operation, and maintenance of your lighting fixture. Please read all instructions carefully before beginning installation.
Veiligheidsinligting:
- Always turn off the power at the main fuse or circuit breaker before installation or maintenance.
- Raadpleeg 'n gekwalifiseerde elektrisiën as jy onseker is oor die installasieproses.
- Maak seker dat alle elektriese verbindings voldoen aan plaaslike kodes en verordeninge.
- Moenie die aanbevole wat oorskry nietage vir gloeilampe.
- Hanteer glaskomponente versigtig.
2. Pakketinhoud
Verifieer dat alle komponente teenwoordig is voordat u met die installasie begin.
- Chandelier fixture body
- Glass shades (3)
- Monteer hardeware kit
- Adjustable rods (various lengths)
- Instruksie handleiding

Image: A diagram illustrating the chandelier's dimensions, including the 28-inch height and 18-inch width, along with adjustable rods (two 6-inch and two 12-inch) and a note that bulbs are not included. Various compatible bulb types are shown at the bottom, indicating an E26 base.
3. Spesifikasies
| Kenmerk | Detail |
|---|---|
| Handelsmerk | Tawson |
| Modelnommer | 13810 |
| Kleur | Geborselde nikkel |
| Materiaal | Glas, metaal |
| Styl | Moderne |
| Liggaamvorm | Chandelier (Convertible) |
| Produk afmetings | 18.1 cm L x 18.1 cm B x 13.8 cm H |
| Binne/buiteluggebruik | Binneshuise |
| Kragbron | AC |
| Installasie tipe | Semi Flush Mount |
| Ligbrontipe | Incandescent, LED, Fluorescent, Halogen |
| Voltooi Tipe | Geborsel |
| Skadu Materiaal | Glas |
| Aantal ligbronne | 3 |
| Voltage | 110-120V (AC) |
| Gloeilamp basis | E26 |
| Wattage | Up to 100 watts per bulb |
| Helderheid | 5100 lumen (total) |
| Doeltreffendheid | 51 lumen per watt |
| Vergadering benodig | Minimale samestelling benodig |
4. Opstelling en installering
This chandelier can be installed as a pendant or a semi-flush mount fixture. Follow these steps carefully.
4.1 Benodigde gereedskap (Nie ingesluit nie)
- Skroewedraaier
- draad strippers
- Tang
- Elektriese band
- Leer
4.2 Voorinstallasie
- Skakel krag af: Vind die stroombreker of sekeringskas en skakel die krag na die aansluitkas af waar die toebehore geïnstalleer sal word.
- Pak uit: Verwyder alle komponente versigtig uit die verpakking.
- Inspekteer: Check for any damage during shipping. Do not install if damaged.
4.3 Monteerstappe
- Heg monteerplaat aan: Bevestig die monteerplaat aan die aansluitkas met die meegeleverde skroewe.
- Determine Height (Pendant Option): Select the desired length of adjustable rods. Connect the rods to the fixture body and the canopy.
- Bedrading:
- Connect the fixture's ground wire to the supply ground wire (usually bare copper or green).
- Connect the fixture's neutral wire (usually white) to the supply neutral wire (white).
- Connect the fixture's hot wire (usually black) to the supply hot wire (black).
- Bevestig alle verbindings met draadmoere en elektriese band.
- Veilige afdak: Stoot die afdak versigtig teen die plafon op, bedek die aansluitboks, en maak dit vas met die meegeleverde skroewe of moere.
- Installeer glasskerms: Attach the three satin etched glass shades to the fixture arms.
- Installeer gloeilampe: Insert three E26 base bulbs (not included) into the sockets. Do not exceed 100W per bulb.

Beeld: 'n Gedetailleerde view highlighting the brushed nickel metal components and the white frosted glass shades, emphasizing the quality of materials and finish.
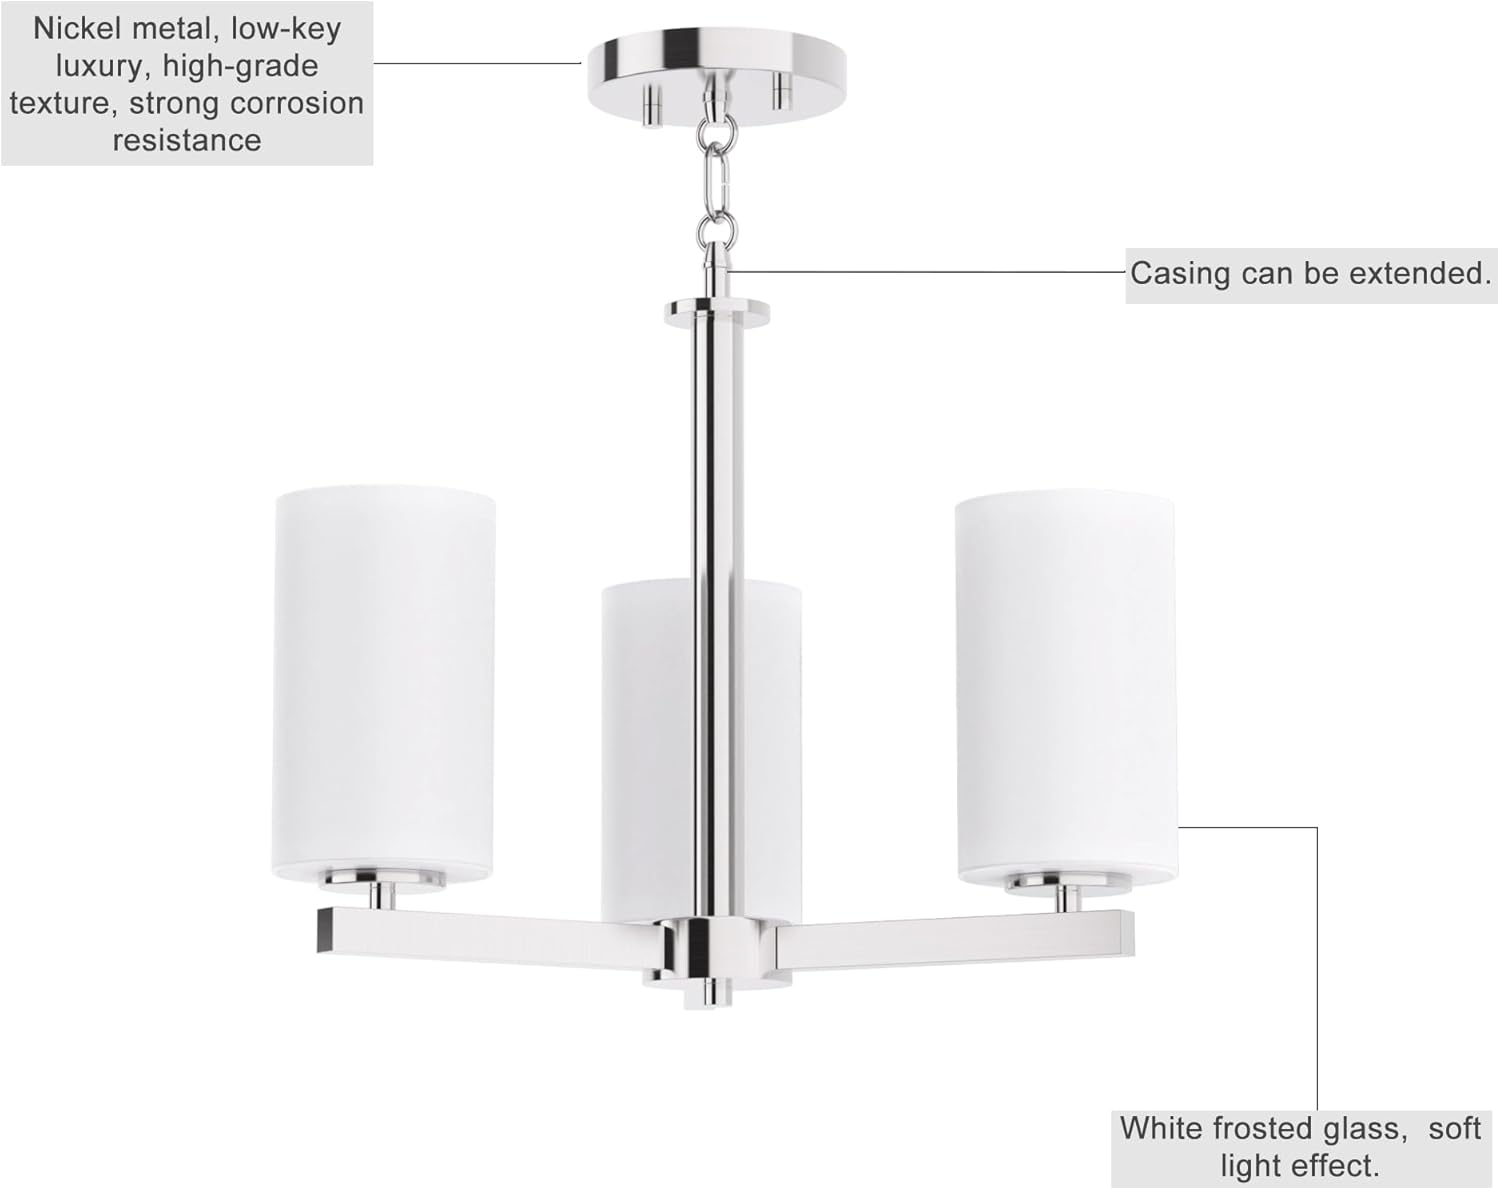
Image: A composite image showing close-ups of various parts of the chandelier: the connection point of the glass shade to the arm, the ceiling canopy with chain link, the central rod connection, and the arm connection to the central body. This illustrates the modular design and connection points.
5. Bedryfsinstruksies
Once installed, restore power at the circuit breaker. The chandelier operates via your wall switch.
- Skakel aan/af: Use the standard wall switch connected to the fixture to turn the lights on or off.
- Verdoof funksie: If you have a compatible wall dimmer switch, use dimmable bulbs to utilize the dimming feature. Bulbs are not included.
Video: 'n Kort videovertoningasing the Tawson 3-Light Chandelier in various room settings, demonstrating its aesthetic appeal and how it illuminates different spaces. The video highlights the brushed nickel finish and the soft glow from the glass shades.
6. Onderhoud en versorging
Regular cleaning and proper care will ensure the longevity and appearance of your chandelier.
- Skoonmaak:
- Skakel krag af voor skoonmaak.
- Wipe the metal parts with a soft, dry cloth.
- Clean glass shades with a mild glass cleaner and a soft cloth. Avoid abrasive cleaners.
- Gloeilamp vervanging:
- Maak seker dat krag af is.
- Laat gloeilampe afkoel voordat dit aanraak.
- Unscrew old bulbs and replace with new E26 base bulbs (max 100W each).
- Inspeksie: Kontroleer gereeld alle verbindings en monteerhardeware vir styfheid.
7. Probleemoplossing
As jy probleme met jou kandelaar ondervind, raadpleeg die volgende algemene probleme en oplossings:
| Probleem | Moontlike oorsaak | Oplossing |
|---|---|---|
| Lig gaan nie aan nie | Geen krag na die toebehore nie | Check circuit breaker/fuse. Ensure wall switch is on. |
| Bulbs not working | Los of foutiewe gloeilampe | Ensure bulbs are screwed in tightly. Replace with new bulbs. |
| Flikkerende ligte | Losse bedrading of onversoenbare dimmer | Turn off power, check wire connections. If using a dimmer, ensure bulbs are dimmable and compatible with the dimmer switch. |
| Toebehore is los | Monteringshardeware nie veilig nie | Turn off power, tighten mounting screws and canopy nuts. |
8. Waarborg en Ondersteuning
For warranty information or technical support, please contact Tawson customer service. Keep your purchase receipt for warranty claims.
Kontakinligting: Refer to your product packaging or the Tawson official webwebwerf vir die mees onlangse ondersteuningsbesonderhede.
9. Gebruiksvoorbeeldamples
The Tawson 3-Light Convertible Chandelier is versatile and suitable for various indoor settings.
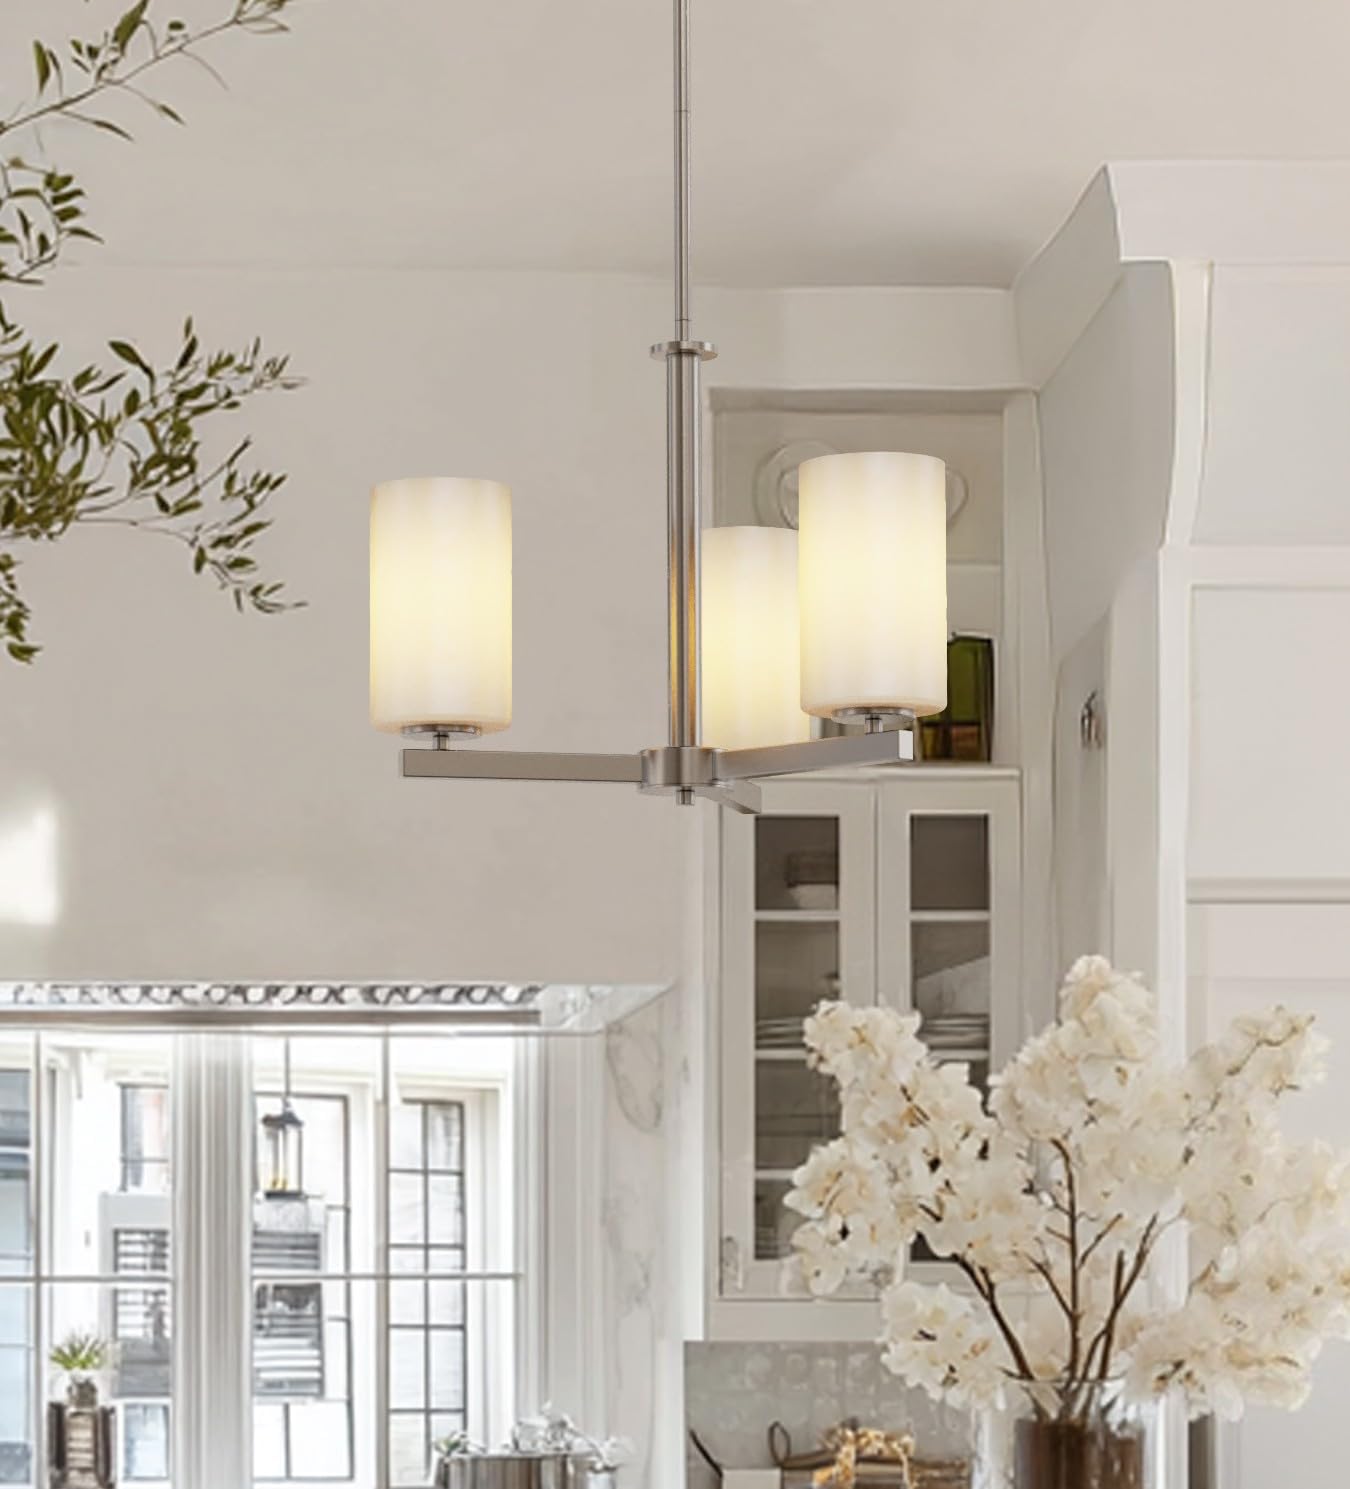
Image: The chandelier illuminating a contemporary kitchen space, featuring white cabinetry, a dark island, and light-colored flooring. The fixture provides ambient lighting above the island.

Image: The chandelier positioned above a dining table in a room with large windows, demonstrating its suitability for dining areas and its ability to complement natural light.

Image: The chandelier installed in a spacious bathroom, featuring a large vanity mirror, a white marble fireplace, and patterned floor tiles, showcasing its elegant integration into a sophisticated bathroom design.

Image: The chandelier hanging above a home bar or serving station, which includes patterned wallpaper, wooden shelves with bottles, and glassware, illustrating its use in a stylish entertainment space.