Inleiding
The Audio-Technica PRO35 is a cardioid condenser clip-on instrument microphone designed for capturing sound from saxophones, toms, brass instruments, and percussion. Its robust design and high Sound Pressure Level (SPL) capability make it suitable for live stage performances. The microphone features an extended frequency response to accurately reproduce the nuances of musical instruments and a cardioid polar pattern to minimize off-axis sound pickup.
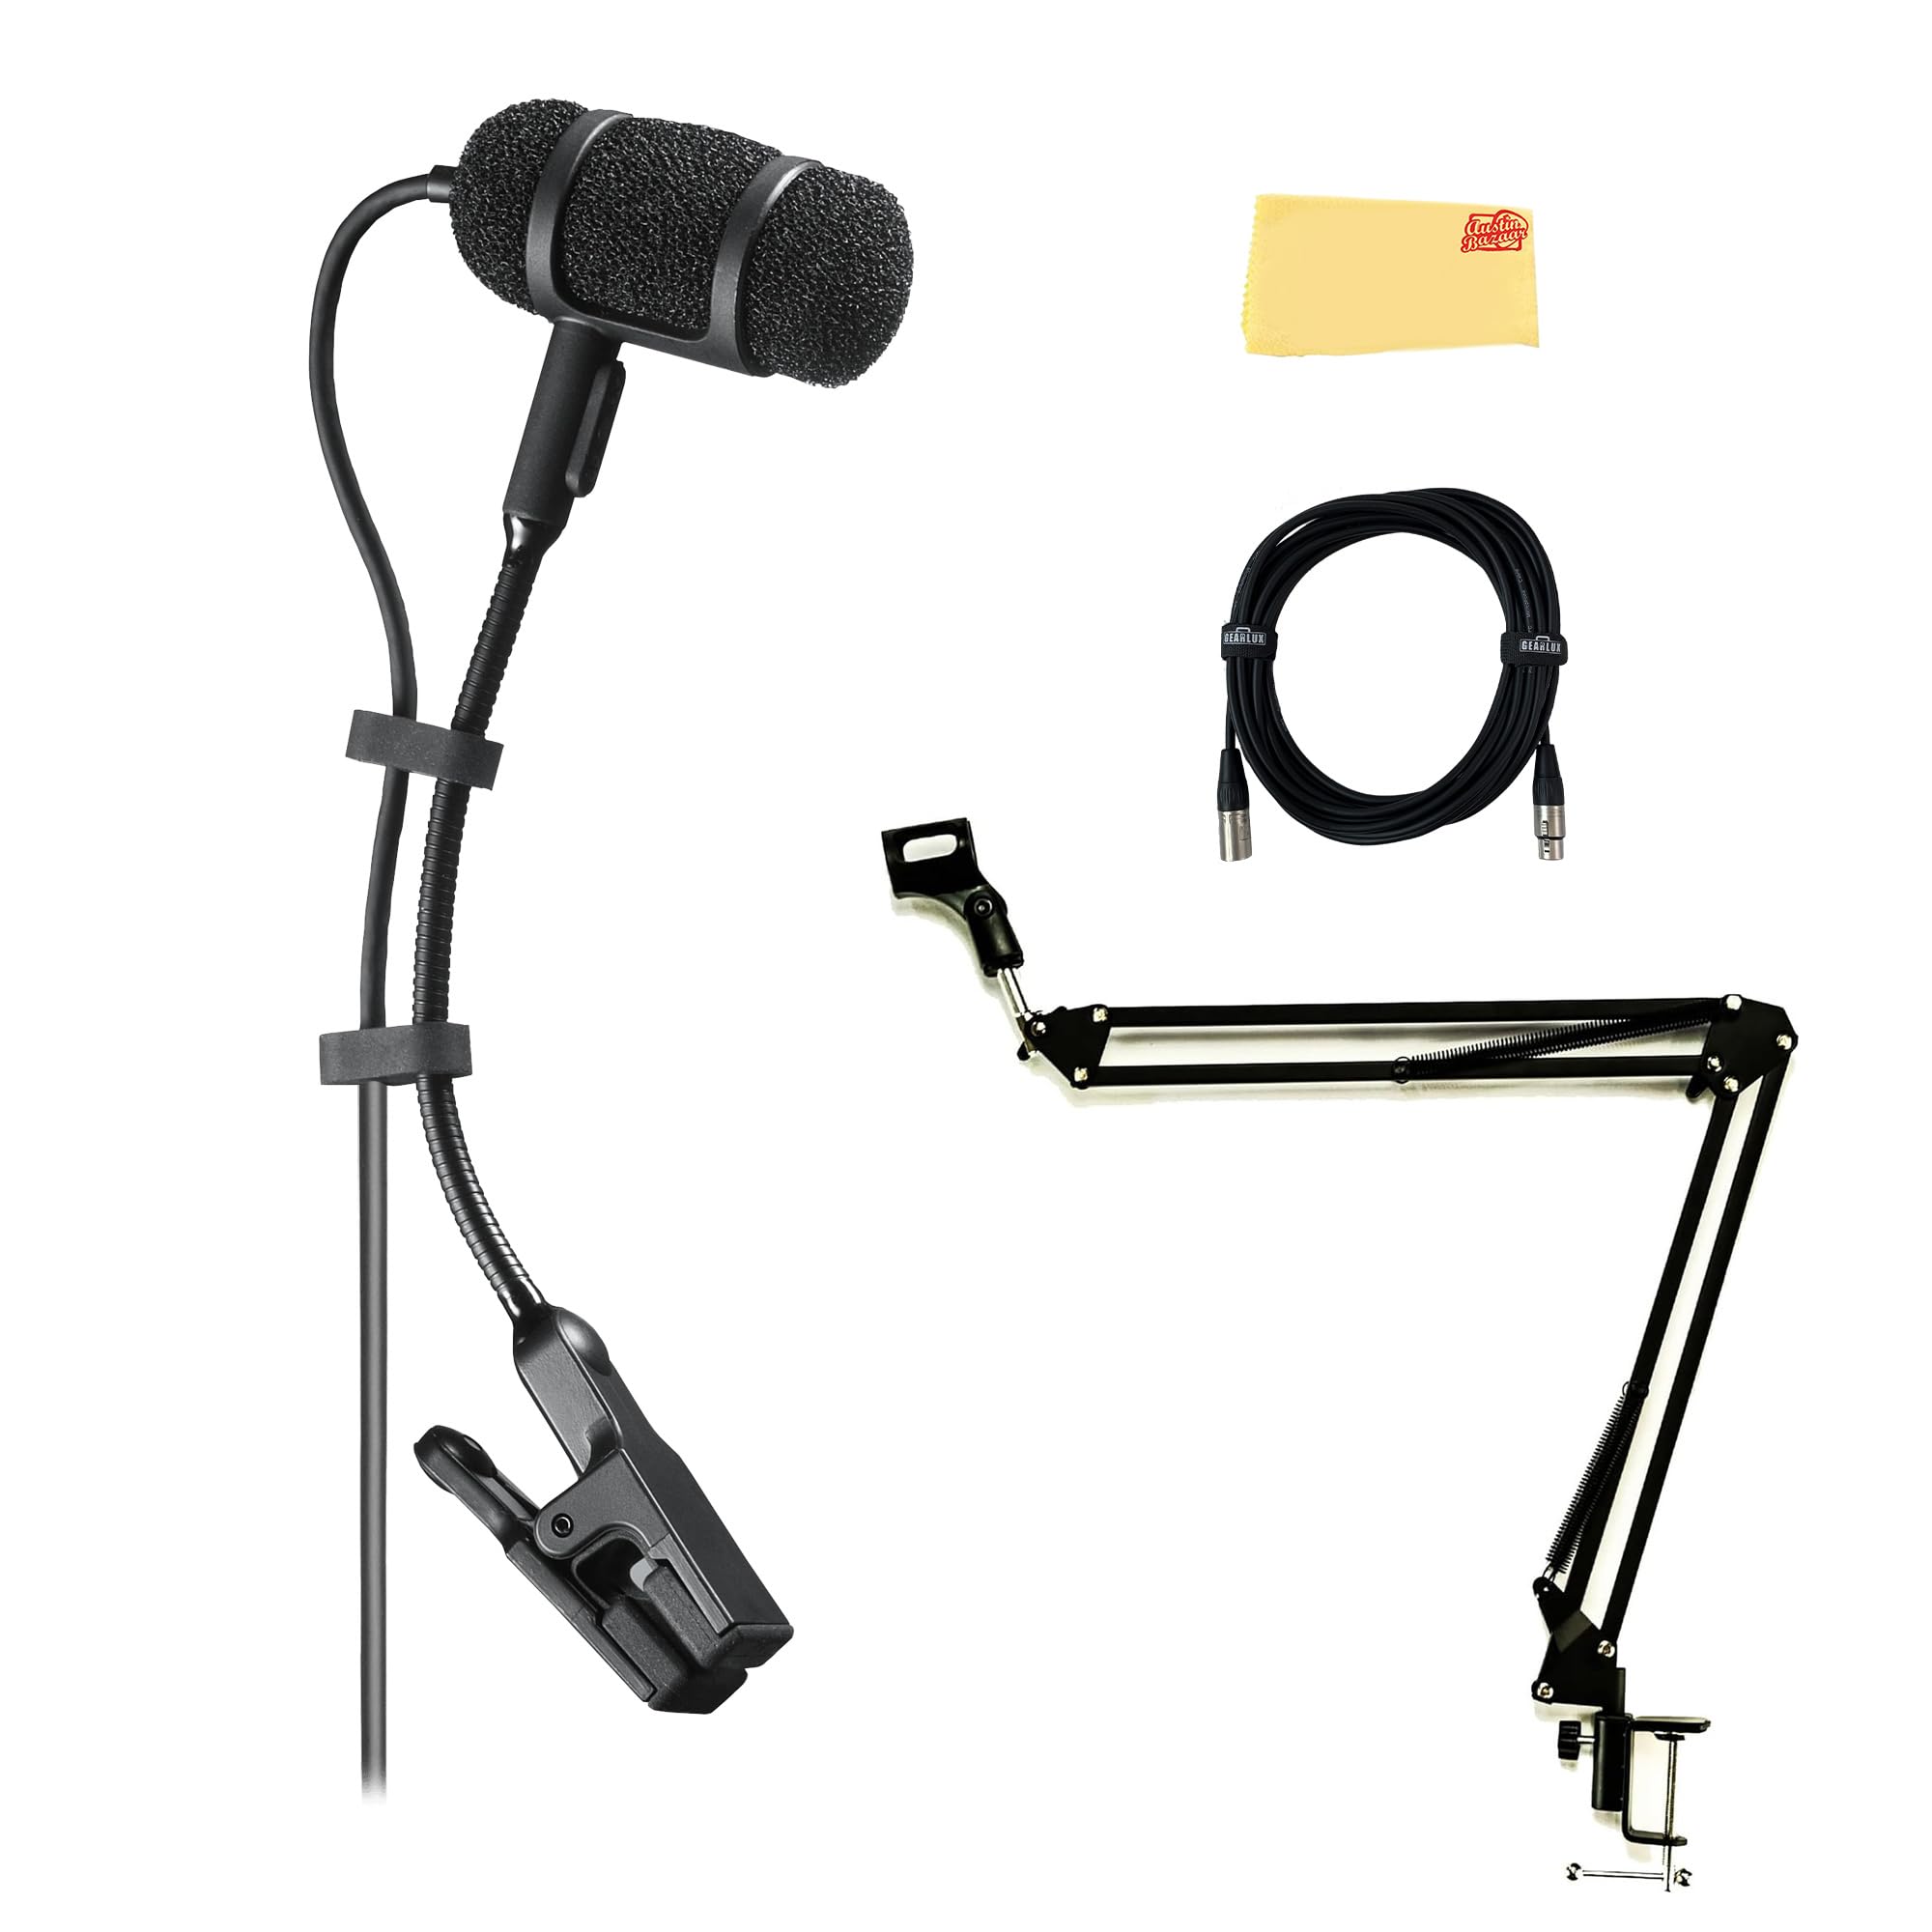
Wat is in die boks
Verifieer dat alle komponente in jou pakket teenwoordig is:
- Audio-Technica PRO35 Cardioid Condenser Clip-On Instrument Microphone
- AT8418 Unimount Clip
- Gearlux XLR Cable
- Boem Arm
- Austin Bazaar Poleerdoek
Opstelling
Follow these steps to set up your PRO35 microphone:
- Attach the Microphone to the Instrument: Use the included AT8418 Unimount Clip to securely attach the PRO35 microphone to your instrument. The clip is designed to provide accurate positioning and shock resistance, protecting the microphone element from vibrations.
- Plaas die mikrofoon: Adjust the flexible gooseneck to position the microphone capsule optimally for sound capture. Aim for a position that captures the desired sound source while minimizing interference from other instruments or ambient noise.
- Koppel die XLR-kabel: Connect one end of the Gearlux XLR cable to the microphone's integral 3-pin XLRM-type connector. Ensure a firm connection.
- Koppel aan klanktoerusting: Connect the other end of the XLR cable to a mixer, audio interface, or preamplifier that provides 11-52V DC phantom power. The PRO35 requires phantom power for operation.
- Boom Arm Setup: If using the included boom arm, attach it to a suitable stand or surface. The boom arm provides additional flexibility for microphone placement, allowing for precise adjustments to height and angle.
Bedryfsinstruksies
Understanding the features of your PRO35 microphone will optimize its performance:
- Kardioïed polêre patroon: The PRO35 features a cardioid polar pattern, which is most sensitive to sound coming from the front of the microphone and significantly reduces sound pickup from the sides and rear. This characteristic helps to isolate the desired instrument sound and minimize feedback or bleed from other sound sources on stage.
- Frekwensie reaksie: The microphone offers an extended frequency response of 50-15,000 Hz, designed to capture the full tonal range and subtle nuances of various instruments.
- Low-Frequency Roll-Off Switch: For wired connections, the power module includes an 80 Hz, 18 dB/octave low-frequency roll-off switch. Engaging this switch can help reduce unwanted low-end rumble, stage vibration, or proximity effect, resulting in a clearer sound.
- High SPL Capability: The PRO35 is engineered to handle high Sound Pressure Levels (up to 145 dB SPL), making it suitable for loud instruments like brass and percussion without distortion.
Onderhoud
Proper maintenance ensures the longevity and optimal performance of your microphone:
- Skoonmaak: Use the provided Austin Bazaar polishing cloth to gently wipe the microphone body and cable. Avoid using harsh chemicals or abrasive materials. Ensure the microphone is dry before storage.
- Berging: When not in use, store the microphone in a protective case or bag to prevent dust accumulation and physical damage. Avoid exposing the microphone to extreme temperatures or high humidity.
- Kabelversorging: Avoid sharp bends or kinks in the XLR cable. Coil the cable loosely when storing to prevent internal wire damage.
Probleemoplossing
If you encounter issues with your PRO35 microphone, refer to the following common troubleshooting steps:
- Geen klankuitset nie:
- Ensure the XLR cable is securely connected at both the microphone and the audio equipment.
- Verify that phantom power (11-52V DC) is enabled on your mixer or audio interface. The PRO35 requires phantom power to operate.
- Check the input gain level on your audio equipment. It may be set too low.
- Test with a different XLR cable to rule out a faulty cable.
- Swak klankgehalte / Vervorming:
- Check the input gain level. If it's too high, it can cause distortion. Reduce the gain until the sound is clear.
- Ensure the microphone is not positioned too close to the sound source, especially for very loud instruments, which can lead to proximity effect or overload.
- If experiencing excessive low-end rumble, engage the low-frequency roll-off switch on the power module (if applicable).
- Verify that the microphone capsule is clean and free from debris.
- Intermitterende klank:
- Inspect the XLR cable for any visible damage or loose connections.
- Ensure the microphone's connection to the clip is stable.
Spesifikasies
| Element | Vaste lading agterplaat, permanent gepolariseerde kondensor |
| Polêre patroon | kardioïed |
| Frekwensierespons | 50-15,000 Hz |
| Low-Frequency Roll Off | 80 Hz, 18 dB/oktaaf (slegs bedraad) |
| Oopkring-sensitiwiteit | -45 dB (5.6 mV) re 1V by 1 Pa |
| Maksimum inset klankvlak | 145 dB SPL, 1 kHz teen 1% THD |
| Dinamiese reeks | 115 dB, 1 kHz at Max SPL (wired only) |
| Sein-tot-geraas verhouding | 64 dB, 1 kHz by 1 Pa |
| Phantom Power Vereistes | 11-52V DC, 2 mA typical (wired only) |
| Skakelaars | Plat, afrol (slegs bedraad) |
| Weight (power module) | 2.9 oz (81 g) (wired only) |
| Kabel | 6.0' (1.8 m) long (permanently attached to microphone), 0.10" (2.6 mm) diameter, 2-conductor, shielded cable |
| Afmetings (mikrofoon) | 0.98" (25.0 mm) long, 0.40" (10.2 mm) diameter |
| Dimensions (power module) | 3.66" (92.9 mm) long, 0.74" (18.9 mm) diameter (wired only) |
Waarborg inligting
The Audio-Technica PRO35 microphone comes with a 2 jaar waarborg from the date of purchase. This warranty covers defects in materials and workmanship under normal use. Please retain your proof of purchase for warranty claims. For detailed warranty terms and conditions, refer to the official Audio-Technica webwebwerf of kontak hul kliëntediens.
Ondersteuning
For further assistance, technical support, or service inquiries regarding your Audio-Technica PRO35 microphone, please visit the official Audio-Technica website or contact their customer service department. You can find contact information and additional resources on their support pages.
Note: This manual provides general instructions. Specific setup and operation may vary depending on your audio equipment and application.