1. Inleiding
This manual provides comprehensive instructions for the installation, operation, and maintenance of your Juno 2-Inch Flat Trim Canless Wafer LED Downlight. This innovative lighting solution is designed for quick and easy installation in various ceiling spaces, eliminating the need for traditional recessed housings. It features an all-in-one design with switchable white color temperature and adjustable lumen output, offering versatile lighting for accent, task, or general illumination.

Figure 1: Juno 2-Inch Flat Trim Canless Wafer LED Downlight with its remote driver box.
2. Veiligheidsinligting
Lees asseblief alle instruksies sorgvuldig deur voor installasie en bewaar hierdie handleiding vir toekomstige verwysing. Versuim om hierdie instruksies te volg, kan lei tot elektriese skok, brand of ander gevare.
- Always turn off power at the circuit breaker before beginning installation or performing any maintenance.
- All electrical connections must be in accordance with local and National Electrical Code (NEC) standards. If you are unfamiliar with proper electrical wiring connections, consult a qualified electrician.
- Moenie die produk op enige manier verander of verander nie.
- Verseker die toevoer voltage is versoenbaar met die toestel (120 Volt).
- This product is suitable for wet locations and is IC Rated for direct contact with insulation.
- Do not install damaged products. Inspect the product upon receipt.
3. Pakketinhoud
Verifieer dat alle komponente teenwoordig en onbeskadig is voordat u met die installasie voortgaan:
- LED Lens (Integrated with Downlight Fixture)
- Mounting Hardware (Spring clips, remote driver box)
Note: The downlight fixture and remote driver box are typically pre-assembled or connected.
4. Kenmerke
The Juno 2-Inch Flat Trim Canless Wafer LED Downlight offers advanced features for optimal lighting performance and ease of use:
- Canless Design: No housing required, allowing installation directly into ceiling drywall.
- Switchable White Color Temperature (SWW5): Easily select from five color temperature options:
- 2700K sagte wit
- 3000K Warm Wit
- 3500K Neutraal Wit
- 4000K Koel Wit
- 5000K daglig
- Adjustable Lumen Output (ALO25): Choose from three brightness levels (Low, Medium, High) to suit your needs.
- Dimbaar: Compatible with most standard TRIAC dimmers, dimming down to 10 percent.
- Energiedoeltreffend: Long-life LEDs and a high-efficiency driver ensure superior illumination and extended service life.
- IC gegradeer: Approved for direct contact with insulation, simplifying installation in insulated ceilings.
- Wet Location Certified: Suitable for use in bathrooms, showers, and outdoor covered areas.

Figure 2: Switches on the remote driver box allow selection of color temperature and lumen output.

Figure 3: Visual guide to the different color temperatures available.
5. Opstelling en installering
The canless design simplifies installation. Follow these steps for a secure and proper setup:
- Skakel krag af: Maak seker dat die krag na die installasiearea by die stroombreker afgeskakel is voordat u begin.
- Berei opening voor: Cut a 2-inch diameter hole in the ceiling drywall at the desired location. Ensure there are no obstructions (joists, pipes, wires) within the ceiling space.
- Koppel bedrading:
- Open the remote driver box.
- Connect the building's supply wires (hot, neutral, ground) to the corresponding wires in the driver box using appropriate wire connectors.
- Maak seker dat alle verbindings veilig en behoorlik geïsoleer is.
- Close the driver box cover.
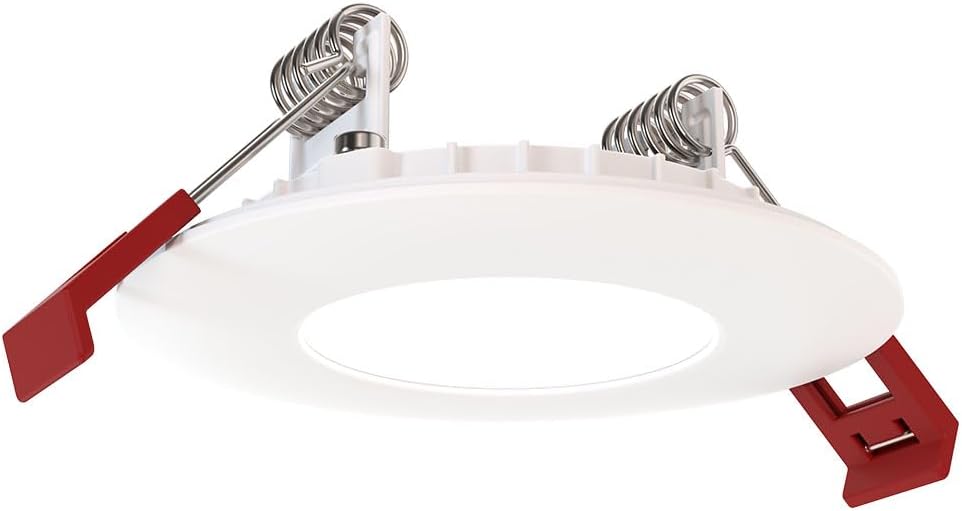
Figure 4: The remote driver box houses the electrical connections and adjustment switches.
- Select Settings (Pre-Installation): Before inserting the downlight into the ceiling, use the switches on the remote driver box to select your desired color temperature (2700K-5000K) and lumen output (Low, Medium, High). These settings can be adjusted later if needed, but it's easier before final installation.
- Insert Driver Box: Place the remote driver box into the ceiling opening. Its slim design allows it to fit into tight spaces.
- Install Downlight:
- Gently push the spring-loaded clips on the sides of the downlight upwards.
- Insert the downlight into the ceiling opening.
- Once the downlight is fully inserted, release the clips. The clips will spring back down and firmly secure the fixture against the ceiling.

Figure 5: Dimensions of the downlight and driver box for installation planning.
- Herstel krag: Turn the power back on at the circuit breaker. Test the downlight's functionality.
6. Bedryfsinstruksies
Your Juno LED Downlight is designed for simple operation once installed.
- Krag aan/af: Control the light using a standard wall switch connected to the circuit.
- verduistering: If connected to a compatible TRIAC dimmer switch, adjust the brightness by manipulating the dimmer control. The light can be dimmed down to 10% of its maximum output.
- Adjusting Color Temperature and Lumen Output:
The color temperature and lumen output are set via switches located on the remote driver box (refer to Figure 2). To change these settings after installation, you will need to access the driver box, which may require temporarily removing the fixture from the ceiling or accessing the box through an attic/access panel if it was placed there. It is recommended to set these preferences during installation.
- Color Temperature Switch: Select from 2700K, 3000K, 3500K, 4000K, or 5000K.
- Lumen Output Switch: Choose Low, Medium, or High brightness.
7. Onderhoud
The Juno LED Downlight requires minimal maintenance due to its durable design and long-life LEDs.
- Skoonmaak: Maak seker dat die krag afgeskakel is voor skoonmaak. Vee die toestel af met 'n sagte, droë of effens droë lap.amp lap. Moenie skuurmiddels of oplosmiddels gebruik nie, aangesien dit die afwerking of elektriese komponente kan beskadig.
- LED-leeftyd: The integrated LEDs are designed for extended operation and do not require replacement under normal use.
8. Probleemoplossing
Indien u probleme met u downlight ondervind, verwys na die volgende algemene probleme en oplossings:
| Probleem | Moontlike oorsaak | Oplossing |
|---|---|---|
| Lig skakel nie aan nie. | Geen krag aan die armatuur nie. Los bedrading konneksie. Foutiewe skakelaar of stroombreker. | Kontroleer die stroombreker en muurskakelaar. Turn off power, check all wire connections in the driver box. Test switch or breaker; replace if necessary. |
| Lig flikker of dof onbehoorlik. | Onversoenbare dimmerskakelaar. Los bedrading. Oorlaaide kring. | Ensure dimmer is TRIAC compatible and designed for LED lighting. Skakel die krag af, kontroleer alle draadverbindings. Reduce load on the circuit or consult an electrician. |
| Verkeerde kleurtemperatuur of helderheid. | Switches on driver box set incorrectly. | Access the remote driver box and adjust the color temperature and lumen output switches to desired settings. |
Indien die probleem voortduur nadat u hierdie oplossings probeer het, kontak kliëntediens.
9. Spesifikasies
| Eienskap | Detail |
|---|---|
| Handelsmerk | Juno |
| Model Naam | WF2 RD ALO25 SWW5 90CRI 120 MW M6 (Round LED) |
| Grootte | 2-Inch Flat Trim |
| Kleur | Mat Wit |
| Materiaal | Aluminium, Polikarbonaat |
| Ligbrontipe | LED |
| Voltage | 120 Volt |
| Wattage | 9.2 watt |
| Spesiale kenmerke | Adjustable Color Temperature (2700K-5000K), Dimmable (Triac), Energy Efficient, Waterproof |
| Installasie tipe | Ingeboude montering (kanloos) |
| Binne/buiteluggebruik | Indoor, Outdoor (Wet Location Certified) |
| Produk afmetings | 3.2 cm L x 3.2 cm B x 1.3 cm H (Beslag) |
| Item gewig | 13.2 onse |
| Sertifiserings | CSA certified, Title 24, Energy Star, IC Rated |
10. Waarborg en Ondersteuning
Waarborg: This product comes with a Limited Warranty. Please refer to the product packaging or the manufacturer's official website for specific terms and conditions of the warranty.
Kliëntediens: For technical assistance, troubleshooting beyond this manual, or warranty claims, please contact Juno customer support. Contact information can typically be found on the product packaging or the official Juno webwebwerf.
Aanlyn hulpbronne: For additional information, product updates, or FAQs, visit the official Juno webwebwerf: www.acuitybrands.com/brands/juno