Acekool TAC-12CHPB/DM7
Acekool Mobile Air Conditioner 12000 BTUs User Manual
Model: TAC-12CHPB/DM7
1. Inleiding
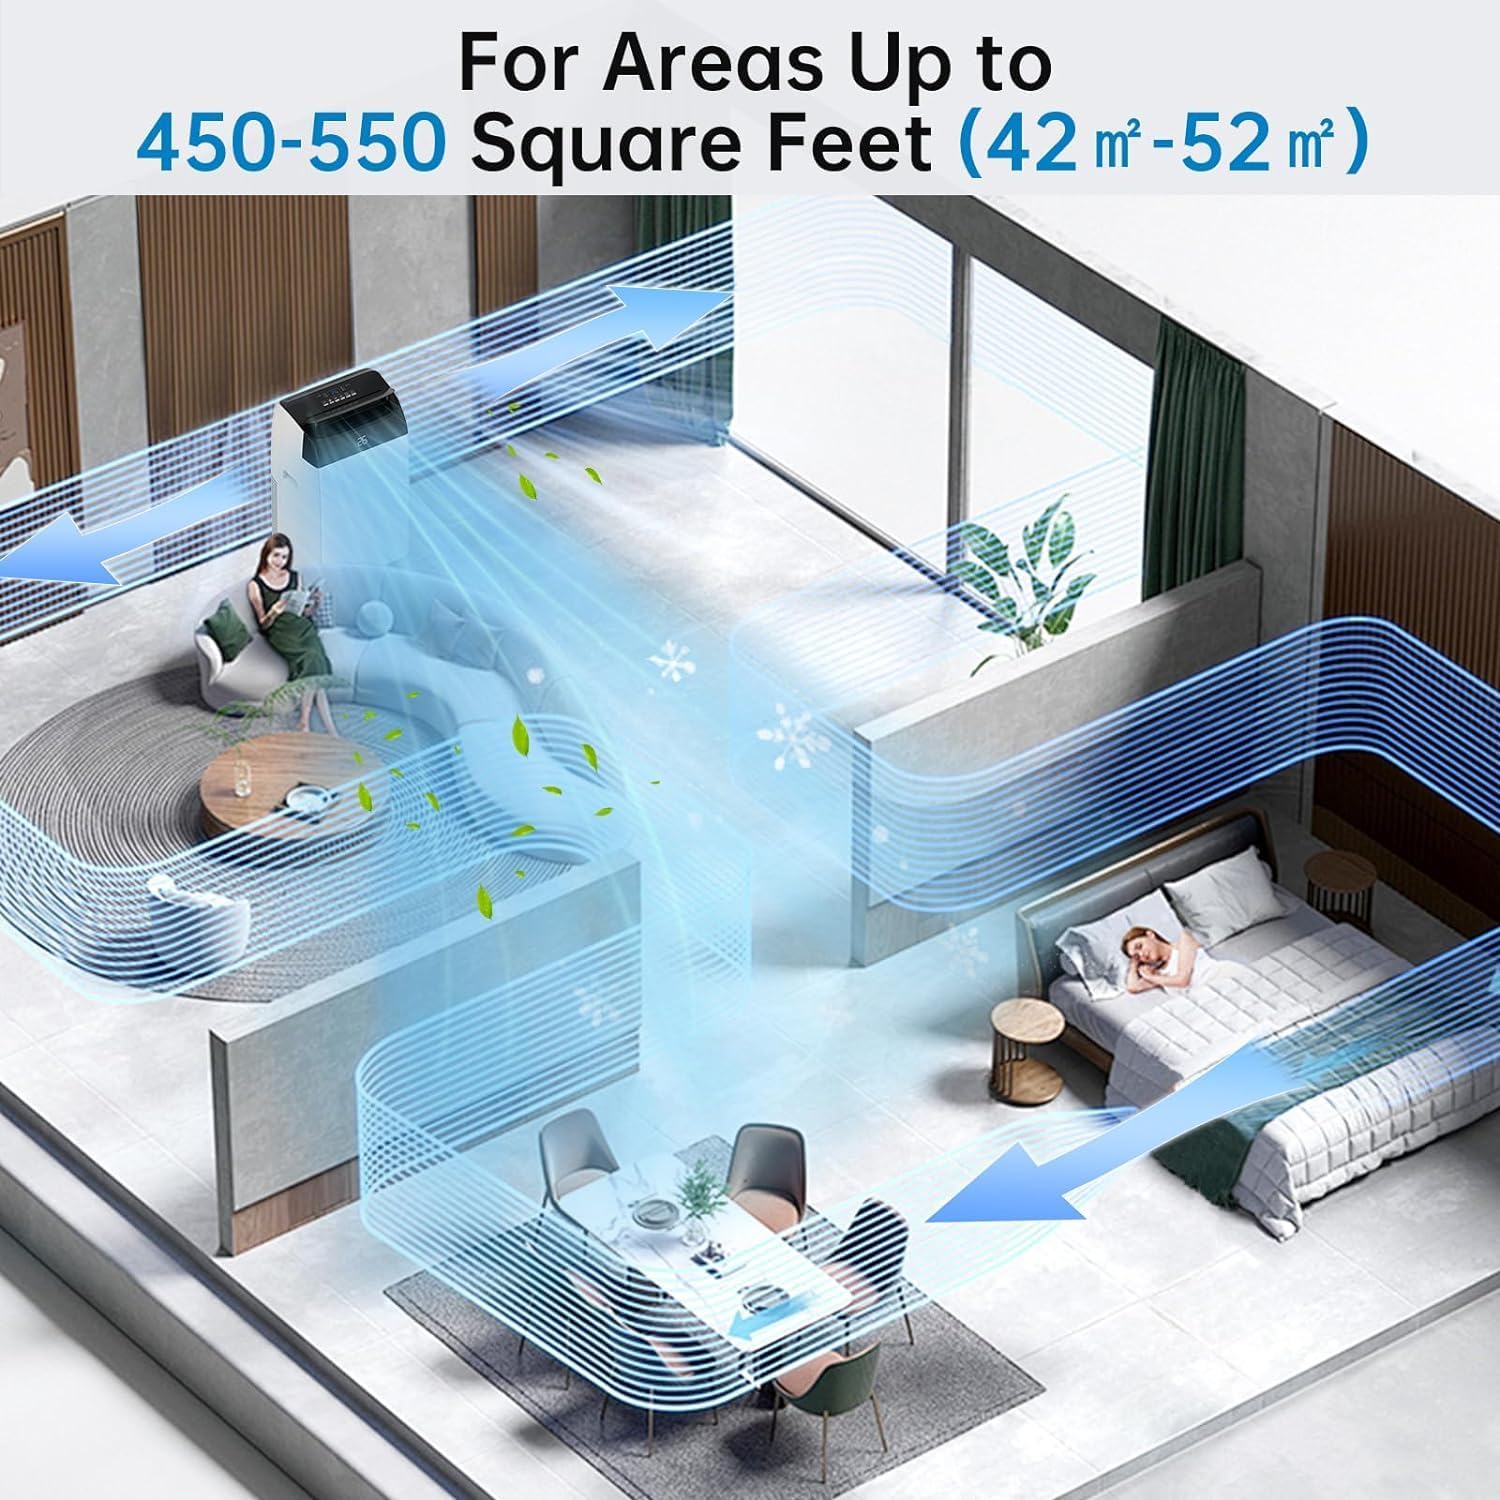
Thank you for choosing the Acekool Mobile Air Conditioner. This 3-in-1 unit provides cooling, dehumidifying, and fan functions, designed for optimal comfort in your home or office. With a powerful 12000 BTUs cooling capacity, it is suitable for rooms up to 550 square feet (approximately 52 square meters). This manual provides essential information for safe operation, installation, maintenance, and troubleshooting to ensure long-lasting performance of your appliance.
Lees asseblief hierdie handleiding deeglik deur voordat u die eenheid gebruik en bewaar dit vir toekomstige verwysing.
2. Veiligheidsinstruksies
Om beserings aan die gebruiker of ander mense en skade aan eiendom te voorkom, moet die volgende instruksies gevolg word. Verkeerde werking as gevolg van die ignoreer van instruksies kan skade of skade veroorsaak.
Algemene veiligheidsmaatreëls:
- Always use the unit on a flat, stable surface to prevent tipping.
- Do not block air inlets or outlets. Maintain at least 20 cm clearance from walls or other objects.
- Do not insert fingers or foreign objects into the air inlets/outlets.
- Hou die eenheid weg van vlambare gasse of brandbare materiale.
- Maak seker dat die kragkabel nie beskadig of geknyp is nie.
- Moenie die toestel met nat hande gebruik nie.
- Ontkoppel die eenheid voordat u skoonmaak of enige onderhoud uitvoer.
- Hierdie toestel is nie bedoel vir gebruik deur persone (insluitend kinders) met verminderde fisiese, sensoriese of geestelike vermoëns, of 'n gebrek aan ervaring en kennis nie, tensy hulle toesig of instruksies oor die gebruik van die toestel gegee is deur 'n persoon wat verantwoordelik is vir hul veiligheid.
- Kinders moet onder toesig wees om te verseker dat hulle nie met die toestel speel nie.
Elektriese veiligheid:
- Connect the unit to a properly grounded electrical outlet with the correct voltage (220V).
- Do not use extension cords or multi-sockets with this appliance.
- As die kragkoord beskadig is, moet dit deur die vervaardiger, sy diensagent of soortgelyke gekwalifiseerde persone vervang word om 'n gevaar te vermy.
3. Produk verbyview
Familiarize yourself with the components and controls of your Acekool Mobile Air Conditioner.
Pakketinhoud:
- Mobile Air Conditioner Unit
- Afstandbeheer
- Uitlaatslang
- Slide Bar (Window Kit)
- Slide Bar Connector
- Exhaust Pipe Joint (2 pieces)

Figuur 3.1: Package Contents and Dimensions. This image shows the main unit with its dimensions (36cm depth, 42cm width, 70cm height) and all accessories included in the box, such as the remote control, exhaust hose, slide bar, slide bar connector, and two exhaust pipe joints.

Figuur 3.2: verbyview of the Acekool Portable Air Conditioner and its accessories, including the main unit, remote control, and various components for window installation.
Beheerpaneel en afstandbeheer:
The unit can be operated via the intelligent touch panel on top of the unit or the included remote control.
Figuur 3.3: Control Panel and Remote Control. This image highlights the digital display showing "26" and various touch buttons for Timer, Fan Speed, Mode, and Power. Below, a hand holds the remote control, demonstrating its use with the air conditioner in a living room setting.
- Digitale skerm: Toon huidige temperatuur- of timerinstellings.
- Kragknoppie: Skakel die eenheid aan/af.
- Modusknoppie: Cycles through Cool, Fan, and Dehumidify modes.
- Temperatuur Op/Af Knoppies: Pas die verlangde temperatuur in die koelmodus aan.
- Fan Speed Button: Kies waaierspoed (Laag, Medium, Hoog).
- Timer-knoppie: Sets the 24-hour timer for automatic operation.
- Slaapmodus-knoppie: Activates quiet operation for nighttime use.
4. Opstelling
Proper installation of the exhaust hose is crucial for efficient cooling. This unit is designed for window installation.
Installasie van uitlaatslang:
- Attach the exhaust pipe joint to one end of the exhaust hose by twisting it clockwise until secure.
- Attach the slide bar connector to the other end of the exhaust hose.
- Connect the assembled exhaust hose to the exhaust outlet on the back of the air conditioner unit.
- Adjust the slide bar (window kit) to fit your window opening. Secure it in place.
- Insert the slide bar connector into the opening of the adjusted window kit, ensuring a tight seal to prevent air leakage.

Figuur 4.1: Easy Installation Steps. This image illustrates the process of connecting the exhaust hose to the unit and the window kit, ensuring proper ventilation for the air conditioner.
Belangrik: Ensure the exhaust hose is as straight and short as possible to maximize cooling efficiency. Avoid kinks or sharp bends.
5. Bedryfsinstruksies
Your Acekool Mobile Air Conditioner offers three primary functions: Cooling, Fan, and Dehumidifying.
Bedryfsmodusse:

Figuur 5.1: Multipurpose 3-in-1 Function. This graphic illustrates the three main operating modes: Cool Mode (18°C-32°C), Dry Mode (45L/Days dehumidification), and Fan Mode (3 Speeds).
- Koel modus:
Cools your room by expelling hot air outside. Set your desired temperature between 18°C and 32°C using the Up/Down buttons. The unit will cycle on and off to maintain the set temperature.
- Aanhangermodus:
Circulates air without cooling. Ideal for improving air circulation. Select from three fan speeds (Low, Medium, High) using the Fan Speed button.
- Dehumidify Mode (Dry Mode):
Removes excess moisture from the air, with a capacity of up to 45 liters per day. This mode helps maintain indoor humidity between 40% and 60%. The fan speed is typically fixed in this mode.
Timer funksie:
The 24-hour timer allows you to set a specific time for the unit to turn on or off automatically. Press the Timer button and use the Up/Down buttons to set the desired duration.
Slaap stelling:
Activate Sleep Mode for quieter operation during nighttime. In this mode, the fan speed is reduced, and the temperature may gradually increase to save energy and ensure comfortable sleep. The noise level can be as low as 48dB.

Figuur 5.2: Sleep Mode & Quiet Operation. This image shows the air conditioner in a bedroom setting, highlighting its quiet operation at 48dB, along with features like 24h Smart Timer, Sleep Mode, Auto Shut Off, and Ultra Quiet.
6. Onderhoud
Gereelde onderhoud verseker optimale werkverrigting en verleng die lewensduur van jou lugversorger.
Skoonmaak van die lugfilter:
The air filter should be cleaned every two weeks or more frequently depending on usage and air quality. A clean filter improves air quality and unit efficiency.
- Ontkoppel die lugversorger van die kragtoevoer.
- Vind die lugfilterpaneel, gewoonlik aan die agterkant of kant van die eenheid.
- Verwyder die filter deur dit versigtig uit te trek.
- Wash the filter under running water (warm, soapy water can be used for heavy dirt).
- Rinse thoroughly and allow the filter to air dry completely before reinserting it. Do not expose to direct sunlight.
- Sodra dit droog is, plaas die filter terug in sy gleuf.

Figuur 6.1: Washable Filter. This image demonstrates how to remove the air filter from the back of the unit and wash it under a faucet, emphasizing its reusability and ease of cleaning.
Dreineer kondenswater:
This air conditioner features an advanced self-evaporation technology, which automatically evaporates most of the condensed water and expels it with the exhaust air. This significantly reduces the need for manual drainage.

Figuur 6.2: Self-Evaporation System and Efficient Condensing System. This diagram illustrates the internal workings of the air conditioner, showing how condensed water is evaporated and how the efficient condensing system operates.
However, in high humidity conditions or during prolonged dehumidification mode, the internal water tank may fill up. When this happens, the unit will stop operating and display an error code (refer to troubleshooting section). You will need to manually drain the water:
- Ontkoppel die eenheid.
- Plaas 'n vlak pan of skinkbord onder die dreineringspoort aan die onderkant van die agterkant van die eenheid.
- Verwyder die dreinprop.
- Laat al die water heeltemal dreineer.
- Replace the drain plug firmly.
7. Probleemoplossing
Voordat u kliëntediens kontak, verwys asseblief na die volgende tabel vir algemene probleme en hul oplossings.
| Probleem | Moontlike oorsaak | Oplossing |
|---|---|---|
| Eenheid skakel nie aan nie. | No power; Power cord damaged; Water tank full. | Check power connection; Inspect power cord; Drain water tank. |
| Die eenheid verkoel nie effektief nie. | Air filter dirty; Exhaust hose blocked/kinked; Room too large; Doors/windows open. | Clean air filter; Check exhaust hose for obstructions; Ensure room size is within capacity; Close all doors and windows. |
| Eenheid is raserig. | Unit not on a level surface; Fan speed too high; Obstruction in fan. | Place on a flat surface; Reduce fan speed; Check for foreign objects. |
| Water lekkasie. | Dreinprop nie vasgemaak nie; Eenheid gekantel. | Ensure drain plug is firmly in place; Place unit on a level surface. |
| Afstandbeheer werk nie. | Batteries dead/incorrectly inserted; Obstruction between remote and unit. | Vervang batterye; Maak seker dat daar 'n duidelike siglyn na die eenheid se ontvanger is. |
8. Spesifikasies
Detailed technical specifications for the Acekool Mobile Air Conditioner.
| Kenmerk | Spesifikasie |
|---|---|
| Handelsmerk | Acekoel |
| Modelnommer | TAC-12CHPB/DM7 |
| Verkoelingskapasiteit | 12000 BTU's |
| Ontvochtigingskapasiteit | 45 liter/dag |
| Produkafmetings (L x B x H) | 35.8 x 41.9 x 68.8 cm |
| Gewig | 30.8 kilogram |
| Voltage | 220 Volt |
| Wattage | 1780 Watt |
| Geraasvlak | 65 dB (Operating), as low as 48dB (Sleep Mode) |
| Energiedoeltreffendheidklas | A |
| Installasie tipe | Venster |
| Spesiale kenmerke | Dehumidifier, 24H Timer, Digital Display, Remote Control, Self-Evaporation System |
9. Waarborg en Ondersteuning
For warranty information and customer support, please refer to the warranty card included with your product packaging or visit the official Acekool website. Ensure you have your model number (TAC-12CHPB/DM7) and purchase details ready when contacting support.
For further assistance, please contact Acekool customer service through their official channels.
Ask a question about this manual
Ask about setup, troubleshooting, compatibility, parts, safety, or missing instructions. Manuals+ will review the question and use this page’s manual context to help answer it.