JENABOM B0D49FP524
JENABOM 3.7V Electric Precision Screwdriver Set User Manual
Model: B0D49FP524
1. Inleiding
Thank you for choosing the JENABOM 3.7V Electric Precision Screwdriver Set. This manual provides detailed instructions for the safe and efficient operation, maintenance, and troubleshooting of your new tool. Please read this manual thoroughly before first use and retain it for future reference.
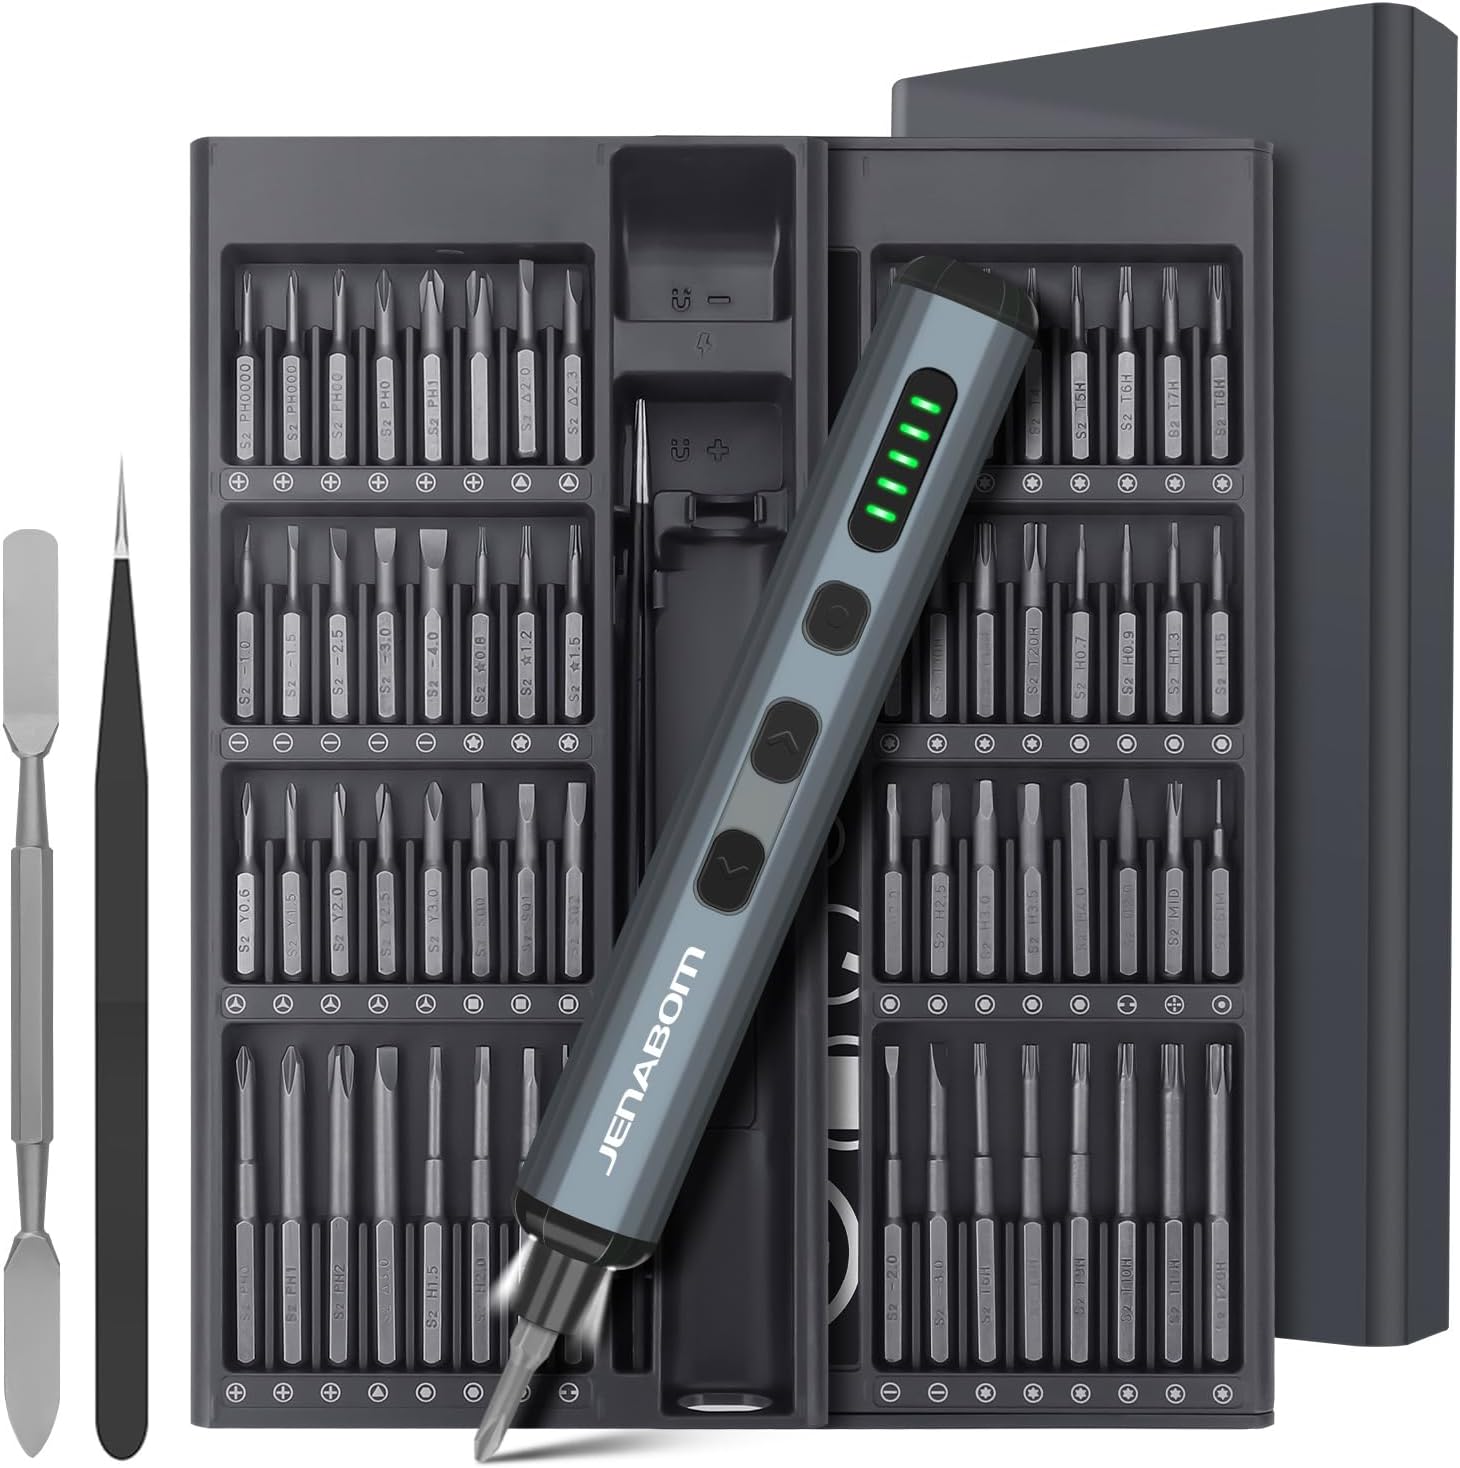
Image 1.1: The JENABOM 3.7V Electric Precision Screwdriver Set, including the screwdriver, magnetic bit case, spudger, and tweezers.
2. Pakketinhoud
Verifieer dat al die items wat hieronder gelys word, in u pakket teenwoordig is:
- 1 x JENABOM 3.7V Electric Precision Screwdriver
- 64 x S2 Steel Magnetic Bits
- 1 x Magnetic Storage Case for screwdriver and bits
- 1 x Magnetizer/Demagnetizer
- 1 x Metal Spudger
- 1 x Tweezers
- 1 x USB Tipe-C-laaikabel

Image 2.1: A visual representation of the 64 included S2 steel screwdriver bits.
3. Produk verbyview
Maak jouself vertroud met die komponente van jou elektriese skroewedraaier:

Image 3.1: Detailed diagram illustrating the main features and buttons of the electric screwdriver.
- Tipe C-laaipoort: Vir die herlaai van die interne battery.
- Battery vlak vertoon: LED indicators showing remaining battery charge.
- LED-ligskakelaar: Activates the integrated LED work light.
- Left Rotation Button: Engages counter-clockwise rotation for unscrewing.
- Right Rotation Button: Engages clockwise rotation for screwing.
- LED lig: Verlig die werkarea.
- Magnetiese Bitshouer: Hou skroewedraaierpunte veilig vas.

Image 3.2: The magnetic storage case featuring a pop-up mechanism for easy access to bits and the screwdriver.
4. Opstelling
4.1 Aanvanklike laai
Before first use, fully charge the electric screwdriver. Connect the provided USB Type-C charging cable to the screwdriver's charging port and a compatible USB power source (e.g., computer, wall adapter). The battery level display LEDs will indicate charging status and full charge.
- A full charge typically allows for approximately 300 screws.
- The screwdriver can be charged while stored in its case via an external USB port on the case.
4.2 Installering van Skroewedraaierpunte
The screwdriver features a magnetic bit holder for quick and secure bit changes.
- Select the appropriate S2 steel bit from the magnetic storage case.
- Insert the bit firmly into the magnetic bit holder at the tip of the screwdriver. The magnetic connection will secure the bit in place.
- To remove, simply pull the bit straight out.
5. Bedryfsinstruksies
5.1 Powering On/Off and Rotation
The screwdriver operates by pressing the rotation buttons:
- Druk die Right Rotation Button (clockwise) to drive screws in.
- Druk die Left Rotation Button (counter-clockwise) to remove screws.
- Laat die knoppie los om die rotasie te stop.
5.2 Wringkragverstelling
The electric screwdriver offers a precision torque range for delicate tasks and a manual mode for higher torque requirements.
- Electric Torque: Provides 0.1 Nm to 0.35 Nm of torque, suitable for electronics, watches, cameras, and other precision instruments. The screwdriver automatically adjusts within this range based on resistance.
- Manual Torque: For screws requiring more force, the screwdriver can be used manually, providing up to 3 Nm of torque. Simply continue turning the screwdriver by hand after the electric motor stops or for initial loosening/final tightening.

Beeld 5.1: Voorbeeldamples of the screwdriver in use, demonstrating its adjustable torque for different applications.
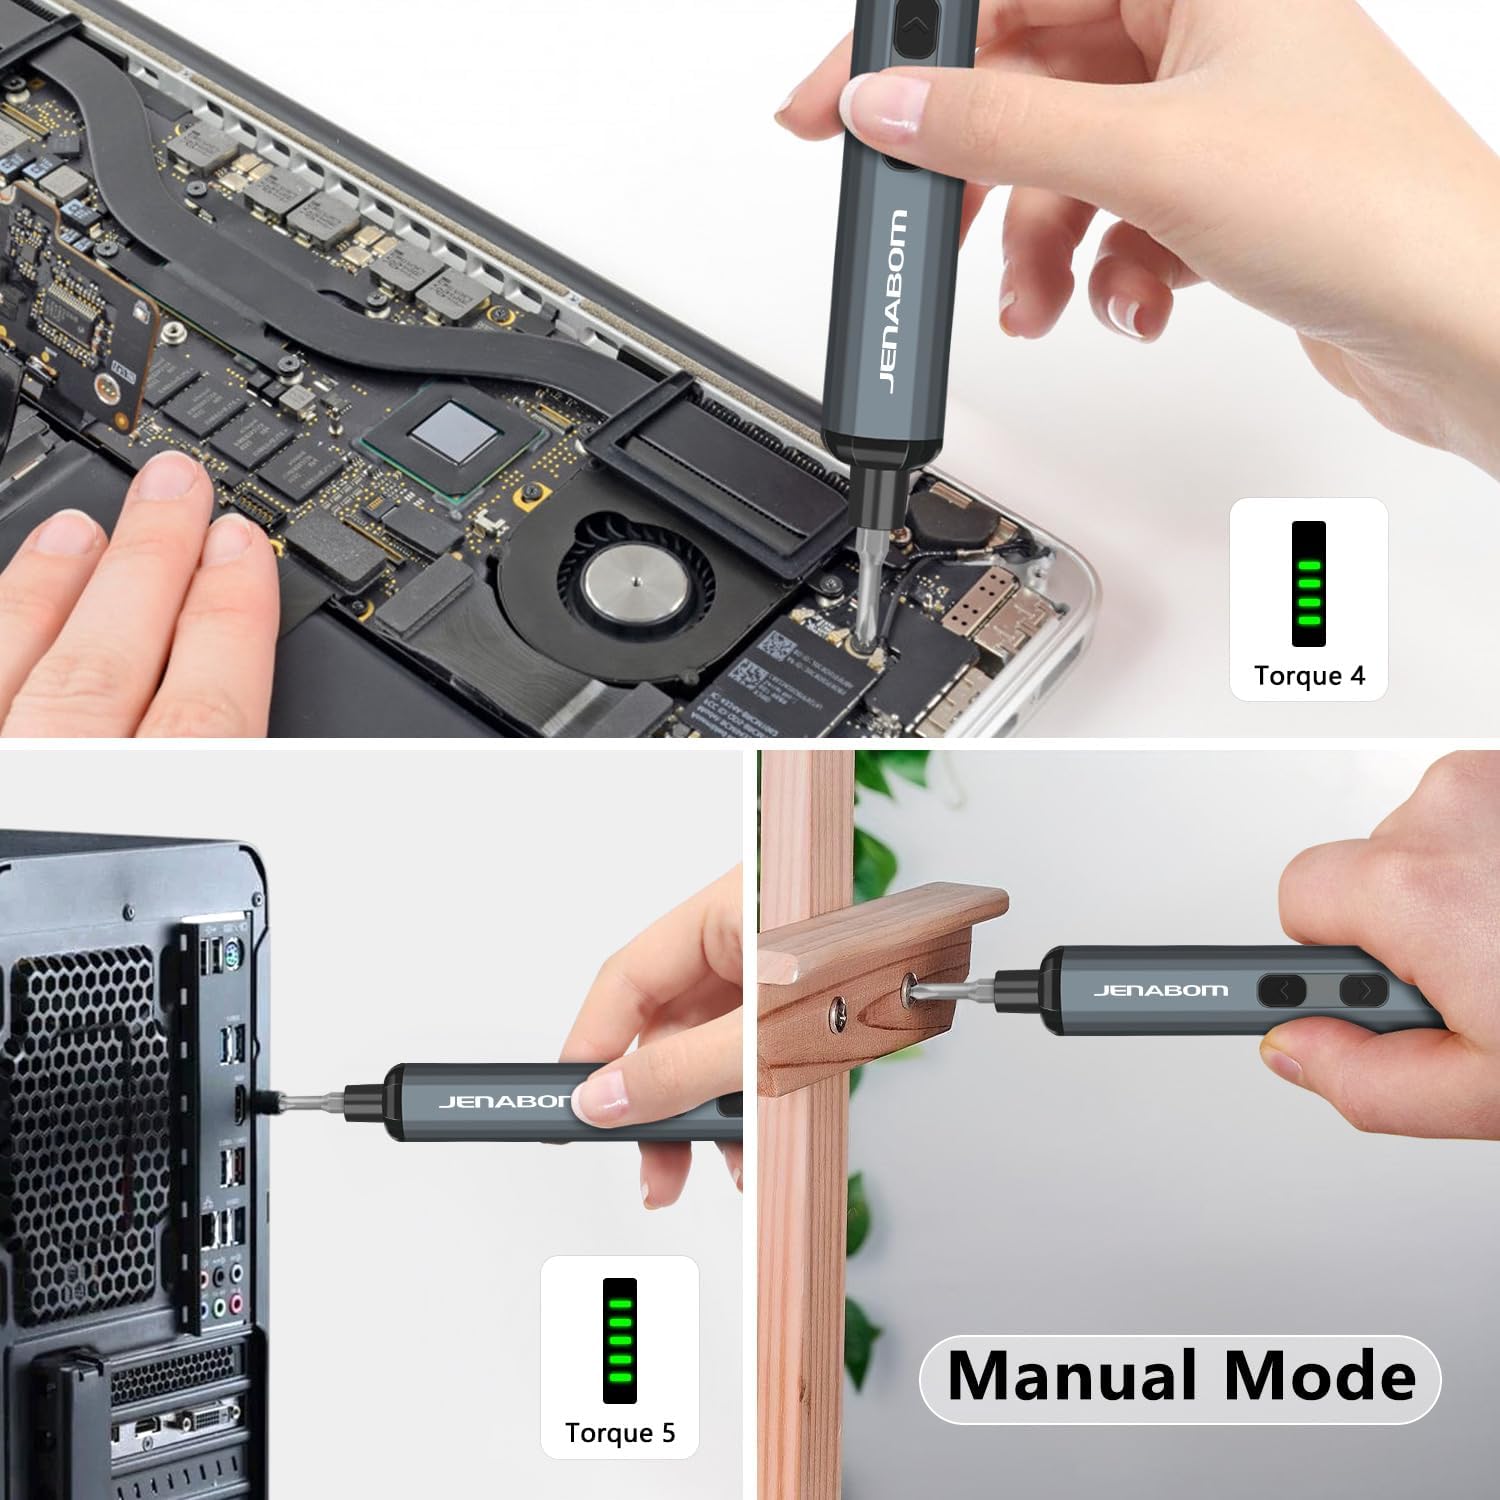
Image 5.2: The screwdriver being used for computer assembly and demonstrating its manual mode capability.
5.3 LED beligting
The integrated LED light illuminates the work area, making it easier to see screw holes and small components, especially in low-light conditions.
- Druk die LED-ligskakelaar om die lig aan of af te skakel.
6. Onderhoud
6.1 Skoonmaak
- Wipe the screwdriver and bits with a clean, dry cloth after each use to remove dust and debris.
- Moenie harde chemikalieë of skuurmiddels gebruik nie.
- Ensure the charging port is free of dust and moisture.
6.2 Berging
- Store the screwdriver and all accessories in the provided magnetic storage case when not in use. This protects the components and keeps them organized.
- Berg in 'n koel, droë plek, weg van direkte sonlig en uiterste temperature.
- Hou buite bereik van kinders.
6.3 Batterysorg
- Om die batterylewe te verleng, vermy om die battery heeltemal te dreineer voordat dit herlaai word.
- If storing for extended periods, charge the battery to approximately 50% every 3-6 months.
7. Probleemoplossing
| Probleem | Moontlike oorsaak | Oplossing |
|---|---|---|
| Screwdriver does not turn on/rotate. | Lae battery. | Charge the screwdriver fully using the provided Type-C cable. |
| Skroewedraaier het nie krag nie of stop tydens gebruik. | Lae battery. | Herlaai die battery. |
| Bit slips or does not engage screw. | Incorrect bit size/type. Worn bit. | Ensure the correct bit is selected for the screw head. Replace worn bits. |
| Screwdriver cannot loosen/tighten a screw. | Screw is too tight for electric torque. | Use the manual mode for additional torque (up to 3 Nm). Apply steady pressure. |
| LED-lig skakel nie aan nie. | LED light switch off. Low battery. | Press the LED light switch. Charge the screwdriver. |
8. Spesifikasies
- Handelsmerk: JENABOM
- Model: B0D49FP524
- Kragbron: Koordelektries (vir laai)
- Battery: 350mAh Litiumioon (ingesluit)
- Electric Torque: 0.1 Nm - 0.35 Nm
- Manual Torque: Tot 3 Nm
- Bits Included: 64 S2 Staalpunte
- Laaipoort: USB Tipe-C
- Kenmerke: LED Lighting, Magnetic Bit Holder, Magnetic Storage Case, Battery Level Display
- Item gewig: Ongeveer 1.19 pond (totale pakket)
- Pakket afmetings: Ongeveer 9.21 x 3.9 x 1.1 duim
9. Veiligheidsinligting
- Always wear appropriate eye protection when using power tools.
- Hou jou werkarea skoon en goed belig. Deurmekaar of donker areas nooi ongelukke uit.
- Moenie elektriese gereedskap in plofbare atmosfeer gebruik nie, soos in die teenwoordigheid van vlambare vloeistowwe, gasse of stof.
- Hou kinders en omstanders weg terwyl 'n elektriese gereedskap gebruik word. Afleidings kan veroorsaak dat jy beheer verloor.
- Vermy toevallige aanskakeling. Maak seker dat die skakelaar in die af-posisie is voordat u aan die batterypak koppel, die gereedskap optel of dra.
- Moenie oorreik nie. Hou te alle tye behoorlike voet en balans.
- Use the correct tool for your application. Do not force small tools or attachments to do the job of a heavy-duty power tool.
- Ontkoppel die batterypak van die kraggereedskap voordat enige aanpassings gemaak word, bykomstighede verander word of kraggereedskap gestoor word.
- Berg ledige elektriese gereedskap buite bereik van kinders en moenie toelaat dat persone wat nie vertroud is met die elektriese gereedskap of hierdie instruksies nie die elektriese gereedskap gebruik nie.
- Onderhou elektriese gereedskap. Kyk vir wanbelyning of binding van bewegende dele, breek van dele en enige ander toestand wat die kraggereedskap se werking kan beïnvloed. Indien beskadig, laat die elektriese gereedskap herstel voor gebruik.
- Gebruik die elektriese gereedskap, bykomstighede en gereedskappunte ens. in ooreenstemming met hierdie instruksies, met inagneming van die werksomstandighede en die werk wat uitgevoer moet word.
10. Waarborg en Ondersteuning
For warranty information or technical support, please refer to the product packaging or contact JENABOM customer service directly through the retailer where the product was purchased. Please have your model number (B0D49FP524) and purchase date available when contacting support.
You can also visit the official JENABOM store on Amazon for more information: JENABOM Store
Ask a question about this manual
Ask about setup, troubleshooting, compatibility, parts, safety, or missing instructions. Manuals+ will review the question and use this page’s manual context to help answer it.