1. Belangrike veiligheidsinligting
Please read all instructions carefully before installation and use. Failure to follow these instructions may result in product damage, vehicle damage, or personal injury.
- Professionele installasie word aanbeveel: If you lack experience with vehicle accessory installation, it is strongly recommended to have this product installed by a qualified professional.
- Self-Installation Warning: If you choose to install the product yourself, proceed with extreme caution and at your own risk. The manufacturer is not responsible for any accidents, malfunctions, or defects caused by improper installation.
- Wringkrag spesifikasies: Always tighten all mounting bolts to the specified torque values. Refer to the detailed installation guide for specific torque requirements.
- Gereelde inspeksie: Periodically inspect all mounting hardware and bolts for tightness. Re-tighten as necessary using a torque wrench to maintain proper security.
- Laai kapasiteit: Do not exceed the maximum load capacity specified for your vehicle's roof rails and the Pioneer Platform. Overloading can compromise vehicle stability and safety.
- Cargo Securement: Always secure cargo properly using appropriate ropes, straps, or mesh to prevent shifting or detachment during transit.
Note: Installation images provided in this manual are for illustration purposes only and may not depict your exact vehicle model or configuration.
2. Produk verbyview
The RHINO-RACK Pioneer Platform with SX Legs is a robust and versatile roof cargo system designed to expand your vehicle's carrying capacity. It is ideal for transporting outdoor gear, luggage, and other items securely.
The platform features a durable, sleek black finish and is treated for rust and fade prevention, ensuring longevity and aesthetic appeal. The 5-series design includes additional accessory channels at the front and rear, enhancing modular setup capabilities for various accessories.
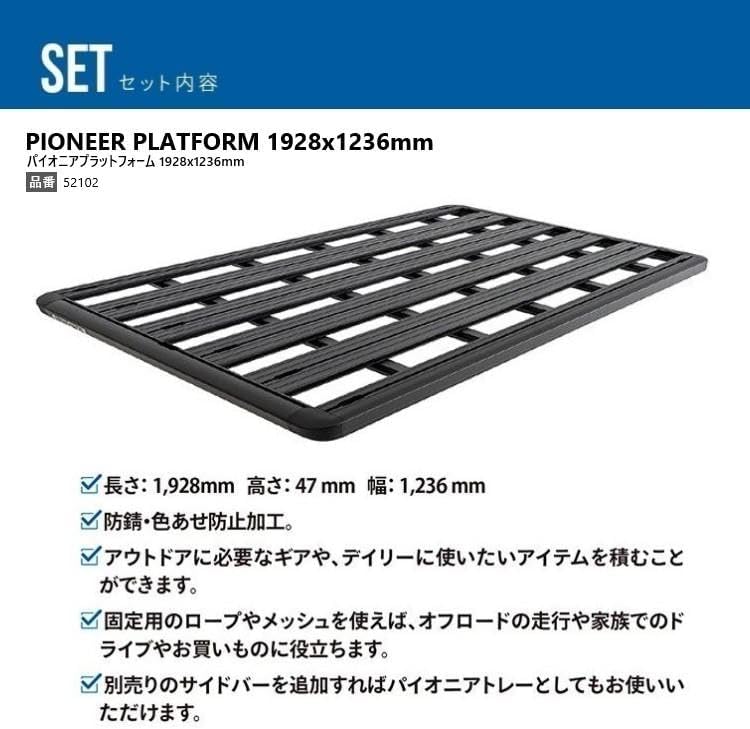
Image: Pioneer Platform Components and Features. This image displays the Pioneer Platform, highlighting its dimensions (1928mm length, 47mm height, 1236mm width) and key features such as rust and fade prevention, suitability for outdoor gear, and compatibility with securing ropes and mesh.

Image: Vortex SX Leg Components and Features. This image shows the Vortex SX Leg, designed for vehicles with roof rails. It emphasizes features like quick and easy installation/removal, integrated security lock system, and suitability for light off-road use.
3. Pakketinhoud
Verifieer dat alle komponente teenwoordig en onbeskadig is voordat u met die installasie begin.
- Pioneer Platform (1928mm x 1236mm), Part No. 52102: 1 unit
- Vortex SX Leg (x4), Part No. SX100: 1 set
- Installation Hardware (bolts, washers, nuts, etc.)
- Simple English Instruction Manual
4. Verenigbaarheid
This Pioneer Platform with SX Legs mounting kit (Model JB1265) is compatible with the following vehicles, provided they have existing roof rails. Please note that platform drilling may be required for installation on these models.
- Toyota Land Cruiser Prado 120 series (5-door, 4WD, with roof rails) - Model years: March 2003 to November 2009
- Toyota Land Cruiser Prado 150 series (5-door, 4WD, with roof rails) - Model years: November 2009 onwards
- Jeep Grand Cherokee WJ (WG 4-door, 4WD, with roof rails)
- Toyota Land Cruiser Prado 90 series (with roof rails) - Model years: July 1996 onwards
- Toyota Hilux Surf 210 series (with roof rails) - Model years: October 2002 onwards
5. Opstelling en installering
The installation process involves attaching the SX Legs to your vehicle's existing roof rails and then securing the Pioneer Platform to the SX Legs. Platform drilling may be required for certain vehicle models as noted in the compatibility section.
5.1 Voor-installasie tjeks
- Ensure your vehicle's roof rails are clean and free from debris.
- Verify all package contents are present and undamaged.
- Gather necessary tools, including a torque wrench, measuring tape, and any tools required for drilling if applicable.
5.2 Attaching SX Legs to Roof Rails
- Position the SX Legs evenly along your vehicle's roof rails, ensuring proper spacing as per the detailed instruction manual.
- Secure the SX Legs to the roof rails using the provided mounting hardware. Hand-tighten initially.
- Once all legs are in place, use a torque wrench to tighten the bolts to the manufacturer's specified torque settings.
5.3 Mounting the Pioneer Platform
- Carefully lift the Pioneer Platform onto the installed SX Legs. It is recommended to have assistance for this step due to the platform's size and weight.
- Align the platform with the mounting points on the SX Legs. If drilling is required for your vehicle model, mark and drill the necessary holes in the platform according to the detailed instructions.
- Secure the platform to the SX Legs using the provided bolts and hardware. Hand-tighten initially.
- Once aligned, use a torque wrench to tighten all bolts to the specified torque settings.
5.4 Na-installasie kontrole
After installation, gently shake the platform to ensure it is securely mounted and there is no excessive movement. Double-check all bolts with a torque wrench.
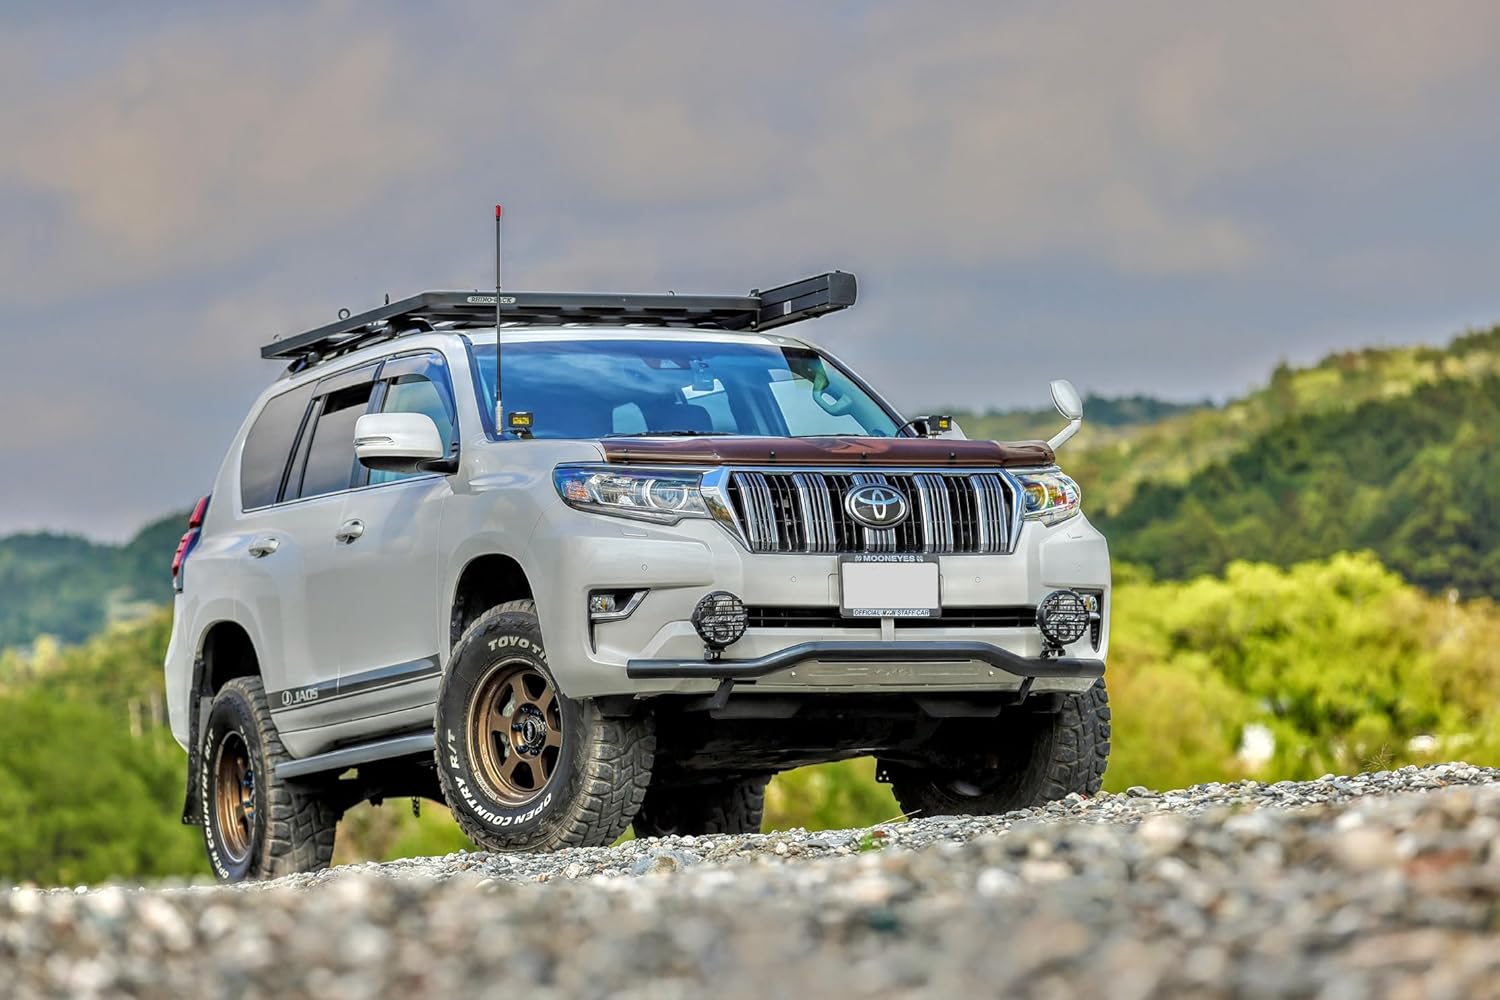
Image: Installed Pioneer Platform on a vehicle (Front View). This image shows the Pioneer Platform and SX Legs installed on a vehicle, viewed from the front. It illustrates the overall appearance of the system when mounted.

Image: Installed Pioneer Platform on a vehicle (Rear View). This image provides a rear view of the Pioneer Platform and SX Legs installed on a vehicle, showcasing the system's profile from the back.
6. Bedryfsinstruksies
The Pioneer Platform is designed for secure cargo transport. Follow these guidelines for optimal use:
- Vragverspreiding: Distribute weight evenly across the platform. Avoid concentrating heavy loads in one area.
- Veilige vrag: Always use appropriate tie-down straps, ropes, or cargo nets to firmly secure all items to the platform. Ensure there is no possibility of movement during transit.
- Kontroleer klarings: Before driving, ensure that all cargo is below the maximum height clearance for your vehicle and does not obstruct your view.
- Aërodinamika: Be aware that carrying cargo on the roof can affect your vehicle's aerodynamics and fuel efficiency. Adjust driving speed accordingly.
- Off-Road Use: When driving off-road, ensure cargo is extra secure to withstand bumps and vibrations. Regularly check cargo security during extended off-road trips.
7. Onderhoud
Regular maintenance will ensure the longevity and safe operation of your Pioneer Platform.
- Skoonmaak: Clean the platform and legs regularly with mild soap and water. Avoid abrasive cleaners or solvents that could damage the finish.
- Boutkontroles: Periodically (e.g., monthly or before long trips) check all mounting bolts for tightness using a torque wrench. Re-tighten to specified torque values if necessary.
- Inspekteer vir skade: Inspect the platform and legs for any signs of damage, cracks, or corrosion. Replace any damaged components immediately.
- Smering: If any moving parts (e.g., accessory channels) become stiff, apply a suitable lubricant as recommended by the manufacturer.
8. Probleemoplossing
Hierdie afdeling spreek algemene probleme aan wat jy mag teëkom.
8.1 Platform Feels Loose After Installation
- Oplossing: Re-check all mounting bolts on both the SX Legs and the Pioneer Platform. Ensure they are tightened to the specified torque settings using a torque wrench. If the issue persists, consult a professional installer.
8.2 Oormatige windgeraas
- Oplossing: Wind noise can be common with roof-mounted accessories. Ensure no gaps exist between the platform and legs. Check if any accessories mounted on the platform are causing turbulence. Consider adjusting the position of the platform if possible, or adding a wind fairing (sold separately) if available for your model.
8.3 Difficulty Securing Cargo
- Oplossing: Ensure you are using appropriate tie-down methods for your cargo type. Utilize the accessory channels on the platform for versatile attachment points. Consider investing in specialized cargo securing accessories if needed.
9. Spesifikasies
| Kenmerk | Detail |
|---|---|
| Modelnommer | JB1265 |
| Platform afmetings | 1928 mm x 1236 mm |
| Kleur | Swart |
| Produk Tipe | Platform + Legs |
| Montage tipe | Bout |
| Opvoubaar | Nee |
| Geskatte produkgewig | 300 kg (Note: This may refer to maximum load capacity rather than product weight. Refer to your vehicle's manual for roof load limits.) |
10. Waarborg en Ondersteuning
Waarborg: The product specifications indicate "Warranty description: None." Please refer to your point of purchase or the official RHINO-RACK website for any applicable warranty information or policies that may apply in your region.
Kliëntediens: For technical assistance, missing parts, or further inquiries, please contact the retailer where you purchased the product or visit the official RHINO-RACK support channels.