BSP D9
BSP D9 Game Controller User Manual
Model: D9
1. Inleiding
The BSP D9 Game Controller is a versatile gaming accessory designed to enhance your mobile and PC gaming experience. It supports a wide range of devices including iPhones, iPads, Android phones and tablets, PCs, Nintendo Switch, and PlayStation consoles. Featuring advanced Hall Effect joysticks and triggers, programmable back buttons, and a stretchable design, the D9 controller provides precise control and comfortable gameplay across various platforms.
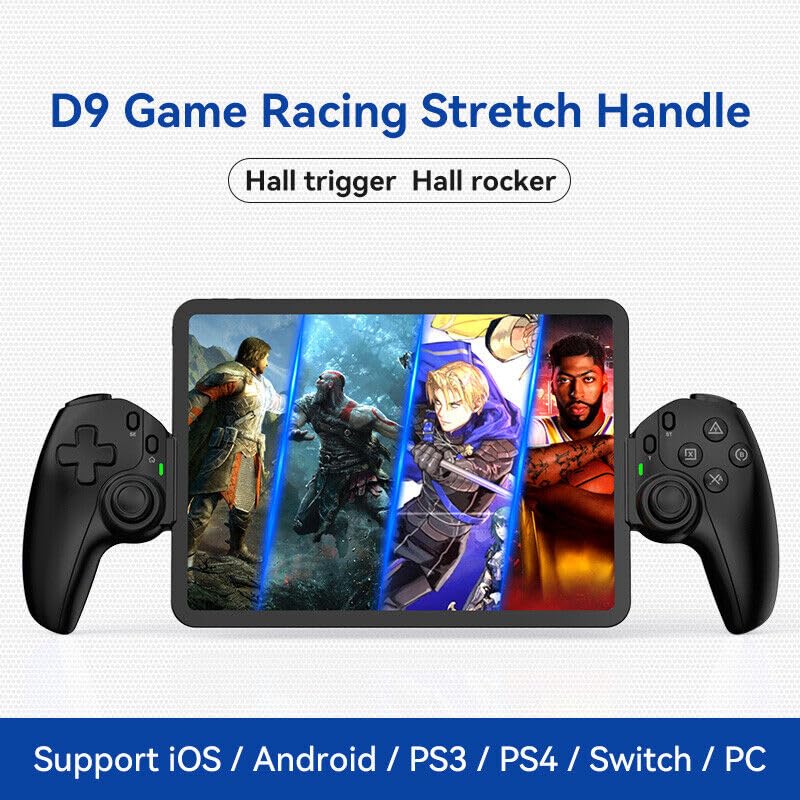
Figure 1.1: The BSP D9 Game Controller attached to a tablet, showcasing its design and compatibility with mobile gaming.
2. Produk verbyview: Key Details
Familiarize yourself with the various buttons and components of your D9 Game Controller.

Figure 2.1: Detailed diagram of the D9 controller's button layout, including the Cross Key, SELECT, HOME, START, A/B/X/Y buttons, L1/R1, L2/R2 triggers, M1/M2 back buttons, Left/Right Sticks (L3/R3), Status Indicator, and Charging Indicator.
- Cross Key (D-Pad): Rigtinginvoer.
- Linkerstok/L3: Left analog joystick, press down for L3.
- SELECT -knoppie: Function button, typically for menu selection.
- TUIS-knoppie: Power on/off, mode switching, return to home screen.
- Status aanwyser: Shows connection status and mode.
- Laai aanwyser: Displays battery charging status.
- Regterstok/R3: Right analog joystick, press down for R3.
- A/B/X/Y-knoppies: Standaard aksieknoppies.
- START-knoppie: Function button, typically for pausing or starting games.
- TURBO-knoppie: Activates/deactivates turbo function for assigned buttons.
- L1/R1-knoppies: Skouerknoppies.
- L2/R2-snellers: Analoog snellers.
- M1/M2-knoppies: Programmeerbare terugknoppies.
3. Kenmerke
3.1 Hall Effect Triggers and Joysticks
The D9 controller is equipped with advanced Hall Effect technology for both its triggers and joysticks. This provides superior precision and durability compared to traditional potentiometers.

Figure 3.1: Explanation of Hall Effect Triggers and Joysticks, highlighting 0.1mm accuracy for triggers and benefits like no drift issues, no dead zone, long lifespan, and precise control for joysticks.
- Hall-effek snellers: Provide 0.1mm accuracy for precise micro-operations in games.
- Hall-effek-joysticks: Eliminate drift issues, maintain stable trajectory, offer precise positioning, and provide a smooth feel without stuttering.
3.2 Turbo-funksie
The Turbo function allows you to set automatic rapid firing for specific buttons, giving you an advantage in vinnige speletjies.

Figure 3.2: The Turbo function allows setting A/B/X/Y, L1/R1, L2/R2 buttons for rapid fire. Three adjustable turbo speeds are available: 8 shots/s, 15 shots/s, and 25 shots/s.
3.3 Macro Programming Function
The M1 and M2 back buttons can be programmed to execute complex key combinations with a single press, reducing repetitive actions and extending controller lifespan.

Figure 3.3: Instructions for setting and canceling macro programming on the M1 and M2 back buttons. Macros can be assigned to A/B/X/Y/L1/R1/L2/R2/Cross Key combinations.
3.4 Stretchable Design
The controller features a stretchable design to accommodate a wide range of smartphones and tablets, ensuring a secure fit and comfortable grip.

Figure 3.4: The controller supports device lengths from 130mm to 280mm (5-11 inches) and a maximum thickness of 13mm. It is perfectly compatible with iPhone 15 series and supports silicone & clear phone cases.
4. Verenigbaarheid
The BSP D9 Game Controller offers broad compatibility with various operating systems and gaming platforms, transforming your mobile device into a portable gaming console.

Figure 4.1: The controller supports streaming & cloud gaming (PS Remote Play, Xbox Game Pass, Steam Link, Rainway, NVIDIA GeForce NOW, Moonlight Game Streaming, Apple Arcade), direct play on iOS devices (Genshin Impact, Call of Duty Mobile, Diablo Immortal, Minecraft, Roblox), and direct play on Android devices (Call of Duty Mobile, Diablo Immortal, Minecraft, NBA 2K, Asphalt).
- Bedryfstelsels: iOS, Android, Windows (PC).
- Consoles: Nintendo Switch, PlayStation (PS3, PS4, PS5 via remote play).
- Wolkspeletjies: Supports services like Xbox Game Pass, PS Remote Play, Steam Link, NVIDIA GeForce NOW, and more.
- Direct Play: Compatible with popular mobile games on both iOS and Android.
5. Opstelling
5.1 Laai die beheerder
- Connect the provided USB-C charging cable to the charging port on the controller.
- Koppel die ander kant van die kabel aan 'n USB-kragbron (bv. rekenaar se USB-poort, muuradapter).
- The Charging Indicator light will illuminate during charging and turn off when fully charged.
5.2 Inserting Your Device
- Gently pull the two sides of the controller apart to extend the stretchable mechanism.
- Carefully place your smartphone or tablet into the central slot, ensuring it is securely seated. The controller supports devices with lengths between 130mm and 280mm and a maximum thickness of 13mm.
- The controller is designed to accommodate devices with slim cases.
5.3 Connecting to Your Device (Bluetooth Pairing)
The connection method varies slightly depending on your device's operating system.
Vir Android-toestelle:
- Druk en hou die TUIS button until the Status Indicator light begins to flash rapidly, indicating pairing mode.
- Op jou Android-toestel, gaan na Instellings > Bluetooth en skakel Bluetooth aan.
- Soek vir available devices and select "BSP-D9" or similar from the list.
- Once connected, the Status Indicator light on the controller will become solid.
Vir iOS-toestelle:
- Druk en hou die TUIS button until the Status Indicator light begins to flash rapidly.
- On your iOS device, go to Instellings > Bluetooth en skakel Bluetooth aan.
- Soek vir available devices and select "Xbox Wireless Controller" or "DUALSHOCK 4 Wireless Controller" (depending on the mode the D9 emulates for iOS compatibility) from the list.
- Once connected, the Status Indicator light on the controller will become solid.
For PC/Switch/PS (Wired/Wireless):
Refer to the specific connection instructions provided with your controller for PC, Switch, or PS modes, as these may involve different button combinations or wired connections.
6. Bedryfsinstruksies
6.1 Basic Button Functions
Refer to Section 2, "Product Overview: Key Details," for the layout and basic functions of all buttons (Cross Key, A/B/X/Y, L1/R1, L2/R2, Joysticks, SELECT, START, HOME).
6.2 Gebruik van die Turbo-funksie
- Druk en hou die TURBO knoppie.
- Terwyl jy vashou TURBO, press the button you wish to assign the turbo function to (e.g., A, B, X, Y, L1, R1, L2, R2). The button will now have turbo enabled.
- Om die turbospoed aan te pas, druk en hou die TURBO and then press the Right Stick (R3) up or down to cycle through the 3 available speeds (8, 15, 25 shots/s).
- To cancel the turbo function for a specific button, press and hold TURBO and press the assigned button again.
- To clear all turbo settings, press and hold TURBO and then press the SELECT button.
6.3 Programming Macro Buttons (M1/M2)
The M1 and M2 back buttons can be programmed to store a sequence of button presses.
How to Set a Macro:
- Druk en hou die KIES knoppie en die M1 (or M2) key for 2 seconds. The LED indicator light will flash quickly.
- Press the key(s) you want to set for the macro programming function (e.g., A+B+X+Y).
- After setting the sequence, press the M1 (or M2) key again. The LED light will become solid, indicating that the setting is complete.
- Once set, pressing M1 (or M2) will automatically execute the programmed key combination.
How to Cancel a Macro:
- Druk en hou die KIES knoppie en die M1 (or M2) key for 2 seconds. The LED indicator light will flash quickly.
- Druk die M1 (or M2) key again to clear the macro programming. (Note: Do not press other buttons at this time). The LED light will remain solid to confirm the setting is cleared.
7. Onderhoud
- Skoonmaak: Gebruik 'n sagte, droë lap om die beheerder skoon te maak. Moenie skuurmiddels of oplosmiddels gebruik nie.
- Berging: Bêre die beheerder op 'n koel, droë plek weg van direkte sonlig en uiterste temperature.
- Batterysorg: Om die batterylewe te verleng, vermy om die beheerder gereeld heeltemal te ontlaai. Laai dit gereeld, selfs al word dit nie vir lang tye gebruik nie.
- Vermy druppels: Beskerm die beheerder teen val en impakte, wat interne komponente kan beskadig.
8. Probleemoplossing
| Probleem | Moontlike oorsaak | Oplossing |
|---|---|---|
| Beheerder skakel nie aan nie. | Lae battery. | Charge the controller for at least 30 minutes. |
| Kan nie via Bluetooth koppel nie. | Beheerder nie in paringsmodus nie; Bluetooth-steuring; toestel Bluetooth af. | Ensure controller is in pairing mode (flashing LED). Turn off and on Bluetooth on your device. Move closer to the device. |
| Knoppies of joysticks reageer nie. | Connection issue; software glitch; physical damage. | Reconnect the controller. Restart your device. If problem persists, contact customer support. |
| Toestel pas nie in die beheerder nie. | Device dimensions exceed supported limits. | Ensure your device length is between 130-280mm and thickness is max 13mm. Remove bulky cases. |
9. Spesifikasies
- Model: D9
- Handelsmerk: BSP
- Verbinding: Bluetooth, Wired (for PC/Switch/PS, specific modes may vary)
- Supported Device Length: 130 mm - 280 mm (5 - 11 duim)
- Supported Device Thickness: Tot 13 mm
- Joystick/Trigger Technology: Saal-effek
- Programmeerbare knoppies: M1, M2 (back buttons)
- Turbo-funksie: Yes, with 3 adjustable speeds
- Vervaardiger: ShenZhen ShanWan Technology Co., Ltd.
- Eerste Beskikbare Datum: 30 Maart 2024
10. Waarborg en Ondersteuning
For warranty information and technical support, please refer to the documentation included with your purchase or visit the official BSP product support webwebwerf. Bewaar u bewys van aankoop vir waarborgeise.
Let wel: Spesifieke waarborgvoorwaardes en ondersteuningskontakbesonderhede kan per streek verskil.