Inleiding
This manual provides detailed instructions for the installation, operation, and maintenance of your NAPCAT 5MP Solar Wireless Security Camera Outdoor System. This system is designed to provide reliable outdoor surveillance with features such as solar power, high-definition video, advanced motion detection, and flexible storage options. Please read this manual thoroughly before using the product to ensure proper setup and optimal performance.

Figuur 1: oorview of the NAPCAT 5MP Solar Wireless Security Camera Outdoor System.
Wat is in die boks
Verifieer dat alle komponente in die pakket teenwoordig is voordat u met die installasie voortgaan.

Figuur 2: Pakketinhoud.
- Wireless NVR (1 unit)
- Draadlose Sekuriteitskameras (4 eenhede)
- Kragadapter (1 eenheid)
- HDMI-kabel (1 eenheid)
- 1m netwerkkabel (1 eenheid)
- 10ft (3m) USB-C Extension Cord (4 units)
- Sonpanele (4 eenhede)
- Solar Panel Mounting Bracket (4 units)
- USB-muis (1 eenheid)
- Camera Holding Bracket (2 units)
- Pack of Screws (4 packs)
- Reset Needle Pin (1 unit)
- Surveillance Poster (1 unit)
- Quick Start Guide (1 unit)
- Screw Positioning Stickers (4 units)
Opstelling
1. NVR Aanvanklike Opstelling
- Koppel die NVR:
- Connect the NVR to a monitor using the provided HDMI cable.
- Connect the NVR to your router using the provided network cable for internet access.
- Koppel die kragadapter aan die NVR en prop dit in 'n kragaansluiting. Die NVR sal outomaties aanskakel.
- Aanvanklike konfigurasie: Follow the on-screen prompts to complete the initial setup, including language selection, time zone, and creating an administrator password.

Figure 3: NVR Connection Setup.
2. Kamera- en sonpaneelinstallasie
The cameras are designed for outdoor use and are IP66 weatherproof. The solar panels provide continuous power to the cameras, eliminating the need for frequent battery charging.
- Laai kameras: Ensure cameras are sufficiently charged before installation. While solar panels provide continuous power, an initial charge may be beneficial.
- Kies installasie ligging: Select a location that provides optimal camera view and sufficient sunlight exposure for the solar panel. Ensure the camera is within range of the NVR's Wi-Fi signal.
- Mounting Options for Solar Panel:
- Option 1: Separate Installation: Mount the solar panel in a location with maximum sunlight exposure, and connect it to the camera using the provided USB-C extension cord. This allows for flexible placement of both the camera and the solar panel.
- Option 2: Integrated Installation: Mount the solar panel directly onto the camera bracket, ideal for locations where both can receive adequate sunlight.
- Veilige montering: Use the provided screws and mounting brackets to securely attach the cameras and solar panels to a wall or eave. Use the screw positioning stickers for accurate drilling.
- Connect Solar Panel to Camera: Plug the USB-C cable from the solar panel into the camera's charging port.

Figure 4: Solar Panel Installation Options.

Figure 5: Solar Power for Continuous Operation.
3. App-installasie en -paring
To access your camera system remotely and manage settings, download the "Napcat Life" app.
- Laai die toepassing af: Soek vir "Napcat Life" on the Google Play Store (for Android) or Apple App Store (for iOS) and install it on your smartphone or tablet.
- Skep rekening: Open the app and follow the instructions to create a new account.
- Voeg toestel by:
- On the NVR interface, navigate to the device pairing section.
- In the Napcat Life app, tap "Add Device" and scan the QR code displayed on the NVR monitor.
- Volg die aanwysings op die skerm in die toepassing om die paringsproses te voltooi.

Figure 6: Napcat Life App Interface.
Die bedryf van die stelsel
1. Viewing Opsies
Your NAPCAT system offers multiple ways to view leef footage and recordings:
- Local Monitor (HDMI): Connect a monitor directly to the NVR via HDMI for local viewing without internet access. Use the included USB mouse for navigation.
- Smartphone App ("Napcat Life"): View live feeds, playback recordings, and manage settings remotely from your smartphone or tablet.
- Rekenaarkliënt: Install the NAPCAT PC client software on your computer for remote viewing en bestuur.
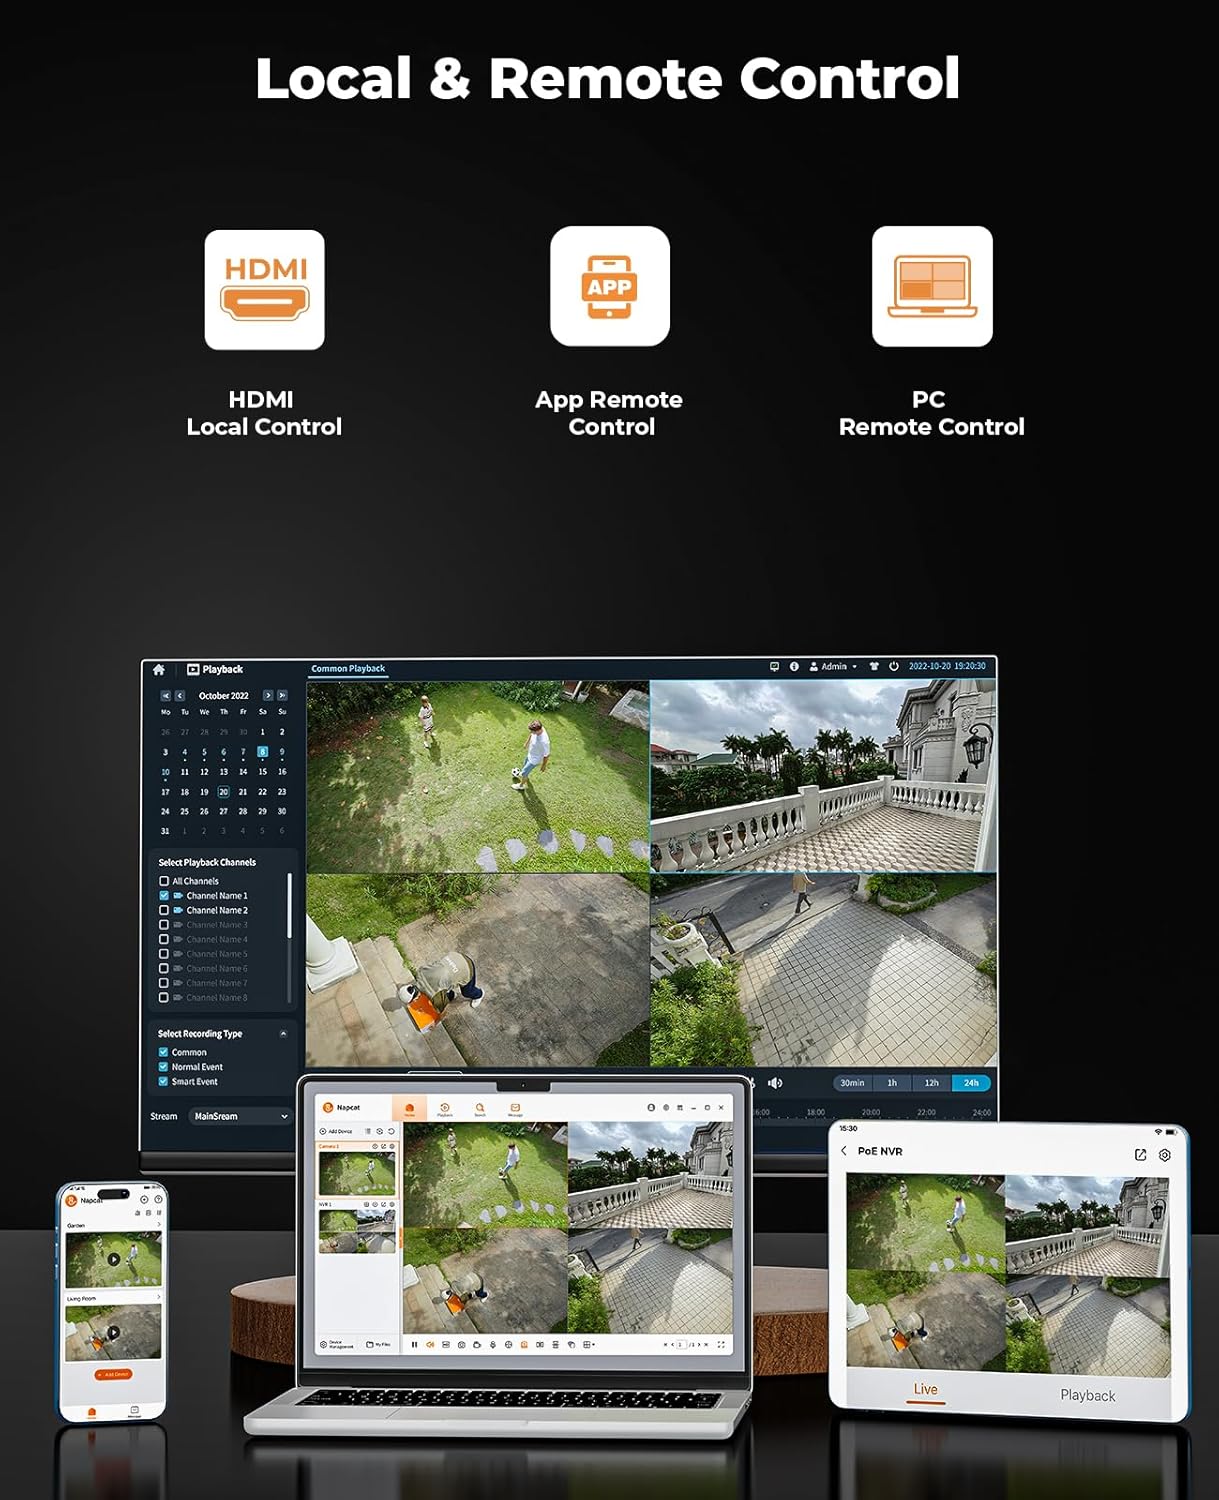
Figure 7: Local and Remote Control Options.

Figure 8: Multi-Device Viewing.
2. Videokwaliteit en Nagvisie
The cameras provide 5MP Super HD resolution, offering clearer images than traditional 1080p systems. They also feature advanced night vision capabilities.
- 5MP Super HD: Enjoy detailed and sharp video footage.
- Kleur Nag Visie: The system can capture full-color video even in low-light conditions, providing more informative footage than black-and-white night vision.
- 135° breed Viewhoek: Minimizes blind spots and provides extensive coverage.

Figure 9: 5MP Super HD Lens Technology.

Figure 10: Day and Color Night Vision Comparison.
3. Bewegingsopsporing en waarskuwings
The system is equipped with advanced detection features to minimize false alarms and provide timely notifications.
- PIR-sensor: Passive Infrared sensor detects heat signatures for accurate motion detection.
- Menslike/Voertuigopsporing: Advanced AI algorithms differentiate between humans, vehicles, and other moving objects, reducing irrelevant alerts.
- Strobe Lights and Siren Alarms: When motion is detected, the cameras can activate built-in strobe lights and a siren to deter intruders.
- Aanpasbare Aktiwiteitsones: Definieer spesifieke areas binne die kamera se view where motion detection should be active, ignoring other areas.
- Onmiddellike waarskuwings: Receive push notifications on your smartphone when motion is detected.

Figure 11: AI Human and Vehicle Detection.

Figure 12: Smart Deterrence with Strobe and Siren.

Figure 13: Customizable Activity Zones.
4. Tweerigting-klank
Elke kamera is toegerus met 'n ingeboude mikrofoon en luidspreker, wat tweerigtingkommunikasie moontlik maak.
- Communicate Remotely: Speak to visitors or deter unwanted guests directly through the camera using the Napcat Life app.

Figure 14: Two-Way Audio Communication.
5. Storage Options (No Monthly Fee)
The system offers flexible and expandable local storage solutions without recurring subscription fees.
- Ingesluit 32GB MicroSD-kaart: The NVR comes with a 32GB microSD card for immediate local storage.
- Expandable HDD: The system supports expandable local storage up to 16TB via an external Hard Disk Drive (HDD), which is not included.

Figure 15: Dual Storage Options.
6. Konnektiwiteit
The NVR supports robust connectivity options for stable and versatile placement.
- Ethernet-kabel: For a stable and reliable wired connection to your home network.
- 2.4/5GHz Dual-Band WiFi: Provides flexibility in NVR placement and ensures strong wireless connection to cameras.

Figure 16: Connectivity Options.
Onderhoud
- Skoonmaak: Vee die kameralense en sonpanele gereeld af met 'n sagte, damp lap om duidelike sig en doeltreffende sonkraglading te verseker. Vermy skuurmiddels.
- Battery gesondheid: While solar-powered, extreme weather or prolonged periods of low sunlight may affect battery levels. Monitor battery status via the app and ensure solar panels are free from obstructions.
- Firmware -opdaterings: Periodically check for firmware updates through the Napcat Life app or NVR interface. Updates often include performance improvements and security enhancements.
Probleemoplossing
| Probleem | Moontlike oorsaak | Oplossing |
|---|---|---|
| Camera not connecting to NVR. | Out of Wi-Fi range; low camera battery; interference. | Move camera closer to NVR; ensure solar panel is charging effectively or manually charge; reduce Wi-Fi interference. |
| Geen videostroom nie. | Camera powered off; NVR not powered; network issue. | Check camera power/battery; ensure NVR is plugged in; verify NVR network connection. |
| Gereelde vals bewegingswaarskuwings. | Sensitivity too high; objects like trees/pets triggering. | Adjust motion detection sensitivity in app; set up activity zones to exclude irrelevant areas; enable human/vehicle detection. |
| Swak nagsigkwaliteit. | Dirty lens; insufficient ambient light for color night vision. | Clean camera lens; ensure there's some ambient light for optimal color night vision, or rely on IR black-and-white mode. |
| Kan nie op afstand toegang tot die stelsel kry nie. | NVR not connected to internet; app issues; firewall settings. | Check NVR's internet connection; restart app/phone; ensure router firewall isn't blocking NVR access (consult router manual if needed). |
Spesifikasies
| Kenmerk | Detail |
|---|---|
| Modelnommer | N1S24 |
| Video-opname-resolusie | 5MP Super HD |
| Viewing Hoek | 135 grade |
| Nagsigreeks | 15 meter |
| Verbindingstegnologie | 2.4/5GHz Dual-Band WiFi |
| Kragbron | Solar Powered, Battery Powered (1 Lithium Ion battery included) |
| Ingesluit komponente | Power Adapter, Quick Start Guide, Solar Panels, WiFi NVR, Wireless Security Cameras |
| Aantal kanale | 8 |
| Spesiale kenmerke | Non-stop Solar Power, Wire-Free Installation, Expandable Local Storage, AI Detection, Spotlight Color Night Vision, Two-Way Audio, IP66 Weatherproof, Smart Deterrence |
| Berging | 32GB MicroSD card included, expandable up to 16TB HDD (not included) |
| Itemafmetings (L x B x H) | 30.5 x 25.4 x 20.3 Centimetres (Package) |
| Item gewig | 4.35 kg |
| Vervaardiger | NAPCAT |
Waarborg en Ondersteuning
For warranty information, technical support, or any inquiries regarding your NAPCAT security camera system, please contact NAPCAT customer support.
- Vervaardiger: NAPCAT
- Ondersteunings-e-pos: support@napcat.net
- Verwys asseblief na u aankoopdokumentasie vir spesifieke waarborgbepalings en -voorwaardes.