CREWORKS 9" x 24"
CREWORKS Mini Metaal Draaibank 9" x 24" Instruksiehandleiding
Model: 9" x 24" | Brand: CREWORKS
1. Inleiding
Thank you for choosing the CREWORKS 9" x 24" Mini Metal Lathe. This manual provides essential information for the safe operation, maintenance, and troubleshooting of your new machine. Please read this manual thoroughly before operating the lathe to ensure proper use and to prevent injury or damage.
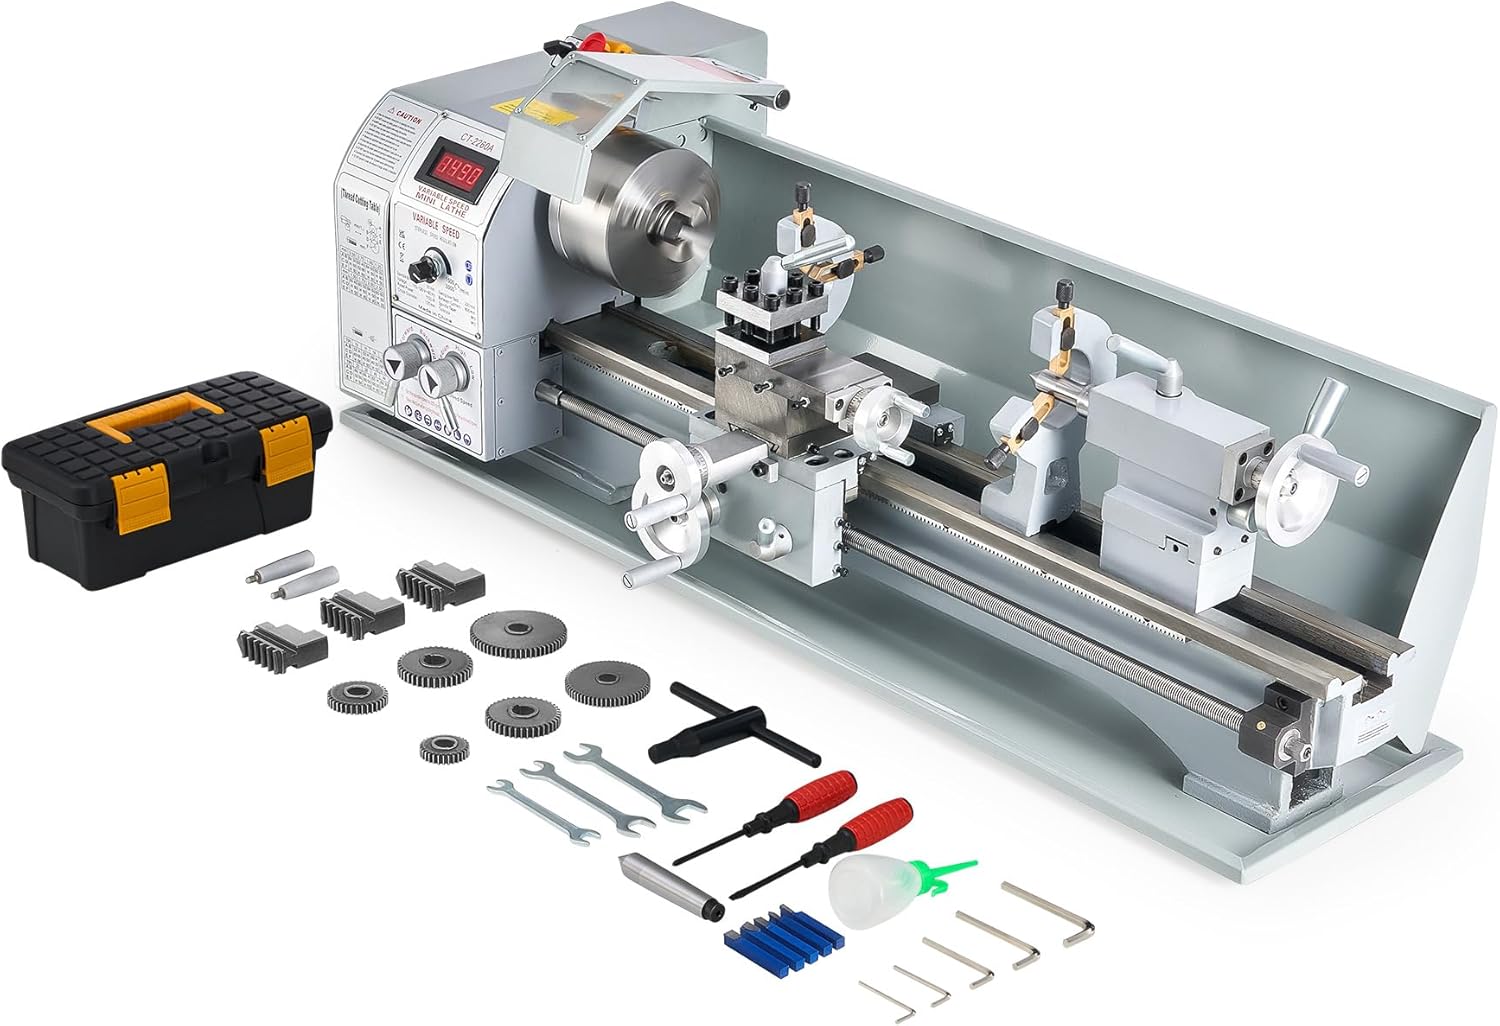
Figure 1.1: CREWORKS 9" x 24" Mini Metal Lathe with included accessories.
2. Veiligheidsinstruksies
Always prioritize safety when operating machinery. Failure to follow these instructions may result in serious injury or death.
- Lees die handleiding: Verstaan alle instruksies en waarskuwings voor operasie.
- Persoonlike Beskermende Toerusting (PPE): Always wear safety glasses or a face shield. Use hearing protection. Do not wear loose clothing, gloves, ties, or jewelry that can get caught in moving parts. Tie back long hair.
- Werksarea: Keep the work area clean, well-lit, and free from clutter. Ensure adequate space around the machine.
- Masjientoestand: Inspect the lathe for damage or loose parts before each use. Do not operate if damaged.
- Kragverbinding: Ensure the machine is properly grounded. Disconnect power before making adjustments, changing tools, or performing maintenance.
- Werkstuk Sekuriteit: Maak altyd seker dat die werkstuk stewig vas isamped in the chuck or collet.
- Chip verwydering: Never remove chips by hand while the machine is running. Use a brush or hook.
- Noodstop: Maak jouself vertroud met die ligging en werking van die noodstopknoppie.
- Toesig: Moet nooit die masjien sonder toesig laat terwyl dit aan die gang is nie.

Figuur 2.1: oorview of the lathe components, including the emergency stop button.
3. Komponente en Beheermaatreëls
Understanding the various parts of your lathe is crucial for effective and safe operation.
3.1 Hoofkomponente
- Kopstok: Houses the main spindle, motor, and gear train.
- tjok: Holds the workpiece securely. The CREWORKS lathe features a 3-jaw chuck.
- Waentjie: Moves along the bed, carrying the cross slide and tool post.
- Cross Slide: Moves perpendicular to the bed, allowing for facing operations.
- Compound Rest: Rotates and slides to allow for angled cuts and fine adjustments.
- Tool Post: Holds the cutting tools.
- Stootstok: Supports the end of long workpieces or holds drilling/reaming tools.
- Bed: The main frame of the lathe, providing precision guide rails for the carriage and tailstock.
- Loodskroef: Used for automatic feeding and threading operations.
3.2 Kontroles
- Power and Emergency Stop: Main power switch and immediate shutdown button.
- Vorentoe/Agtertoe skakelaar: Controls spindle rotation direction.
- Spoedaanpassingsknop: Varies the spindle speed.
- Digital Speed Display: Shows the current spindle RPM.
- Vervoer Handwiel: Manual movement of the carriage along the bed.
- Kruisskuifhandwiel: Manual movement of the cross slide.
- Compound Control Wheel: Manual movement of the compound rest.
- Tail Feed Handwheel: Advances the tailstock quill.
- Half Nut Lever: Engages the lead screw for threading.
Figure 3.1: Detailed diagram showing the main components and controls of the lathe.
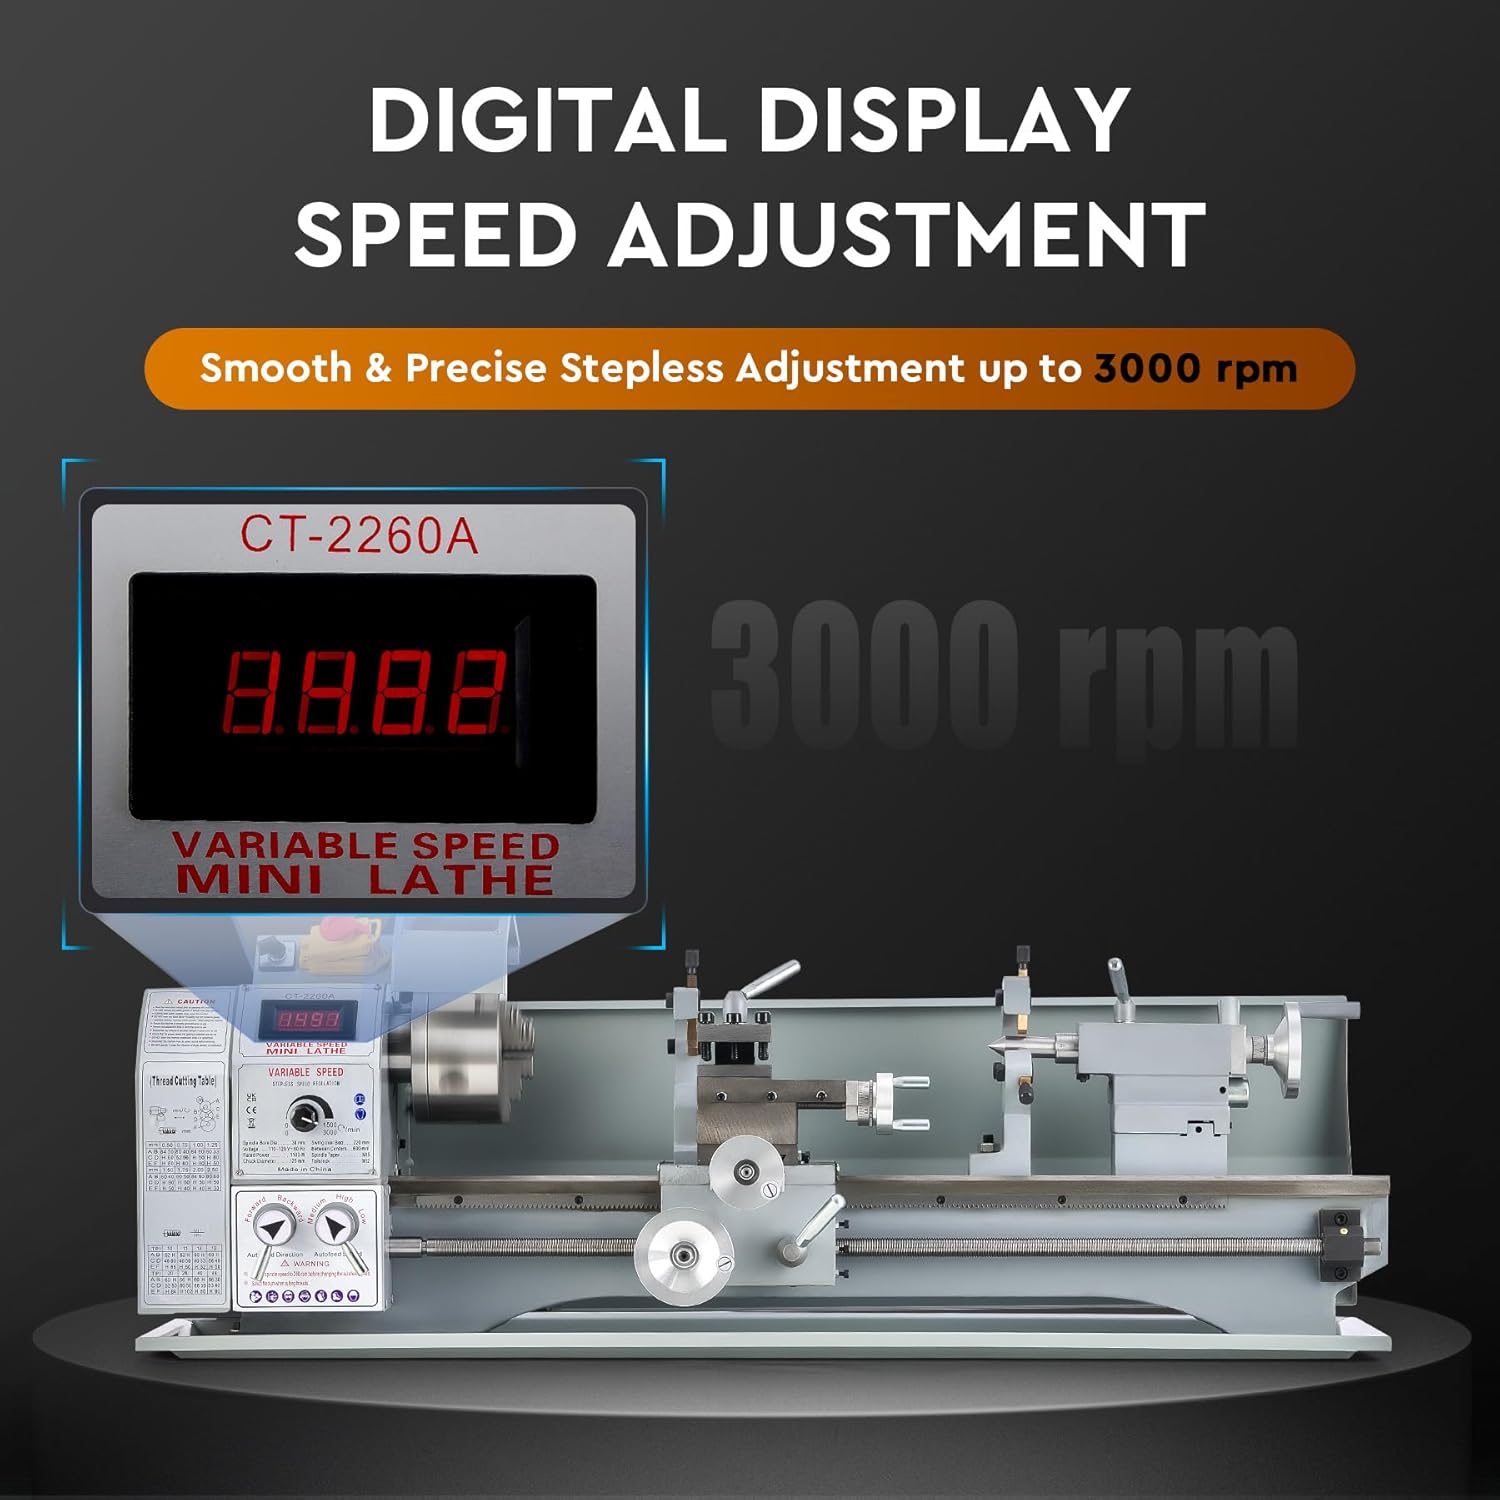
Figure 3.2: The digital display provides real-time spindle speed readings.
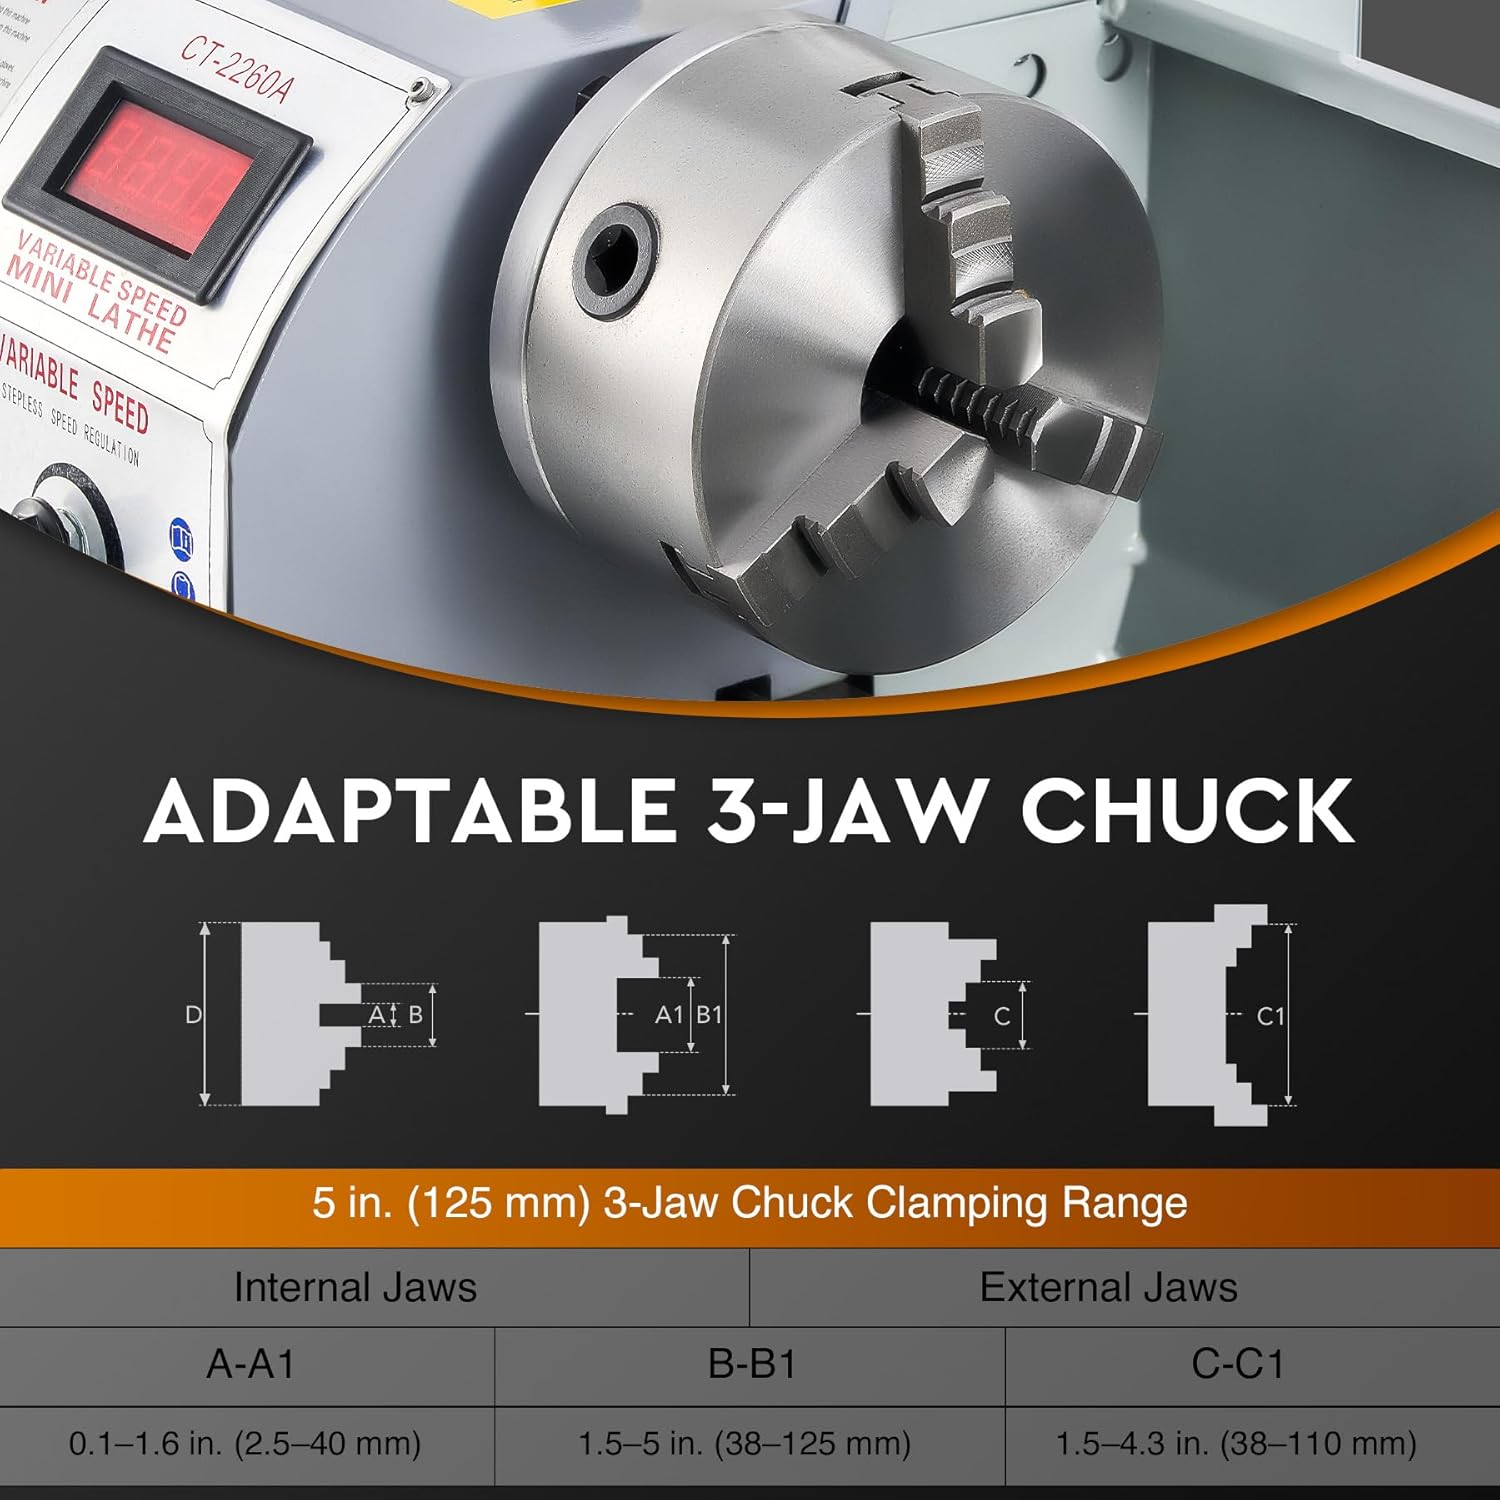
Figure 3.3: The 5-inch 3-jaw chuck is adaptable for various workpiece sizes.
4. Opstelling
4.1 Uitpak en plasing
- Carefully remove the lathe and all accessories from the packaging. Retain packaging for future transport or storage.
- Clean off any protective grease or oil from the machine surfaces using a suitable degreaser.
- Place the lathe on a sturdy, level workbench capable of supporting its weight (approximately 159 lbs / 72 kg). Ensure the workbench is stable and does not wobble.
- Secure the lathe to the workbench using appropriate fasteners through the mounting holes in the base.
4.2 Aanvanklike Kontrole
- Verify all moving parts move freely without excessive play or binding.
- Kontroleer dat alle hegstukke styf is.
- Ensure the chuck guard is properly installed and functions correctly.
- Koppel die kragkabel aan 'n geaarde elektriese aansluiting.
5. Operasie
5.1 Basiese werking
- Krag aan: Turn on the main power switch. The digital display should illuminate.
- Workpiece Mounting: Open the chuck jaws using the chuck key. Insert the workpiece, ensuring it is securely centered and clamped. Remove the chuck key before starting the machine.
- Gereedskap installasie: Loosen the tool post locking screw. Insert the cutting tool, ensuring it is at the correct height relative to the workpiece center. Tighten the locking screw.
- Spoedverstelling: Use the speed adjustment knob to set the desired spindle RPM. The digital display will show the current speed. The lathe supports speeds from 0 to 3000 rpm.
- Spindle Direction: Select forward or reverse rotation using the direction switch.
- Betrek Voer: For manual operation, use the carriage, cross slide, and compound handwheels. For automatic feed or threading, engage the half-nut lever (refer to threading charts for gear setup).
- Sny: Slowly advance the cutting tool into the workpiece. Monitor the cut and adjust feed rate as needed.
- Skakel af: After completing the operation, turn off the spindle, then the main power switch.
5.2 Aansoeke
This mini metal lathe is versatile and can perform various operations on materials such as wood, plastics, brass, and aluminum.
- Draai: Reducing the diameter of a workpiece.
- Gesig: Creating a flat surface on the end of a workpiece.
- Boor: Creating holes along the center axis using the tailstock.
- Threading: Sny van eksterne of interne drade.
- Sny: Parting off sections of material.

Figure 5.1: The lathe is suitable for a wide range of metalworking and other material applications.
6. Onderhoud
Regular maintenance ensures the longevity and precision of your CREWORKS Mini Metal Lathe.
6.1 Skoonmaak
- After each use, clean all chips and debris from the machine, especially from the bedways, lead screw, and chuck. Use a brush or shop vacuum.
- Wipe down all surfaces with a clean cloth.
6.2 Smering
- Regularly apply a thin coat of machine oil to the bedways, lead screw, and other sliding surfaces to prevent rust and ensure smooth operation.
- Consult the lubrication points diagram (if available in a more detailed manual) for specific oiling requirements.
6.3 Adjustments and Inspections
- Periodically check the tension of the drive belts.
- Inspect the chuck jaws for wear or damage.
- Ensure the tailstock is aligned correctly.
- Check the condition of the metal gear set for any signs of wear or damage.
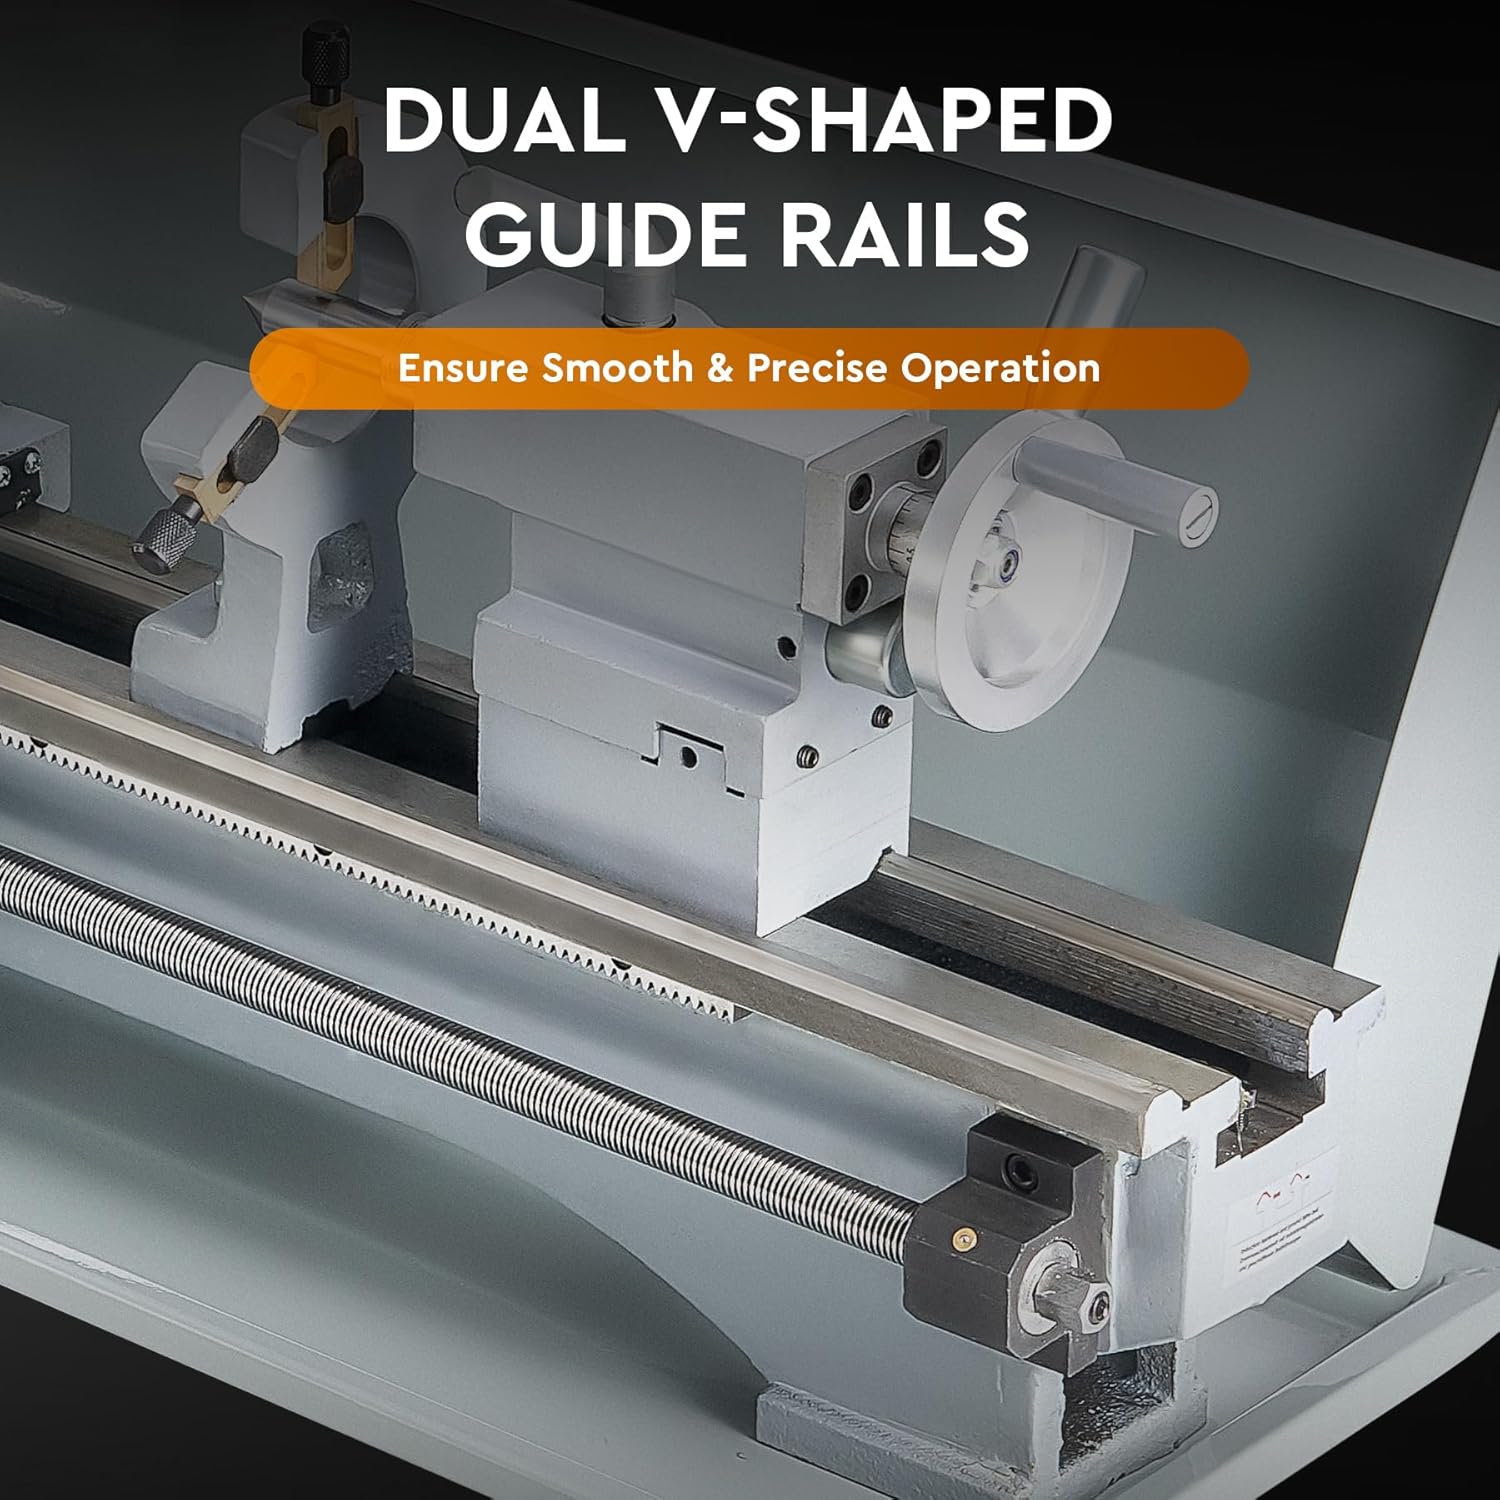
Figure 6.1: The dual V-shaped guide rails require regular cleaning and lubrication for smooth and precise operation.

Figure 6.2: The metal gear set ensures strong and efficient power transmission and should be inspected periodically.
7. Probleemoplossing
This section addresses common issues you might encounter with your lathe.
| Probleem | Moontlike oorsaak | Oplossing |
|---|---|---|
| Lathe does not power on. | No power supply; Emergency stop engaged; Loose wiring. | Check power cord and outlet; Disengage emergency stop; Inspect wiring (if qualified). |
| Spindle does not rotate. | Speed knob set to zero; Direction switch not engaged; Motor fault. | Increase speed; Select forward/reverse; Contact support if motor fault suspected. |
| Oormatige vibrasie of geraas. | Unbalanced workpiece; Loose components; Worn bearings; Insufficient lubrication. | Ensure workpiece is balanced and secure; Tighten all fasteners; Lubricate moving parts; Contact support for bearing issues. |
| Poor surface finish on workpiece. | Dull cutting tool; Incorrect speed/feed rate; Workpiece not rigid; Lathe not level. | Sharpen/replace tool; Adjust speed/feed; Ensure workpiece is secure; Level the lathe. |
8. Spesifikasies
Technical specifications for the CREWORKS 9" x 24" Mini Metal Lathe.
| Kenmerk | Spesifikasie |
|---|---|
| Model | 9" x 24" |
| Gegradeerde krag | 1.5 HP (1100W) |
| Swaai oor die bed | 8.7 duim (220 mm) |
| Afstand tussen sentrums | 23.6 duim (600 mm) |
| Spilboring | 1.5 duim (38 mm) |
| Chuck deursnee | 5 duim (125 mm) |
| Max. Spindle Speed | 3000 rpm |
| Stootstok Taper | MT#2 |
| Spil Taps | MT#5 |
| Metriese draadreeks | 0.3–3 mm |
| Inch Thread Range | 8–44 tpi |
| Produkafmetings (L x B x H) | 39.57 x 13.78 x 16.93 duim |
| Netto gewig | 158.7 lbs (72 kg) |
| Materiaal | Cast Iron, Stainless Steel, ABS |

Figuur 8.1: Visuele voorstelling van belangrike spesifikasies en afmetings.
9. Waarborg en Ondersteuning
For warranty information or technical support, please refer to the contact details provided at the point of purchase or visit the official CREWORKS webwebwerf.
- Kliëntediens: For assistance with product issues, setup, or operation, please contact CREWORKS customer service.
- Terugsendings: This product typically includes a 30-day easy return policy. Please check your purchase details for specific terms.
Let wel: Any unauthorized modifications or repairs to the machine may void the warranty.
Ask a question about this manual
Ask about setup, troubleshooting, compatibility, parts, safety, or missing instructions. Manuals+ will review the question and use this page’s manual context to help answer it.