Promethean UST-P1
Promethean UST-P1 DLP-projektor gebruikershandleiding
Model: UST-P1 | Brand: Promethean
1. Inleiding
This manual provides essential information for the safe and efficient operation of your Promethean UST-P1 DLP Projector. The Promethean UST-P1 is a WXGA Ultra Short Throw (UST) Projector designed for various applications, capable of displaying 3,300 Lumens at its brightest setting with a native resolution of 1280x800. It features DLP technology for higher contrast and reduced pixel visibility, and is 3D capable.
Wat is in die boks
Maak asseblief seker dat al die items wat hieronder gelys word, teenwoordig en in 'n goeie toestand is wanneer u dit uitpak:
- Promethean UST-P1 DLP Projector
- HDMI kabel
- Afstandbeheer
- Kragkoord
- Gebruikershandleiding (hierdie dokument)

Figure 1.1: Promethean UST-P1 Projector with its bundled accessories, including the projector unit, HDMI cable, remote control, and power cord.

Figuur 1.2: Bo view of the Promethean UST-P1 Projector, showing the lens assembly and control panel area.
2. Opstelling
2.1 Projektorplasing
The Promethean UST-P1 is an Ultra Short Throw (UST) projector, designed to project a large image from a very short distance. Place the projector on a stable, flat surface directly in front of the projection screen or wall. Ensure there are no obstructions between the projector lens and the projection surface.
2.2 Koppel aan krag
- Connect the supplied power cord to the AC IN port on the rear of the projector.
- Steek die ander kant van die kragkabel in 'n geaarde elektriese aansluiting.
2.3 Verbinding van videobronne
The projector offers multiple connectivity options. Refer to the rear panel diagram for port locations.
- HDMI: Connect an HDMI cable from your video source (e.g., laptop, Blu-ray player) to the HDMI port on the projector. The projector supports HDMI 1.4a.
- VGA: Connect a VGA cable from your computer to one of the VGA In ports (VGA In 1 or VGA In 2).
- Saamgestelde video: Use an RCA cable to connect to the Composite Video port for standard definition video sources.
- Netwerk (RJ-45): For network control and monitoring, connect an Ethernet cable to the RJ-45 port.
- RS232 (DB-9-pen): For serial control, connect a DB-9pin cable to the RS232 port.
- USB B: Vir diens of spesifieke beheerfunksies.
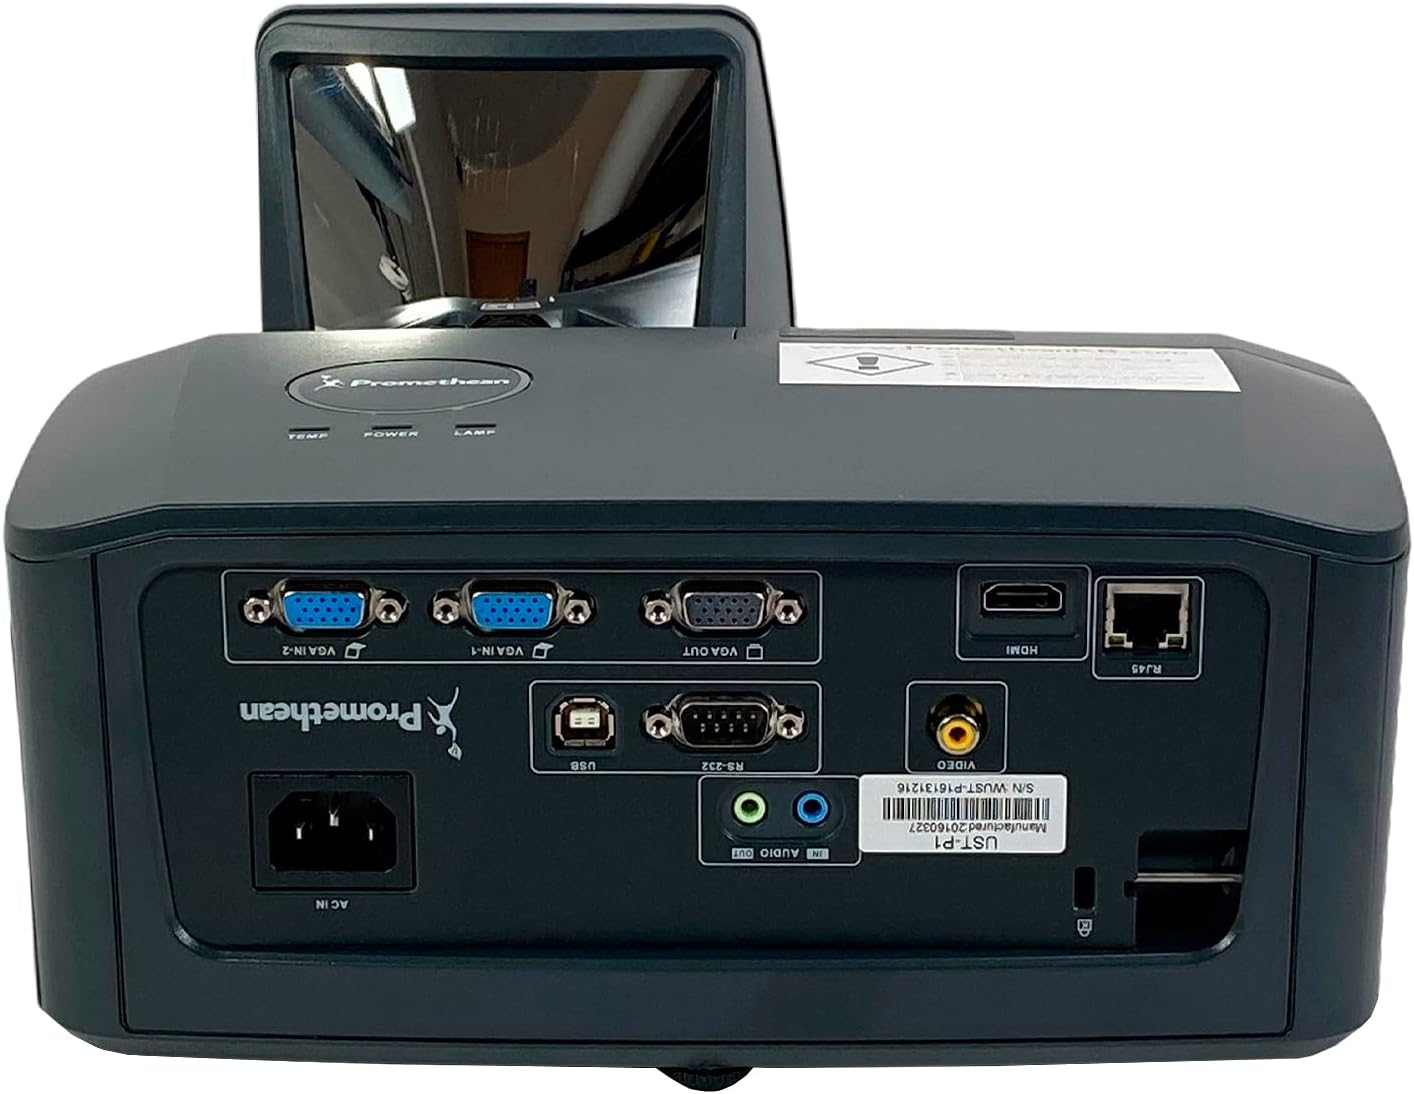
Figuur 2.1: Gedetailleerd view of the Promethean UST-P1 projector's rear panel, highlighting the HDMI, VGA, Composite, Network (RJ-45), RS232, and USB B connectivity options.
3. Bedryfsinstruksies
3.1 Aan-/afskakel
- Krag aan: Press the Power button on the projector's control panel or the remote control. The power indicator light will illuminate.
- Skakel af: Press the Power button again. A confirmation message may appear; press Power again to confirm shutdown. Allow the projector to cool down completely before unplugging it.
3.2 Invoerbronkeuse
To switch between connected video sources, use the "Source" or "Input" button on the remote control or the projector's control panel. Cycle through the available inputs (HDMI, VGA1, VGA2, Video) until your desired source is displayed.
3.3 Beeldaanpassing
- Fokus: Adjust the focus ring on the projector lens until the image is sharp and clear.
- Keystone-korreksie: If the image appears trapezoidal, use the keystone correction function (usually found in the projector's OSD menu or via dedicated buttons on the remote) to square the image.
- Aspekverhouding: The projector has a native aspect ratio of 16:10 (WXGA). You can adjust the aspect ratio settings in the menu to match your content (e.g., 4:3, 16:9) if necessary.
3.4 Supported Video Modes
The Promethean UST-P1 supports various video modes, including 720p, 1080i, 1035i, 575i, 576i, 480p, and 480i.
4. Onderhoud
Gereelde onderhoud verseker optimale werkverrigting en verleng die lewensduur van jou projektor.
4.1 Skoonmaak van die Projektor
- Buitekant: Gebruik 'n sagte, pluisvrye lap effens dampened with water to clean the projector's casing. Vermy skuurmiddels of oplosmiddels.
- Lens: Gently wipe the projector lens with a lens cleaning cloth or lens paper. Do not use abrasive materials or excessive force, as this can scratch the lens.
- Lugventilasies: Periodically check and clean the air vents to prevent dust buildup, which can impede airflow and cause overheating. Use a soft brush or compressed air to remove dust.
4.2 Lamp Vervanging
The Promethean UST-P1 is a lamp-based projector. The lamp has a finite lifespan and will eventually need replacement. The projector will typically display a warning message when the lamp is nearing the end of its life. Refer to the projector's on-screen display (OSD) menu for lamp hour information.
Waarskuwing: Lamp replacement should only be performed when the projector is completely cool and unplugged from the power source. Consult a qualified technician if you are unsure about the replacement procedure.
5. Probleemoplossing
This section addresses common issues you might encounter with your projector. If the problem persists after trying these solutions, please contact customer support.
| Probleem | Moontlike oorsaak | Oplossing |
|---|---|---|
| Geen beeld op die skerm nie |
|
|
| Beeld is vaag of buite fokus |
|
|
| Image is trapezoidal (not square) |
|
|
| Afstandbeheer werk nie |
|
|
6. Tegniese spesifikasies
| Kenmerk | Detail |
|---|---|
| Model | UST-P1 |
| Vertoon tegnologie | DLP |
| Helderheid | 3,300 ANSI lumen |
| Inheemse resolusie | 1280x800 (WXGA) |
| Aspekverhouding | 16:10 (Inboorling) |
| Kontrasverhouding | 10,000:1 |
| 3D-vermoë | Ja |
| Connectivity Inputs | HDMI 1.4a, Composite (RCA), Network (RJ-45), RS232 (DB-9pin), VGA In (Dsub-15pin x 2), USB B |
| Ondersteunde videomodusse | 720p, 1080i, 1035i, 575i, 576i, 480p, 480i |
| Spesiale kenmerke | Crestron KamerView™ |
| Produk afmetings | 14.5 x 11.4 x 6.3 duim |
| Item gewig | 10.6 pond |
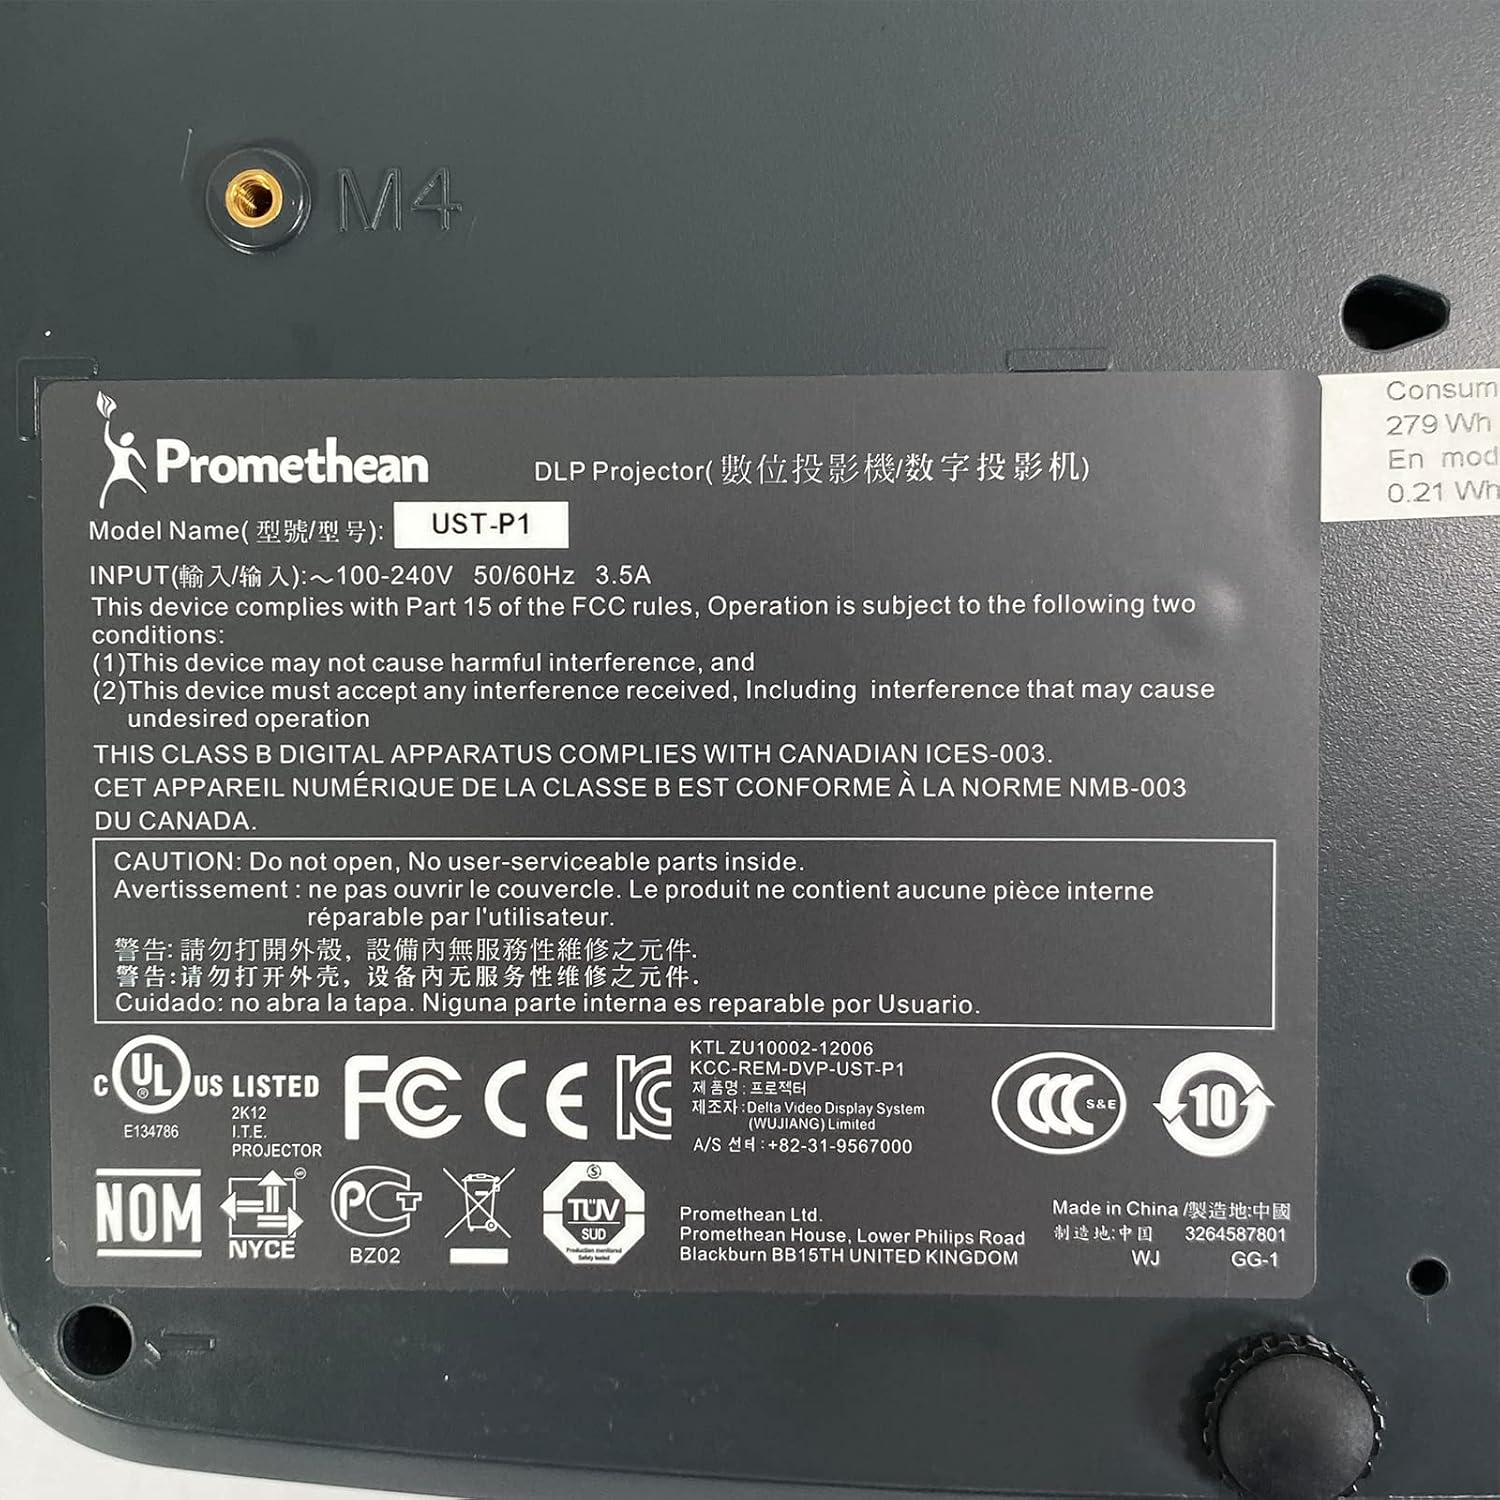
Figure 6.1: The bottom label of the Promethean UST-P1 projector, displaying the model number, input power requirements, and various regulatory compliance marks.
7. Waarborg en Ondersteuning
For specific warranty information regarding your Promethean UST-P1 DLP Projector, please refer to the documentation provided at the time of purchase or contact the seller directly. Warranty terms and conditions may vary.
For technical support, troubleshooting assistance beyond this manual, or inquiries about replacement parts (such as lamps), please contact the seller, Tekswamp, or the official Promethean support channels.
Jy kan besoek die Tekswamp Winkel op Amazon for more information or to contact their support.
Ask a question about this manual
Ask about setup, troubleshooting, compatibility, parts, safety, or missing instructions. Manuals+ will review the question and use this page’s manual context to help answer it.