Sharp SPC5028AMZ
Sharp Digital Alarm Clock User Manual
Model: SPC5028AMZ
Inleiding
Thank you for choosing the Sharp Digital Alarm Clock. This manual provides detailed instructions for setting up, operating, and maintaining your new alarm clock. Designed for clarity and convenience, this clock features an easy-to-read LCD display with an optional always-on backlight, dual alarm settings, and a USB charging port for your devices. Please read this manual thoroughly before use to ensure optimal performance and longevity of your product.

Voorkant view of the Sharp Digital Alarm Clock, displaying time, month, date, day, and temperature on its colorful LCD screen.
Veiligheidsinligting
Please observe the following safety precautions to prevent damage to the unit or personal injury:
- Moenie die eenheid blootstel aan uiterste temperature, direkte sonlig of hoë humiditeit nie.
- Vermy om die eenheid te laat val of aan harde impakte bloot te stel.
- Moenie ou en nuwe batterye, of verskillende tipes batterye meng nie.
- Verwyder batterye as die eenheid nie vir 'n lang tydperk gebruik gaan word om lekkasie te voorkom.
- Hou die eenheid weg van water en ander vloeistowwe.
- Moenie probeer om die eenheid self uitmekaar te haal of te herstel nie. Verwys alle diens na gekwalifiseerde personeel.
Pakketinhoud
Verifieer dat alle items in die pakket teenwoordig is:
- Sharp Digital Alarm Clock (Model SPC5028AMZ)
- Gebruikershandleiding (hierdie dokument)
Note: 3 x AAA batteries are required and not included.
Produk verbyview
Voorste vertoon

Diagram illustrating key features of the alarm clock, including atomic accuracy, 1.5-inch tall time display, on/off display nightlight, indoor temperature display, calendar display, bright color display, wall mountable or tabletop viewing, and battery operation (3x AAA batteries).
The front of the clock features a clear LCD display that shows the time, month, date, day of the week, and indoor temperature. The main time display is approximately 1.5 inches tall for easy readability.
Agterpaneel en kontroles

Gedetailleerd view of the clock's rear panel, showing the location of the battery compartment, various control buttons (Calendar, Time, Alarm, 12/24, Up, °C/°F, Down, Wave), the ON/OFF switch for the nightlight, and the backstand for tabletop viewing. Dimensions (6.45"W x 5"H) are also indicated.
- CALENDAR Set Button: Used to set the date and year.
- TIME Set Button: Used to set the time manually.
- ALARM Set & ON/OFF Button: Used to set and activate/deactivate alarms.
- 12/24-knoppie: Toggles between 12-hour and 24-hour time formats.
- UP -knoppie: Adjusts settings upwards.
- °C/°F-knoppie: Wissel temperatuurvertoning tussen Celsius en Fahrenheit.
- AFKNOP knoppie: Adjusts settings downwards.
- WAVE (Atomic Search) Button: Initiates a manual search for the atomic time signal.
- ON/OFF Switch (Nightlight): Controls the always-on backlight feature.
- Battery kompartement: Holds 3 x AAA batteries.
- Backstand: For tabletop viewing.
- Wall Mount Hole: For hanging the clock on a wall.
Opstelling
Battery installasie
- Open the battery compartment cover on the rear of the clock.
- Plaas 3 nuwe AAA-batterye in en maak seker dat die polariteit (+ en -) korrek is.
- Maak die batterykompartement se deksel stewig toe.
Aanvanklike krag aan
Upon battery installation, the clock will power on and attempt to synchronize with the atomic time signal.
Atoomtydsinchronisasie (WWVB)
The Sharp Digital Alarm Clock is designed to automatically synchronize with the WWVB atomic time signal broadcast from Fort Collins, Colorado, ensuring precise timekeeping.

Map of the United States showing the WWVB radio broadcast signal originating from Fort Collins, Colorado, which the atomic clock uses for synchronization.
- The clock will automatically attempt to receive the signal daily, typically overnight when electronic interference is minimal.
- For optimal reception, place the clock near a window and orient its front or rear panel towards Fort Collins, Colorado.
- A signal strength indicator (antenna icon) on the display will show the reception status.
- To manually initiate a signal search, press the GOLF knoppie op die agterpaneel.

Graphic depicting a full moon, with text 'LESS ELECTRONIC INTERFERENCE AT NIGHT SET BY MORNING', indicating optimal atomic clock synchronization occurs during nighttime hours.
Setting Time Zone
Even with atomic synchronization, you must manually select your local time zone for the correct hourly time display.
- Druk en hou die TYD button until the time zone indicator flashes.
- Gebruik die UP or AF buttons to select your desired time zone (e.g., PST, MST, CST, EST).
- Druk die TYD knoppie weer om te bevestig en te verlaat.
Handmatige tyd- en datuminstelling
If atomic synchronization is not desired or available, you can set the time and date manually.
- Om tyd in te stel: Druk en hou die TYD button until the hour flashes. Use UP/AF om aan te pas. Druk TYD to move to minutes, then adjust. Press TYD weer om te red.
- Om datum in te stel: Druk en hou die KALENDER button until the year flashes. Use UP/AF om aan te pas. Druk KALENDER to move to month, then day, adjusting each. Press KALENDER weer om te red.
- 12/24-uur-formaat: Druk die 12/24 button to switch between 12-hour (with AM/PM indicator) and 24-hour formats.
Bedryfsinstruksies
Adjusting Display Brightness and Backlight
The clock features an optional always-on backlight with adjustable brightness for optimal viewin verskillende beligtingstoestande.
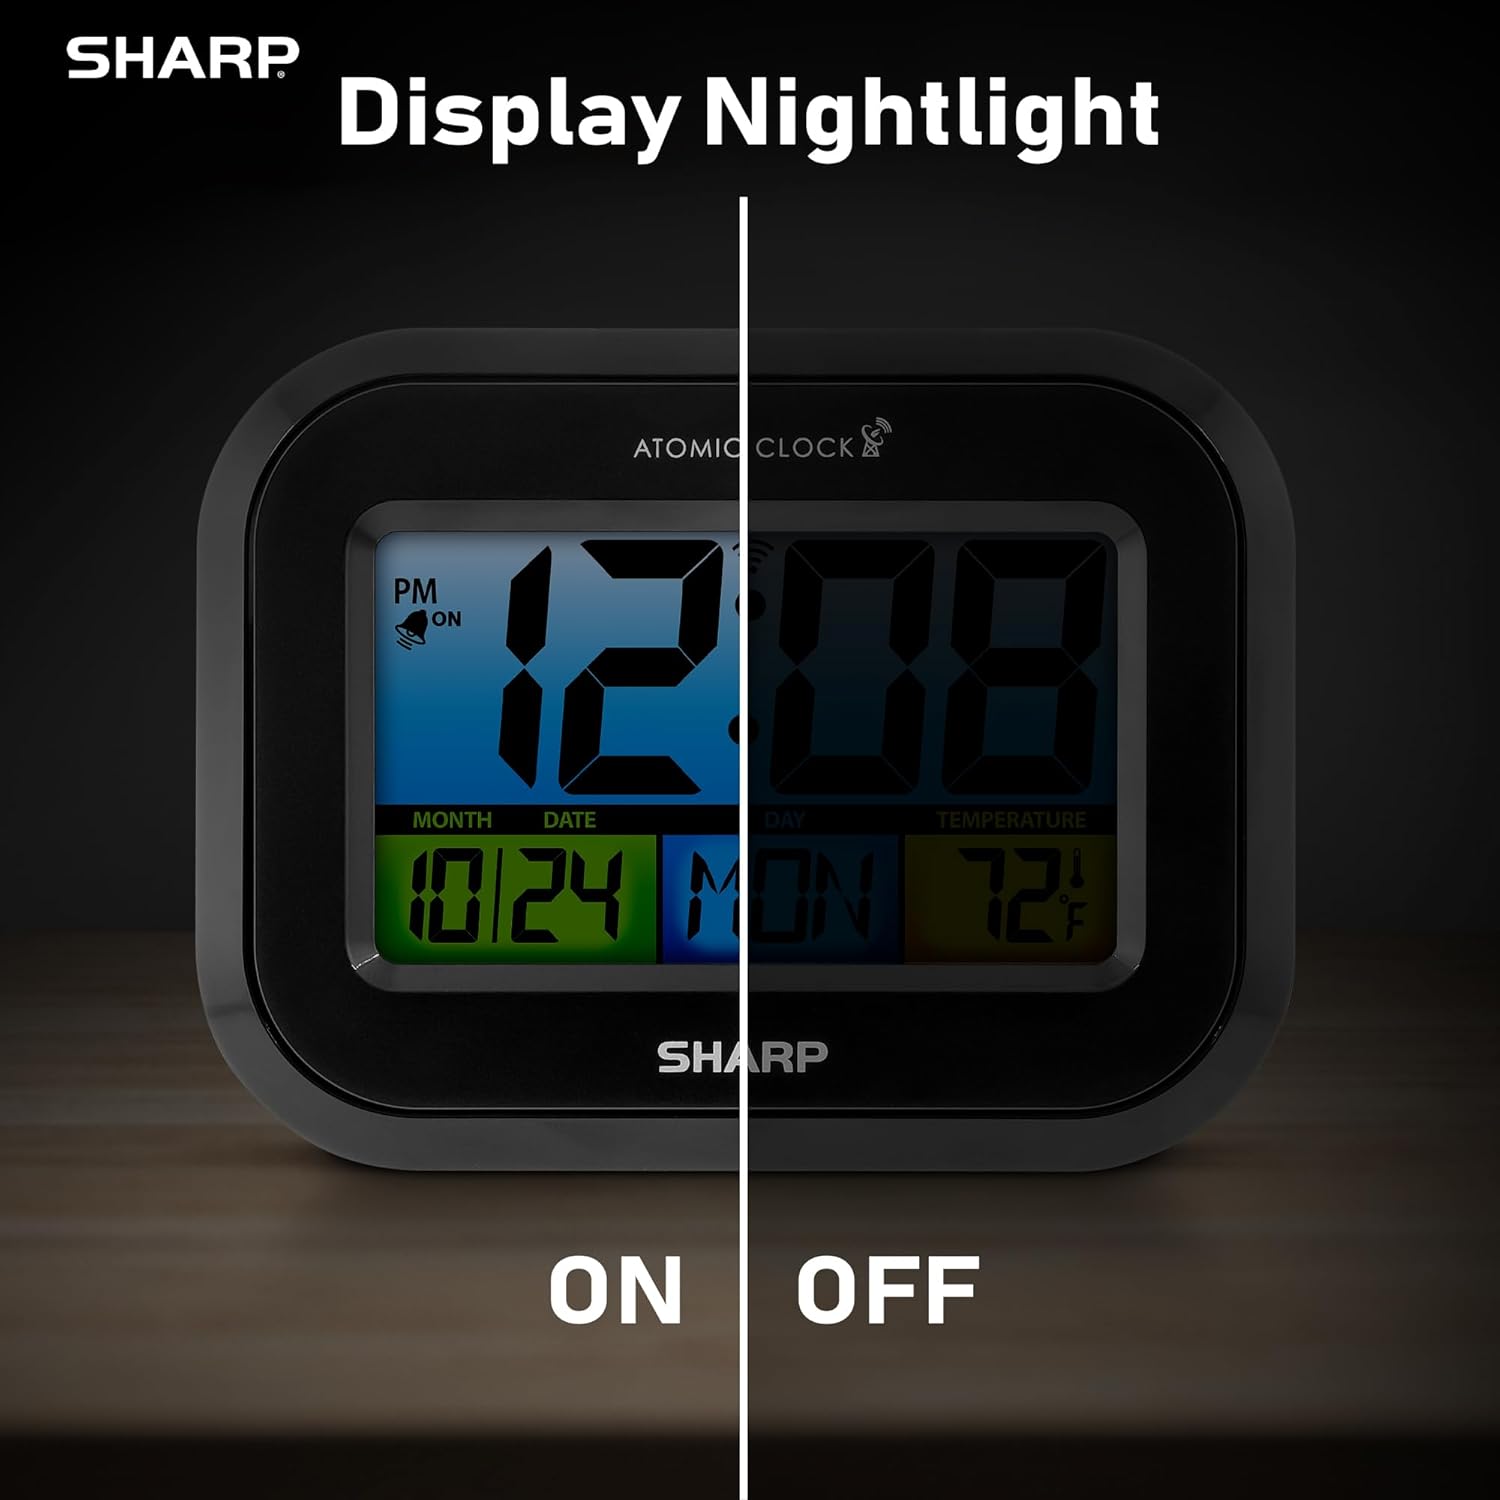
Comparison image showing the clock's display with the nightlight off (dim) and on (illuminated) in both day and night settings.
- Always-On Backlight: Gebruik die AAN/UIT skakelaar on the rear panel to activate or deactivate the continuous backlight. When ON, the display will have a soft glow.
- Op-aanvraag-agterlig: Even if the always-on backlight is OFF, you can momentarily illuminate the display by pressing the AGTERLIG button (usually located on the top edge, though not explicitly labeled in the provided image, it's a common feature). This provides a brighter illumination for a few seconds.

Image highlighting the physical ON/OFF switch on the rear of the clock for controlling the display nightlight, indicating its function for soft glowing backlight in the dark.
Setting Dual Alarms
The clock supports two independent alarm settings.
- Druk die ALARM button once to select Alarm 1. Press again for Alarm 2.
- Terwyl die alarmtyd vertoon word, druk en hou die ALARM knoppie totdat die uur flikker.
- Gebruik die UP or AF knoppies om die uur aan te pas. Druk ALARM to move to minutes, then adjust.
- Druk ALARM again to save the alarm time.
- Om 'n alarm te aktiveer/deaktiveer, druk die ALARM button repeatedly until the alarm icon (bell) appears/disappears for the desired alarm.
Gebruik die USB-laaipoort
The clock includes a USB charging port for convenient charging of small electronic devices. Locate the USB port on the side or rear of the unit (specific location not detailed in provided images, but implied by feature bullets). Connect your device's USB cable to this port to begin charging.
Temperature Display (°C/°F)
The clock displays the indoor temperature. To switch between Celsius and Fahrenheit, press the ° C / ° F. knoppie op die agterpaneel.
Viewing Angle Optimization
Like most LCD screens, this display is best viewed from the front or slightly above. Visibility may appear reduced at sharp side or low angles. For the best viewing experience, use the built-in kickstand to position the clock to face you.

Illustration demonstrating the optimal viewing angle for the LCD display, showing that the clock is best viewed from above or straight on, with a built-in kickstand to position it.
Wall Mounting and Tabletop Use
The clock is designed for versatile placement. Use the integrated backstand for tabletop viewing or the wall mount hole on the rear for hanging it on a wall.

The Sharp Digital Alarm Clock displayed in a home office setting, showing its versatility for both wall mounting and tabletop placement.
Onderhoud
Skoonmaak
Vee die horlosie af met 'n sagte, droë lap. Moenie skuurmiddels of oplosmiddels gebruik nie, aangesien dit die oppervlak kan beskadig.
Battery vervanging
When the display becomes dim or the clock stops functioning, it's time to replace the batteries. Follow the battery installation steps in the Setup section. It is recommended to replace all three AAA batteries at the same time with new ones.
Probleemoplossing
| Probleem | Moontlike Oplossing |
|---|---|
| Die skerm is dof of leeg. | Check battery polarity and ensure batteries are fresh. Replace all 3 AAA batteries. Ensure the backlight ON/OFF switch is in the 'ON' position if continuous illumination is desired. |
| Atomic time not synchronizing. | Ensure the clock is placed near a window and oriented towards Fort Collins, Colorado. Avoid placing near electronic devices that may cause interference. Try initiating a manual search by pressing the WAVE button. Synchronization is often best overnight. |
| Time or date is incorrect after battery change. | Manually set the time zone. Allow time for atomic synchronization, or manually set the time and date using the TIME and CALENDAR buttons. |
| Display is hard to read from certain angles. | This is a characteristic of LCD technology. Adjust the clock's position using the kickstand to ensure it is viewed straight-on or from slightly above eye level. |
| Die alarm lui nie. | Ensure the alarm is set and activated (bell icon visible). Check battery level. |
Spesifikasies
| Eiendom | Waarde |
|---|---|
| Handelsmerk | Skerp |
| Modelnommer | SPC5028AMZ |
| Tipe vertoon | LCD |
| Kleur | Swart |
| Produk afmetings | 6.45"B x 5"H |
| Item gewig | 10.8 onse (0.31 kilogram) |
| Kragbron | Battery Powered (3 x AAA, not included) |
| Bedryfsmodus | Atoom |
| Spesiale kenmerke | Cordless, Dual Alarm, USB Charging Port, Indoor Temperature Display, Always-On Backlight |
| Montage tipe | Muurmontering, tafelblad |
| Raammateriaal | Plastiek |
Waarborg en Ondersteuning
Sharp products are manufactured to the highest quality standards. For warranty information or technical support, please refer to the documentation included with your purchase or visit the official Sharp webwebwerf. Bewaar u aankoopbewys as bewys van aankoop vir waarborgeise.

Sharp Time Solutions
Ask a question about this manual
Ask about setup, troubleshooting, compatibility, parts, safety, or missing instructions. Manuals+ will review the question and use this page’s manual context to help answer it.