1. Belangrike veiligheidsinligting
Please read these instructions carefully before installation. If you do not understand these instructions or have doubts about the safety of the installation, please contact a qualified installer. The manufacturer is not responsible for damage or injury caused by incorrect mounting or operation.
- Gewig kapasiteit: This TV wall mount is designed for TVs weighing up to 110 lbs (50 kg)Moenie hierdie gewigslimiet oorskry nie.
- TV-grootte verenigbaarheid: Versoenbaar met die meeste 40-82 duim flat or curved TVs.
- VESA-versoenbaarheid: Supports VESA mounting patterns from 200x100mm tot 600x400mm. Verify your TV's VESA pattern before installation.
- Muurtipe: This mount is designed for installation on houtstutte or solid concrete/brick walls. MOENIE op gips alleen installeer nie.
- UL gelys: Hierdie produk is UL-gelys, wat aandui dat dit aan spesifieke veiligheidsstandaarde voldoen.
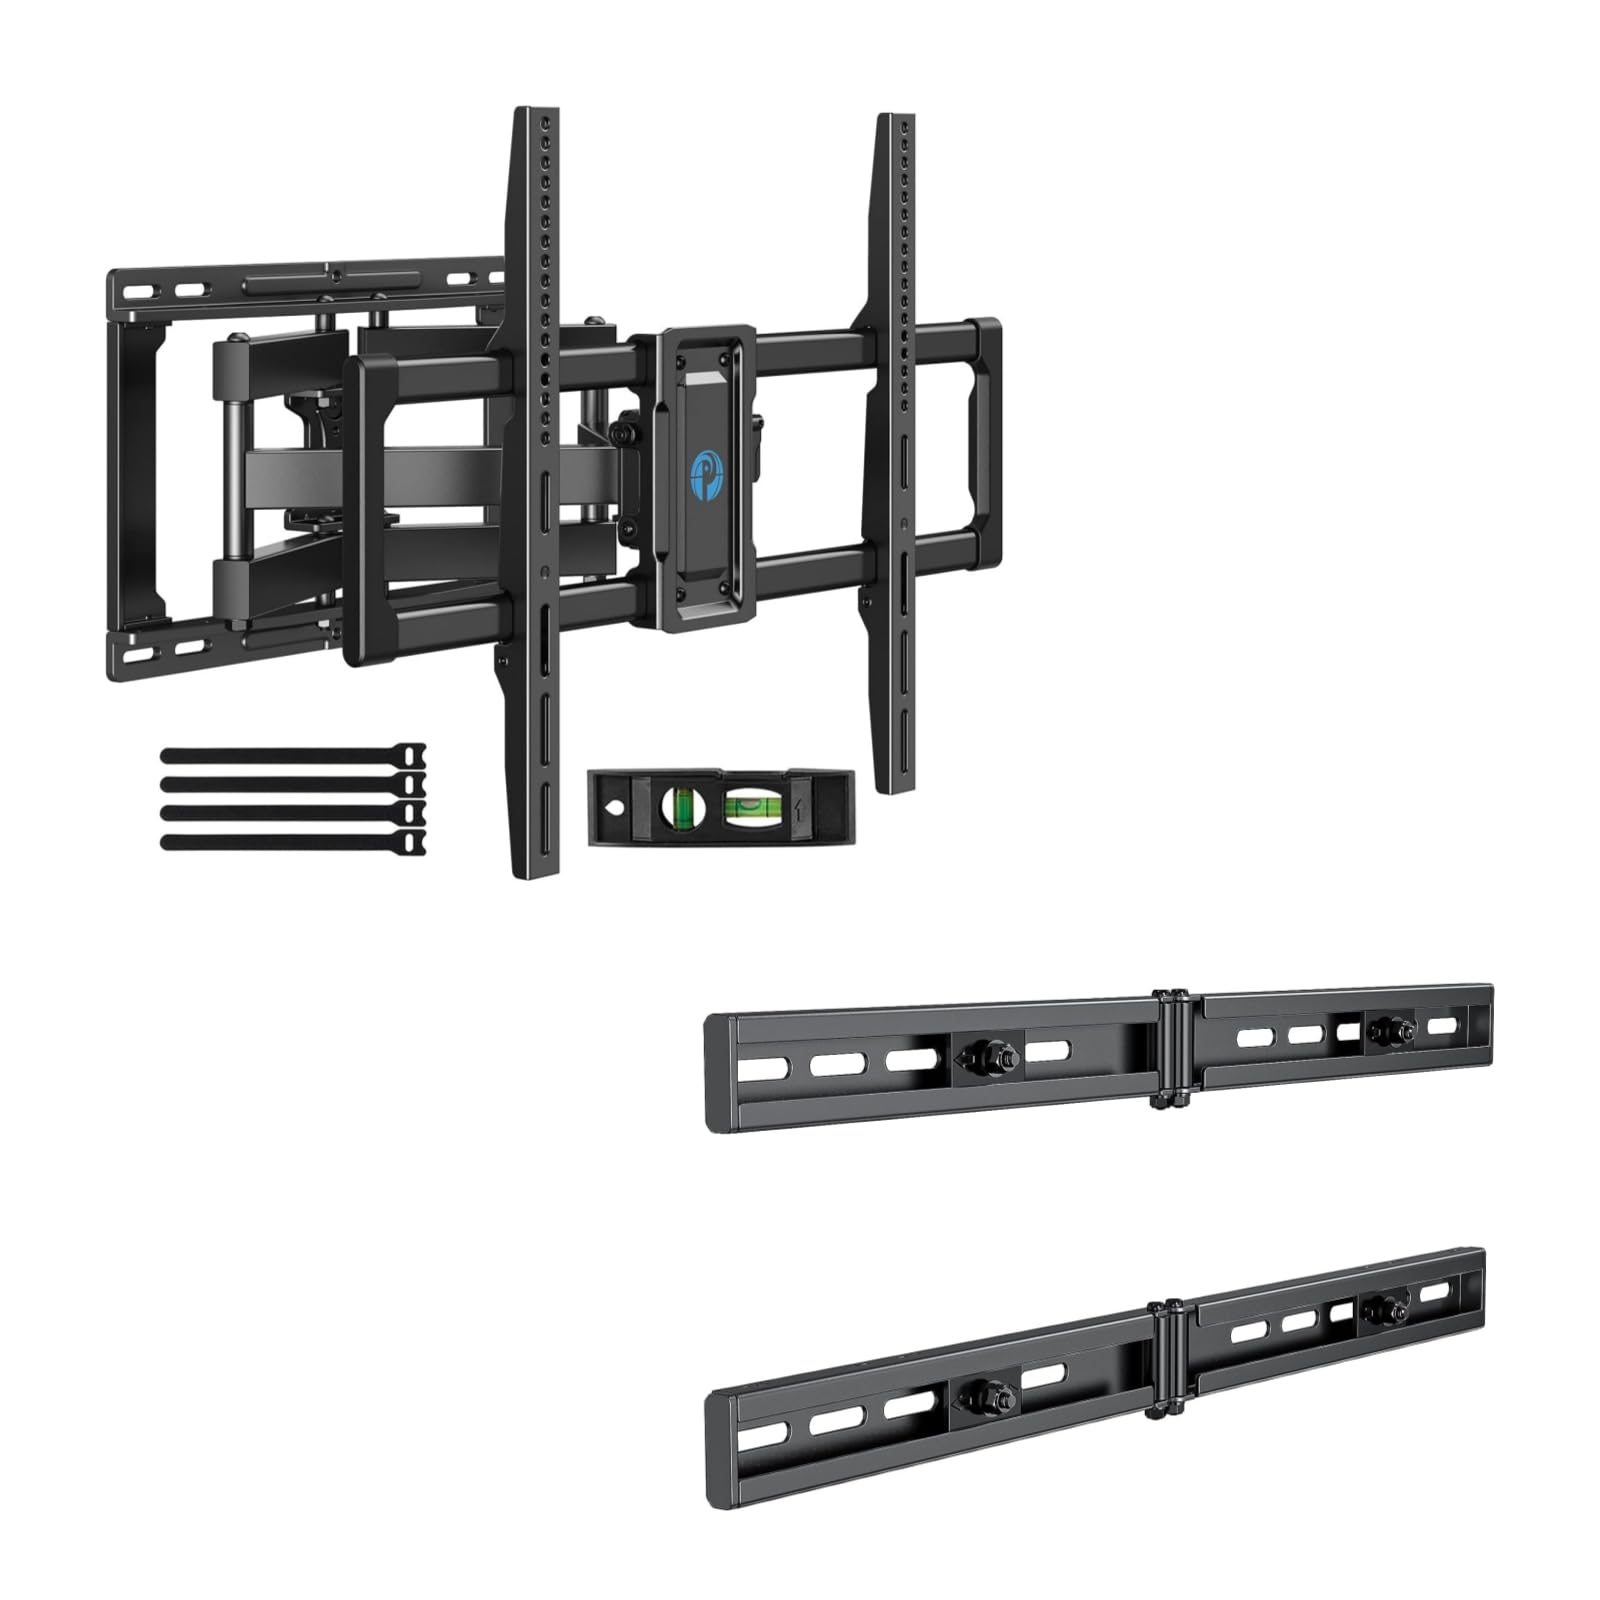
Image 1.1: Reinforced stability of the mount, highlighting heavy-duty steel arms and UL certification for safety and durability.
2. Pakketinhoud
Please check to ensure all components are present and undamaged before beginning installation. If any parts are missing or defective, contact Pipishell customer service.
2.1 Benodigde gereedskap (Nie ingesluit nie)
- Potlood
- Stoetvinder
- Drill with appropriate drill bits (e.g., 5/32" (4mm) for wood studs, 3/8" (10mm) for concrete)
- Vlak
- Maatband
- Socket Wrench of Verstelbare Sleutel
- Phillips-kopskroewedraaier
2.2 Hardware and Components (Included)
- Muurplaat-samestelling
- TV-hakies (2)
- Extension Brackets (2)
- Various TV Screws, Washers, and Spacers (M4, M6, M8)
- Lag Bolts and Concrete Anchors
- Vlak borrel
- Kabelbinders
3. Opstelling en installering
3.1 Voor-installasie tjeks
- Verify your TV's weight, size, and VESA pattern are within the mount's specifications.
- Determine the desired viewing height for your TV.
- Locate the wall studs using a stud finder. Mark the center of the studs.
3.2 Installeer die muurplaat
The extension bracket feature allows for installation on wood studs with spacing between 16 and 24 inches.
- Position the wall plate assembly on the wall at your desired height, ensuring it is level. Mark the drill holes.
- For wood stud installation, drill pilot holes (e.g., 5/32" or 4mm) into the center of the studs. For concrete/brick, drill pilot holes (e.g., 3/8" or 10mm) and insert concrete anchors.
- Attach the wall plate to the wall using the provided lag bolts. Tighten securely.

Image 3.1: The extended wall plate design provides a flexible solution for mounting on walls with stud spacing between 16 and 24 inches.

Image 3.2: This feature helps center your TV for optimal viewing, even when wall studs are not perfectly centered.
3.3 TV-hakies aan TV vasmaak
- Plaas jou TV versigtig met die gesig na onder op 'n sagte, skoon oppervlak.
- Select the appropriate screws, washers, and spacers for your TV's VESA mounting holes.
- Attach the two TV brackets to the back of your TV. Ensure they are securely fastened and evenly spaced.
3.4 Mounting TV to Wall Plate
- Lig die TV versigtig met hulp op en haak die TV-hakies aan die muurplaat.
- Maak seker dat die TV stewig op die muurplaat vas is.
- Tighten the safety screws or locking mechanisms on the TV brackets to prevent accidental dislodgement.
4. Operating the TV Mount
This full motion mount allows for flexible adjustment to achieve the best viewing hoek.
4.1 Draai-aanpassing
The mount allows for a swivel range of +/-45°. Gently push or pull the TV to the desired left or right angle.

Image 4.1: The mount offers a smooth swivel motion of up to 45 degrees in either direction for flexible viewing.
4.2 Kantelverstelling
Adjust the tilt angle from +5° tot -15° to reduce glare and optimize viewing. This adjustment is tool-free.

Image 4.2: Easily adjust the TV's vertical angle from +5° to -15° without tools to minimize glare and improve comfort.
4.3 Uitbreiding en Terugtrekking
The mount allows the TV to extend from the wall by 2.89 duim tot 16.3 duim. Gently pull the TV forward or push it back towards the wall to adjust the distance.

Image 4.3: Adjust the TV's distance from the wall, extending up to 16.3 inches or retracting to 2.89 inches for optimal viewruimte.
5. Onderhoud
- Gereelde tjeks: Kontroleer gereeld alle skroewe en verbindings om te verseker dat hulle styf en stewig bly.
- Skoonmaak: Maak die monteerstuk skoon met 'n sagte, droë lap. Vermy skuurmiddels of oplosmiddels.
- Smering: The moving parts are designed for smooth operation. No lubrication is typically required. If movement becomes stiff, check for debris or loose components.
6. Probleemoplossing
- TV is nie gelyk nie: Check the level of the wall plate during installation. Most mounts have a post-installation leveling adjustment. Refer to the specific mechanism on your mount.
- Difficulty adjusting swivel/tilt/extension: Ensure no cables are snagged or obstructing movement. Check if any adjustment knobs or screws are overtightened. The mount features improved torque accuracy for smoother movement.
- Die montering voel los teen die muur: Immediately remove the TV from the mount. Re-check all wall plate fasteners and ensure they are securely anchored into the studs or concrete. If issues persist, consult a professional installer.
- TV brackets do not fit TV: Verify your TV's VESA pattern matches the mount's compatibility (200x100mm to 600x400mm). Ensure you are using the correct screws and spacers for your TV model.
7. Spesifikasies
| Kenmerk | Spesifikasie |
|---|---|
| Montage tipe | Muurmontering |
| Beweging Tipe | Articulating (Full Motion) |
| Handelsmerk | Pipishell |
| Materiaal | Allooi staal |
| Versoenbare toestelle | Televisie |
| Minimum Supported Screen Size | 40 duim |
| Maximum Supported Screen Size | 82 duim |
| Maksimum gewig kapasiteit | 110 lbs (50 kg) |
| VESA-versoenbaarheid | 200x100mm tot 600x400mm |
| Draaibereik | +/-45 grade |
| Kantelbereik | +5 / -15 Degrees (Tool-Free) |
| Verlenging vanaf die muur | 2.89 - 16.3 duim |
8. Waarborg en Kliëntediens
Pipishell products are designed for durability and performance. For warranty information or technical assistance, please contact Pipishell customer support through their official webwebwerf of die kleinhandelaar waar die produk gekoop is.
Hou asseblief u produkmodel en aankoopdatum byderhand wanneer u ondersteuning kontak.