SJCODE M6/R6
SJCODE 1080P Wireless Outdoor Security Camera User Manual
Model: M6/R6
Inleiding
This manual provides detailed instructions for the installation, operation, and maintenance of your SJCODE 1080P Wireless Outdoor Security Camera. Designed for home security, this camera features a solar panel for continuous power, color night vision, PIR motion detection, and two-way audio communication. Please read this manual thoroughly before using the product to ensure proper functionality and safety.
Wat is in die boks
- Sekuriteitskamera
- Solar Panel (Included 120-inch cable)
- Montagebeugel en skroewe
- USB-laaikabel
- Gebruikershandleiding

Image: The SJCODE 1080P Wireless Outdoor Security Camera and its accompanying solar panel, along with a smartphone displaying the live camera feed.
Spesifikasies
| Kenmerk | Detail |
|---|---|
| Modelnommer | M6/R6 |
| Binne/buiteluggebruik | Buitelug |
| Kragbron | Sonkrag aangedryf |
| Konnektiwiteit | Wi-Fi (2.4GHz) |
| Video-resolusie | 1080p (1920 x 1080 piksels) |
| Nagvisie | Kleur Nagvisie |
| Bewegingsopsporing | PIR Motion Sensor, AI Human Detection |
| Oudio | Tweerigtinggesprek |
| Berging | Cloud Storage (Subscription Sold Separately) |
| Weerweerstand | IP65 waterbestand |
| Battery kapasiteit | 6000 mAh litiumpolimeer |
| Veld van View | 120 grade |
| Afmetings | 2.8 x 1.7 x 3.4 duim |
| Gewig | 1.19 pond |
Opstelling
1. Aanvanklike laai
Before first use, fully charge the camera's internal battery using the provided USB cable. Connect the USB cable to the camera's charging port and a standard 5V USB power adapter (not included). The indicator light will show charging status.
2. App Installasie
Download the companion mobile application (e.g., Aiwit app, as mentioned in reviews) from your smartphone's app store. Soek vir "Aiwit" or scan the QR code provided in the quick start guide that came with your product.
3. Paring en verbinding
- Maak seker dat jou slimfoon aan 'n 2.4GHz Wi-Fi-netwerk gekoppel is.
- Maak die toepassing oop en skep 'n rekening of meld aan.
- Follow the in-app instructions to add a new device. This typically involves powering on the camera and scanning a QR code displayed on your phone with the camera's lens.
- Once connected, you can name your camera and configure initial settings.
4. Montering
Select an optimal outdoor location for your camera and solar panel. The solar panel should receive direct sunlight for most of the day to ensure continuous charging. Use the included mounting bracket and screws to securely attach the camera and solar panel to a wall or other stable surface. Ensure the 120-inch cable from the solar panel can reach the camera's charging port.

Image: Illustration of the solar panel providing continuous power to the security camera when mounted outdoors.
Bedryfsinstruksies
1. Leef View
Open the app on your smartphone to access the live video feed from your camera. You can monitor your property in real-time from anywhere with an internet connection.
2. Tweerigtingpraatjies
The camera supports two-way audio communication. While in live view, tap the microphone icon in the app to speak through the camera's speaker. This allows you to communicate with visitors or deter unwanted guests. Release the icon to listen.
3. Bewegingsopsporing en waarskuwings
The camera is equipped with a PIR motion sensor and AI human detection. When motion is detected, the camera will record and send real-time alerts to your smartphone. You can configure sensitivity settings and enable human detection in the app to reduce false alarms from pets or vehicles.

Image: The AI Human Detection feature accurately identifies human movement while filtering out non-human triggers like pets.
4. Kleur Nagvisie
The camera provides clear 1080p imagery and color night vision. Built-in infrared night vision lights and intelligent infrared sensors enable bright, colorful video even in low-light conditions, enhancing visibility and detail at night.
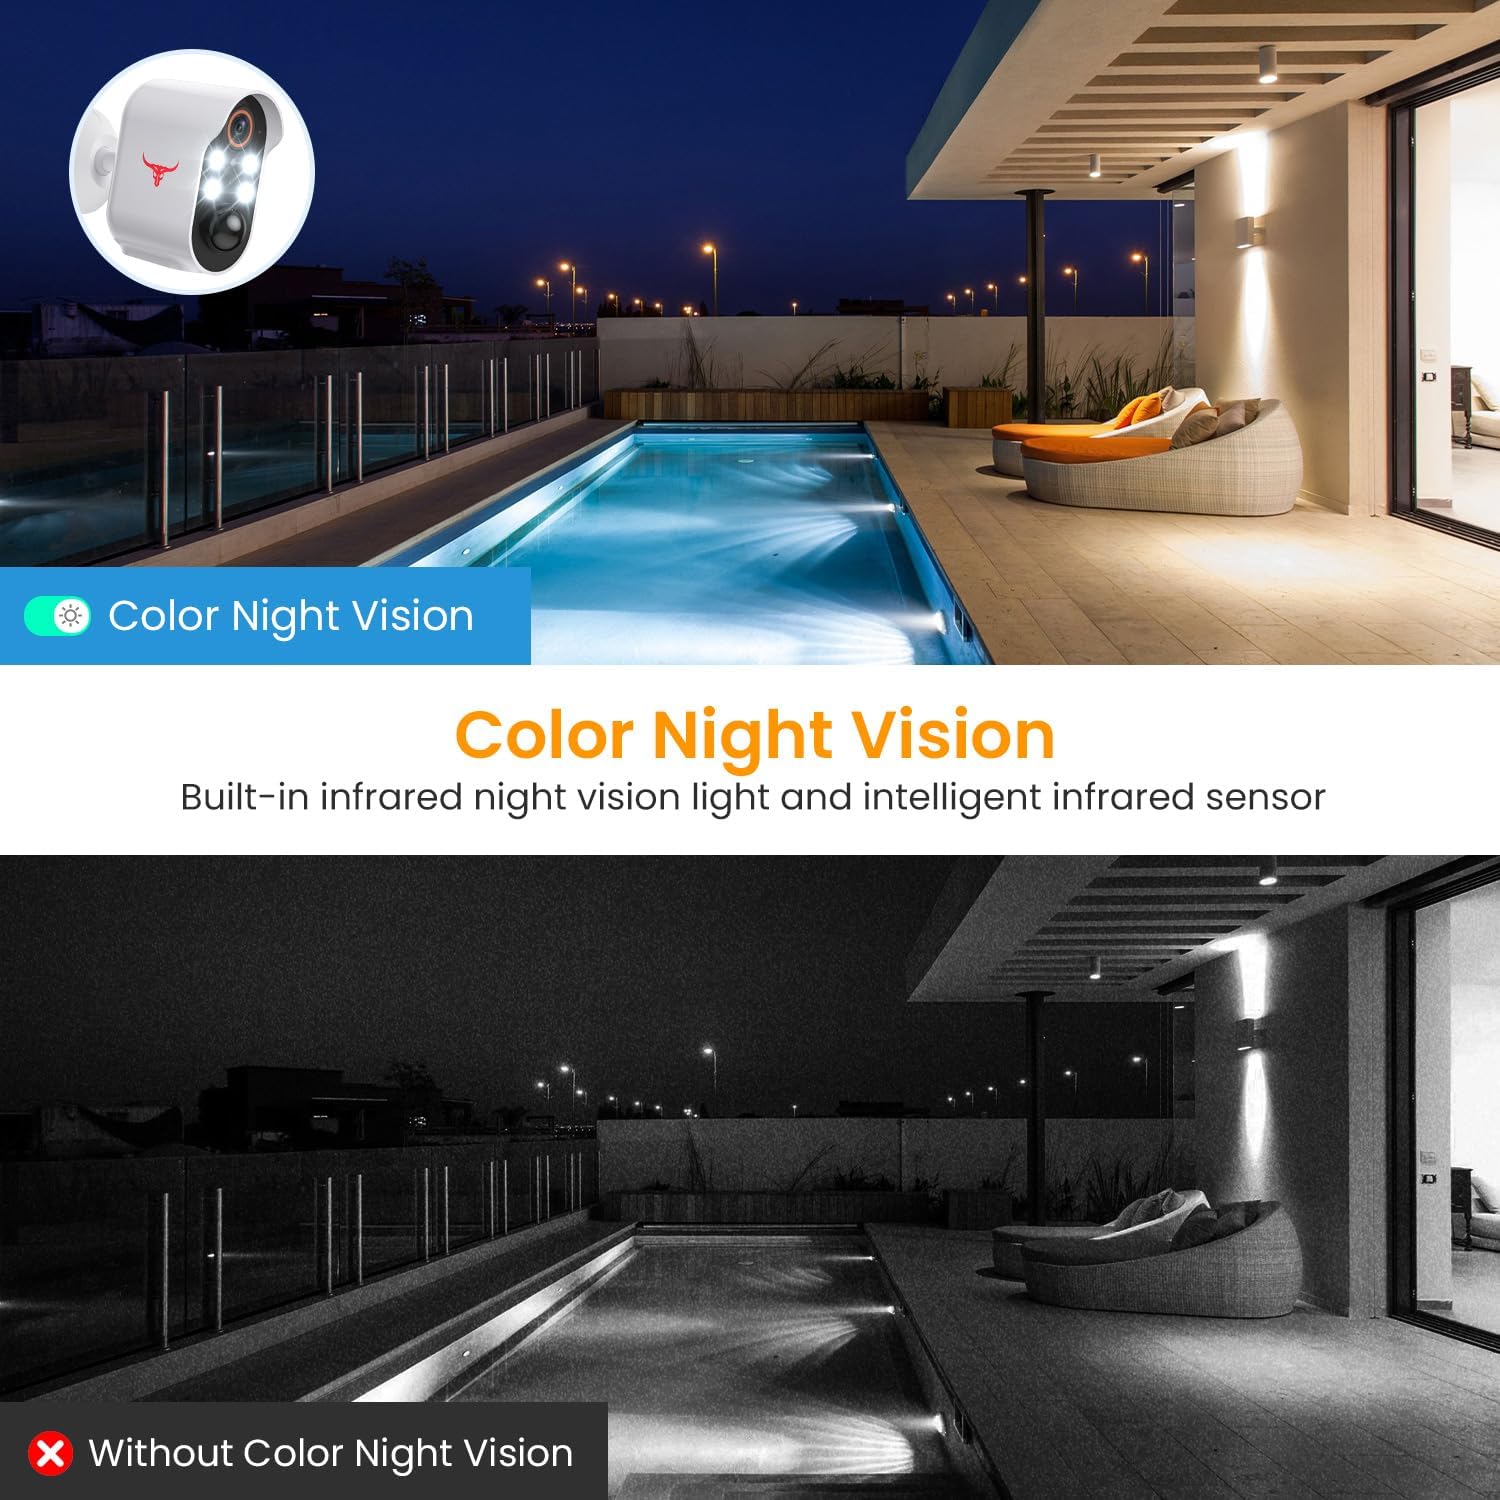
Image: A visual comparison demonstrating the clarity and color provided by the camera's color night vision feature compared to traditional infrared night vision.
5. Wolkberging
Opgeneem footage is securely stored in the cloud with AES-128 encryption. An optional subscription plan (sold separately) is required to access and review recorded events. A 30-day free trial is typically included with your purchase.

Image: Visual representation of how the camera's footage is securely uploaded to cloud storage for remote access and review.
Onderhoud
1. Sonpaneel skoonmaak
Regularly inspect and clean the solar panel surface to ensure maximum sunlight absorption. Dust, dirt, or debris can reduce charging efficiency. Use a soft, damp cloth to gently wipe the panel.
2. Batteryversorging
While the solar panel provides continuous power, extreme weather conditions or prolonged periods of low sunlight may affect battery levels. Monitor the battery status via the app. If the battery level drops significantly, you may need to temporarily charge the camera using the USB cable.
3. Weerbestandheid
The camera is IP65 water resistant, designed to withstand various weather conditions including rain, shine, and snow. However, avoid submerging the camera in water or exposing it to high-pressure water jets.

Image: The camera and solar panel are designed to withstand various weather conditions, including sun, rain, and snow.
Probleemoplossing
1. Camera Not Connecting to Wi-Fi
- Maak seker dat jou Wi-Fi-netwerk 2.4GHz is. Die kamera ondersteun nie 5GHz-netwerke nie.
- Kontroleer die Wi-Fi-seinsterkte by die kamera se ligging. Beweeg die kamera nader aan die router indien nodig.
- Herbegin jou Wi-Fi-router en die kamera.
- Verifieer dat die Wi-Fi-wagwoord wat in die toepassing ingevoer is, korrek is.
2. Frequent False Alerts
- Pas die bewegingsopsporingsgevoeligheid in die toepassing aan.
- Enable AI Human Detection to filter out non-human movements.
- Ensure the camera is not pointed at busy streets or areas with constant movement that is not relevant to security.
3. Battery laai nie
- Ensure the solar panel is clean and free of obstructions.
- Verify the solar panel is receiving adequate direct sunlight throughout the day.
- Check the connection between the solar panel cable and the camera's charging port.
- If issues persist, try charging the camera directly with the USB cable to rule out battery issues.
4. No Two-Way Audio
- Ensure your phone's microphone is enabled for the app.
- Kontroleer die volume-instellings op beide jou foon en binne die toepassing.
- Verifieer 'n stabiele internetverbinding vir intydse klankoordrag.
Amptelike Produkvideo
Video: 'n Amptelike produkvideovertoningasing the features of the SJCODE Wireless Outdoor Security Camera, including its solar power, two-way talk, and night vision capabilities.
Waarborg en Ondersteuning
For warranty information and technical support, please refer to the contact details provided on the product packaging or within the mobile application. You can also visit the official SJCODE website for frequently asked questions and further assistance.
Ask a question about this manual
Ask about setup, troubleshooting, compatibility, parts, safety, or missing instructions. Manuals+ will review the question and use this page’s manual context to help answer it.