1. Inleiding
This manual provides detailed instructions for the setup, operation, maintenance, and troubleshooting of your TOMLOV DM9 Pro and DM202 Digital Microscopes. These devices are designed for various applications, including electronics repair, coin observation, and general microscopic examination, offering a clear and magnified view van klein voorwerpe.
2. Opstelling
Follow these steps to set up your TOMLOV Digital Microscope for first use.
2.1 Uitpak en monteer
Carefully remove all components from the packaging. Assemble the microscope stand, ensuring the base is stable and the pillar is securely attached. Mount the microscope unit onto the stand, and then attach the display screen to the microscope unit. Ensure all connections are firm.

2.2 Kragverbinding
Connect the provided power adapter to the microscope and then to a suitable power outlet. The microscope is powered by corded electric.
2.3 Connecting to External Displays (Optional)
Your microscope supports output to external displays via HDMI or USB for a larger viewondervinding.
- HDMI-uitset: Connect an HDMI cable from the microscope's HDMI port to an HD TV or projector.
- USB-uitset: Connect a USB cable from the microscope's USB port to a personal computer (Windows/Mac). The microscope is plug-and-play and can be used with the Camera App on Windows 10 or Photo Booth for iMac/MacBook.


3. Bedryfsinstruksies
This section details how to operate your TOMLOV Digital Microscope.
3.1 Powering On and Basic Controls
Press the power button located on the microscope unit or screen to turn on the device. The 10.1-inch IPS screen will display the live view from the microscope camera. Use the 'OK' button to confirm selections and 'MENU' to access settings.

3.2 Adjusting Magnification and Focus
The microscope offers a wide zoom range from 3X to 1300X. Rotate the focus wheel on the microscope body to achieve a clear image of your specimen. Adjust the distance between the lens and the base using the stand's adjustment knob to change magnification and working distance.
3.3 Helderheidsaanpassing
Utilize the brightness adjustment switch, typically located on the side of the screen or microscope body, to control the intensity of the LED lights. This helps in illuminating the specimen evenly and achieving optimal image clarity.

3.4 Monitor and Bracket Adjustments
The monitor and bracket are adjustable to provide comfortable viewing angles and a larger workspace. The monitor can be tilted up to 90 degrees, rotated 270 degrees, and the entire bracket can be adjusted vertically. The monitor can also be angled up to 160 degrees.

3.5 Aansoeke
The TOMLOV digital microscopes are suitable for various tasks:
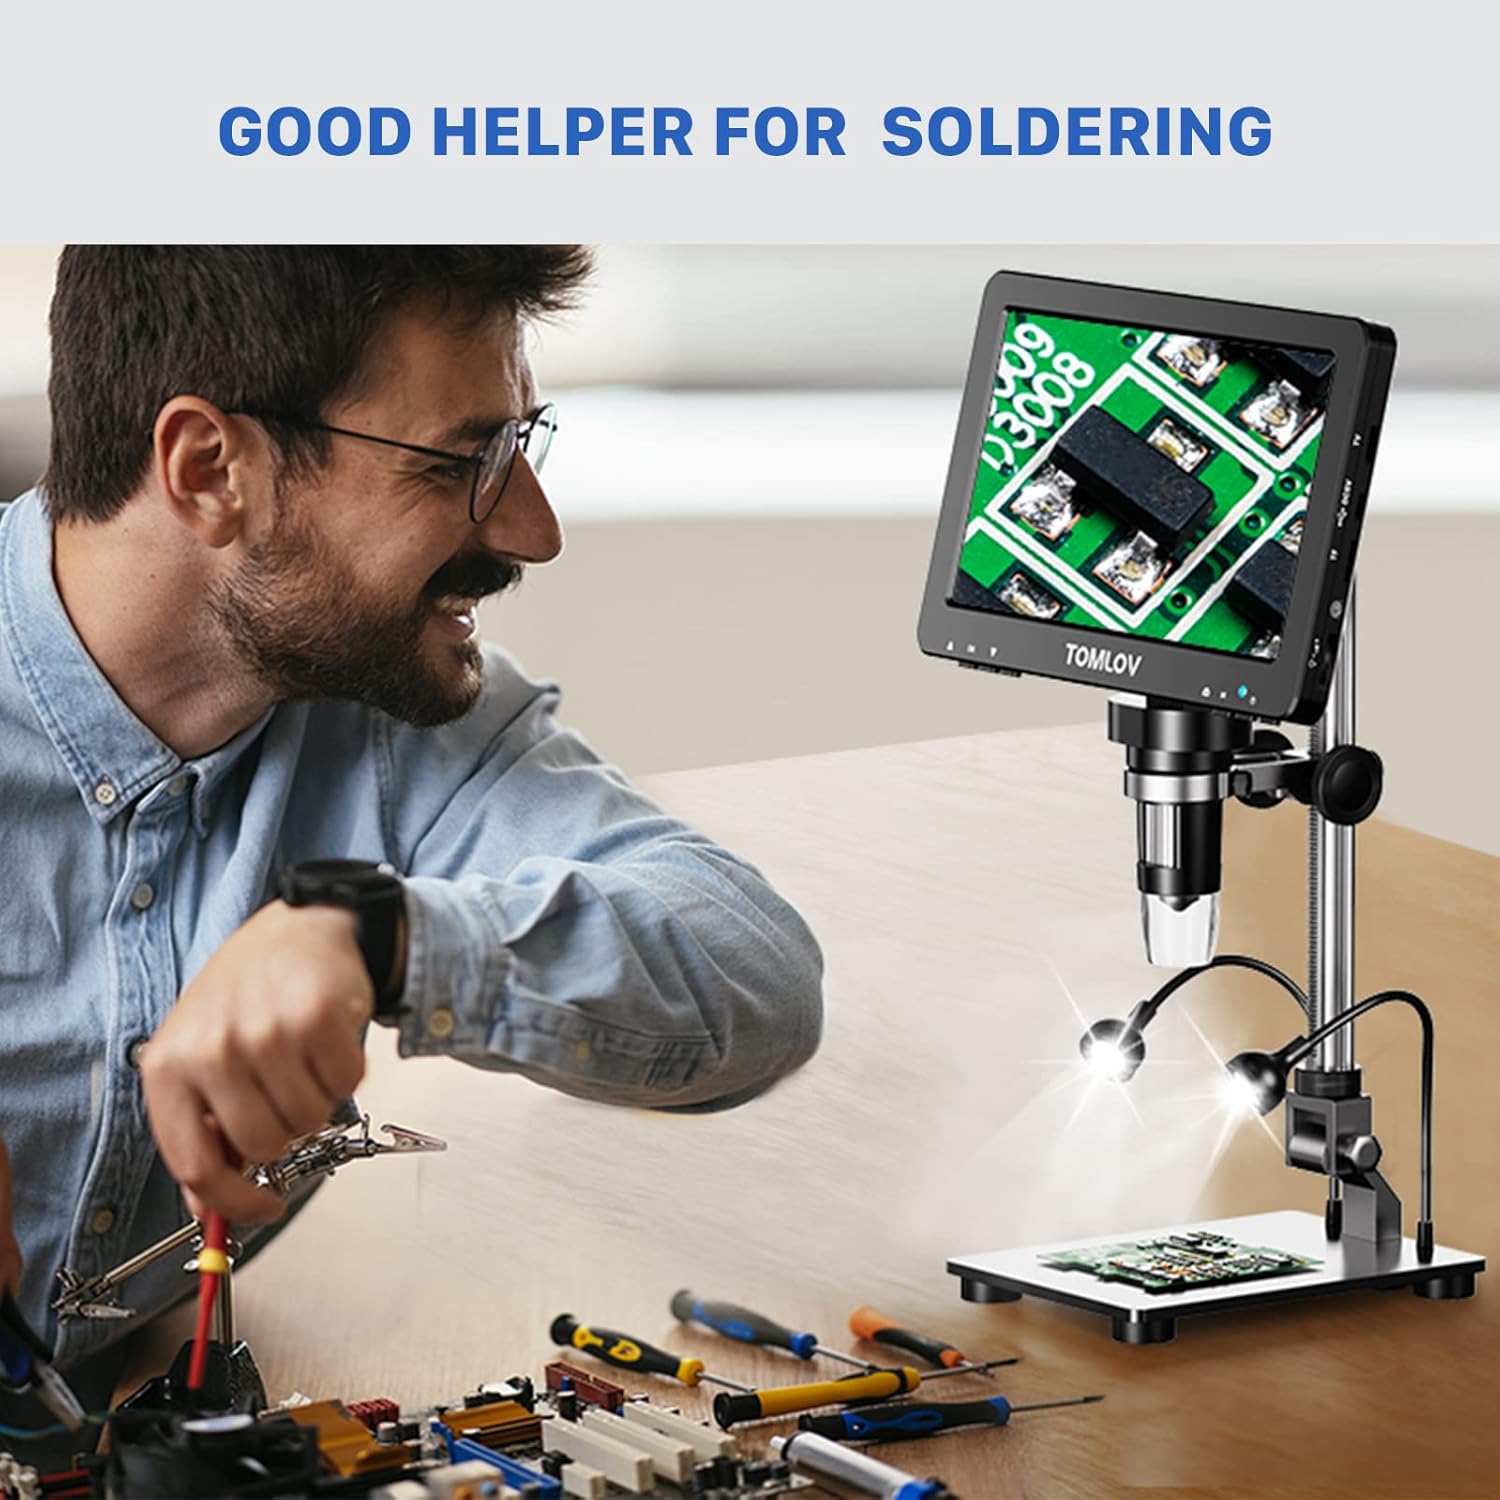
- Soldeer: Verskaf 'n vergrote view for precise soldering work on circuit boards.
- Coin Collection: Ideal for examining the intricate details of coins, including large silver dollars, without needing extension tubes.
- Elektroniese herstelwerk: Facilitates inspection and repair of small electronic components.

4. Onderhoud
Proper maintenance ensures the longevity and optimal performance of your microscope.
- Skoonmaak: Use a soft, dry cloth to clean the exterior of the microscope and screen. For the lens, use a specialized lens cleaning cloth and solution. Avoid abrasive cleaners.
- Berging: Store the microscope in a clean, dry environment away from direct sunlight and extreme temperatures.
- Hantering: Always handle the microscope with care to prevent damage to optical components or the display.
5. Probleemoplossing
If you encounter issues with your microscope, refer to the following common problems and solutions.
- Geen krag: Ensure the power adapter is securely connected to both the microscope and a working power outlet. Check if the power button is pressed.
- Geen beeld op skerm nie: Verify that the microscope unit is properly connected to the display screen. If using an external monitor, check HDMI/USB cable connections and input source selection on the external display.
- Wasige prent: Adjust the focus wheel until the image is clear. Ensure the specimen is properly illuminated and the brightness is adjusted. Check for any dust or smudges on the lens.
- Beeld te donker/helder: Use the brightness adjustment switch to fine-tune the illumination.
If problems persist, please contact TOMLOV customer support for further assistance.
6. Spesifikasies
| Kenmerk | Spesifikasie |
|---|---|
| Handelsmerk | TOMLOV |
| Modelle | DM9 Pro, DM202 |
| Vertoon skerm | 10.1-inch IPS (DM202), 7-inch IPS (DM9 Pro) |
| Vergrotingsreeks | 3X-1300X |
| Materiaal | ABS akriel |
| Kleur | Silwer |
| Versoenbare toestelle | Personal Computer, Television |
| Kragbron | Elektries met koord |
| ASIN | B0C7KTWRZL |
| Datum Eerste Beskikbaar | 9 Junie 2023 |
7. Waarborg en Ondersteuning
For warranty information, product registration, or technical support, please refer to the official TOMLOV webwebwerf of kontak hul kliëntediens direk. Kontakbesonderhede kan tipies op die produkverpakking of die vervaardiger se webwebwerf.