Inleiding
This manual provides detailed instructions for the safe and effective use of your Dylanto Kids Instant Print Camera, Model BLL2. Please read this manual thoroughly before operating the device and retain it for future reference.
Produk verbyview
The Dylanto Kids Instant Print Camera is designed for children aged 3-12, offering both digital photography and instant black-and-white printing capabilities. It features a 2.4-inch screen, 1080P video recording, 16x digital zoom, and various creative functions.

Figure 1: Dylanto Kids Instant Print Camera and included accessories.
Pakketinhoud:
- Dylanto Kids Instant Print Camera (Model BLL2)
- 3 Rolls of Thermal Printing Paper
- 32GB geheue kaart
- Lanyard
- USB Type-C kabel
- Gebruikershandleiding (hierdie dokument)
Veiligheidsinligting
- Ensure the camera is fully charged before first use and after each use to prolong battery life.
- The thermal printing paper is BPA-free.
- Do not expose the camera to extreme temperatures or moisture.
- Supervise young children during use to prevent accidental damage or misuse.
- Keep small parts, such as the memory card, out of reach of very young children to prevent choking hazards.
Opstelling
1. Laai die kamera
Before initial use, fully charge the camera. Connect the provided USB Type-C cable to the camera's charging port and the other end to a compatible USB power adapter (not included) or computer USB port. The charging indicator will show the charging status.
The camera has a 2000 mAh battery capacity, providing approximately 3-4 hours of continuous use after a full charge.
2. Die installering van die geheuekaart
Locate the memory card slot on the camera. Insert the provided 32GB memory card into the slot until it clicks into place. Ensure the card is inserted in the correct orientation.
3. Laai van drukpapier
The camera uses thermal printing paper. Follow these steps to load a new roll:
- Gently push up the part with the lens to open the paper slot.
- Insert a roll of thermal printing paper into the slot. Ensure the paper feeds from the bottom of the roll and the end of the paper is facing upwards, ready to be pulled out.
- Close the two parts of the camera until they click securely.
- To avoid blank prints, pull the paper out by approximately 1 inch before the first print.

Figure 2: Steps for loading thermal printing paper.

Figure 3: Detailed instructions for paper installation, including a tip for blank prints.
Bedryfsinstruksies
Krag aan/af
Druk en hou die aan/af-knoppie in om die kamera aan of af te skakel.
Navigasie en spyskaart
Use the directional buttons and the OK/Shutter button to navigate through the camera's menu and select options on the 2.4-inch IPS screen.

Figure 4: Camera interface showing main functions.
Neem Foto's
In photo mode, frame your shot using the screen. Press the shutter button to capture a photo. The camera supports 16x digital zoom.
The camera can capture color photos digitally and simultaneously print black-and-white thermal photos.
Drukmodusse:
The camera offers three printing modes for thermal prints: Low, Middle, and High, which likely refer to print density or quality.

Figure 5: Available printing modes.
Opname van video's
Switch to video mode. Press the shutter button to start recording 1080P video. Press it again to stop recording.

Figure 6: Video recording capabilities and storage.
Video 1: Demonstration of the camera's instant print and video recording features. This video highlights the camera's ability to capture moments and print them instantly.
Spesiale kenmerke
- Time-lapse fotografie: Set intervals for automatic photo capture (e.g., 2s, 5s, 10s).
- Deurlopende skietery: Neem verskeie foto's vinnig agtereenvolgens.
- Speletjies: The camera includes built-in puzzle games for entertainment.
- Filter Frames & Stickers: Apply various frames and stickers to photos before printing or saving.
- Mp3 speler: The camera supports MP3 playback.
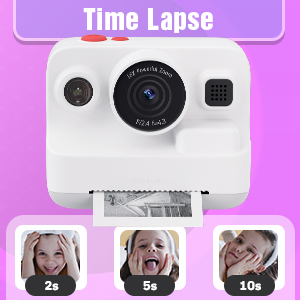
Figure 7: Time-lapse settings.

Figure 8: Built-in games and DIY photo features.

Figure 9: Creative frame and sticker options.
Onderhoud
- Skoonmaak: Use a soft, dry cloth to clean the camera body and screen. Do not use liquid cleaners or abrasive materials.
- Berging: Store the camera in a cool, dry place away from direct sunlight when not in use.
- Batterysorg: Fully charge the camera regularly, even if not in frequent use, to maintain battery health.
- Papierberging: Store thermal paper rolls in a cool, dark place to prevent premature fading or damage.
Probleemoplossing
| Probleem | Moontlike oorsaak | Oplossing |
|---|---|---|
| Kamera skakel nie aan nie. | Lae battery. | Charge the camera fully using the provided USB Type-C cable. |
| Printed photos are blank. | Thermal paper installed incorrectly (wrong side up). | Open the paper slot, rotate the paper roll 180 degrees, and re-install it correctly. Ensure the paper feeds from the bottom of the roll and the end is facing upwards. |
| Swak drukkwaliteit. | Low battery; paper quality; print mode setting. | Ensure camera is fully charged. Use recommended thermal paper. Check print mode settings (Low, Middle, High) and adjust to High for better quality. |
| Kan nie foto's/video's stoor nie. | Memory card full or not inserted correctly. | Kontroleer of die 32GB-geheuekaart behoorlik ingesit is. Vee onnodige inligting uit. files to free up space or replace the card if full. |
| Kamera vries of reageer nie. | Sagtewarefout. | Press and hold the power button for 10-15 seconds to force a restart. If the issue persists, contact customer support. |
Spesifikasies
| Kenmerk | Detail |
|---|---|
| Model Naam | BLL2 |
| Vertoon skerm | 2.4-duim IPS-kleurskerm |
| Foto resolusie | Up to 12 MP Effective Still Resolution |
| Video-resolusie | 1080P (AVI format) |
| Optiese zoom | 16x digitale zoom |
| Beeldstabilisasie | Digitaal |
| Fotosensortegnologie | CMOS (1/4-inch sensor size) |
| Ondersteun File Formaat | JPEG (photos) |
| Battery kapasiteit | 2000 XNUMX mAh litiumioon |
| Batterylewe | Approx. 3-4 hours continuous use |
| Laai-koppelvlak | USB Tipe-C |
| Geheue berging | 32GB (ingesluit) |
| Konnektiwiteit | USB, Wi-Fi |
| Flits | Built-In, Automatic |
| Deurlopende skiet | 30 fps |
| Ouderdomsreeks | Kid (3-12 years old recommended) |
| Afmetings (ongeveer) | 3.9 duim (breedte) x 3.1 duim (hoogte) |

Figure 10: Camera dimensions and included accessories.
Waarborg inligting
The Dylanto Kids Instant Print Camera comes with a 6 maande waarborg vanaf die aankoopdatum. Hierdie waarborg dek vervaardigingsdefekte en wanfunksies onder normale gebruik. Dit dek nie skade wat veroorsaak word deur misbruik, ongelukke, ongemagtigde herstelwerk of normale slytasie nie.
Behou asseblief jou aankoopbewys vir waarborgeise.
Kliënte ondersteuning
For any questions, technical assistance, or warranty claims, please contact Dylanto customer support through the retailer where you purchased the product or visit the official Dylanto brand store on Amazon: