Cecotec 08114
Cecotec Conga Rockstar Wet & Dry Steel Max Vacuum Cleaner User Manual
Model: 08114 | Handelsmerk: Cecotec
Inleiding
This manual provides essential information for the safe and efficient operation, maintenance, and troubleshooting of your Cecotec Conga Rockstar Wet & Dry Steel Max vacuum cleaner. Please read this manual thoroughly before using the appliance and keep it for future reference.
The Cecotec Conga Rockstar Wet & Dry Steel Max is a high-power solid and liquid vacuum cleaner designed with a durable metal tank, capable of cleaning various types of dirt, including liquids, from any area of your home or workshop.
Veiligheidsinstruksies
Volg altyd basiese veiligheidsmaatreëls wanneer u elektriese toestelle gebruik om die risiko van brand, elektriese skok en persoonlike besering te verminder.
- Verseker die kragtoevoer voltage stem ooreen met die graderingsetiket op die toestel.
- Moenie die stofsuier gebruik om vlambare of brandbare vloeistowwe, soos petrol, op te tel nie, of gebruik in gebiede waar hulle teenwoordig kan wees.
- Moenie iets optel wat brand of rook nie, soos sigarette, vuurhoutjies of warm as.
- Moenie die toestel, kragkabel of prop in water of ander vloeistowwe dompel nie.
- Ontkoppel altyd die stofsuier van die elektriese aansluiting voordat u skoonmaak of enige onderhoud uitvoer.
- Hou hare, los klere, vingers en alle dele van die liggaam weg van openinge en bewegende dele.
- Gebruik slegs soos beskryf in hierdie handleiding. Gebruik slegs die vervaardiger se aanbevole aanhegsels.
- Noukeurige toesig is nodig wanneer enige toestel deur of naby kinders gebruik word.
Produk verbyview
Familiarize yourself with the components of your Cecotec Conga Rockstar Wet & Dry Steel Max vacuum cleaner.

Figure 1: Main unit and included accessories, showing the vacuum's wet and dry capabilities.

Figuur 2: Gedetailleerd view of the vacuum cleaner and its various attachments for different cleaning tasks.
Komponente:
- Main Vacuum Unit with Metal Tank
- Buigsame buis
- Extensible Tube (Wand)
- Vloerborsel
- 2-in-1 Accessory (Crevice tool and brush)
- Hoekbykomstigheid
- Wiele vir maklike mobiliteit
- Patroonfilterstelsel

Figure 3: Close-up of one of the durable wheels, highlighting the vacuum's mobility.

Figure 4: The included accessories: a crevice tool, a brush attachment, and a floor nozzle.
Opstelling
- Uitpak: Verwyder alle komponente versigtig uit die verpakking. Kontroleer vir enige skade.
- Heg wiele aan: Insert the wheels into the designated slots on the base of the vacuum cleaner until they click into place.
- Koppel slang: Attach the flexible tube to the suction inlet on the front of the vacuum unit. Ensure it is securely fastened.
- Assemble Wand and Nozzle: Connect the extensible tube (wand) to the flexible tube. Then, attach the desired cleaning nozzle (e.g., floor brush, 2-in-1 accessory, or corner accessory) to the end of the wand.
- Filterinstallasie: Ensure the cartridge filter is correctly installed inside the tank for dry vacuuming. For wet vacuuming, the filter may need to be removed or replaced with a foam filter (if included and specified by manufacturer). Refer to the maintenance section for filter details.
Bedryfsinstruksies
Droë stofsuig:
For dry vacuuming, ensure the cartridge filter is properly installed. Plug the vacuum cleaner into a suitable electrical outlet. Turn on the appliance using the power switch. Guide the nozzle over the dry surfaces you wish to clean.

Figure 5: A user demonstrating dry vacuuming on an outdoor patio, effectively cleaning solid debris.

Figure 6: The vacuum cleaner being used to clear leaves and dirt from an outdoor area, showcasing sy veelsydigheid.

Figure 7: Using the vacuum with a specialized attachment to clean the interior of a car, reaching tight spaces.
Nat stofsuig:
Before wet vacuuming, ensure the dry filter is removed and, if applicable, a wet-specific foam filter is installed. Do not overfill the tank; monitor the liquid level. The vacuum is designed to pick up spilled liquids. When the tank is full, the float mechanism will automatically shut off suction to prevent overflow.

Figure 8: The vacuum effectively cleaning up a liquid spill on a hard floor, demonstrating its wet vacuuming capability.

Figure 9: A close-up showing the vacuum's nozzle collecting water from a surface, indicating its wet function.
Blaser funksie:
The vacuum cleaner also features a blower function. To use it, detach the flexible tube from the suction inlet and connect it to the blower outlet, usually located on the rear or side of the unit. This function is useful for clearing debris from hard-to-reach areas or blowing leaves.
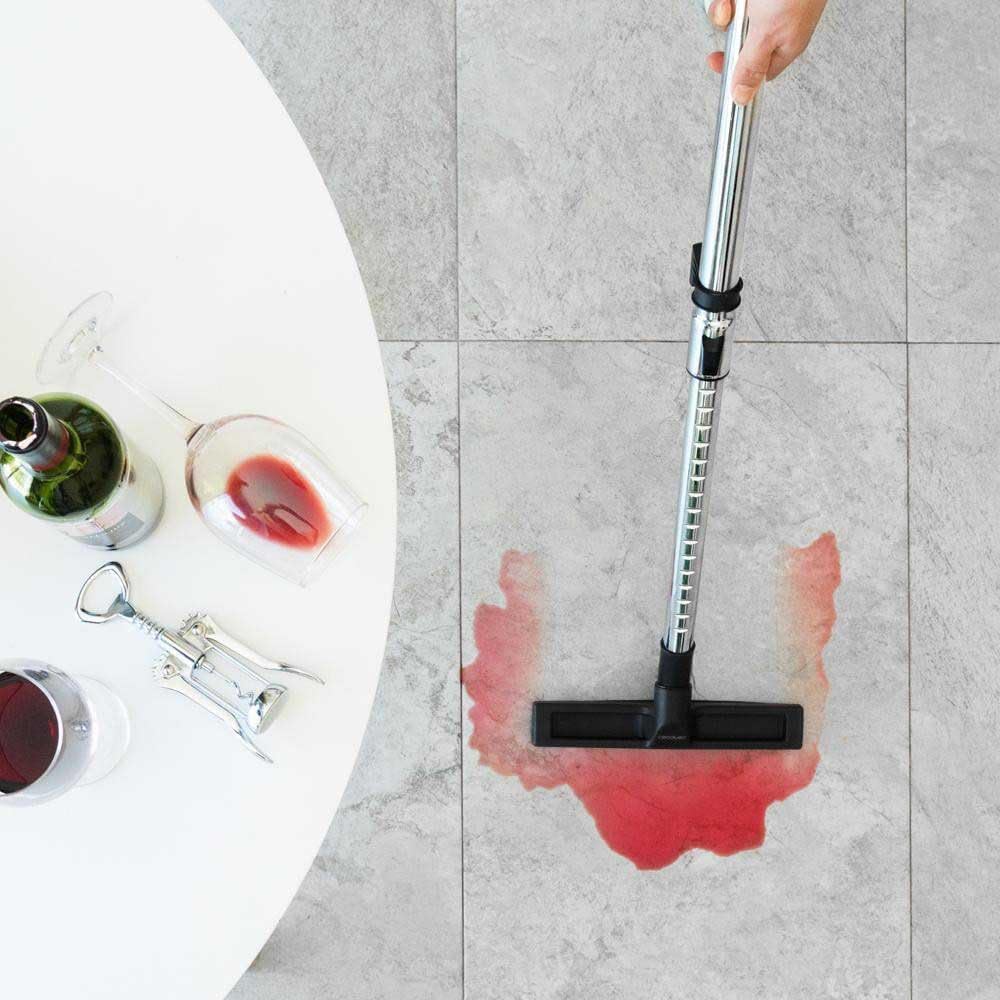
Figure 10: A user utilizing the blower function to clear debris from around a rock wall, demonstrating its utility beyond vacuuming.
Onderhoud
Gereelde onderhoud verseker optimale werkverrigting en verleng die lewensduur van jou stofsuier.
Maak die tenk leeg:
After each use, especially after wet vacuuming, empty the tank. Unlatch the top motor unit from the tank and carefully pour out the contents. Clean the inside of the tank with water and mild detergent if necessary, then dry thoroughly.

Figure 11: The vacuum cleaner being carried, illustrating its portability for emptying or transport.
Filter Skoonmaak en Vervanging:
The cartridge filter is crucial for dry vacuuming. Periodically remove and clean it by tapping off dust or rinsing with water. Ensure the filter is completely dry before re-installing for dry use. For wet vacuuming, ensure the appropriate filter (e.g., foam filter) is used and cleaned as per its specific instructions.

Figure 12: A close-up of the vacuum's filter, emphasizing the importance of regular cleaning for optimal performance.

Figure 13: Diagram illustrating the multi-layer filter system, designed for efficient dust and debris capture.
Algemene skoonmaak:
Vee die buitekant van die stofsuier af met adamp lap. Moenie skuurmiddels of oplosmiddels gebruik nie. Maak seker dat alle dele droog is voor berging.
Probleemoplossing
| Probleem | Moontlike oorsaak | Oplossing |
|---|---|---|
| Die stofsuier skakel nie aan nie. | Nie ingeprop nie; kragskakelaar af; stroombreker het geaktiveer. | Check power cord connection; ensure switch is ON; reset circuit breaker. |
| Verlies aan suiging. | Full tank; clogged hose/nozzle; dirty filter. | Empty tank; clear any blockages; clean or replace filter. |
| Motor stop tydens nat stofsuig. | Tenk is vol (vlottermeganisme geaktiveer). | Maak die tenk leeg. |
| Ongewone geraas. | Blockage in hose/nozzle; damaged motor. | Kontroleer vir en verwyder blokkasies. Indien geraas voortduur, kontak kliëntediens. |
Spesifikasies
- Handelsmerk: Cecotec
- Modelnommer: 08114
- Kleur: Grys
- Afmetings (L x B x H): 36 x 36 x 45 cm
- Gewig: 6.8 kilogram
- Kapasiteit: 20 liter
- Krag: 1400 Watt
- Voltage: 1400 Volts (as per product specifications, typically refers to power input)
- Kragbron: Elektries met koord
- Filter tipe: Patroon
- Aanbevole oppervlak: Harde vloer, mat

Figure 14: Visual representation of the 1400W power output, indicating strong suction capabilities.

Figure 15: Illustration of the 20-liter tank capacity, allowing for extended cleaning sessions.
Waarborg en Ondersteuning
Cecotec provides support for its products. Spare parts for this model are available for up to 10 years from the date of purchase. For warranty claims, technical assistance, or to inquire about spare parts, please refer to the contact information provided with your purchase or visit the official Cecotec webwebwerf.