1. Inleiding
Dankie vir die aankoopasing the Audizio Adria DAB/Internet Radio Tuner. This device offers a versatile audio experience, combining Internet Radio, DAB+, FM radio, Bluetooth connectivity, and Spotify Connect. This manual provides essential information for setting up, operating, and maintaining your tuner to ensure optimal performance and longevity.
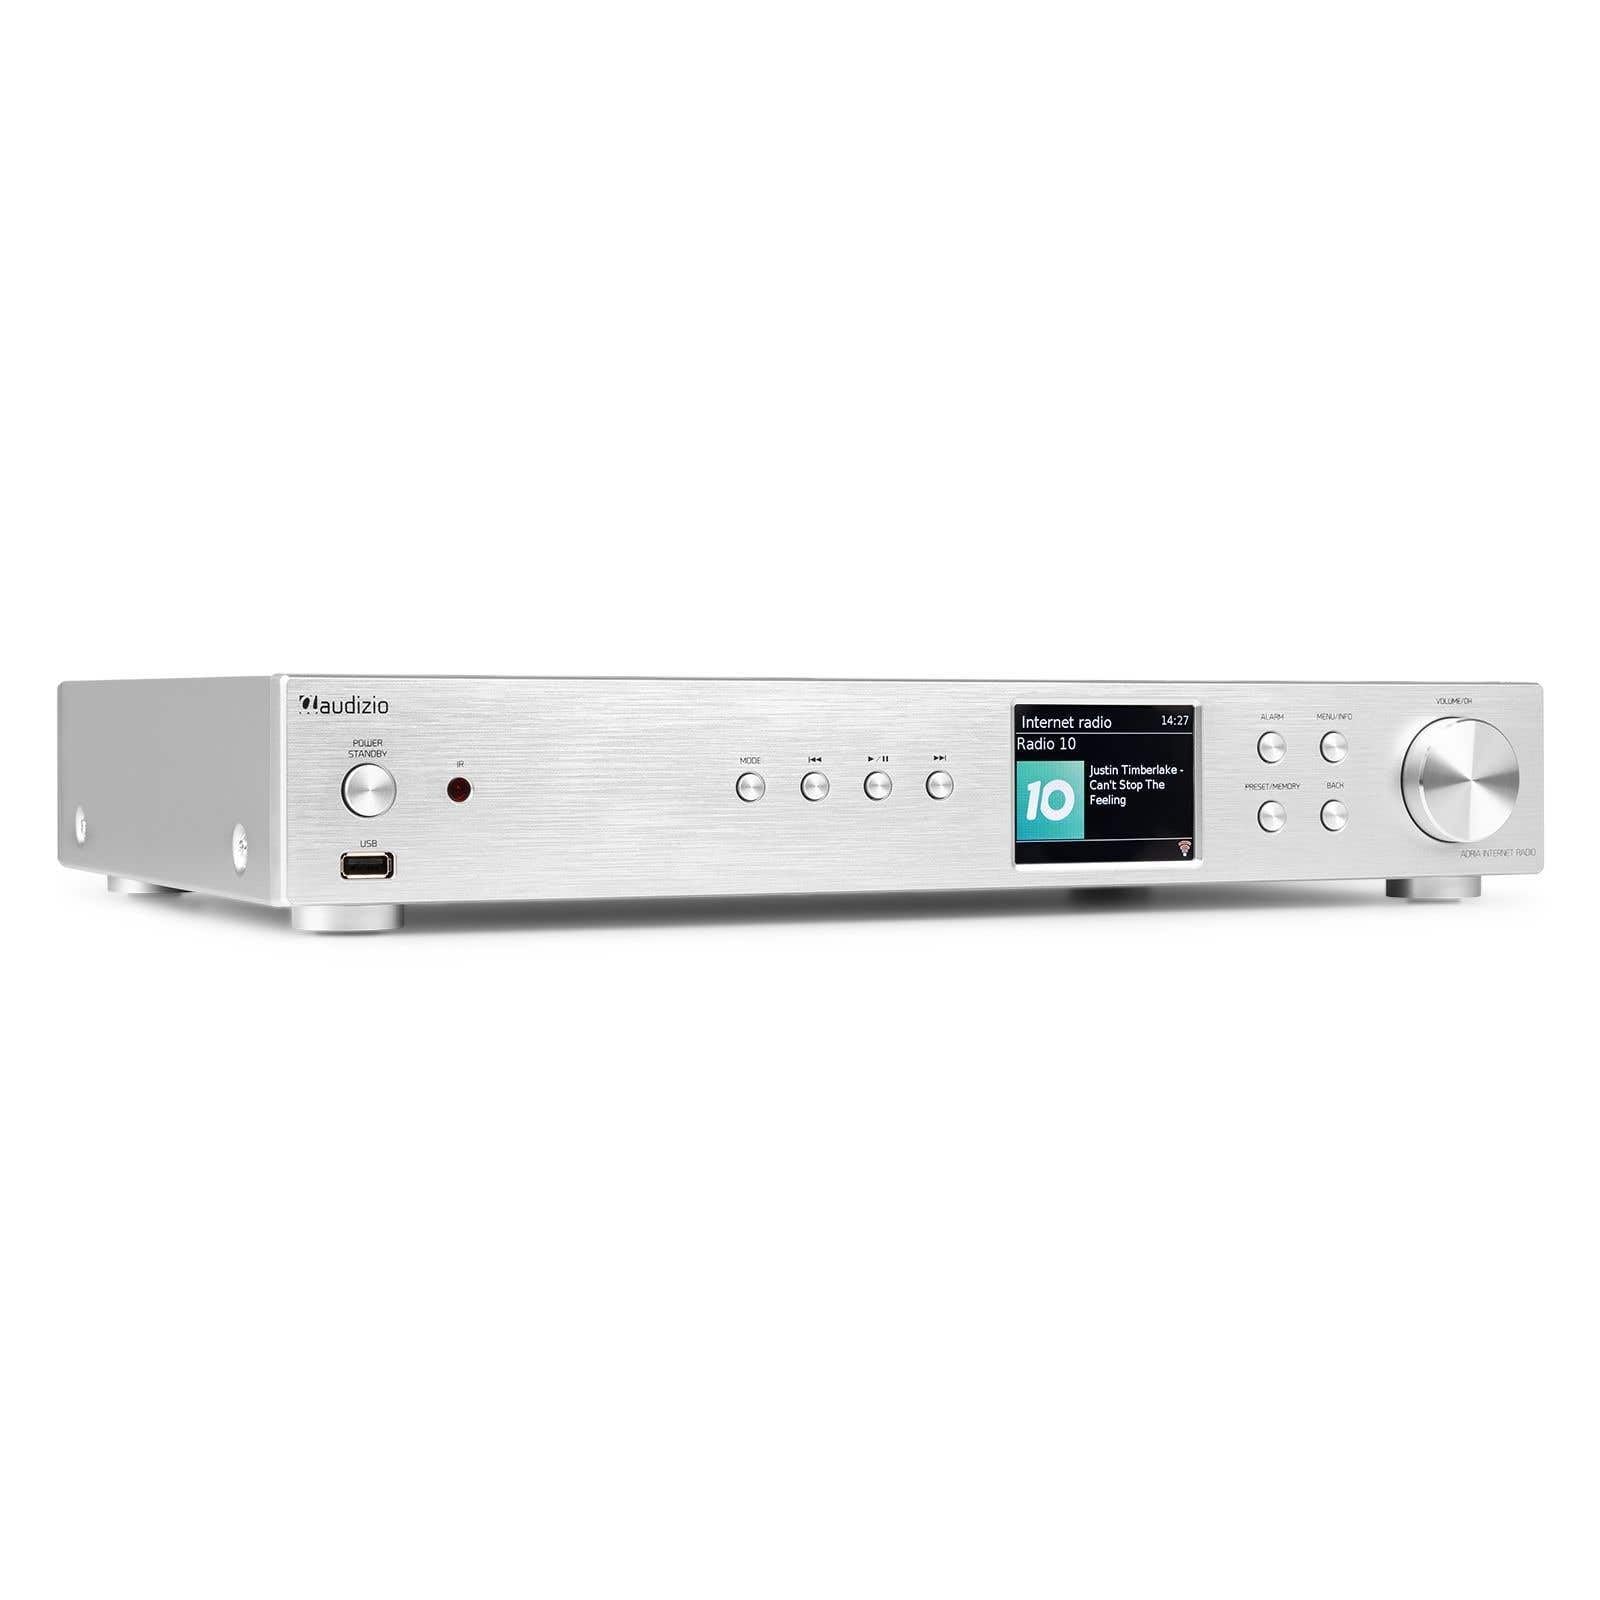
Figure 1.1: Audizio Adria DAB/Internet Radio Tuner with included remote control and antenna.
2. Veiligheidsinligting
- Lees alle instruksies noukeurig voor gebruik.
- Keep the unit away from water, moisture, and direct heat sources.
- Moenie ventilasie-openinge blokkeer nie. Maak seker dat daar voldoende ruimte rondom die eenheid is vir behoorlike lugvloei.
- Gebruik slegs die kragadapter wat by die eenheid voorsien is.
- Moenie probeer om die eenheid self te herstel of te wysig nie. Verwys alle diens na gekwalifiseerde personeel.
- Dispose of batteries responsibly. The remote control uses 1 AAA battery.
3. Pakketinhoud
Verifieer dat alle items in die pakket teenwoordig is:
- Audizio Adria DAB/Internet Radio Tuner Unit
- Remote Control (requires 1x AAA battery, included)
- Kragadapter
- DAB/FM-antenne
- Gebruikershandleiding
4. Produk verbyview
4.1 Voorpaneel

Figure 4.1: Front Panel Controls and Display
- Power / Standby Button: Skakel die eenheid aan of af.
- USB-poort: Vir mediaweergawe vanaf USB-bergingstoestelle.
- Modusknoppie: Switches between Internet Radio, DAB+, FM, Bluetooth, and Media Player modes.
- Speel/Pause-knoppie: Beheer terugspeel in mediamodusse.
- Skip/Tune Buttons: Navigates tracks or tunes radio frequencies.
- Vertoon skerm: Shows station information, menus, and settings.
- Alarmknoppie: Accesses alarm settings.
- Kieslys/Inligtingsknoppie: Enters menu or displays information.
- Preset/Memory Button: Saves or recalls favorite stations.
- Terug-knoppie: Keer terug na die vorige kieslys of skerm.
- Volume / OK Knob: Rotates to adjust volume or navigate menus; presses to confirm selections.
4.2 Agterpaneel

Figuur 4.2: Agterpaneelverbindings
- Kragtoevoer: Koppel die meegeleverde kragadapter hier aan.
- DAB/FM Antenna-invoer: Connect the included DAB/FM antenna.
- Analog Output (RCA): Koppel aan 'n ampluidspreker of aktiewe luidsprekers met behulp van RCA-kabels.
- AUX-invoer: Koppel eksterne klankbronne via 'n 3.5 mm-aansluiting.
- USB-laaipoort: Vir die laai van eksterne toestelle.
- Optiese digitale uitset: Koppel aan 'n amplifier or DAC with an optical cable.
- Coaxial Digital Output: Koppel aan 'n amplifier or DAC with a coaxial cable.
5. Opstelling
5.1 Connecting Power and Antennas
- Connect the supplied DAB/FM antenna to the DAB/FM Antenna Input on the rear panel. Extend the antenna fully for best reception.
- Connect the power adapter to the Power Input on the rear panel, then plug it into a wall outlet.
5.2 Verbinding met 'n oudiostelsel
Choose one of the following methods to connect the Adria tuner to your ampluidsprekers of aktiewe luidsprekers:
- Analog Output (RCA): Use RCA cables to connect the Analog Output ports on the Adria to the corresponding input on your amplewendiger.
- Optiese digitale uitset: Use an optical cable to connect the Optical Digital Output to an optical input on your ampverligter of DAC.
- Coaxial Digital Output: Use a coaxial cable to connect the Coaxial Digital Output to a coaxial input on your ampverligter of DAC.
5.3 Aanvanklike aanskakeling en netwerkopstelling
- Press the Power/Standby button on the front panel or remote control to turn on the unit.
- The display will show the Audizio logo, then guide you through the initial setup wizard.
- Follow the on-screen prompts to select your language, time zone, and connect to your Wi-Fi network. You will need your Wi-Fi network name (SSID) and password.
- Use the Volume/OK knob to navigate menus and confirm selections.
6. Bedryfsinstruksies
6.1 Moduskeuse
Druk die Modus button on the front panel or remote control to cycle through available modes: Internet Radio, DAB+, FM, Bluetooth, and Media Player (USB).
6.2 Internetradio
Figure 6.1: Internet Radio Mode Display
- Select Internet Radio mode.
- Use the Volume/OK knob to browse stations by location, genre, or search.
- Press the Volume/OK knob to select a station.
- Om 'n stasie as 'n voorafinstelling te stoor, druk en hou die Vooraf ingestelde/geheue button. Select a preset number and confirm.
- Om 'n voorinstelling te herroep, druk die Vooraf ingestelde/geheue button briefly, then select the desired preset.
6.3 DAB/DAB+ Radio

Figure 6.2: DAB Radio Mode Display
- Select DAB+ mode. The unit will automatically scan for available stations on first use.
- Use the Volume/OK knob to scroll through the list of stations.
- Press the Volume/OK knob to select a station.
- Saving and recalling presets works the same as for Internet Radio.
6.4 FM -radio
In FM mode, use the Skip/Tune buttons to manually tune frequencies or press and hold to auto-scan. Saving and recalling presets works the same as for Internet Radio.
6.5 Bluetooth-konnektiwiteit
- Select Bluetooth mode. The unit will enter pairing mode automatically.
- On your smartphone, tablet, or other Bluetooth device, search for available devices and select "Audizio Adria".
- Once paired, you can stream audio from your device to the tuner.
6.6 Spotify Connect
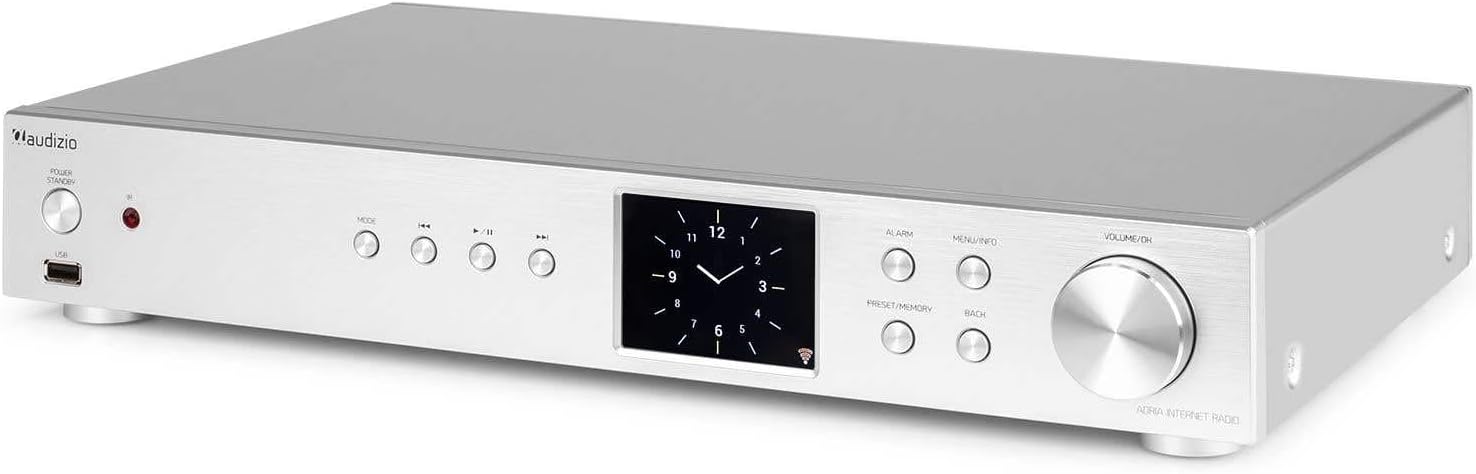
Figure 6.3: Spotify Connect Display
Om Spotify Connect te gebruik:
- Ensure your Audizio Adria is connected to the same Wi-Fi network as your smartphone or tablet running the Spotify app.
- Open the Spotify app on your device and play a song.
- Tap the "Devices Available" icon (usually a speaker or computer icon) at the bottom of the screen.
- Select "Audizio Adria" from the list of available devices. The music will now play through your tuner.
6.7 Alarm Funksie

Figure 6.4: Clock and Alarm Display
Druk die Alarm button to access and set up alarms. You can configure alarm time, source (buzzer, Internet Radio, DAB, FM), and frequency (daily, once, weekends, weekdays).
7. Afstandbeheer

Figuur 7.1: Uitleg van afstandbeheer
The remote control provides full functionality for operating your Audizio Adria tuner. Ensure the included AAA battery is correctly inserted. Point the remote control directly at the unit's front panel for optimal response.
- SLUIMER: Maak die alarm tydelik stil.
- Kragknoppie: Skakel die eenheid aan of af.
- Navigasieknoppies (Op, Af, Links, Regs, OK): Vir menu-navigasie en -keuse.
- VOL +/-: Pas volume aan.
- WYSE: Blaai deur invoermodusse.
- SPYSKAART: Verkry toegang tot die hoofkieslys.
- TERUG: Keer terug na die vorige skerm.
- INLIGTING: Displays detailed information about the current station or track.
- SKANDEER: Initiates a scan for radio stations.
- EQ: Accesses equalizer settings.
- Numeriese sleutelbord (0-9): For direct input or selecting presets.
- VOORAFSTELLING: Saves or recalls favorite stations.
8. Onderhoud
To ensure the longevity and optimal performance of your Audizio Adria tuner, follow these maintenance guidelines:
- Skoonmaak: Gebruik 'n sagte, droë lap om die buitekant van die eenheid skoon te maak. Moenie skuurmiddels, was of oplosmiddels gebruik nie.
- Ventilasie: Ensure that the ventilation openings are not blocked. Dust accumulation can be removed with a soft brush or vacuum cleaner.
- Berging: Indien die eenheid vir 'n lang tydperk gestoor word, ontkoppel dit van die kragtoevoer en bêre dit op 'n koel, droë plek.
- Antenna sorg: Handle the antenna gently to avoid damage.
9. Probleemoplossing
If you encounter issues with your Audizio Adria tuner, consult the following table for common problems and solutions:
| Probleem | Moontlike oorsaak | Oplossing |
|---|---|---|
| Geen krag nie | Kragkabel nie gekoppel nie; kragaansluiting foutief. | Kontroleer die kragkabelverbinding; probeer 'n ander aansluiting. |
| Geen klank nie | Volume too low; incorrect audio output selected; amplifier/speakers off or disconnected. | Increase volume; check audio cable connections; ensure amplifier/speakers are on and set to correct input. |
| Kan nie aan Wi-Fi koppel nie | Verkeerde wagwoord; swak sein; routerprobleem. | Verifieer Wi-Fi-wagwoord; skuif eenheid nader aan die router; herbegin router. |
| Poor DAB/FM reception | Antenna nie uitgestrek nie; swak seinarea. | Fully extend and reposition the antenna; consider an external antenna if available. |
| Bluetooth-samestelling misluk | Device not in pairing mode; device too far; interference. | Ensure both devices are in pairing mode; move devices closer; turn off other Bluetooth devices. |
10. Spesifikasies
| Kenmerk | Spesifikasie |
|---|---|
| Handelsmerk | Audizio |
| Modelnommer | Adria |
| Kleur | Silwer |
| Vertoon grootte | 3.2 duim |
| Verbindingstegnologie | Optical, Coaxial, Bluetooth |
| Spesiale kenmerke | Bluetooth, Internet Radio, DAB+, FM, Spotify Connect |
| Ondersteunde radiobande | DAB, DAB+, FM |
| Kragbron | Elektries met koord |
| Produkafmetings (L x B x H) | 43.4 x 7.5 x 31 cm |
| Item gewig | 3.2 kilogram |
| Ingesluit komponente | Afstandbeheer |
| Versoenbare toestelle | Slimfoon, tablet, skootrekenaar |
11. Waarborginligting
This product is covered by a manufacturer's warranty. Please refer to the warranty card included in your package or contact your retailer for specific terms and conditions. Keep your proof of purchase for warranty claims.
12. Ondersteuning
For technical assistance, troubleshooting beyond this manual, or service inquiries, please contact Audizio customer support or your local dealer. Contact information can typically be found on the manufacturer's webwebwerf of u aankoopdokumentasie.