1. Belangrike veiligheidsinligting
Please read all instructions carefully before operating the dehumidifier. Retain this manual for future reference.
- Ensure the unit is placed on a level, stable surface to prevent water spillage.
- Maintain adequate clearance (at least 20 cm) around the unit for proper airflow.
- Do not operate the unit with a damaged power cord. Contact customer support for replacement.
- Ontkoppel die ontvochtiger voordat u skoonmaak of enige onderhoud uitvoer.
- Moenie voorwerpe in die luginlaat of -uitlaat steek nie.
- Hou die eenheid weg van hittebronne en direkte sonlig.
- Hierdie toestel is nie bedoel vir gebruik deur persone (insluitend kinders) met verminderde fisiese, sensoriese of geestelike vermoëns, of 'n gebrek aan ervaring en kennis nie, tensy hulle toesig of instruksies oor die gebruik van die toestel gegee is deur 'n persoon wat verantwoordelik is vir hul veiligheid.
2. Produk verbyview
The Waykar 80 Pints Dehumidifier is designed to efficiently remove excess moisture from your environment, improving air quality and comfort. It is suitable for spaces up to 5,000 square feet.

Figuur 2.1: Voorkant view of the Waykar 80 Pints Dehumidifier.

Figure 2.2: Dehumidifier operating in a room, illustrating its coverage capability and adjustable humidity range (30-80% RH).
Sleutel kenmerke sluit in:
- 80 Pint Kapasiteit: Verwyder tot 80 pinte vog per dag.
- Energy Star-gesertifiseer: Designed for high energy efficiency.
- Wide-Angle Swing: Automatic 30°-90° swing function for improved air circulation.
- Stil werking: Operates as low as 42 dB.
- Slim raakbeheer: Intuitive panel for easy settings adjustment.
- 24-uur timer: Schedule operations for convenience.
- Auto Defrost & Memory Restart: Ensures stable performance and resumes settings after power interruption.
- Buigsame Dreinering: Options for manual tank emptying or continuous drainage.
- Wasbare lugfilter: Maklik om skoon te maak en te onderhou.
- 360° Swivel Wheels & Integrated Handle: Vir maklike mobiliteit.
3. Opstelling en installering
3.1 Uitpak
Carefully remove the dehumidifier from its packaging. Inspect the unit for any signs of damage. If any damage is found, do not operate the unit and contact customer support.
3.2 Plasing
Place the dehumidifier on a firm, level surface in a location where the ambient temperature will not fall below 5°C (41°F). Ensure there is at least 20 cm (8 inches) of space around the unit for proper air circulation. Avoid placing the unit near heat-generating appliances or in direct sunlight.

Figure 3.1: The dehumidifier features 360° swivel wheels and an integrated handle for easy movement, along with tidy cable storage.
3.3 Kragverbinding
Steek die kragkabel in 'n geaarde elektriese aansluiting. Maak seker die volume istage and frequency of the power supply match the specifications on the unit's rating label.
4. Bedryfsinstruksies
The control panel allows you to manage all functions of the dehumidifier.
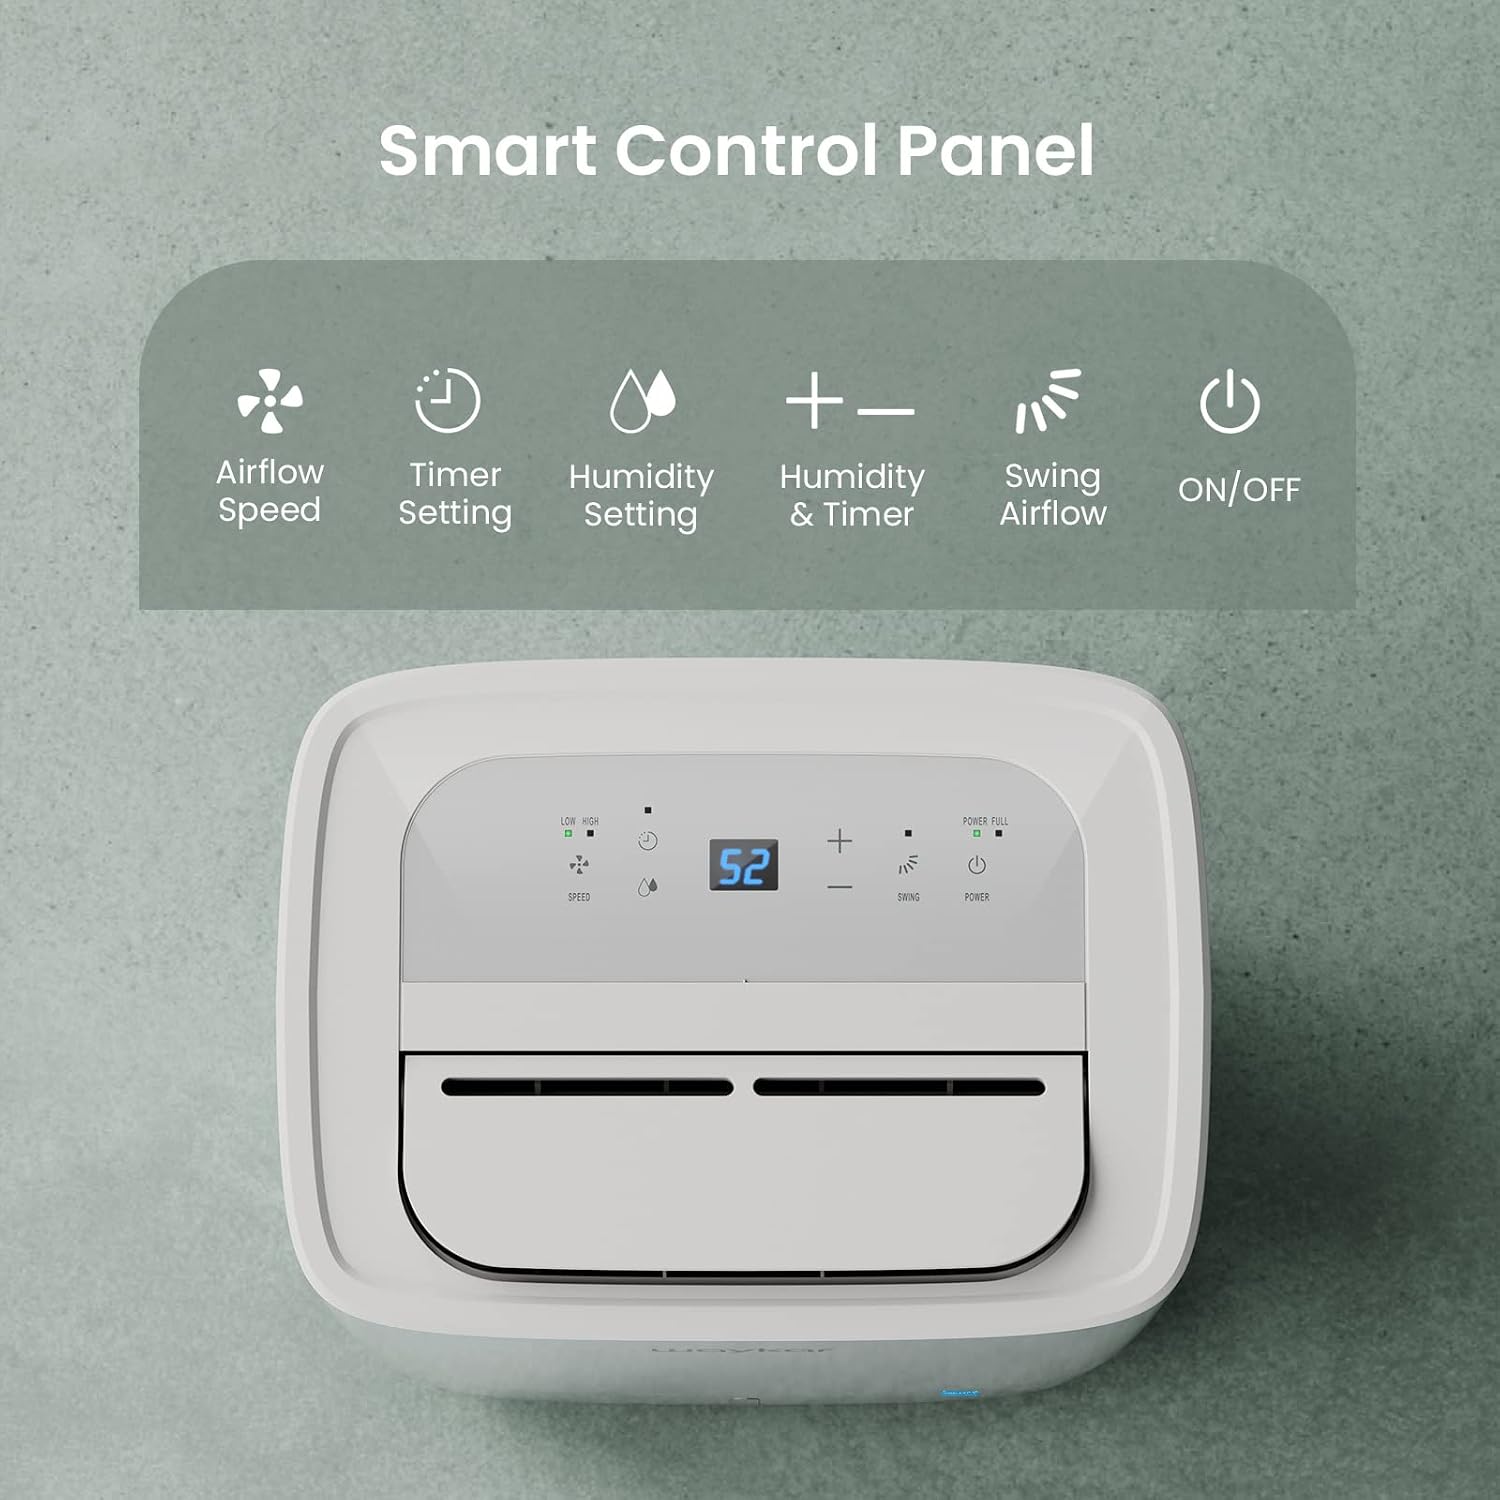
Figure 4.1: Smart Control Panel with buttons for Airflow Speed, Timer Setting, Humidity Setting, Swing Airflow, and ON/OFF.
4.1 Krag AAN/AF
- Druk die Krag knoppie om die eenheid AAN of AF te skakel.
4.2 Setting Humidity Level
- Druk die + or - buttons to adjust the desired humidity level between 30% and 80% Relative Humidity (RH). The unit will operate until the set humidity level is reached, then cycle ON/OFF to maintain it.
4.3 Fan Spoed
- Druk die Spoed button to toggle between Low and High fan speeds.
4.4 Timer-funksie
- Druk die Afteller button to set a delay for the unit to turn ON or OFF. The timer can be set from 0.5 to 24 hours.
4.5 Swing Airflow
- Druk die Swaai button to activate the automatic 30°-90° airflow oscillation. This helps distribute dehumidified air more evenly.
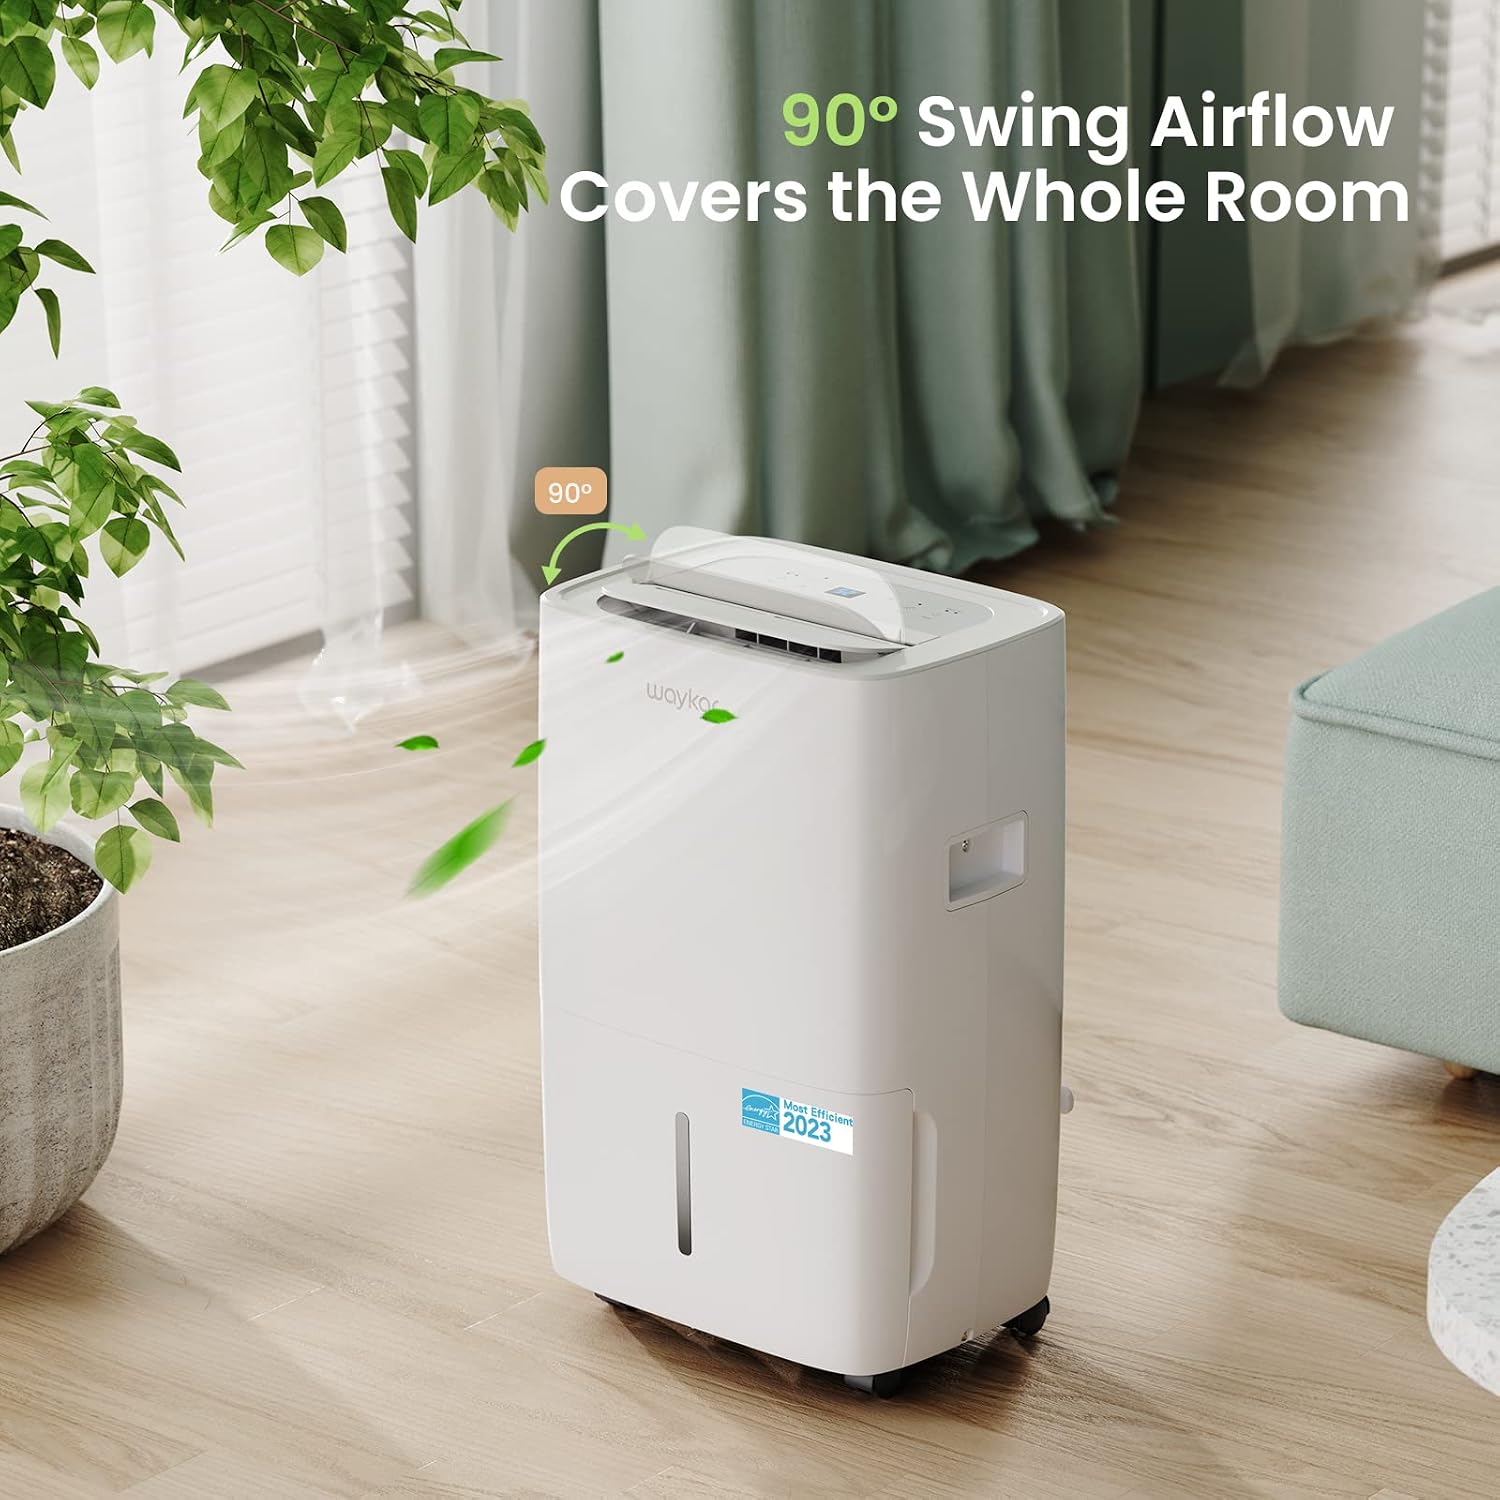
Figure 4.2: The 90° swing airflow feature helps cover the entire room for efficient dehumidification.
4.6 Kinderslot
- Om die Kinderslot te aktiveer, druk en hou die Afteller button for 3 seconds. The control panel will be locked to prevent accidental changes. Repeat to unlock.
4.7 Auto Defrost and Memory Restart
- The unit features an automatic defrost function that activates when frost builds up on the evaporator coils, ensuring efficient operation in cooler environments.
- In die geval van 'n krag outage, the Memory Restart function will automatically resume the previous settings once power is restored.
5. Dreineringsopsies
The Waykar dehumidifier offers two convenient drainage methods:
5.1 Handmatige Dreinering (Watertenk)
- When the 1.14-gallon (4.3L) water tank is full, the unit will automatically shut off and an indicator light will illuminate on the control panel.
- Trek die watertenk versigtig uit die voorkant van die eenheid.
- Maak die versamelde water leeg.
- Slide the empty tank back into the unit until it clicks into place. The unit will then resume operation.
5.2 Continuous Drainage (Drain Hose)
- For continuous operation without needing to empty the tank, attach the included 3.3 ft (1 m) drain hose to the drainage outlet at the back of the unit.
- Maak seker dat die slang stewig vasgedraai is om lekkasies te voorkom.
- Direct the other end of the hose to a suitable drain (e.g., floor drain, sink). Ensure the hose is sloped downwards to allow gravity drainage.

Figure 5.1: Illustration of both manual drainage (left) and continuous drainage (right) options.
6. Onderhoud
Gereelde onderhoud verseker optimale werkverrigting en lang lewensduur van u ontvochtiger.
6.1 Skoonmaak van die lugfilter
The washable air filter should be cleaned regularly (approximately every 250 hours of operation or when the filter indicator light illuminates) to maintain efficiency.
- Skakel die eenheid af en trek die stekker uit die stopcontact.
- Verwyder die lugfilter van die agterkant van die eenheid.
- Was die filter met warm seepwater. Spoel deeglik af.
- Laat die filter heeltemal lugdroog word voordat dit weer in die eenheid geplaas word.
- Once the filter is reinstalled, press and hold the Filter button for 3 seconds to reset the filter indicator.

Figure 6.1: The detachable and washable water tank, featuring a visible water level indicator.
6.2 Skoonmaak van die watertenk
Clean the water tank periodically to prevent mold and bacteria growth.
- Verwyder die watertenk uit die eenheid.
- Was die tenk met warm water en 'n sagte skoonmaakmiddel.
- Spoel deeglik uit en droog af voordat dit terug in die ontvochtiger geplaas word.
6.3 Buite Skoonmaak
- Vee die buitekant van die eenheid af met 'n sagte, damp lap. Moenie harde chemikalieë of skuur skoonmaakmiddels gebruik nie.
7. Probleemoplossingsgids
Voordat u kliëntediens kontak, verwys asseblief na die volgende algemene probleme en oplossings:
| Probleem | Moontlike oorsaak | Oplossing |
|---|---|---|
| Dehumidifier does not turn ON | No power supply; Power cord not plugged in; Water tank full or incorrectly installed. | Check power outlet; Plug in power cord securely; Empty and correctly reinstall water tank. |
| Eenheid loop, maar ontvogtig nie | Lugfilter verstop; Kamertemperatuur te laag; Humiditeitsinstelling te hoog. | Clean air filter; Ensure room temperature is above 5°C (41°F); Lower desired humidity setting. |
| Die eenheid is raserig | Eenheid nie op 'n gelyke oppervlak nie; Lugfilter verstop. | Plaas die eenheid op 'n plat, stabiele oppervlak; Maak die lugfilter skoon. |
| Water lek uit die eenheid | Water tank incorrectly installed; Drain hose not securely attached (continuous drainage). | Reinstall water tank correctly; Securely tighten drain hose connection. |
| Foutkode |