GYMAX 12FT Internal Net
GYMAX 12FT Trampoline with Enclosure Net and Basketball Hoop User Manual
Model: 12FT Internal Net
1. Inleiding
Thank you for choosing the GYMAX 12FT Trampoline with Enclosure Net and Basketball Hoop. This manual provides essential information for the safe assembly, operation, and maintenance of your trampoline. Lees dit asseblief deeglik deur voor gebruik en bewaar dit vir toekomstige verwysing.
2. Veiligheidsinligting
Jou veiligheid is van die allergrootste belang. Hierdie trampoline is designed and manufactured to ASTM standards to ensure a reliable jumping experience. Always follow these safety guidelines:
- Volwasse toesig word te alle tye vereis.
- Slegs een persoon moet op 'n slag spring om botsings te voorkom.
- Moenie tuimelbewegings of ander gevaarlike maneuvers probeer sonder behoorlike opleiding en toesig nie.
- Ensure the enclosure net is properly secured before each use.
- Inspekteer die trampoline for any damage or wear before each use. Do not use if damaged.
- Hou die area rondom die trampoline vry van hindernisse.
- Do not hang on the basketball rim or enclosure poles.
- Maksimum gewigskapasiteit: 400 lbs.
- Always use the provided ladder for safe entry and exit.
For additional safety, the trampoline features a 6ft safety net and 10mm anti-collision EPE foam covers on the poles.
3. Pakketinhoud
The GYMAX Trampoline is delivered in multiple boxes. Please verify all components are present before assembly.
- Buitelug Trampoline Frame and Legs
- Jumping Mat (8-row stitched PP, UV tested)
- Springs (72 pcs for 12FT model)
- Veiligheidskassie
- Enclosure Net (6ft height)
- Enclosure Poles with Foam Covers
- 2-stap leer
- Basketball Hoop Set (Hoop, Basketball, Pump)
- Gebruikersgids
- Installasie gereedskap
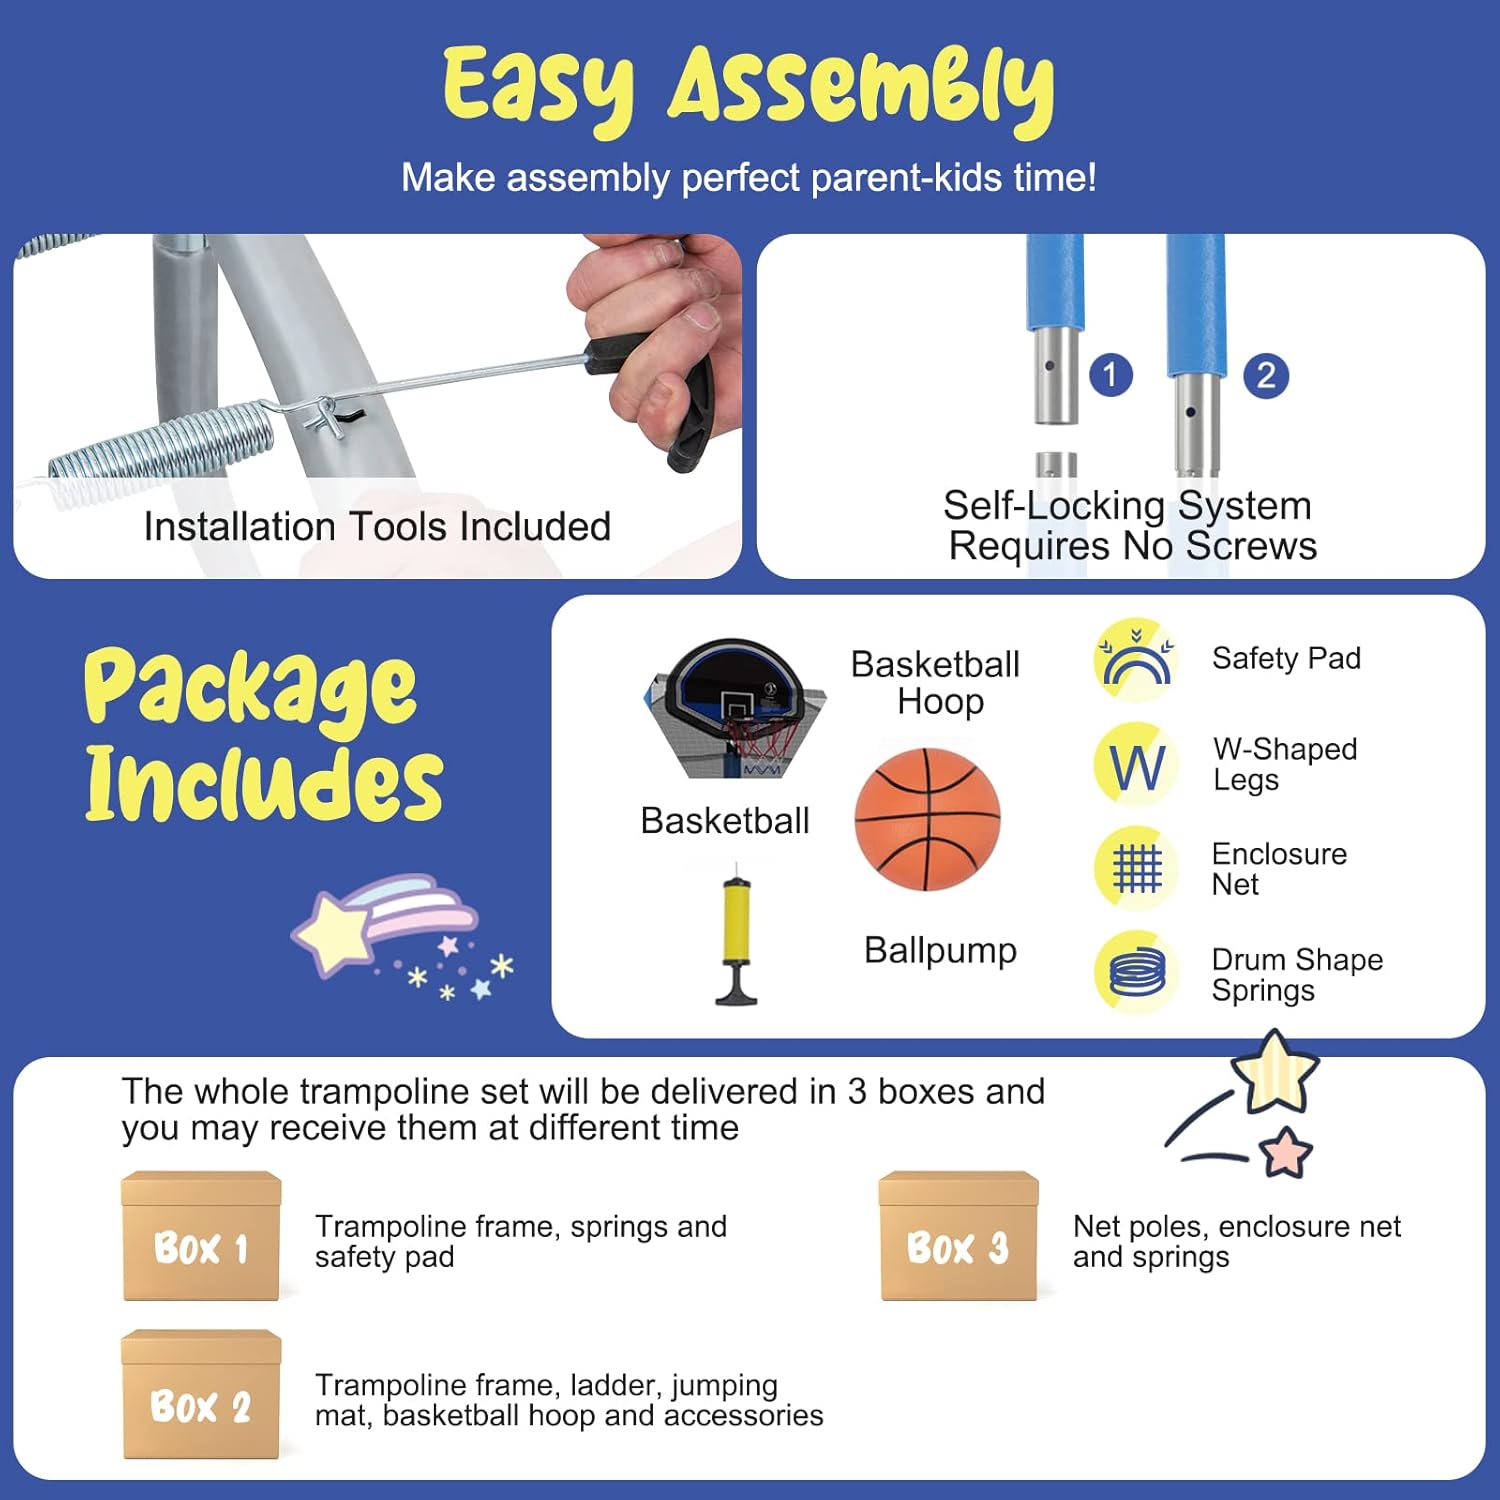
Figure 1: Illustration of package contents and easy assembly features like self-locking system and included tools.
4. Opstelling en samestelling
Assembly requires at least two adults. Follow the step-by-step instructions provided in the included User Guide. A general overview word hieronder verskaf:
- Berei die area voor: Choose a flat, level surface free from obstacles. Ensure adequate clearance around the trampolyn.
- Stel die raam bymekaar: Connect the steel frame sections and attach the W-shaped legs. The self-locking system requires no screws for initial frame assembly.
- Heg die springmat aan: Carefully attach the springs to the jumping mat and the frame. Pro Wenk: When attaching springs, always work across from each other (e.g., 12 o'clock, then 6 o'clock, then 3 o'clock, then 9 o'clock) to ensure even tension and prevent frame warping. Do not attach springs in a circular pattern.
- Installeer die Veiligheidsmat: Cover the springs and frame with the safety pad.
- Rig die omhulselpale op: Attach the foam-covered enclosure poles to the frame.
- Install the Enclosure Net: Secure the enclosure net to the poles and the jumping mat. Ensure the zipper and buckles are functional.
- Heg die leer aan: Secure the 2-step ladder to the trampolyn raam.
- Mount the Basketball Hoop: Attach the basketball hoop to the designated enclosure pole.
Video 1: Official Gymax video demonstrating the assembly process and features of the trampoline with basketball hoop. This video highlights the ease of setup and various safety components.
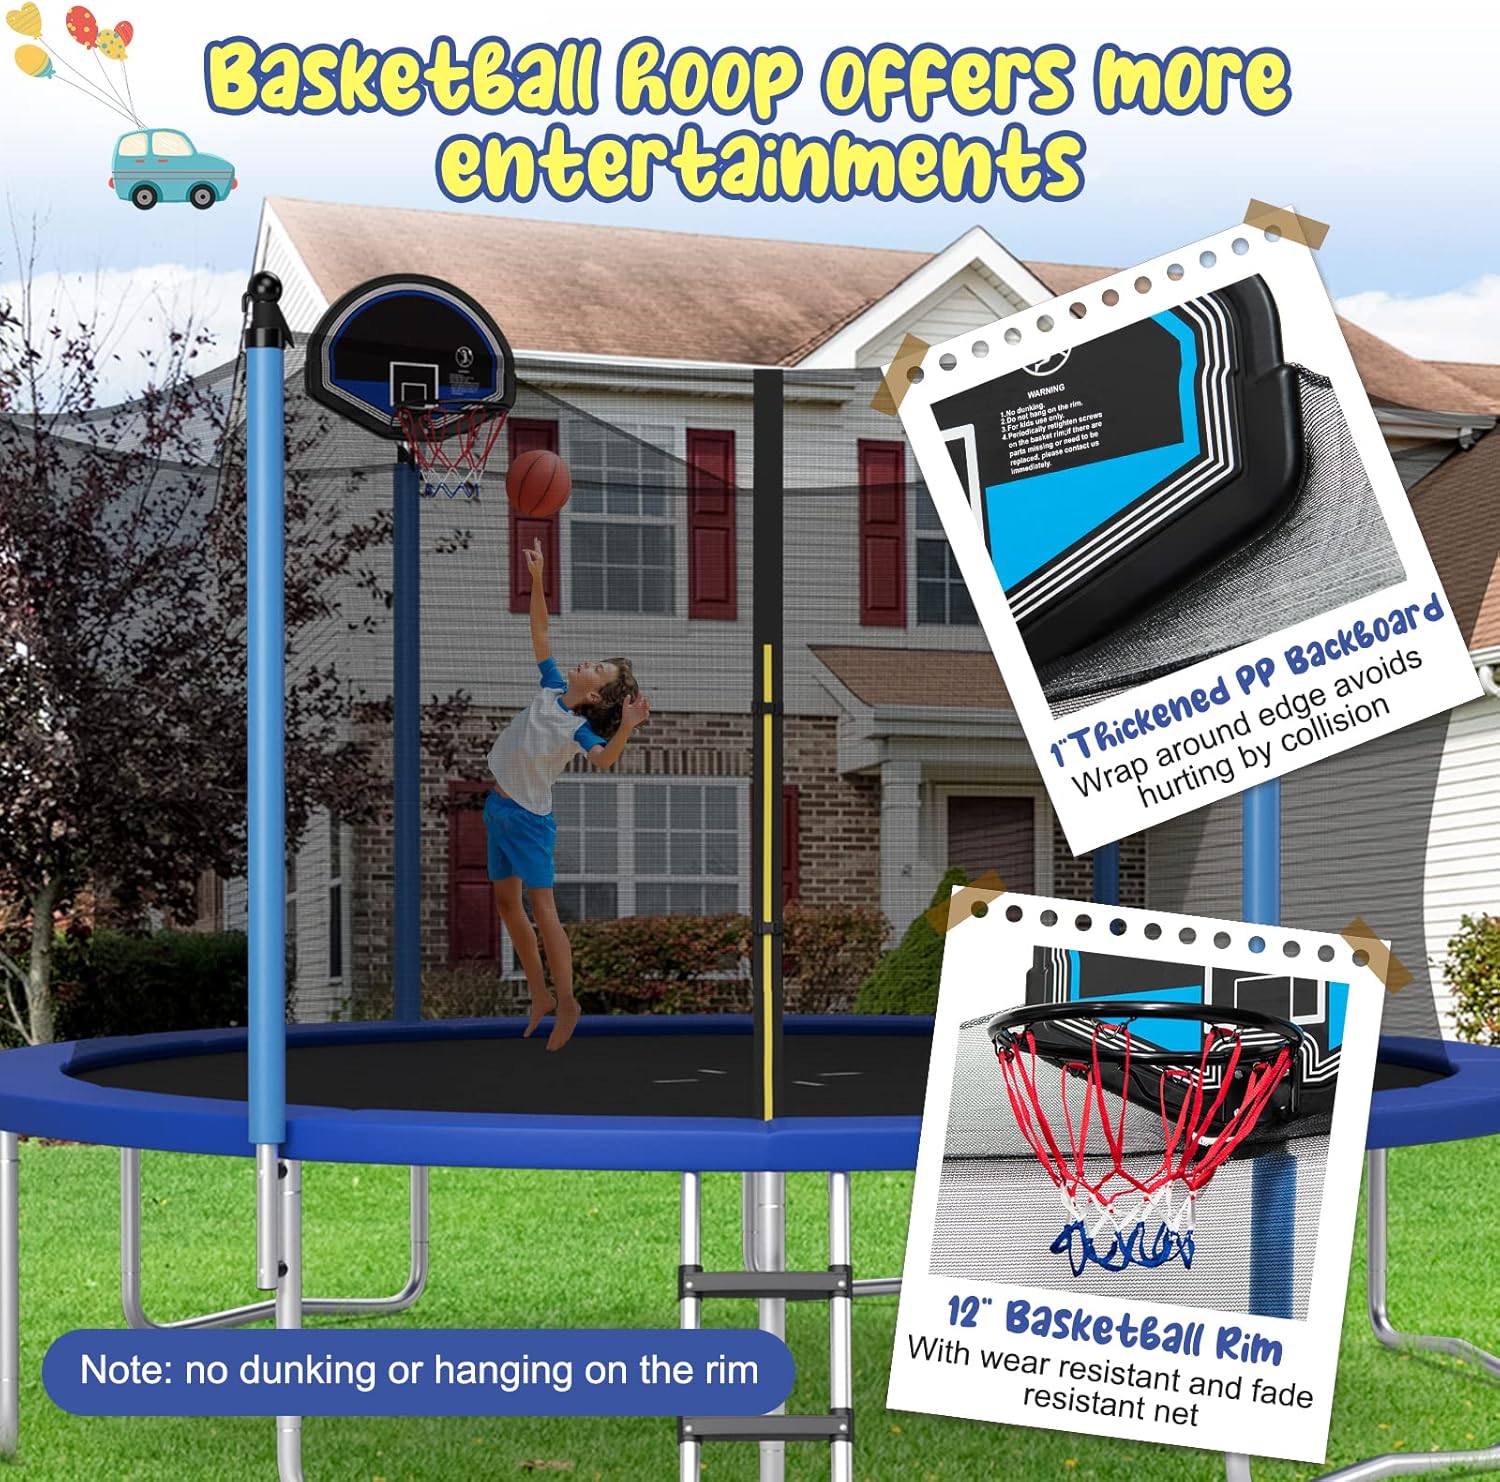
Figure 2: The integrated basketball hoop offers additional recreational activity. Note: Do not dunk or hang on the rim.
5. Bedryfsinstruksies
To ensure a fun and safe experience:
- Gaan altyd in en verlaat die trampoline using the provided ladder.
- Ensure the enclosure net zipper is fully closed and buckles are secured before jumping.
- Jump in the center of the mat for optimal bounce and safety.
- Do not wear shoes on the jumping mat.
- Do not bring sharp objects onto the trampolyn.
- For the basketball hoop, use the included soft basketball. Avoid dunking or hanging on the rim to prevent damage and injury.
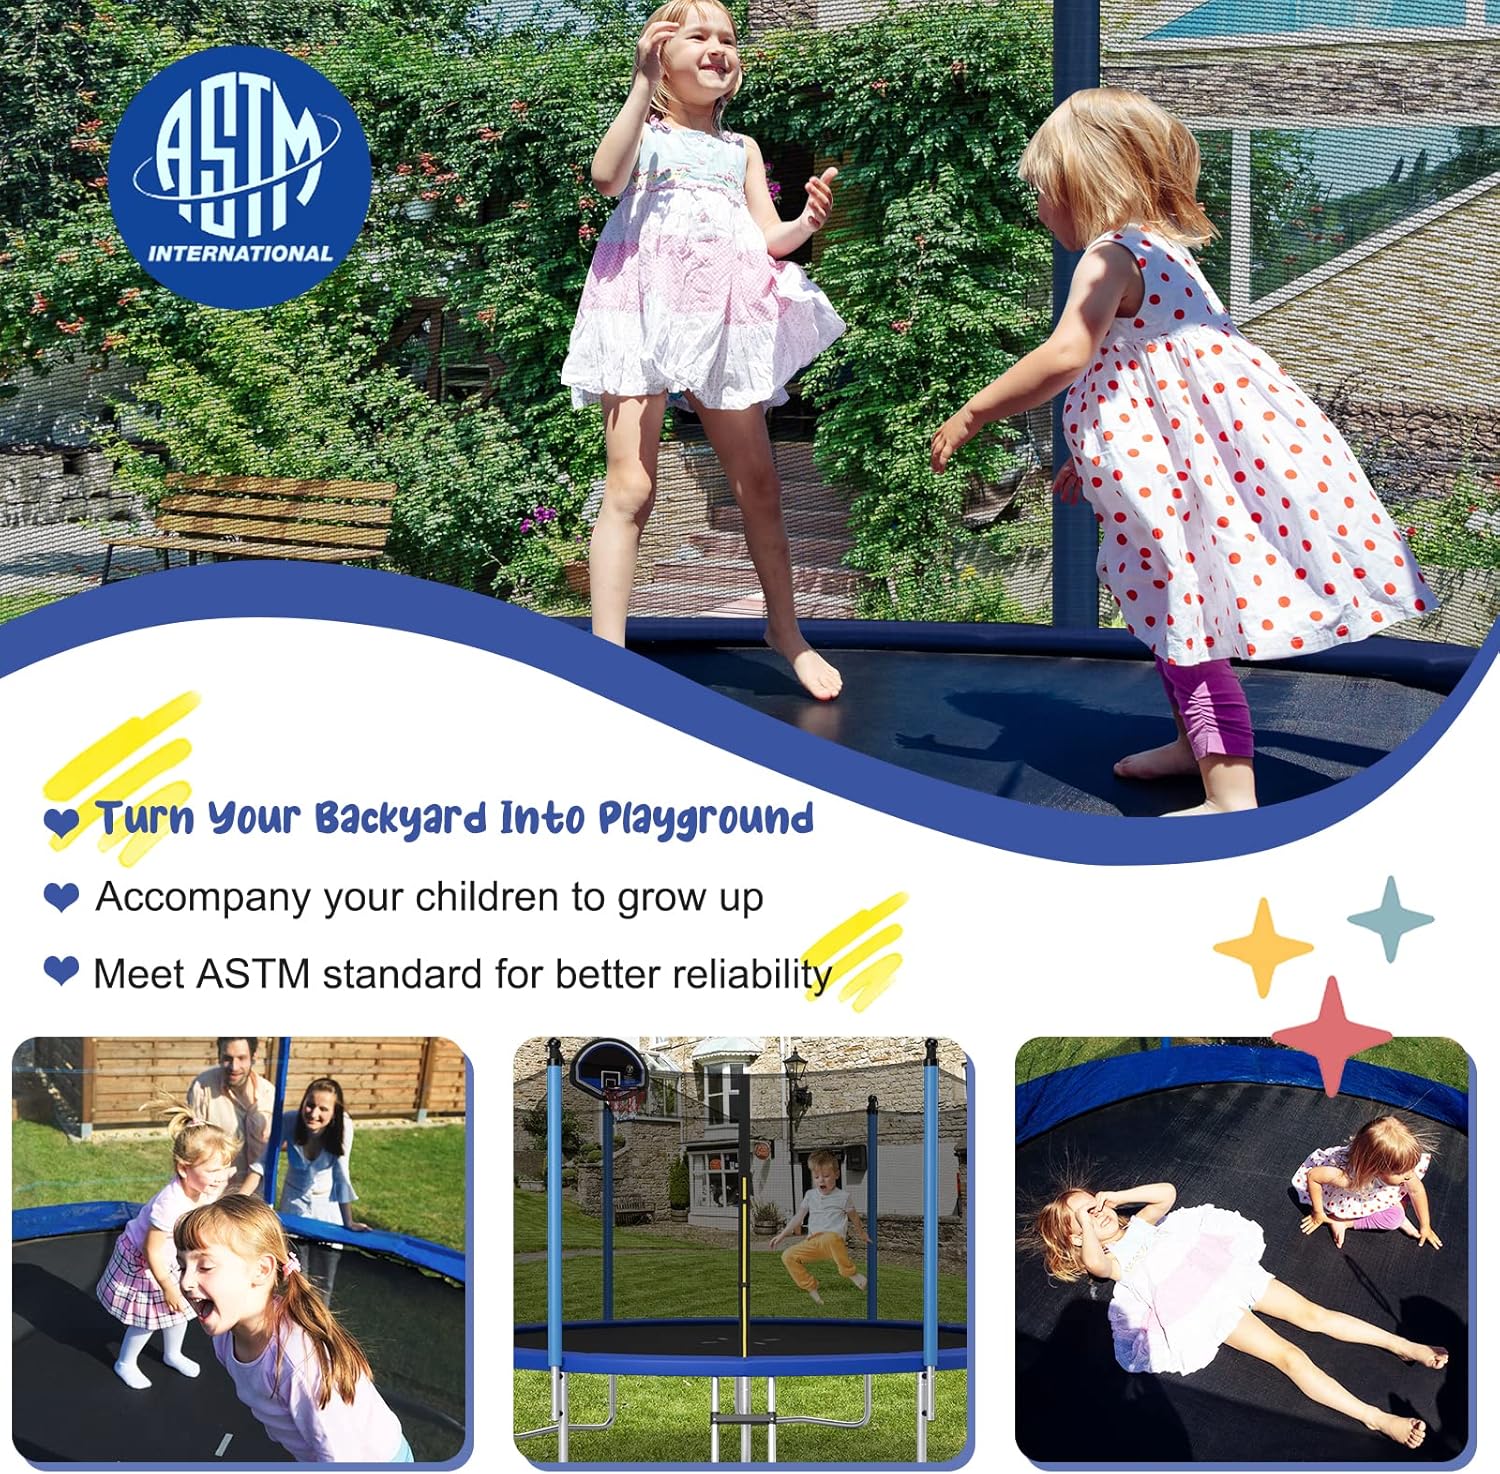
Figure 3: Children enjoying the trampoline, highlighting the safety enclosure and padded poles for protection.
6. Onderhoud
Gereelde onderhoud sal die lewensduur van jou tr verlengampaanlyn en verseker voortgesette veiligheid:
- Inspekteer gereeld: Check the frame, springs, jumping mat, safety pad, enclosure net, and poles for any signs of wear, tears, rust, or damage.
- Maak die mat skoon: Use mild soap and water to clean the jumping mat. Rinse thoroughly and allow to air dry.
- Gaan verbindings na: Ensure all bolts, nuts, and connections are tight and secure.
- Weerbeskerming: Terwyl die trampoline features hot-dip galvanized steel for weather resistance and a UV-tested jumping mat, consider covering it during extreme weather conditions or prolonged periods of non-use to prolong its lifespan.
- Vervang beskadigde onderdele: Moenie die tr gebruik nieampoline if any part is damaged. Contact customer support for replacement parts.

Figure 4: Illustration of the trampoline's durable construction, featuring hot-dip galvanized steel pipes and stable W-shaped legs.

Figure 5: The trampoline is designed with weather-resistant materials, including UV protection for the jumping mat and enclosure net.
7. Probleemoplossing
| Probleem | Moontlike oorsaak | Oplossing |
|---|---|---|
| Uneven Frame / Mat Sagging | Improper spring installation; uneven ground. | Ensure springs were installed across from each other. Verify the trampoline is on a level surface. |
| Net not taut | Loose connections; improper installation. | Check all net attachments and pole connections. Ensure the net is tightened at the top. |
| Reduced Bounce | Worn springs; damaged jumping mat. | Inspect springs for stretching or damage. Check the jumping mat for tears. Replace worn components. |
8. Spesifikasies
| Kenmerk | Detail |
|---|---|
| Handelsmerk | GYMAX |
| Model Naam | Kinders Trampoline with Basketball Set |
| Raamgrootte | 12 feet (also available in 14FT, 15FT, 16FT) |
| Product Dimensions (12FT) | 144 cm L x 144 cm B x 108 cm H |
| Vorm | Ronde |
| Raammateriaal | Alloy Steel (Hot-dip galvanized) |
| Springmatmateriaal | Polypropylene (PP), 8-row stitched, 5000H UV tested |
| Springs (12FT model) | 72 pcs, high quality, rust-resistant |
| Maksimum gewig aanbeveling | 400 pond |
| Hoogte van die veiligheidsnet | 6 vt |
| Veiligheidskenmerke | ASTM Approved, Internal Enclosure Net, 10mm Anti-Collision EPE Foam Cover, 3-Layer Safety Pad, Double Zipper with Buckles |
| Bykomstighede ingesluit | Basketball Hoop Set, 2-Step Ladder |
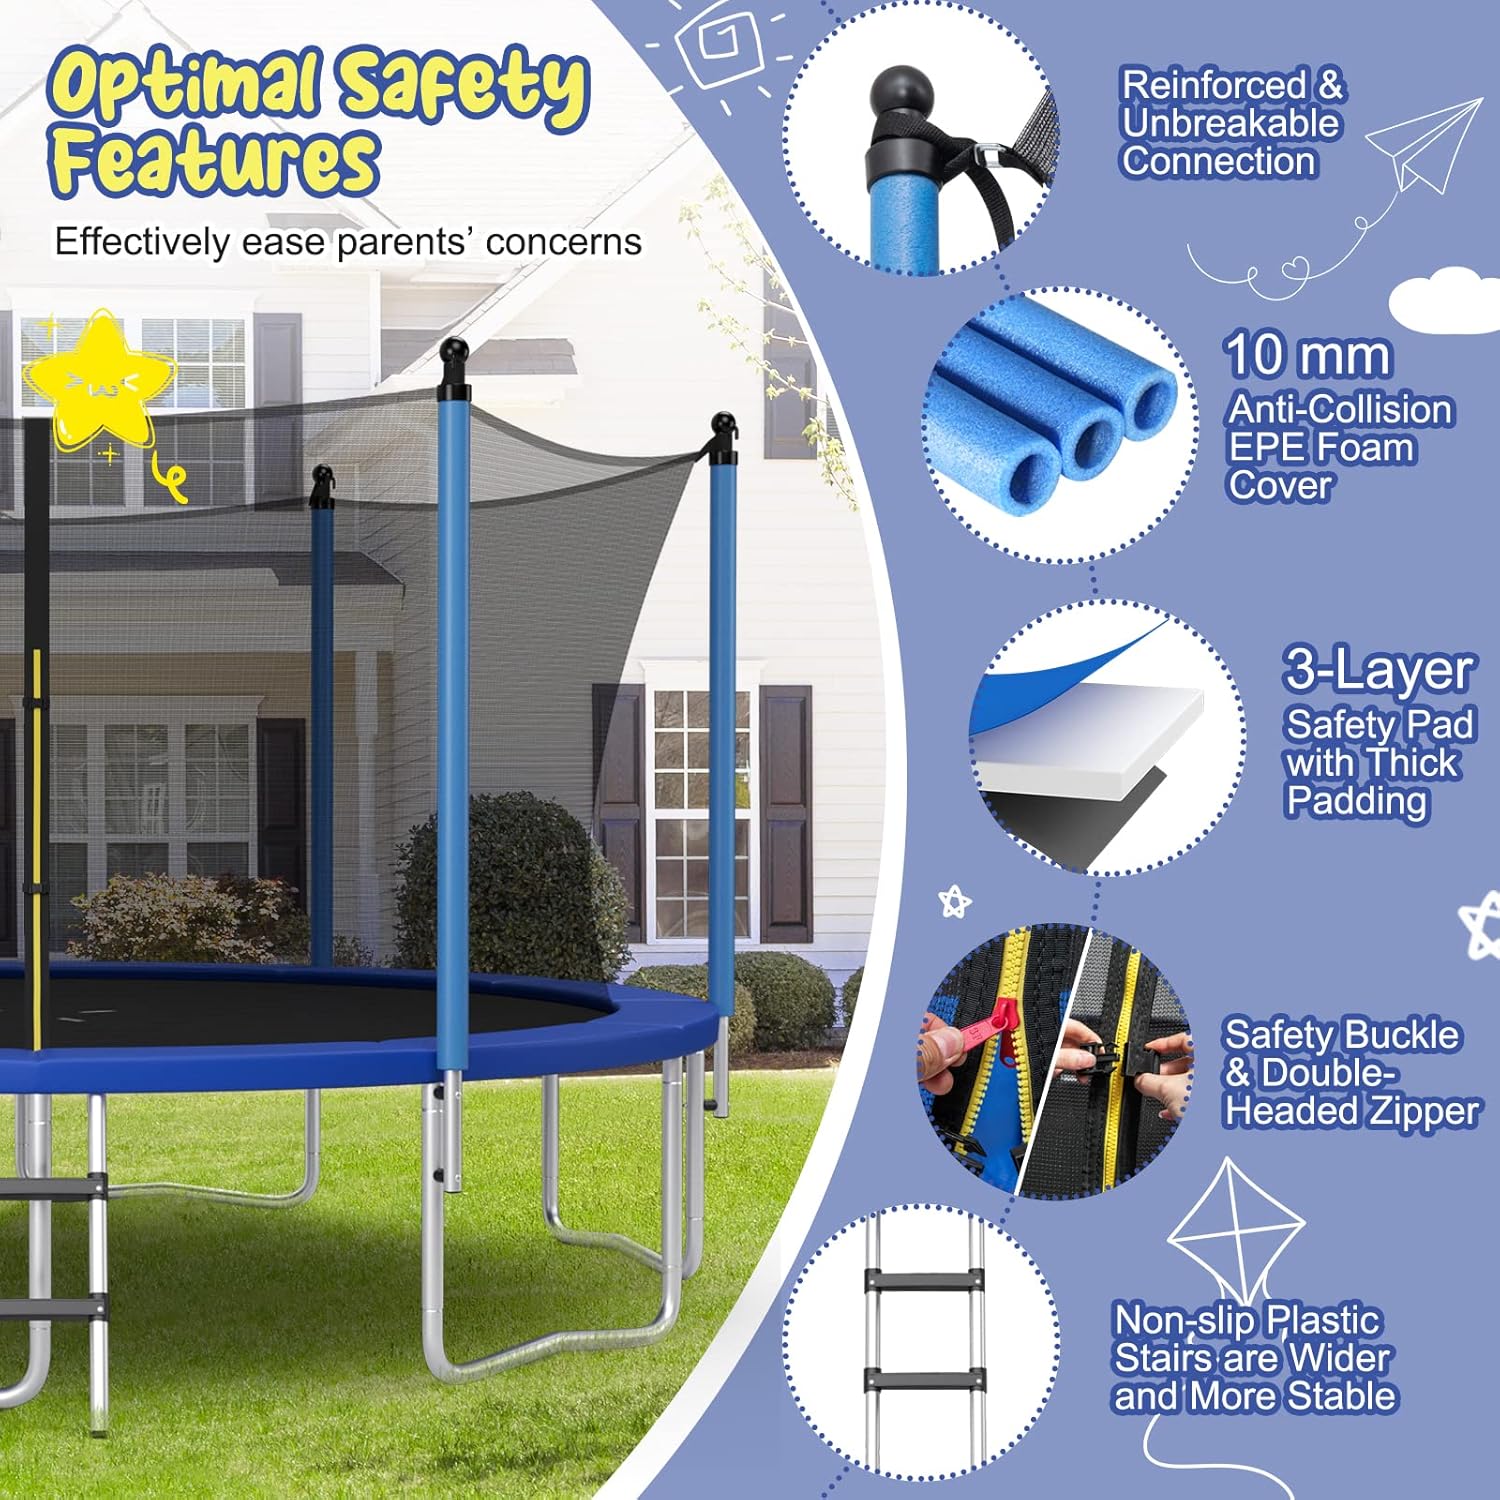
Figure 6: Size chart detailing dimensions and maximum load for various GYMAX trampoline modelle.
9. Waarborg en Ondersteuning
This GYMAX TrampOline kom met 'n 90-dae waarborg. For warranty claims, replacement parts, or any product-related inquiries, please contact GYMAX customer support through your original retailer or the official GYMAX webwebwerf.
Bewaar asseblief u aankoopbewys vir waarborgvalidering.
Ask a question about this manual
Ask about setup, troubleshooting, compatibility, parts, safety, or missing instructions. Manuals+ will review the question and use this page’s manual context to help answer it.