1. Inleiding
Thank you for choosing the COUGAR MX360 RGB Mid Tower Case. This manual provides essential information for the proper installation, operation, and maintenance of your new PC case. The MX360 RGB combines a sleek design with ARGB LED strips on the front panel, offering excellent cooling performance and support for a wide range of components, including up to a 360mm radiator, 315mm graphics cards, and 170mm CPU coolers. Its compact layout and full-length PSU shroud contribute to a clean and organized build.
2. Veiligheidsinligting
- Ontkoppel altyd die kragtoevoer van die muursok voordat u enige komponente installeer of verwyder.
- Handle components with care to avoid damage from static electricity. Consider using an anti-static wrist strap.
- Hou klein onderdele en skroewe weg van kinders.
- Verseker behoorlike ventilasie rondom die kas om oorverhitting te voorkom.
- Moenie probeer om die kas of sy komponente te wysig nie, aangesien dit jou waarborg ongeldig kan maak en veiligheidsrisiko's inhou.
3. Pakketinhoud
Verifieer asseblief dat al die volgende items in u pakket ingesluit is:
- COUGAR MX360 RGB Mid Tower Case
- Toebehoreboks (bevat skroewe, afstandhouers, kabelbinders, ens.)
- Gebruikershandleiding (hierdie dokument)
4. Produk verbyview
The COUGAR MX360 RGB case features a minimalist design with integrated ARGB lighting and a tempered glass side panel for showcasing your build.

Figuur 4.1: Voorkant view of the COUGAR MX360 RGB case, showing the interior and active RGB lighting.
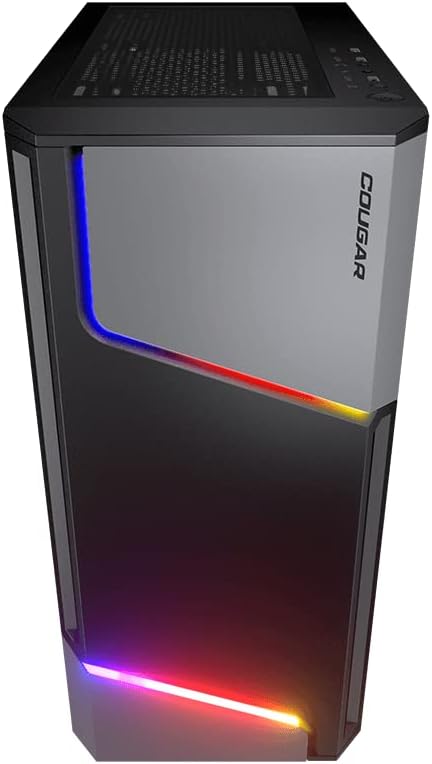
Figuur 4.2: Voorkant view of the COUGAR MX360 RGB case, highlighting the integrated ARGB LED strips.
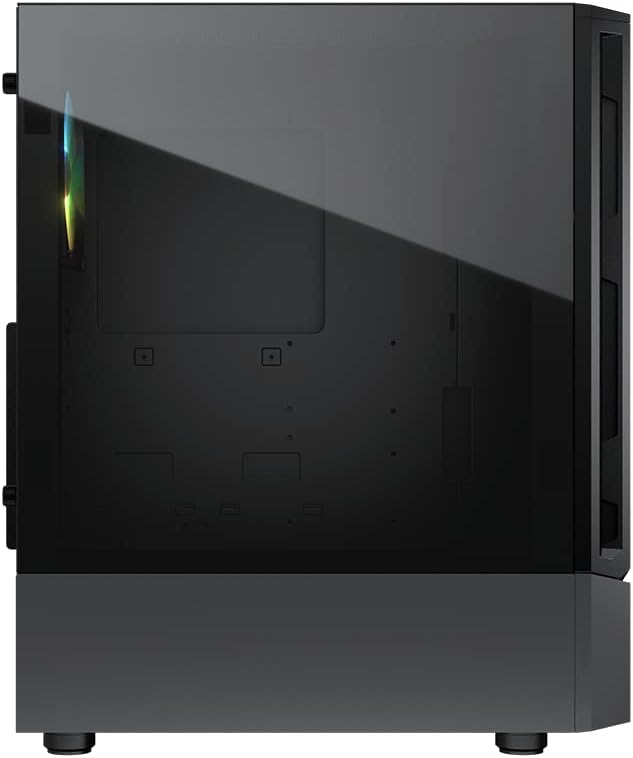
Figuur 4.3: Kant view of the COUGAR MX360 RGB case, featuring the tempered glass panel.

Figuur 4.4: Skuins voorkant view of the COUGAR MX360 RGB case, showcasing its design and ARGB elements.
5. Opstelling en installering
Follow these steps to install your components into the COUGAR MX360 RGB case.
5.1 Voorbereiding van die Saak
- Plaas die kas op 'n plat, stabiele oppervlak.
- Remove the tempered glass side panel by unscrewing the thumb screws at the rear of the case and carefully sliding the panel off.
- Remove the opposite metal side panel by unscrewing the thumb screws and sliding it off.
5.2 Moederbord installasie
- Install the I/O shield (if not pre-installed on your motherboard) into the rear opening of the case.
- Ensure the correct standoffs are installed for your motherboard form factor (ATX, Micro-ATX, Mini-ITX). Adjust or add standoffs as needed.
- Plaas jou moederbord versigtig op die afstandhouers en belyn die skroefgate.
- Bevestig die moederbord met die meegeleverde skroewe.
5.3 Installasie van kragtoevoereenheid (PSU).
- Locate the PSU shroud at the bottom of the case.
- Slide your PSU into the designated compartment from the rear of the case.
- Bevestig die PSU met skroewe van die agterkant van die kas.
- Route necessary cables through the cutouts in the PSU shroud for cable management.
5.4 Installasie van stoorskyf
The MX360 RGB supports various storage configurations.
- 3.5" HDD's: Install into the drive cage located under the PSU shroud.
- 2.5" SSDs/HDDs: Mount onto the dedicated trays or mounting points behind the motherboard tray.
5.5 Grafiese Kaart (GPU) Installasie
- Verwyder die nodige PCIe-gleufdeksels van die agterkant van die kas.
- Insert your graphics card into the appropriate PCIe slot on the motherboard.
- Secure the graphics card with screws. The case supports graphics cards up to 315mm in length.
5.6 Cooling System Installation (Fans/Radiators)
The case supports up to six fans and a 360mm water cooling radiator.
- Voor: Supports up to 3 x 120mm or 2 x 140mm fans, or a 240/280/360mm radiator.
- Top: Supports up to 2 x 120mm or 2 x 140mm fans, or a 240/280mm radiator.
- Agter: Supports 1 x 120mm fan.
Install fans or radiators using the provided screws, ensuring proper airflow direction.
5.7 Voorpaneelverbindings
Connect the front panel cables (USB, Audio, Power, Reset, LED) to their corresponding headers on your motherboard. Refer to your motherboard manual for exact header locations.
5.8 ARGB Lighting Connection
The integrated ARGB LED strips on the front panel connect via a 5V/3Pin ARGB connector. Connect this cable to a compatible 5V/3Pin ARGB header on your motherboard to synchronize lighting effects with your system.
6. Die bedryf van die saak
Once all components are installed and connected, replace the side panels. Power on your system using the power button on the top I/O panel. The ARGB lighting will illuminate, controlled by your motherboard's software or a dedicated ARGB controller if you have one installed.
7. Onderhoud
Gereelde onderhoud help om optimale werkverrigting en lang lewensduur van jou rekenaarkomponente te verseker.
- Stoffilters: The MX360 RGB includes removable dust filters (e.g., top, bottom). Periodically remove and clean these filters with compressed air or water (ensure they are completely dry before reinstallation).
- Binne skoonmaak: Use compressed air to remove dust from internal components like fans, heatsinks, and the motherboard.
- Buitenste skoonmaak: Vee die buite-oppervlaktes af met 'n sagte, damp lap. Vermy skuur skoonmakers.
8. Probleemoplossing
Indien u probleme ondervind, raadpleeg die volgende algemene stappe vir probleemoplossing:
- Geen krag: Ensure all power cables (24-pin ATX, 8-pin CPU, GPU power) are securely connected. Check the PSU switch is in the 'ON' position. Verify front panel power button connection to the motherboard.
- ARGB-beligting werk nie: Confirm the 5V/3Pin ARGB connector is correctly plugged into a compatible motherboard header. Check your motherboard's RGB software for control settings.
- Oorverhitting: Ensure all case fans are spinning and oriented correctly for optimal airflow. Check for dust buildup on filters and components. Verify CPU cooler and GPU cooler are properly installed.
- Los verbindings: Re-seat all components (RAM, GPU, storage drives) and check all power and data cables.
9. Spesifikasies
| Kenmerk | Spesifikasie |
|---|---|
| Handelsmerk | COUGAR |
| Model Naam | MX360 RGB |
| Item Modelnommer | CGR-5CC6G-RGB |
| Soort saak | Mid Tower |
| Afmetings (LxBxH) | 14.88 x 8.27 x 18.11 duim (378 x 210 x 460 mm) |
| Item gewig | 10.56 pond (4.8 kilogram) |
| Materiaal | Tempered Glass, Fine Metal |
| Kleur | Swart |
| Moederbord ondersteuning | Mini ITX / Mikro ATX / ATX |
| Maks. Grafiese kaart lengte | 315 mm |
| Maks. SVE Verkoeler Hoogte | 170 mm |
| PSU Ondersteuning | Standaard ATX PS2 |
| Verkoelingsmetode | Lug / Water |
| Radiator Ondersteuning | Front: 360mm / 280mm / 240mm / 140mm / 120mm Top: 280mm / 240mm / 140mm / 120mm Agter: 120 mm |
| Aanhangerondersteuning | Voor: 3 x 120 mm / 2 x 140 mm Bo: 2 x 120 mm / 2 x 140 mm Agter: 1 x 120 mm |
| Rybaaie | 3.5" HDD: 2 2.5" SSD: 2+2 (converted from 3.5" drive bays) |
| I/O-paneel | USB 3.0 x 2, USB 2.0 x 1, Mic x 1, Audio x 1, RGB Button |
| Spesiale kenmerk | ARGB LED Strips, Full-length PSU Cover for Cable Hiding and Improved Airflow |
10. Waarborg en Ondersteuning
COUGAR products are designed and manufactured to the highest quality standards. For warranty information, please refer to the warranty card included with your product or visit the official COUGAR webwebwerf. Bewaar u bewys van aankoop vir waarborgeise.
For technical support or further assistance, please visit the official COUGAR website or contact their customer service department. You can find more information and resources on the COUGAR Store on Amazon.