1. Inleiding en oorview
The CAMO Marksman Pro-X1 Deck Fastening System is designed to provide a fastener-free deck surface by installing screws through the edge of deck boards. This kit includes the Marksman PRO-X1 tool, 1750 CAMO Edge Screws (2-3/8"), and two replacement driver bits. It is suitable for various decking materials, including treated lumber, composite, and PVC deck boards, and automatically creates a 1/16 inch (1.58mm) spacing between boards.

Image 1.1: The complete CAMO Marksman Pro-X1 Kit, featuring the fastening tool, a container of Edge Screws, and two driver bits.
Video 1.1: 'n Oorview of the CAMO PRO-X1 Deck Tool, demonstrating its design and how it facilitates hidden deck fastening.
2. Produkkomponente
The CAMO Marksman Pro-X1 Kit includes the following items:
- Marksman PRO-X1 Tool: The primary tool for guiding screws into the edge of deck boards.
- CAMO Edge Screws (1750 count, 2-3/8"): Specifically designed screws with a patented rake tip to auger material out, reducing splitting and cracking. These screws are Protech coated for durability.
- Replacement Driver Bits (2): Special T-15 Star Drive bits designed to work with the Edge Screws, offering optimal bit connection and preventing over-driving.

Beeld 2.1: 'n Gedetailleerde view of a CAMO Edge Screw, showing its specialized tip for material removal and its T-15 Star Drive head.
3. Opstelling
Before beginning installation, ensure your deck boards are clean and properly aligned. The Marksman PRO-X1 tool is designed to fit 5-1/4 inch (133mm) to 5-3/4 inch (146mm) wide deck boards and automatically creates a 1/16 inch (1.58mm) gap.
- Prepare the Deck Boards: Ensure all deck boards are cut to the correct length and are free from debris.
- Attach Driver Bit: Insert one of the provided T-15 Star Drive bits into your power drill. The bit is designed with a depth stop to prevent over-driving.
- Plaas die gereedskap: Place the Marksman PRO-X1 tool onto the edge of the deck board you intend to fasten. The tool's guides will automatically set the correct spacing from the adjacent board.

Image 3.1: The Marksman Pro-X1 tool correctly placed on a deck board, demonstrating how it aligns for hidden fastening.
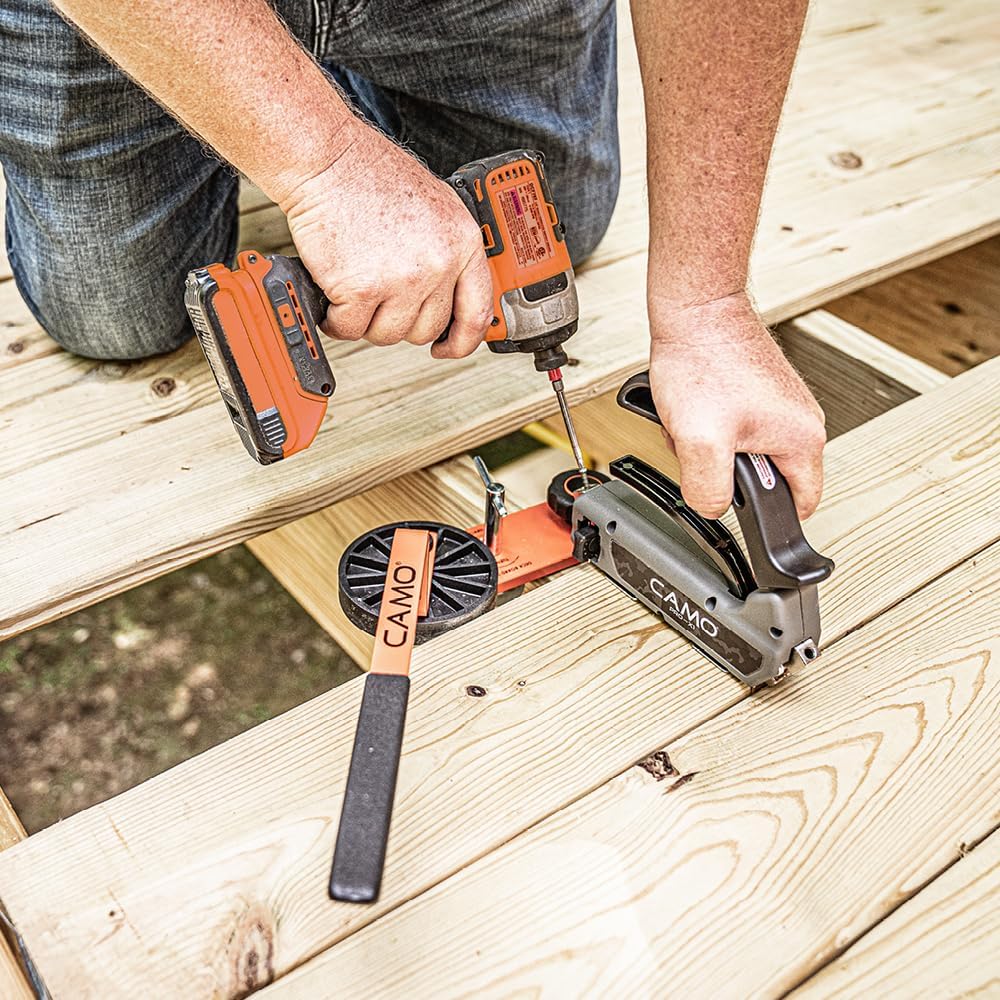
Image 3.2: Close-up of the driver bit being inserted into the tool, highlighting the depth stop mechanism.
4. Bedryfsinstruksies
Follow these steps to effectively use the CAMO Marksman Pro-X1 for hidden deck fastening:
- Load Screws: Insert a CAMO Edge Screw into each of the two guide holes on the Marksman PRO-X1 tool.
- Beveilig die Gereedskap: Press down firmly on the tool's handle to engage the deck board. This action also ensures the correct spacing.
- Drive Screws: Using your power drill with the T-15 Star Drive bit, drive the screws through the guide holes into the edge of the deck board. The bit's depth stop will prevent over-driving, ensuring the screw head is flush with the tool's surface.
- Laat los en herhaal: Release the tool's handle and move to the next fastening point along the deck board. Repeat the process for all subsequent boards.
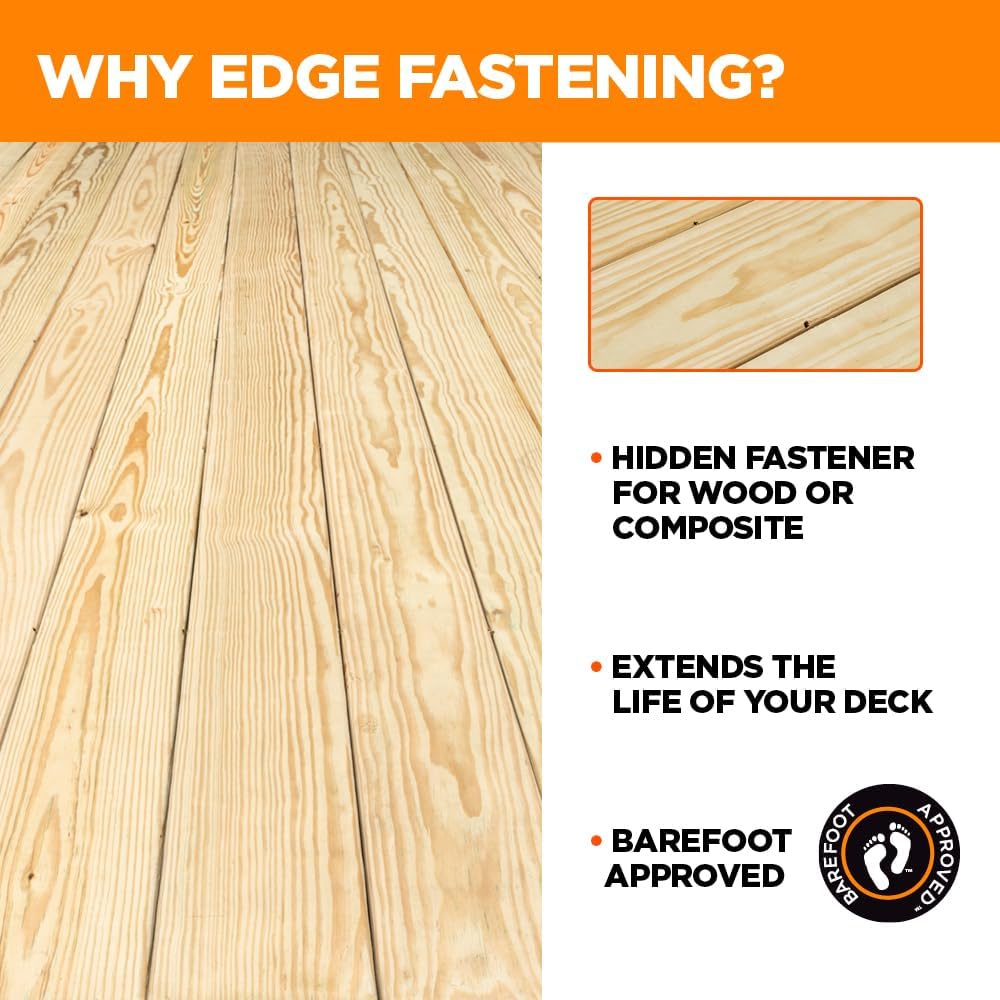
Image 4.1: Demonstrating the Marksman Pro-X1 tool in action, showing the user driving screws into the side of a deck board.

Image 4.2: A visual representation of the hidden fastening method, showing screws driven into the edge of the deck board.
Video 4.1: A demonstration of the CAMO MARKSMAN Tools and EDGE Screws, detailing their use for secure and hidden deck board installation.
5. Onderhoud
To ensure the longevity and optimal performance of your CAMO Marksman Pro-X1 tool:
- Skoonmaak: After each use, clean the tool to remove any sawdust or debris. A dry cloth is usually sufficient.
- Berging: Store the tool in a dry place to prevent rust or damage.
- Driver Bits: Inspect driver bits regularly for wear. Replace them when they show signs of stripping or damage to ensure proper screw installation.
6. Probleemoplossing
If you encounter issues during installation, consider the following:
- Screws Not Driving Properly: Ensure you are using the correct CAMO Edge Screws and the provided T-15 Star Drive bit. Check that your power drill is set to the appropriate torque.
- Deck Board Splitting: While CAMO Edge Screws are designed to minimize splitting, ensure boards are not excessively dry or brittle. For very hard woods, pre-drilling might be considered, though typically not required with these screws.
- Inconsistent Spacing: Verify that the Marksman PRO-X1 tool is firmly pressed against the deck board and the adjacent board before driving screws.
7. Spesifikasies
| Kenmerk | Detail |
|---|---|
| Vervaardiger | National Nail |
| Deelnommer | 0345002-B1 |
| Item gewig | 2 pond |
| Produk afmetings | 11 x 10 x 9 duim |
| Item Modelnommer | 0345002-B1 |
| Styl | Marksman Tool Kit |
| Kragbron | Power Drill (not included) |
| Ingesluit komponente | (1) Marksman PRO-X1 Tool, (1) 1750 ct Edge Screws, (2) Replacement Driver Bits |
| Batterye benodig? | Nee |
| ASIN | B0BWKBB7SC |
| Datum Eerste Beskikbaar | 16 Mei 2019 |
8. Waarborg en Ondersteuning
For information regarding product warranty, technical support, or replacement parts, please refer to the official CAMO Fasteners website or contact National Nail customer service directly. Specific warranty details may vary and are typically provided with the product packaging.