1. Belangrike veiligheidsinstruksies
Lees en verstaan asseblief alle instruksies voordat u met die installasie begin. Versuim om hierdie instruksies te volg, kan lei tot elektriese skok, brand of persoonlike besering.
- Maak seker dat die krag by die stroombreker afgeskakel is voor installasie of onderhoud.
- All electrical connections must be in accordance with local codes and ordinances.
- Raadpleeg 'n gekwalifiseerde elektrisiën as u onseker is oor bedrading of installasie.
- Mount the fan directly to a structural ceiling joist or an outlet box marked 'Acceptable for Fan Support of 35 lbs (15.9 kg)'.
- Moenie voorwerpe in die waaierlemme steek terwyl die waaier aan die gang is nie.
- Hou kinders weg van die waaier tydens werking.
2. Pakketinhoud
Verifieer dat alle komponente teenwoordig is voordat u met die installasie voortgaan.
- Motor Housing with Blades
- Downrod (various lengths available)
- Montagebeugel
- Afstandbeheer
- LED-ligstel
- Hardewarepak (skroewe, wassers, draadmoere)
- Gebruikershandleiding
3. Produkspesifikasies
| Kenmerk | Spesifikasie |
|---|---|
| Handelsmerk | Ohniyou |
| Model Naam | GLX047B |
| Elektriese waaierontwerp | Plafonventilator |
| Kragbron | DC |
| Styl | Moderne |
| Produk afmetings | 7.6" D x 17.23" B x 9.79" H |
| Bladlengte | 38 duim |
| Aantal lemme | 4 |
| Soort kamer | Study Room (suitable for various rooms) |
| Geraasvlak | 35 Desibel |
| Wattage | 35 watt |
| Voltooi Tipe | Geverf |
| Skakel Tipe | Afgeleë |
| Ingesluit komponente | Afgeleë |
| Binne/buiteluggebruik | Buitelug |
| Beheer metode | Afgeleë |
| Aantal kragvlakke | 6 |
| Materiaal | Metaal, plastiek |
| Montage tipe | Plafon Mount |
Vir meer inligting oor energie, verwys na die amptelike EPREL-databasis: EPREL QR Code Link
4. Installasiehandleiding
Follow these steps carefully to install your Ohniyou GLX047 ceiling fan. It is recommended to have two people for installation.
4.1 Voorinstallasie
- Skakel krag af: Ensure the power supply to the installation location is disconnected at the circuit breaker.
- Berei montering voor: Securely attach the mounting bracket to the ceiling joist or fan-rated outlet box.
4.2 Assembling the Fan
- Attach the fan blades to the motor housing using the provided screws. Ensure they are securely fastened.
- Connect the LED light kit to the motor housing. Secure the light kit with the provided screws.
- Insert the downrod through the canopy and connect the wires. Secure the downrod to the motor housing with the pin and screws.
Video: Assembly Video for Ohniyou Ceiling Fan - 38 inch. This video demonstrates the step-by-step assembly process of the ceiling fan, including attaching blades, installing the light kit, and securing the downrod.
4.3 Montering en bedrading
- Hang the assembled fan onto the ceiling mounting bracket.
- Make electrical connections: connect the fan wires to the household wiring according to the wiring diagram in the full manual. Ensure all connections are secure with wire nuts.
- Tuck wires into the outlet box and slide the canopy up to cover the mounting bracket. Secure the canopy.
Prent: 'n Volledige view of the Ohniyou 38-inch ceiling fan with integrated lights, showcasing its modern design and four blades.

Prent: Detailed dimensions of the Ohniyou 38-inch ceiling fan, including blade length, downrod options (4-inch and 8-inch), and overall height and width.
5. Bedryfsinstruksies
Your Ohniyou GLX047 ceiling fan can be controlled via the included remote control or a smartphone application.
5.1 Afstandbeheerfunksies
- Waaier AAN/AF: Druk die waaierknoppie om die waaier aan of af te skakel.
- Fan Spoed: Use the '1' to '6' buttons to select desired fan speed (6 speeds available).
- Lig AAN/UIT: Druk die ligknoppie om die lig aan of af te skakel.
- Ligverduistering: Use the '+' and '-' buttons to adjust light brightness.
- Kleur temperatuur: Cycle through 3 color temperatures (warm, neutral, cool) by pressing the color temperature button.
- Afteller: Set a 2-hour timer for automatic fan shutdown.
- Natuurlike windmodus: Activates a varying fan speed to simulate natural wind.
- Geheue funksie: The fan remembers the last light and fan settings.
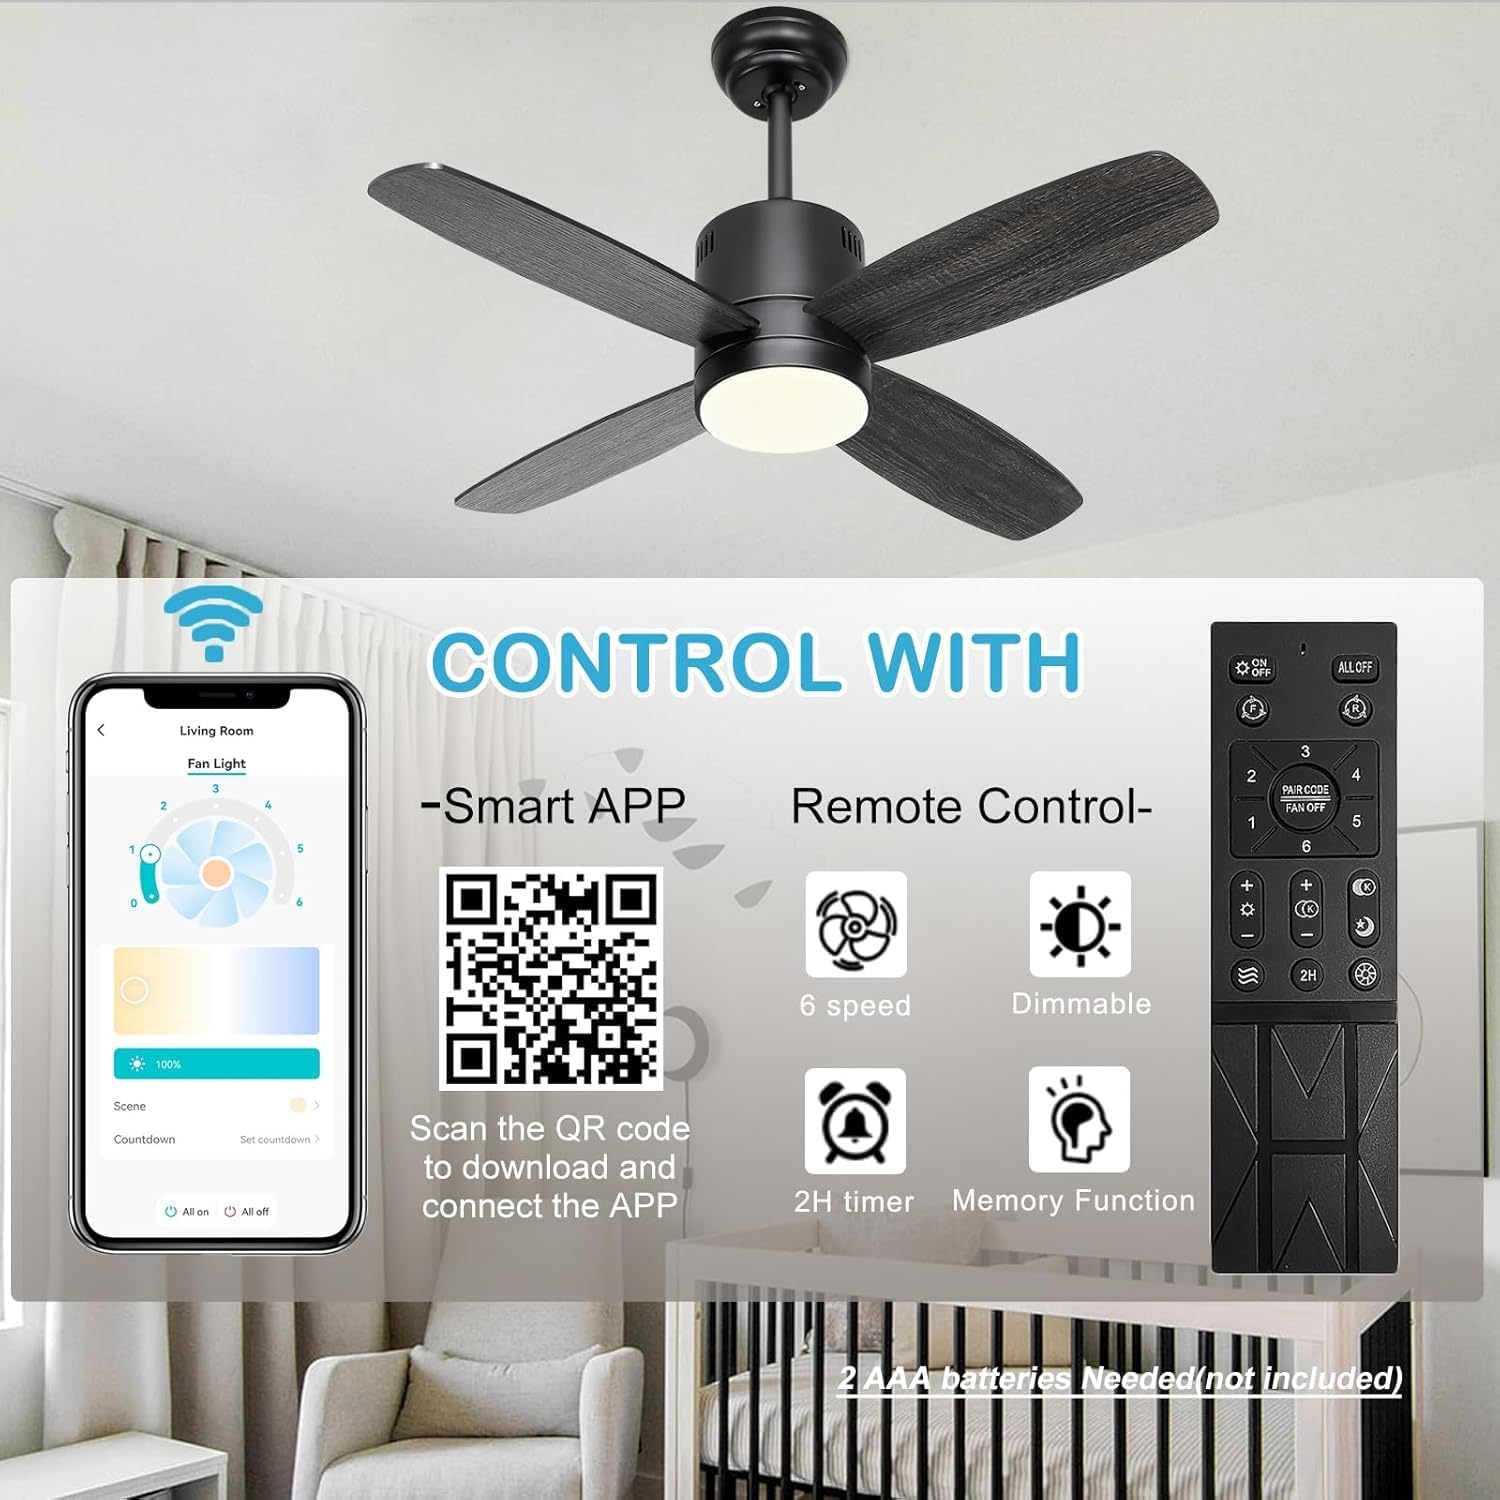
5.2 Toepassingsbeheer
Scan the QR code provided in the product packaging or on the product image to download the companion smartphone application. The app offers full control over fan speed, light dimming, color temperature, and timer functions.

Prent: This image illustrates the dual control options for the Ohniyou ceiling fan: a remote control with dedicated buttons for fan speed, light, timer, and dimming, and a smartphone app interface for comprehensive control. A QR code for app download is also visible.

Prent: Demonstrates the 3-color temperature options (3000K, 4000K, 6000K) and dimmable brightness (1% to 100%) of the integrated LED light, controllable via remote or app.
5.3 Omkeerbare GS-motor
The fan features a reversible DC motor for year-round comfort.
- Afwaartse trekmodus (Somer): Lemme draai antikloksgewys om 'n verkoelende briesie te skep.
- Opwaartse stroommodus (Winter): Lemme draai kloksgewys om warm lug wat naby die plafon vasgevang is, te sirkuleer.

Prent: Illustrates the reversible DC motor function, showing airflow patterns for both downdraft (cooling in summer) and updraft (circulating warm air in winter) modes.
5.4 Energiebesparende kenmerke

Prent: Highlights key energy-saving features including a quiet and efficient DC motor, a 2-hour timer function, and a night light mode for soft illumination during sleep.
6. Onderhoud
Gereelde onderhoud verseker optimale werkverrigting en lang lewensduur van jou plafonwaaier.
- Skoonmaak: Gebruik 'n sagte, damp lap om die waaierlemme en motorbehuising skoon te maak. Moenie skuurmiddels of oplosmiddels gebruik nie.
- Lembalans: If the fan wobbles, check that all blade screws are tight. Refer to the full manual for detailed balancing instructions if needed.
- Ligbron: Die geïntegreerde LED-lig is ontwerp vir 'n lang lewensduur en kan nie deur die gebruiker vervang word nie.
7. Probleemoplossing
Indien u probleme met u waaier ondervind, verwys na die volgende algemene probleme en oplossings.
| Probleem | Moontlike oorsaak | Oplossing |
|---|---|---|
| Waaier begin nie | No power, loose wiring, remote control issue | Check circuit breaker. Verify all wire connections. Replace remote batteries. |
| Lig werk nie | Loose wiring, LED driver issue | Check light kit wiring connections. If problem persists, contact customer support. |
| Fan wiebel | Loose blades, unbalanced blades, improper mounting | Ensure all blade screws are tight. Use a balancing kit (not included) if necessary. Recheck mounting bracket. |
| Afstandbeheer werk nie | Dead batteries, remote not paired | Replace batteries (2 AAA batteries, not included). Refer to the full manual for remote pairing instructions. |
8. Waarborg en Ondersteuning
Ohniyou products are manufactured to high-quality standards. For warranty information, technical support, or replacement parts, please contact Ohniyou customer service through the retailer where the product was purchased or visit the official Ohniyou webwebwerf.
Aanlyn hulpbronne:
- Ohniyou Store: Visit the Ohniyou Store on Amazon