1. Inleiding
Thank you for choosing the Witsanlex LED Grow Light. This intelligent grow light system is designed to provide optimal lighting conditions for your indoor plants, simulating natural sunlight patterns with adjustable brightness and an automatic timer. This manual provides detailed instructions for setup, operation, and maintenance to ensure the best results for your plants.

Image 1.1: Witsanlex LED Grow Light in a plant pot.
2. Pakketinhoud
Verifieer asseblief dat alle komponente in u pakket teenwoordig is:
- LED Grow Light (4 units)
- Afstandbeheerder
- Telescopic Rods (4 units)
- USB Power Adapter (not included)
- Gebruikershandleiding (hierdie dokument)
3. Sleutel kenmerke
- Sun Mode Dimming: Automatic dimming that simulates the daily change of natural sunshine intensity. Manual brightness adjustment is also available.
- Daily Auto On/Off Timer: Easily set the light to automatically turn off using the remote controller (2 to 22 hours). Once set, the timer will activate daily.
- Full Spectrum Grow Lights: Provides a true full spectrum of light (380nm to 800nm) for comprehensive plant growth. The 4500K color temperature is eye-friendly.
- Hoogte verstelbaar: Tools-free installation allows for easy adjustment of the lamp's height using the retractable rod.
- Moderne ontwerp: The simple design integrates well with home decor.
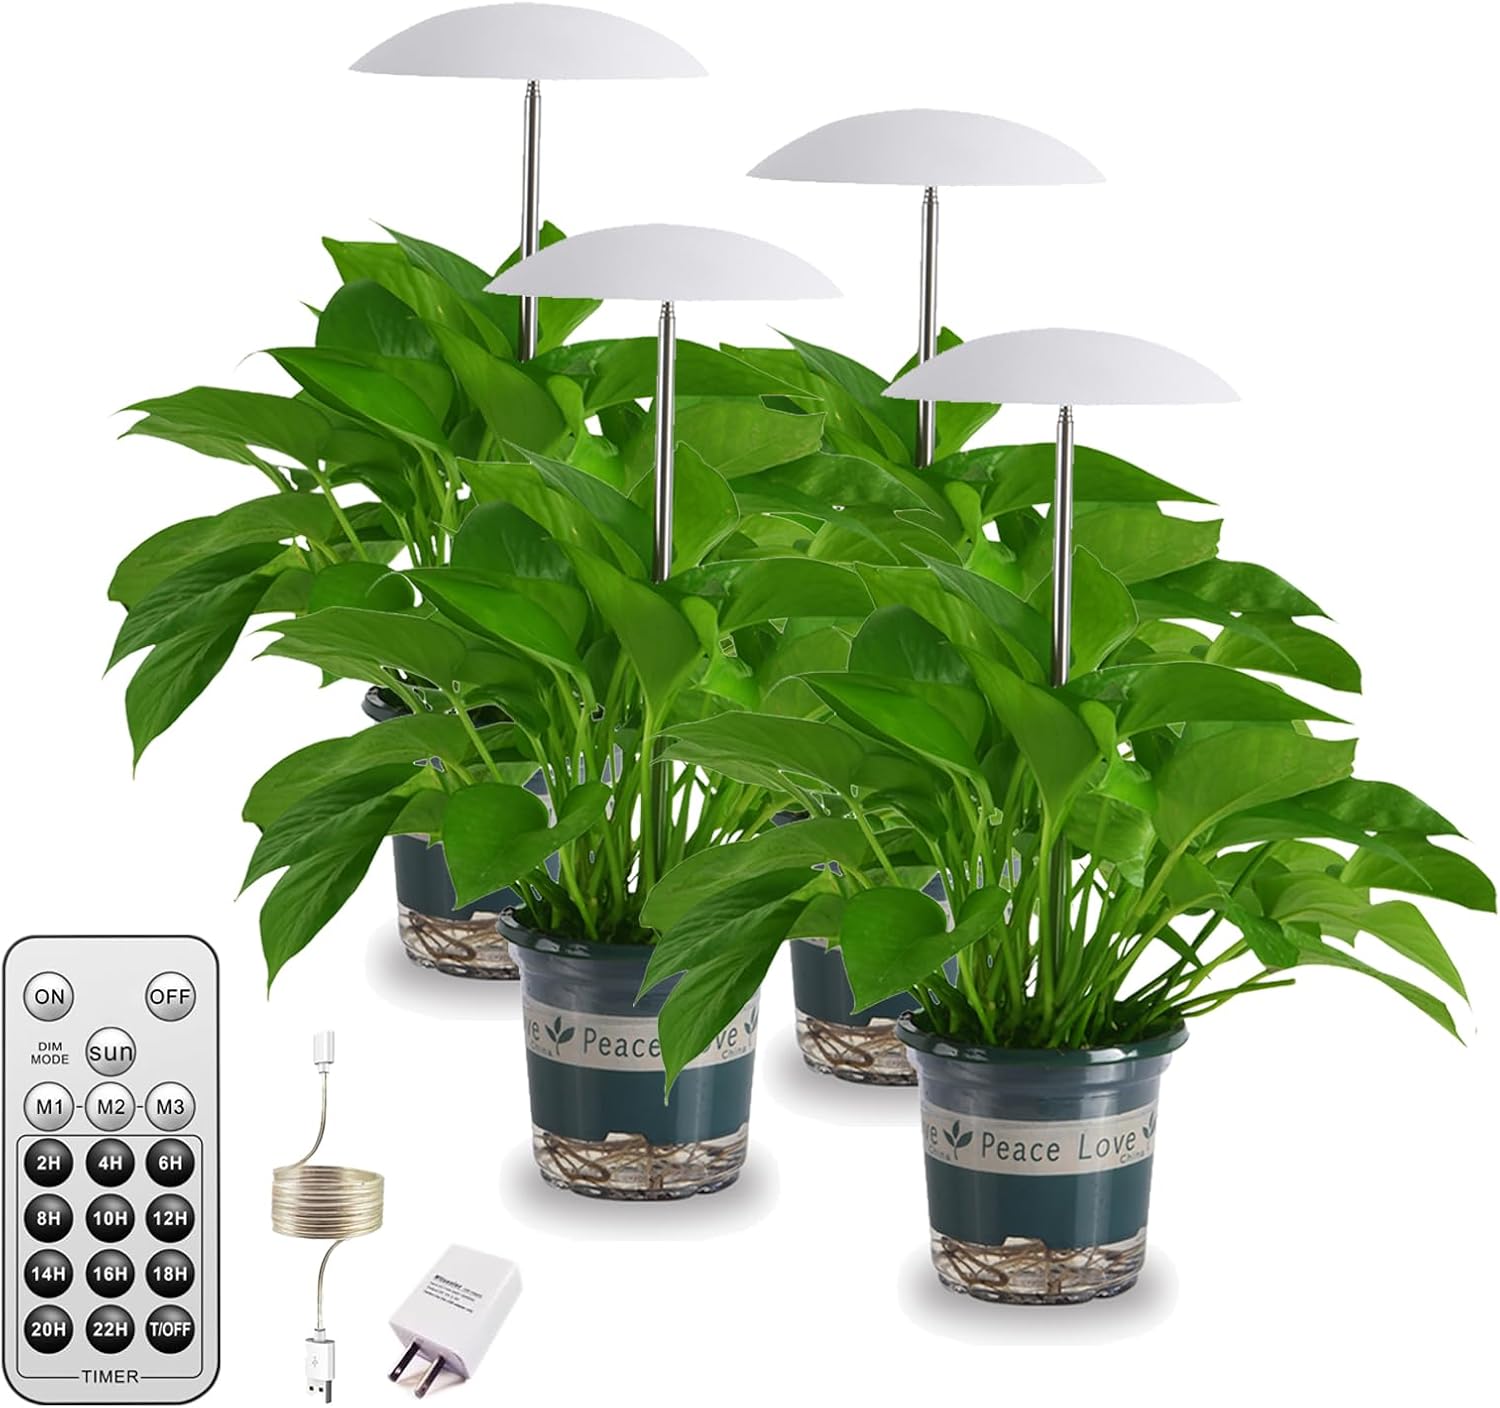
Image 3.1: Grow lights with adjustable height for various plant sizes.
4. Opstelinstruksies
- Pak komponente uit: Carefully remove all items from the packaging and ensure all parts listed in Section 2 are present.
- Maak die lig bymekaar:
- Insert the telescopic rod into the base of the LED grow light head.
- Place the assembled light into your plant pot.
- Pas hoogte aan: Extend or retract the telescopic rod to adjust the height of the light according to your plant's needs. The light should be positioned to provide optimal coverage without touching the plant.
- Koppel krag: Plug the USB cable from the grow light into a compatible USB power adapter (not included) and then into a power outlet.

Image 4.1: Assembly diagram for the Witsanlex LED Grow Light.
5. Bedryfsinstruksies
5.1 Afstandbeheerder verbyview
The remote controller allows you to manage the grow light's functions. Ensure the included CR2 battery is correctly installed.

Image 5.1: Remote controller for the Witsanlex LED Grow Light.
5.2 Krag aan/af
- Press the "ON" button to turn the light on.
- Press the "OFF" button to turn the light off.
5.3 Sun Mode Operation
The "SUN" mode simulates the natural progression of sunlight throughout a day, dynamically adjusting brightness from sunrise to sunset over a 12-hour period, followed by a 12-hour off period. This cycle repeats daily.
- Press the "SUN" button on the remote to activate Sun Mode.
- The light will automatically adjust its brightness over 12 hours, then turn off for 12 hours, and repeat this cycle daily.
Video 5.2: Demonstration of the "SUN mode" feature, showing how the light intensity changes over time to mimic natural sunlight. This video illustrates the dynamic brightness adjustment and automatic daily cycle.

Image 5.3: Visual representation of the Sun Mode's light intensity cycle over 24 hours.
5.4 Manual Dimming Modes (M1, M2, M3)
You can manually select different brightness levels:
- Press "M1" for a low brightness setting.
- Press "M2" for a medium brightness setting.
- Press "M3" for a high brightness setting.
5.5 Automatic Timer Function
The timer function allows the light to operate for a set duration and then turn off automatically. Once set, the timer will activate at the same time every day.
- Turn on the grow light and select your desired brightness mode (M1, M2, M3, or SUN).
- Press the desired timer duration button (e.g., "8H" for 8 hours, "12H" for 12 hours). Available options range from 2 hours to 22 hours.
- The light will remain on for the selected duration and then turn off. It will automatically turn on again at the same time the next day and repeat the cycle.
- To cancel the timer, press the "OFF" button or select a different mode.

Image 5.4: Intelligent timer setting for daily automatic operation.
6. Plant Care Recommendations
Different plants have varying light requirements. Use the following guidelines to select the appropriate mode for your plants:
| Modus | Helderheid | Recommended Plants |
|---|---|---|
| M1 | Laag | Shade Loving Plants (e.g., Ferns) |
| M2 | Medium | Day Neutral Plants (e.g., many common houseplants) |
| M3 | Hoog | Sun Loving Plants (e.g., Succulents) |
| SON | Dynamic (simulates natural sun) | Regular Plants (e.g., Strawberries, general growth) |
Image 6.1: Recommended light settings for various plant types.

Image 6.2: Leafy plant under grow light.

Image 6.3: Seedlings under grow light.

Image 6.4: Flowering plant under grow light.
7. Onderhoud
- Skoonmaak: Gently wipe the LED light surface and telescopic rod with a soft, dry cloth to remove dust. Do not use abrasive cleaners or immerse the unit in water.
- Berging: If storing the grow light for an extended period, disconnect it from power, clean it, and store it in a cool, dry place.
- Battery vervanging: Replace the CR2 battery in the remote controller when its functionality diminishes.
8. Probleemoplossing
| Probleem | Moontlike oorsaak | Oplossing |
|---|---|---|
| Lig skakel nie aan nie. | Geen krag, los verbinding, afstandbeheerder se battery pap. | Check USB connection and power outlet. Ensure remote battery is functional and replaced if necessary. |
| Timer function is inconsistent. | Initial setup error, remote signal interference. | Re-set the timer. Ensure clear line of sight between remote and light. If issues persist, consider using an external timer plug. |
| Light appears dim or flickers. | Power supply issue, unit malfunction. | Try a different USB power adapter. If problem persists, contact customer support. |
9. Spesifikasies
| Kenmerk | Detail |
|---|---|
| Modelnommer | WGL-HUD-06W |
| Kleur | Wit |
| Vorm | Sambreel |
| Materiaal | Aluminium |
| Voltooi Tipe | Poederbedekt |
| Ligbrontipe | LED |
| Kragbron | Elektries met koord (USB) |
| Number of Batteries (Remote) | 1 CR2 (ingesluit) |
| Voltage | 110 Volt |
| Ligbron Wattage | 10 Watt |
| Montage tipe | Paalberg |
| Spesiale kenmerke | Dimmable, Automatic Timer, Sun Mode |
| Kleur temperatuur | 4500 Kelvin |
| Aantal ligbronne | 4 (in 4-pack) |
| Item gewig | 9.6 onse |
| Itemafmetings (L x B x H) | 6"L x 6"W x 3.7"H (per unit) |
10. Waarborginligting
This Witsanlex LED Grow Light comes with a 2 jaar vervaardiger se waarborg. Please retain your proof of purchase for warranty claims. For service or support, refer to the contact information below.
11. Kliëntediens
For any questions, technical assistance, or warranty inquiries, please contact Witsanlex customer support through the retailer where the product was purchased or visit the official Witsanlex store on Amazon:
Witsanlex Store: https://www.amazon.com/stores/Witsanlex/page/AFD9780E-0FBB-4033-8B3B-0BB4E3A5F39F