1. Inleiding
This manual provides essential information for the setup, operation, maintenance, and troubleshooting of your Blackview MP60 Mini PC. The Blackview MP60 is a compact desktop computer designed for home and business use, featuring an Intel N5095 processor, 16GB DDR4 RAM, and a 512GB M.2 SSD. It supports 4K HD dual display output and offers various connectivity options.
2. Wat is in die boks
Upon opening the Blackview MP60 Mini PC package, you should find the following items:
- Swartview MP60 Mini PC Unit
- Kragadapter (12V)
- HDMI kabel
- VESA-monteerbeugel met skroewe
- Gebruikershandleiding (hierdie dokument)

Image: Contents of the Blackview MP60 Mini PC package, including the mini PC, power adapter, HDMI cable, VESA mount, and user manual.
Video: 'n Oorview of the Blackview MP60 Mini PC, showcasing its unboxing, included accessories, and various ports. This video provides a visual guide to the product's physical features and what to expect in the package.
3. Produk verbyview
3.1. Front and Side Ports
Die Swartview MP60 Mini PC features a compact design with strategically placed ports for easy access and connectivity.
- Kragknoppie: Located on the side for easy power on/off.
- USB 3.0-poorte (x2): Vir hoëspoed-data-oordrag met versoenbare toestelle.
- USB 2.0-poort (x1): For connecting standard USB peripherals.
3.2. Agterste Poorten
The rear panel provides essential ports for display, networking, and audio.
- DC Jack: Om die kragadapter aan te sluit.
- USB 2.0-poort (x1): Additional port for peripherals.
- HDMI 1.4b Ports (x2): Supports dual 4K (60Hz) display output.
- RJ45 Gigabit Ethernet-poort: Vir bedrade netwerkverbinding.
- 3.5mm Audio-in/out Jack: Vir die koppeling van oorfone, luidsprekers of 'n mikrofoon.
- Kensington Slot Slot: Vir fisiese sekuriteit.

Beeld: Gedetailleerd view of the various input/output ports available on the Blackview MP60 Mini PC, highlighting its comprehensive connectivity options.
4. Opstelling
Follow these steps to set up your Blackview MP60 Mini PC:
- Koppel aan krag: Plug the power adapter into the DC jack on the rear of the Mini PC, then plug the adapter into a power outlet.
- Koppel aan skerm: Use the provided HDMI cable to connect the Mini PC to your monitor or TV. If using dual monitors, connect a second display to the other HDMI port.
- Koppel randapparatuur: Connect your keyboard, mouse, and any other USB devices to the available USB ports.
- Koppel aan netwerk (opsioneel): For wired internet, connect an Ethernet cable to the RJ45 port. For wireless, the Mini PC supports 2.4G+5.0G dual-band WiFi.
- Krag aan: Press the power button on the side of the Mini PC. The system will boot up, and you will see the Windows 11 Pro setup screen or desktop.
- Aanvanklike Windows-opstelling: Follow the on-screen instructions to complete the Windows 11 Pro setup, including language, region, network, and user account creation.
4.1. VESA-montering
Die Swartview MP60 Mini PC can be mounted to the back of a VESA-compatible monitor using the included bracket and screws. This helps save desk space and creates a cleaner workspace.
5. Bedryfsinstruksies
Die Swartview MP60 Mini PC comes pre-installed with Windows 11 Pro, offering a familiar and user-friendly operating environment.
- Krag aan/af: Press the power button once to turn on the device. To shut down, use the Windows Start menu options (Start > Power > Shut down). A short press on the power button can also initiate sleep mode.
- Herbegin: Use the Windows Start menu options (Start > Power > Restart) to restart the system.
- Dubbele skerm: Connect two monitors to the HDMI ports. Windows 11 Pro will automatically detect both displays. You can configure display settings (extend, duplicate, etc.) via Display Settings in Windows.
- Draadlose konneksie: Connect to Wi-Fi networks via the network icon in the taskbar. Bluetooth 4.2 allows connection to wireless peripherals like keyboards, mice, and headphones.
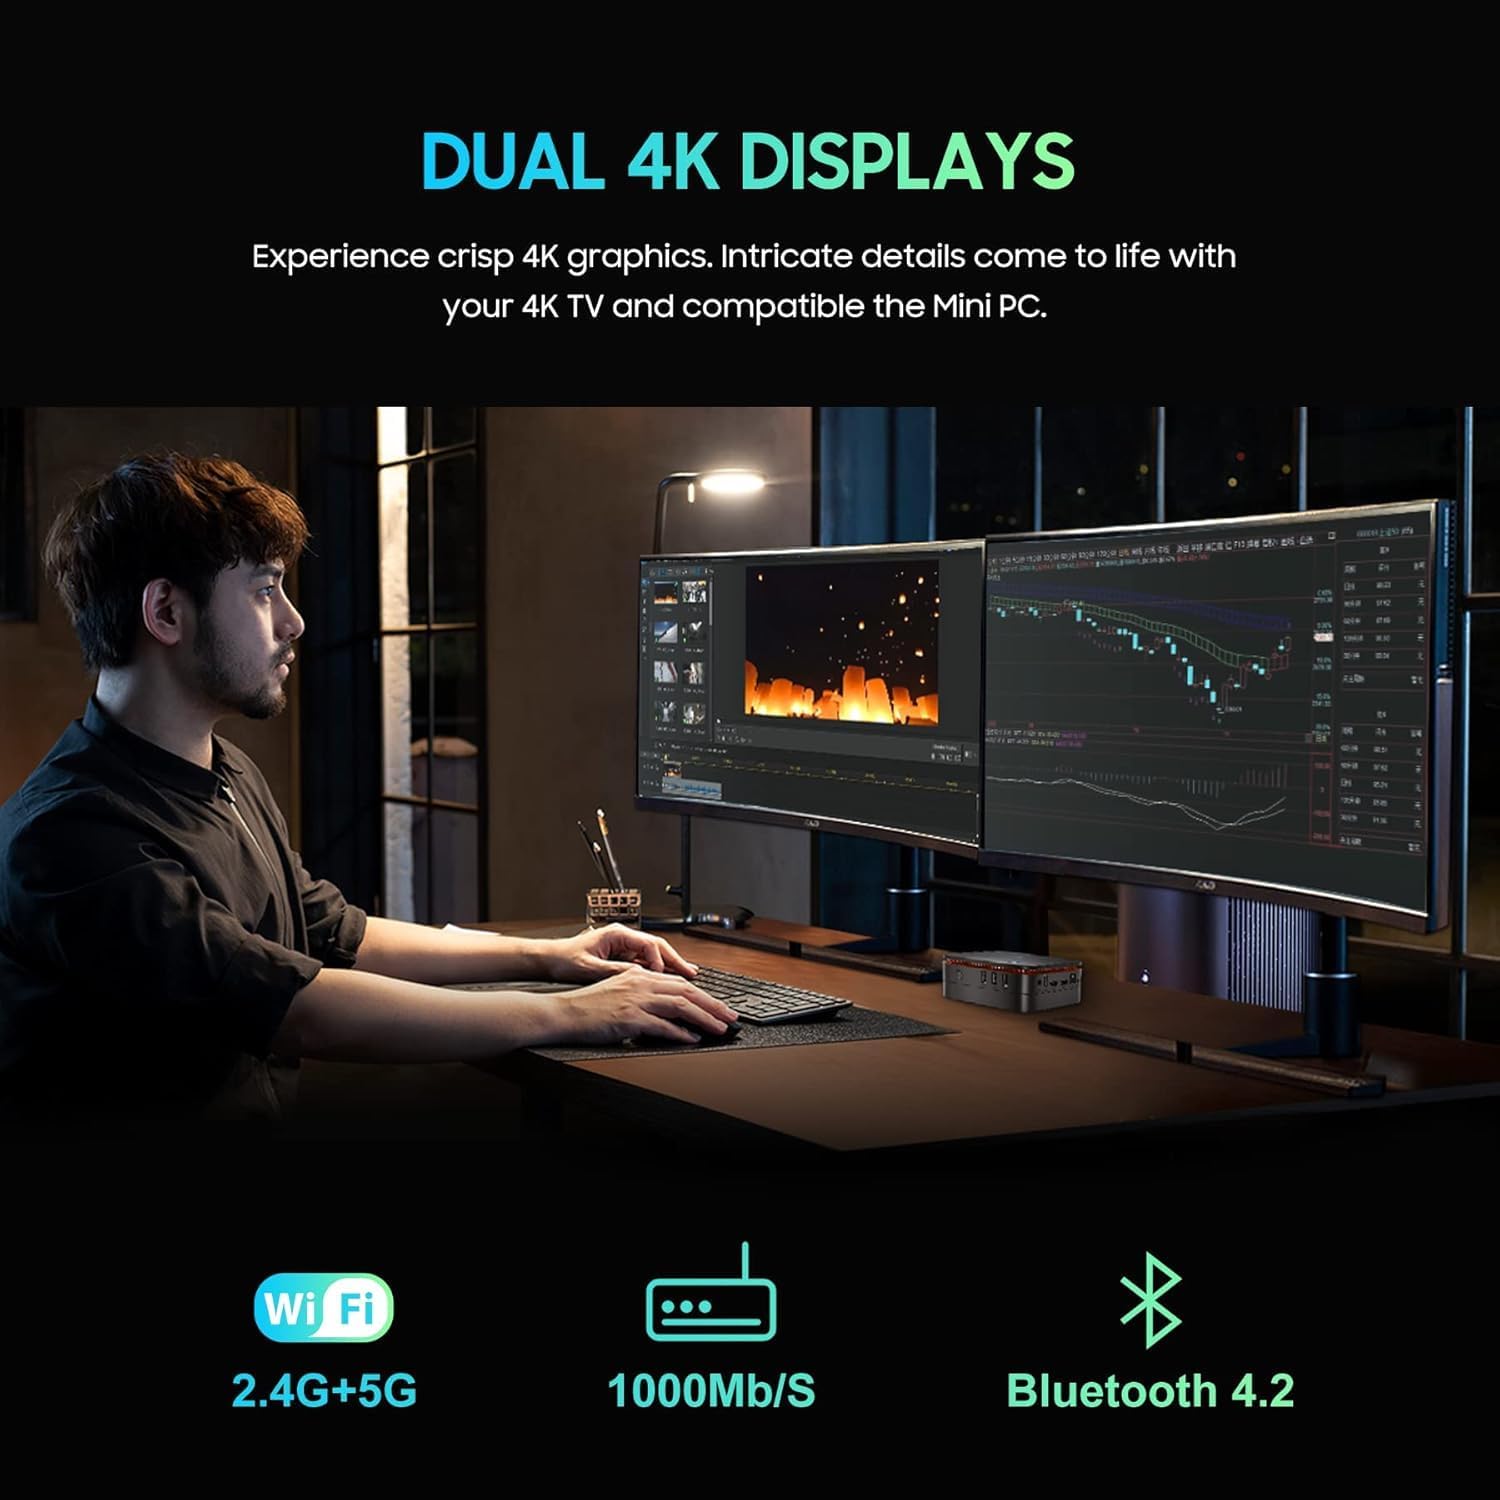
Image: The Blackview MP60 Mini PC in a dual-monitor setup, illustrating its capability to support extended desktop environments for enhanced productivity.
6. Onderhoud
Regular maintenance ensures optimal performance and longevity of your Mini PC.
- Skoonmaak: Keep the Mini PC clean and free from dust. Use a soft, dry cloth for external surfaces. For internal components, especially the fan and vents, use compressed air periodically to prevent dust buildup, which can affect cooling efficiency.
- Sagteware-opdaterings: Regularly update Windows 11 Pro and device drivers to ensure security, stability, and performance.
- Ventilasie: Ensure the Mini PC is placed in a well-ventilated area. Do not block the air vents to allow for proper heat dissipation by the internal fan and heat sink.
- Bergingbestuur: Maak gereeld onnodige dinge skoon files en toepassings om optimale bergingsprestasie te handhaaf.
7. Probleemoplossing
As jy probleme met jou Swart ondervindview MP60 Mini PC, refer to the following common troubleshooting steps:
- Geen krag: Maak seker dat die kragadapter stewig aan beide die Mini-rekenaar en 'n werkende kragaansluiting gekoppel is. Probeer 'n ander aansluiting indien nodig.
- Geen skerm: Verify that the HDMI cable is firmly connected to both the Mini PC and the monitor. Ensure the monitor is set to the correct input source. Try a different HDMI cable or monitor if possible.
- Geen internetverbinding nie: Vir bedrade verbindings, kontroleer die Ethernet-kabel en routerstatus. Vir Wi-Fi, maak seker dat die Wi-Fi-adapter geaktiveer is en dat jy aan die korrekte netwerk met die korrekte wagwoord gekoppel is.
- Stadige prestasie: Close unnecessary applications. Check for background processes consuming high CPU or RAM. Ensure sufficient free storage space. Consider running a disk cleanup.
- Randapparatuur nie opgespoor nie: Ensure USB devices are properly plugged in. Try connecting them to a different USB port. Update or reinstall device drivers if needed.
- Stelsel vries/ineenstort: Restart the Mini PC. If issues persist, check for recent software installations or updates that might be causing conflicts. Consider performing a system restore or reinstalling Windows if necessary (back up your data first).
8. Spesifikasies
Gedetailleerde tegniese spesifikasies vir die Swartview MP60 Mini PC:
| Handelsmerk | Swartview |
| Modelnommer | MP60 |
| Verwerker | Intel Celeron N5095 (4C/4T, 4 MB L3 Cache, 2.0GHz base, up to 2.9 GHz burst) |
| Grafika | Intel UHD Graphics (750 MHz) |
| RAM | 16GB DDR4 (Soldered, not upgradeable) |
| Berging | 512GB M.2 2280 SSD (Upgradeable to 2TB) |
| Berging Uitbreiding | Supports additional 2.5-inch SATA SSD/HDD up to 2TB |
| Bedryfstelsel | Windows 11 Pro |
| Video-uitset | 2 x HDMI 1.4b (Supports Dual 4K@60Hz) |
| USB-poorte | 2 x USB 3.0, 2 x USB 2.0 |
| Netwerk | RJ45 Gigabit Ethernet, 2.4G+5.0G Dual Band WiFi (802.11ac) |
| Bluetooth | Bluetooth 4.2 |
| Oudio | 3.5mm Audio-in/out Jack |
| Verkoelingsmetode | Air Cooling (Fan and Heat Sink) |
| Afmetings | Ongeveer. 5 x 5 x 2.1 duim |
| Montering | VESA-monteerbaar |
9. Storage Expansion and Upgrades
Die Swartview MP60 Mini PC offers options for storage expansion:
- M.2 SSD: The pre-installed 512GB M.2 2280 SSD can be upgraded to a larger capacity, up to 2TB. Note that replacing the primary SSD will require reinstalling the operating system.
- 2.5-inch SATA Drive: An empty bay is available for adding an additional 2.5-inch SATA SSD or HDD, supporting up to 2TB of extra storage. This allows for significant expansion without replacing the primary drive.
- RAM: The 16GB DDR4 RAM is soldered onto the motherboard and is not user-upgradeable.
To access the internal components for storage upgrades, you will need to carefully remove the bottom panel. This involves unscrewing the two visible screws and then removing the four sticky feet to reveal additional screws. Once these are removed, the bottom panel can be detached to access the M.2 slot and the 2.5-inch drive bay.

Beeld: 'n Interne view of the Blackview MP60 Mini PC, illustrating the layout of the motherboard, M.2 SSD, cooling fan, and other components relevant for potential upgrades.
10. Waarborg en Ondersteuning
For warranty information, technical support, or service inquiries, please refer to the warranty card included in your product packaging or visit the official Blackview ondersteun webwebwerf. Bewaar u aankoopbewys as bewys van aankoop vir waarborgeise.