1. Inleiding
Thank you for choosing the Vacmaster VK1638SWC Industrial Wet and Dry Vacuum Cleaner. This manual provides essential information for the safe assembly, operation, maintenance, and troubleshooting of your new appliance. Please read these instructions thoroughly before use and retain them for future reference.

Image: The Vacmaster VK1638SWC vacuum cleaner actively cleaning a workshop floor, demonstrating its industrial application.
2. Veiligheidsinligting
Volg altyd basiese veiligheidsmaatreëls wanneer u hierdie toestel gebruik om die risiko van brand, elektriese skok of besering te verminder.
- Read all instructions before operating the vacuum cleaner.
- Moenie die toestel sonder toesig laat wanneer dit ingeprop is nie. Trek uit die stopcontact wanneer dit nie gebruik word nie en voor diens.
- Do not pick up hot ashes, coals, or flammable/combustible liquids.
- Moet nie rondom plofbare vloeistowwe of dampe gebruik nie.
- Ensure all filters are correctly installed for the intended operation (wet or dry).
- Hou hare, los klere, vingers en alle dele van die liggaam weg van openinge en bewegende dele.
- Gebruik slegs soos beskryf in hierdie handleiding. Gebruik slegs die vervaardiger se aanbevole aanhegsels.
- Moenie met 'n beskadigde koord of prop gebruik nie. As die toestel nie werk soos dit moet nie, laat val, beskadig is, buite gelaat is of in water laat val het, stuur dit terug na 'n dienssentrum.
- Moenie aan koord trek of dra nie, gebruik koord as 'n handvatsel, maak 'n deur op koord toe, of trek koord om skerp kante of hoeke. Moenie die toestel oor die koord laat loop nie. Hou koord weg van verhitte oppervlaktes.
- Moenie die prop uittrek deur aan die koord te trek nie. Om die prop te ontkoppel, gryp die prop vas, nie die koord nie.
- Moenie prop of toestel met nat hande hanteer nie.
- Skakel alle kontroles af voordat u die prop ontkoppel.
- Wees ekstra versigtig wanneer jy op trappe skoonmaak.
- Moet nie gebruik om vlambare of brandbare vloeistowwe, soos petrol, op te tel of in gebiede te gebruik waar hulle teenwoordig kan wees nie.
- Moenie iets optel wat brand of rook nie, soos sigarette, vuurhoutjies of warm as.
- Moenie gebruik sonder filters in plek nie.
- Hierdie toestel is nie bedoel vir gebruik deur persone (insluitend kinders) met verminderde fisiese, sensoriese of geestelike vermoëns, of 'n gebrek aan ervaring en kennis nie, tensy hulle toesig of instruksies oor die gebruik van die toestel gegee is deur 'n persoon wat verantwoordelik is vir hul veiligheid.
- Kinders moet onder toesig wees om te verseker dat hulle nie met die toestel speel nie.
3. Pakketinhoud
Carefully unpack the box and ensure all items are present and undamaged. If any parts are missing or damaged, contact Vacmaster customer support.
- 1 x Dust Extractor Unit
- 1 x HEPA 13 Cartridge Filter
- 1 x HEPA Exhaust Filter
- 1 x Pre-filter (washable)
- 1 x Skuimfilter
- 2 x Verlengbuise
- 1 x Handle with Air Flow Control
- 1 x Universal Floor Head
- 1 x Dual Mode Floor Head
- 1 x Anti-crush Hose
- 1 x Round Dusting Tool
- 1 x Extra-large Crevice Tool
- 1 x Universal Power Tool Adaptor
- 1 x Accessory Pouch
- 1 x 38L Hygiene Seal Dust Bag

Image: The Vacmaster VK1638SWC unit displayed with its full range of included accessories.
4. Opstelling
4.1 Montering van die stofsuier
- Heg wiele aan: Insert the casters into the designated slots on the base of the vacuum until they click securely into place.
- Heg handvatsel: Secure the handle to the top of the unit using the provided hardware.
- Koppel slang: Insert the anti-crush hose into the suction inlet on the front of the tank. Ensure it is firmly seated.
- Installeer filters: Refer to section 4.2 for specific filter installation based on your intended use (wet or dry).

Beeld: 'n Nabyskoot view of the yellow latch, indicating how to secure or release the motor head from the tank.
4.2 Filterinstallasie
The VK1638SWC uses different filters for wet and dry applications. Always ensure the correct filter is installed before operation.
- Vir droë stofsuig: Install the HEPA 13 Cartridge Filter and the washable Pre-filter. Ensure the HEPA Exhaust Filter is also in place. The 38L hygiene seal dust bag can be used for improved dust collection and disposal.
- Vir nat stofsuig: Remove the HEPA 13 Cartridge Filter and Pre-filter. Install the Foam Filter over the filter cage. Do NOT use the dust bag for wet vacuuming.

Image: A person demonstrating the process of accessing and handling the filter inside the vacuum cleaner's tank.
5. Bedryfsinstruksies
5.1 Droë stofsuig
- Ensure the HEPA 13 Cartridge Filter and Pre-filter are correctly installed.
- Connect the desired extension tubes and floor head (universal or dual mode) or other accessory to the hose.
- Steek die kragkabel in 'n geskikte elektriese aansluiting (240 Volt).
- Turn the vacuum cleaner ON using the power switch.
- Begin om die droë puin te stofsuig.
- Wanneer jy klaar is, skakel die stofsuier AF en ontkoppel dit.
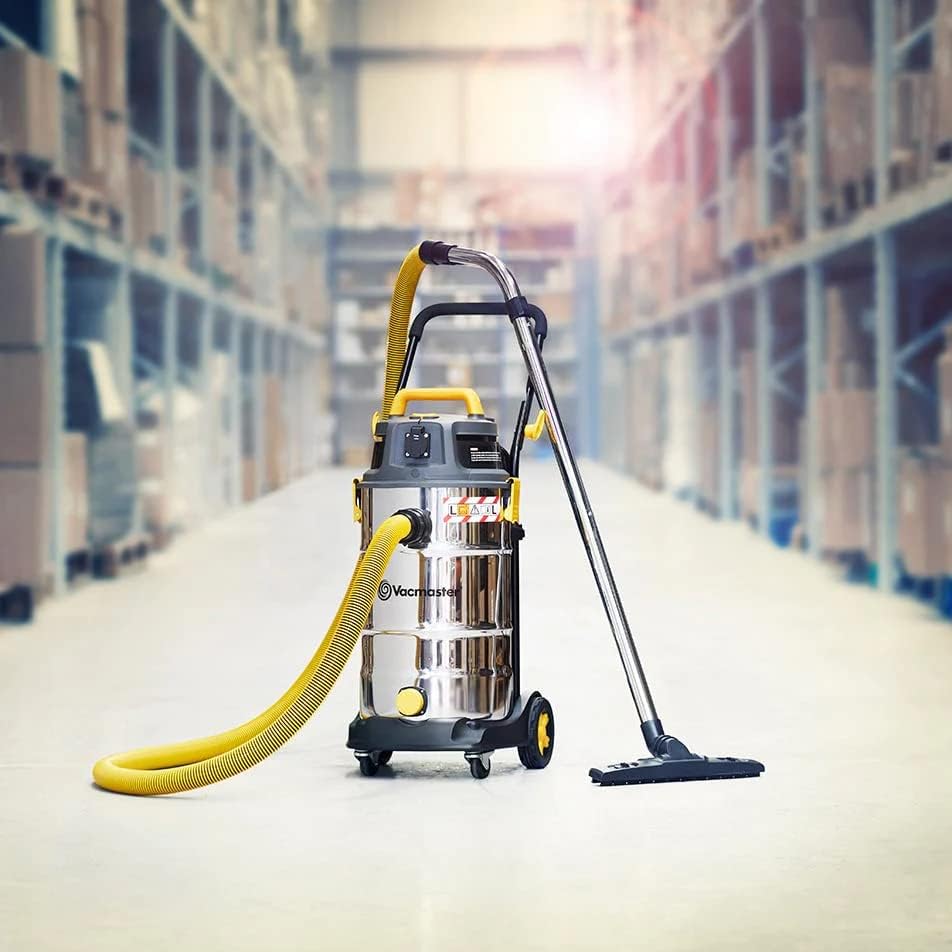
Image: The Vacmaster VK1638SWC vacuum cleaner fully assembled with its hose, extension tubes, and floor head.
5.2 Natstofsuig
- Ensure the Foam Filter is correctly installed and the HEPA 13 Cartridge Filter and Pre-filter are removed.
- Connect the desired floor head or accessory suitable for wet pickup to the hose.
- Steek die kragsnoer in 'n geskikte elektriese aansluiting.
- Turn the vacuum cleaner ON.
- Begin vacuuming liquids. The vacuum has an automatic shut-off feature that will stop suction when the tank is full.
- When finished or when the tank is full, turn the vacuum OFF and unplug it. Empty the tank as described in the Maintenance section.

Image: The Vacmaster VK1638SWC vacuum cleaner demonstrating its liquid draining capability from the tank's outlet.
5.3 Blaserfunksie
The VK1638SWC can also function as a powerful blower.
- Ensure the tank is empty and clean, and the appropriate filter is installed (HEPA for dry blowing, no filter or foam filter for wet blowing).
- Remove the hose from the suction inlet.
- Insert the hose into the blower port located on the motor head.
- Plug in and turn ON the vacuum to use the blower function.
5.4 Power Tool Connection
The included universal power tool adaptor allows for direct dust extraction when working with power tools.
- Ensure the vacuum is set up for dry vacuuming with the HEPA 13 filter.
- Connect the universal power tool adaptor to the end of the vacuum hose.
- Attach the other end of the adaptor to the dust extraction port on your power tool.
- Plug the power tool into the integrated power socket on the vacuum cleaner (if available and compatible). This allows the vacuum to start automatically when the power tool is activated.
- Turn on the vacuum cleaner and then your power tool to begin dust extraction.

Image: The Vacmaster VK1638SWC vacuum cleaner connected to a sanding machine, demonstrating its dust extraction capability.
5.5 Using the Wheel Brake
To secure the vacuum cleaner in place, engage the wheel brake by pressing down on the lever located on one of the casters. To release, lift the lever.

Image: A person's foot pressing down on the yellow lever to engage the wheel brake on the vacuum cleaner.
6. Onderhoud
Gereelde onderhoud verseker optimale werkverrigting en verleng die lewensduur van jou stofsuier. Ontkoppel altyd die eenheid voordat jy enige onderhoud uitvoer.
6.1 Filter Skoonmaak en Vervanging
- HEPA 13 Cartridge Filter & Pre-filter: For dry use, these filters should be cleaned regularly by tapping them gently to dislodge dust or by using a soft brush. The pre-filter is washable; rinse with water and allow to air dry completely before reinstallation. Replace the HEPA cartridge filter when suction power significantly decreases or if it becomes damaged.
- Skuim filter: For wet use, the foam filter should be rinsed with water after each use and allowed to air dry completely before storage or next use.
- HEPA-uitlaatfilter: Check periodically and replace if visibly dirty or if air quality issues are noted.
6.2 Tank Cleaning and Emptying
- Droë puin: Unlatch the motor head and carefully lift it off. Remove the dust bag (if used) and dispose of contents. Empty any remaining debris from the stainless steel tank.
- Vloeistowwe: For liquid disposal, the tank can be emptied by tilting the unit or by using the drain plug located at the bottom of the tank. After emptying, rinse the tank with water and wipe dry to prevent odors and corrosion.
6.3 Bykomstigheidberging
The VK1638SWC features integrated storage for its accessories, keeping them organized and readily accessible.

Image: The Vacmaster VK1638SWC vacuum cleaner showcasing its onboard storage for hose, power cord, and various attachments.
7. Probleemoplossing
Voordat u kliëntediens kontak, verwys na die volgende tabel vir algemene probleme en hul oplossings.
| Probleem | Moontlike oorsaak | Oplossing |
|---|---|---|
| Die stofsuier skakel nie aan nie. | No power supply; Damaged cord/plug; Faulty switch. | Check power outlet and plug. Inspect cord for damage. Contact service if switch is faulty. |
| Verlies aan suiging. | Clogged hose/attachments; Full tank; Dirty/incorrect filter; Air leak. | Clear obstructions. Empty tank. Clean/replace filters. Check all connections for leaks. |
| Motor oorverhit/skakel af. | Blocked airflow; Full tank (wet use); Prolonged heavy use. | Check for blockages. Empty tank. Allow motor to cool down before restarting. |
| Water lek uit eenheid. | Foam filter not installed correctly for wet use; Tank overfilled; Damaged tank seal. | Ensure foam filter is properly seated. Do not overfill tank. Inspect tank seal for damage. |
8. Spesifikasies
| Kenmerk | Detail |
|---|---|
| Modelnommer | VK1638SWC |
| Krag | 1600W motor |
| Air Watts | 260 Lugwatt |
| Lugvloei | 52 L/s (max) |
| Vakuumdruk | 27 kpa |
| Tenk kapasiteit | 38 liter |
| Filtrering | Dual HEPA 13 (Cartridge & Exhaust), Washable Pre-filter, Foam Filter |
| Materiaal | Vlekvrye staaltenk |
| Afmetings (L x B x H) | 49 x 41 x 79 cm |
| Gewig | 17 kilogram |
| Voltage | 240 Volt |
| Spesiale kenmerk | Nat/Droë Funksionaliteit |
9. Waarborg en Ondersteuning
9.1 Waarborginligting
The Vacmaster VK1638SWC Industrial Wet and Dry Vacuum Cleaner comes with a 2 jaar waarborg from the date of purchase. This warranty covers defects in materials and workmanship under normal use. It does not cover damage resulting from misuse, abuse, accident, unauthorized repairs, or lack of maintenance.
9.2 Kliëntediens
For technical assistance, warranty claims, or to order replacement parts, please contact Vacmaster customer support. Refer to the contact information provided with your purchase documentation or visit the official Vacmaster webwebwerf.