1. Inleiding
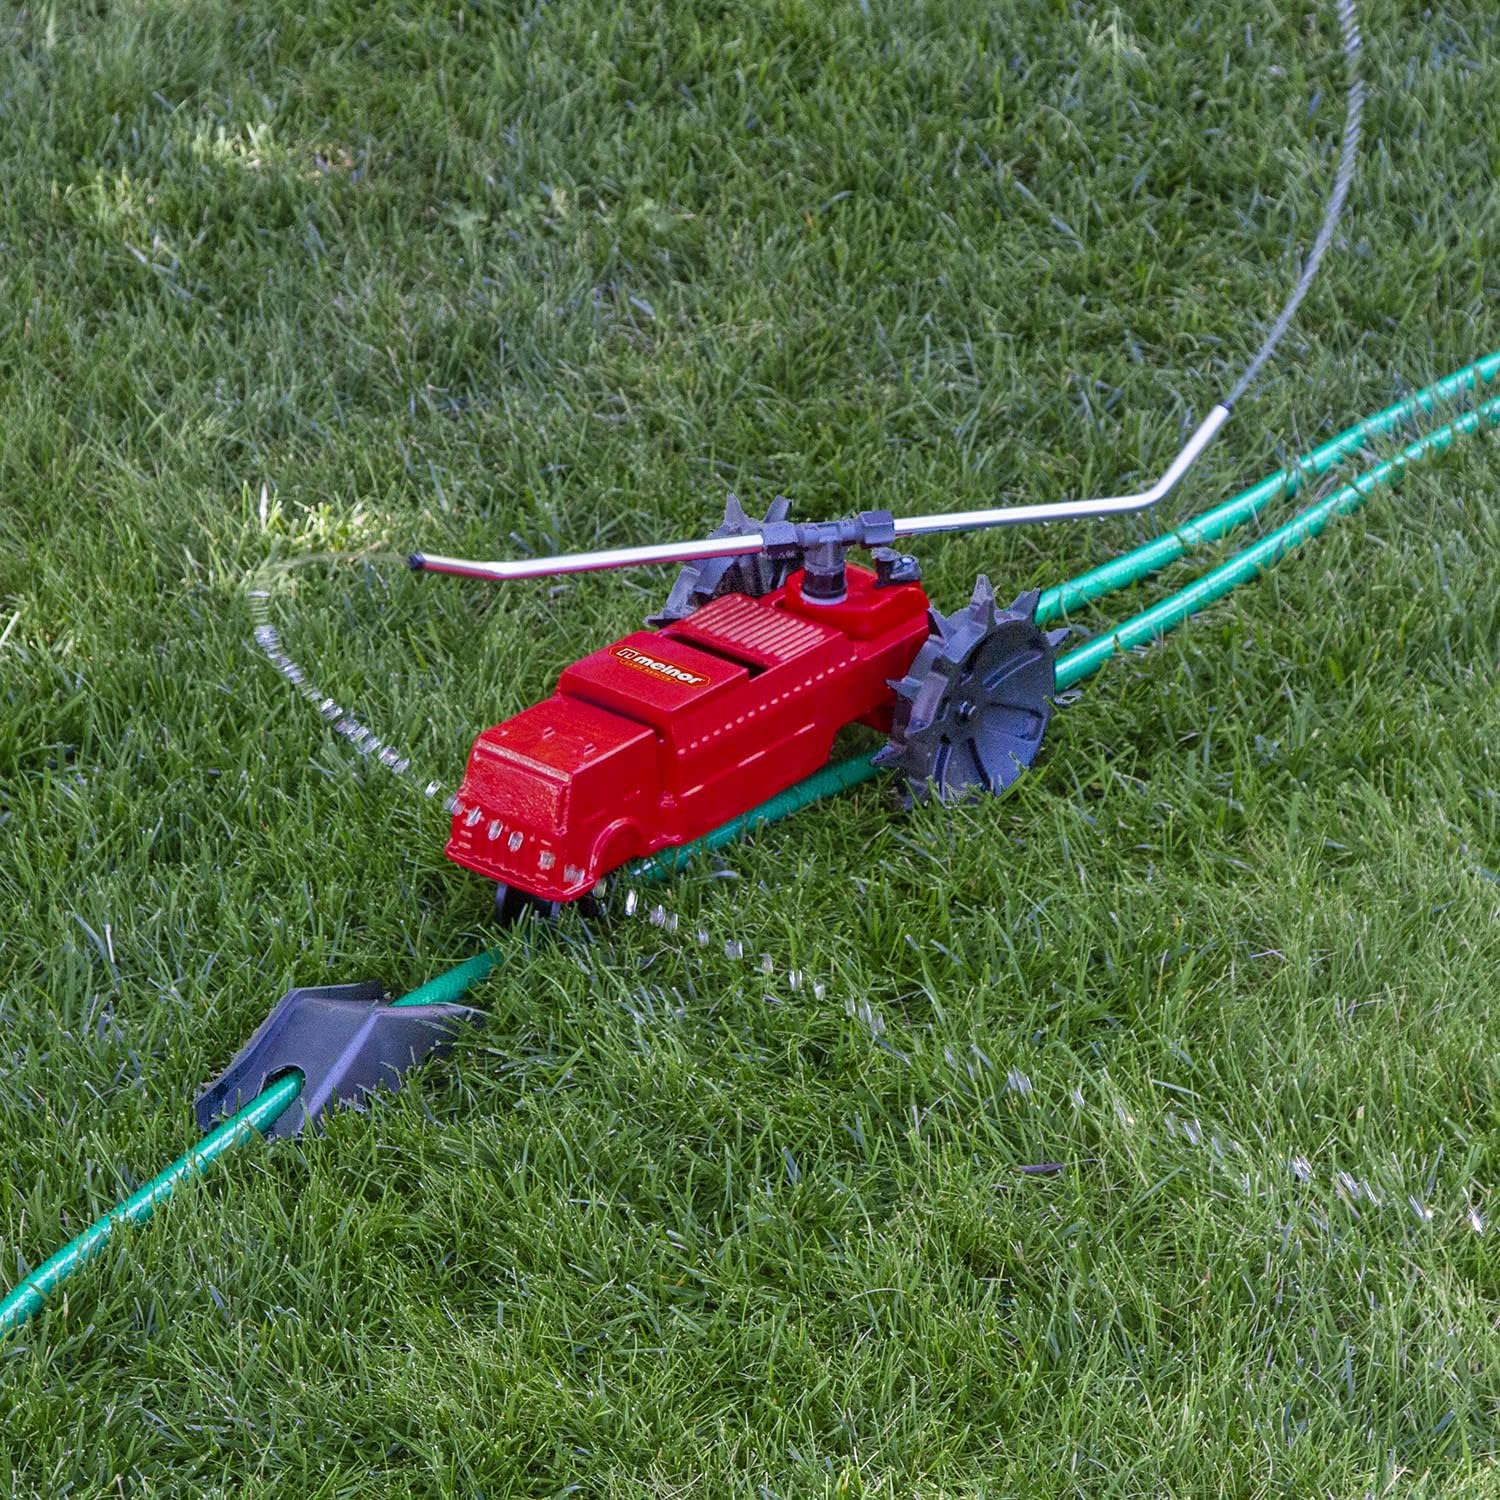
This manual provides comprehensive instructions for the safe and efficient operation of your Melnor 65193AMZ Traveling Sprinkler with QuickConnects. Please read this manual thoroughly before initial use and retain it for future reference. This traveling sprinkler is designed to water large lawn areas by following a path defined by your garden hose, offering adjustable spray coverage and an automatic shut-off feature.
2. Veiligheidsinligting
- Always ensure the water supply is turned off before connecting, disconnecting, or adjusting the sprinkler.
- Do not operate the sprinkler on excessively steep slopes where it may tip over.
- Keep children and pets away from the sprinkler during operation to prevent injury or damage to the unit.
- Use only with standard garden hoses and water pressure.
- Inspect the sprinkler and hose for damage before each use. Do not use if damaged.
3. Pakketinhoud
Verifieer dat alle items in die pakket teenwoordig is:
- Melnor 65193AMZ Traveling Sprinkler Unit
- Quick Connect Product Adapter
- Quick Connect Product End Connector
- Stop Ramp

4. Opstelinstruksies
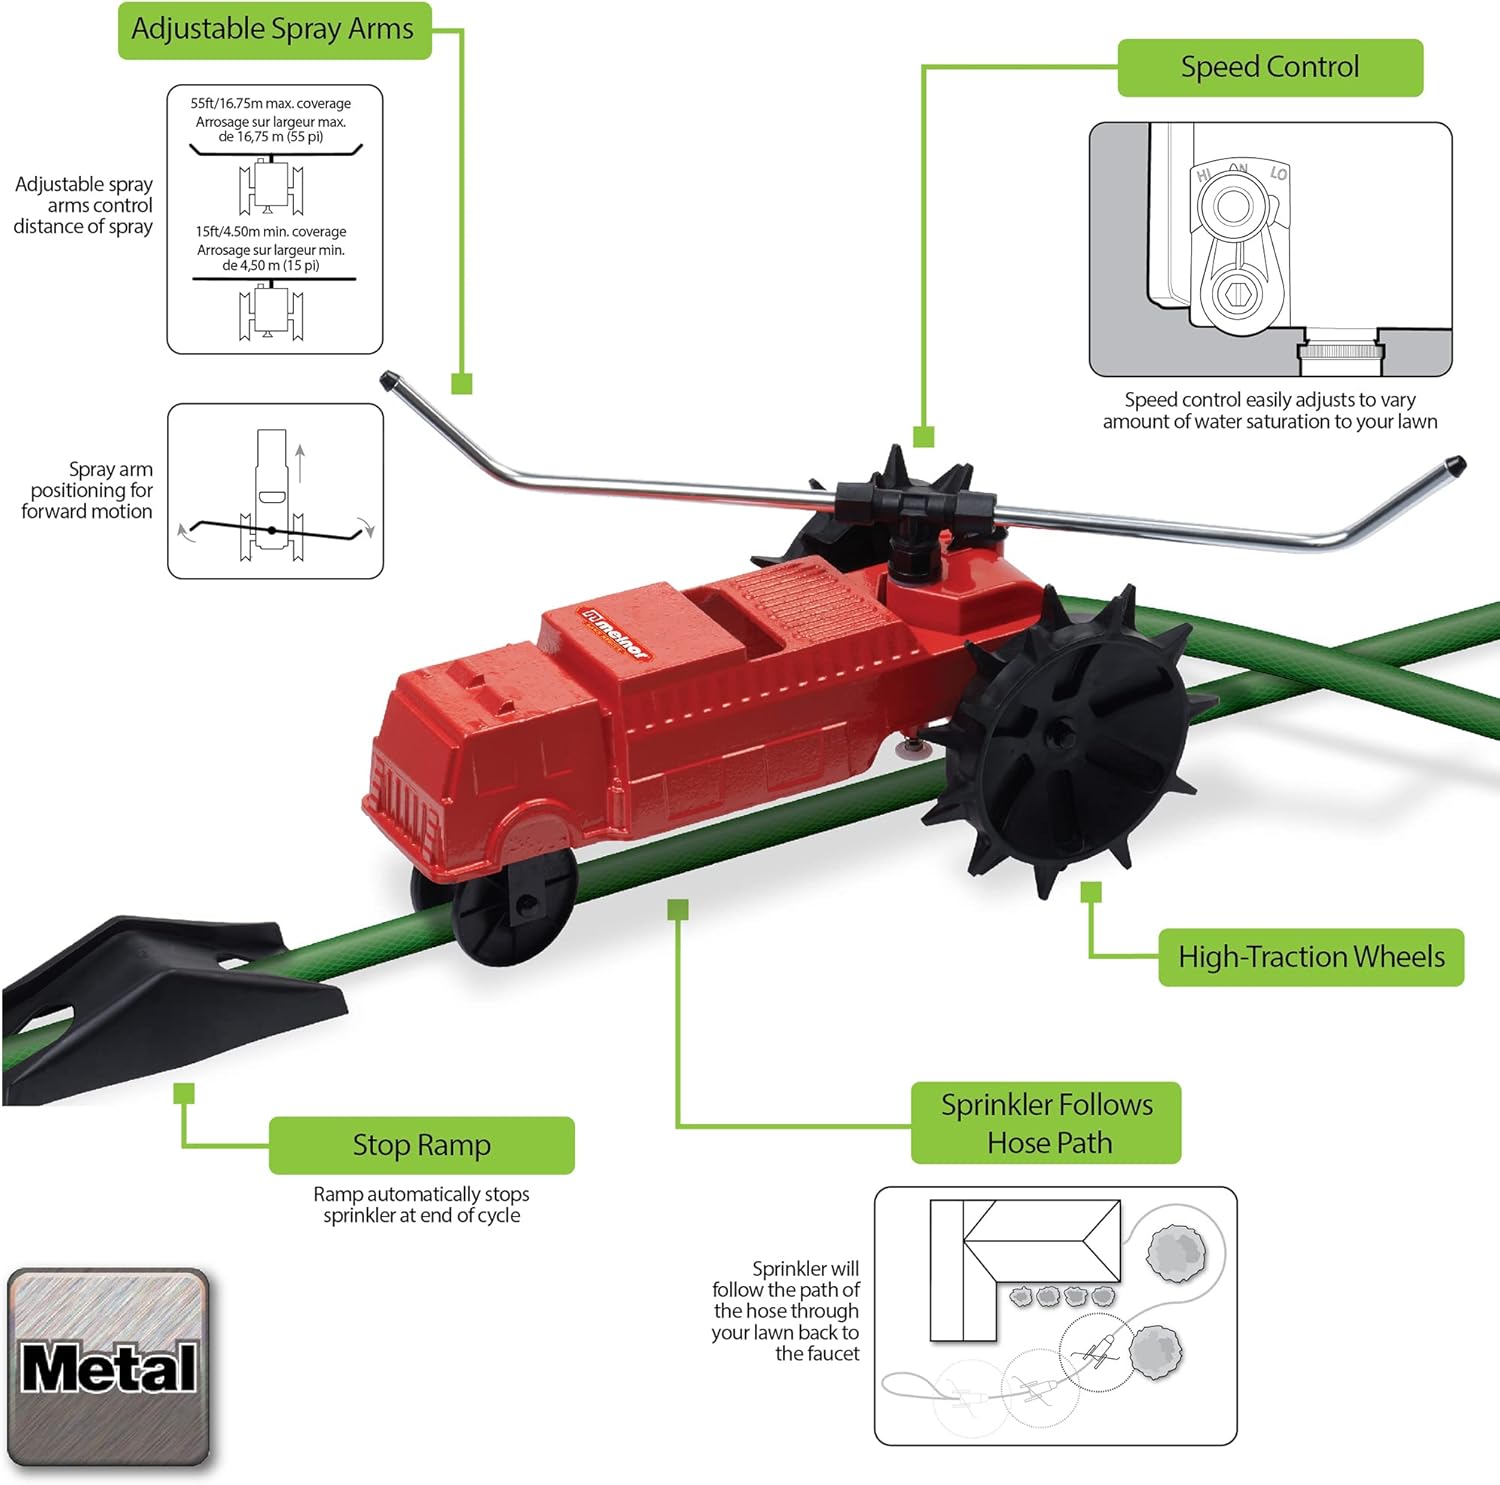
- Connect QuickConnects: Attach the Quick Connect Product Adapter to your garden hose and the Quick Connect Product End Connector to the sprinkler's inlet. This allows for easy attachment and detachment.
- Lay the Hose Path: Position your garden hose to outline the desired watering area. The sprinkler will follow this path. Ensure the hose is laid flat and free of kinks or sharp bends that could impede the sprinkler's movement. For optimal performance, avoid significant uphill sections.
- Place the Stop Ramp: At the end of your desired watering path, place the stop ramp over the hose. The sprinkler will automatically shut off when it reaches this ramp.
- Posisioneer die sprinkel: Place the traveling sprinkler at the beginning of the hose path, ensuring the front wheels are on the hose.

5. Bedryfsinstruksies
- Adjust Spray Arms: The spray arms can be adjusted to control the diameter of the spray coverage. Adjust them to achieve a spray diameter between 15 feet and 50 feet, depending on your watering needs.
- Set Speed Control: The sprinkler features a speed control mechanism. Select 'High' for faster movement and lighter watering, 'Low' for slower movement and deeper watering, or 'Neutral' for stationary watering.
- Skakel die watertoevoer aan: Slowly turn on the water supply to your garden hose. The sprinkler will begin to move along the hose path and distribute water.
- Outomatiese afskakeling: When the sprinkler reaches the stop ramp placed at the end of the hose path, it will automatically shut off the water flow.


6. Onderhoud
- Skoonmaak: Periodically clean the sprinkler body and spray nozzles to prevent mineral buildup and ensure consistent water flow. Use a soft brush or cloth.
- Berging: Before storing for extended periods, especially during freezing temperatures, drain all water from the sprinkler and store it in a dry, protected area.
- Inspeksie: Regularly check the wheels and moving parts for any debris or obstructions.
7. Probleemoplossing
| Probleem | Moontlike oorsaak | Oplossing |
|---|---|---|
| Sprinkler does not move | Insufficient water pressure; hose kinked or obstructed; wheels jammed. | Ensure adequate water pressure. Check hose for kinks. Clear any debris from wheels. Avoid significant uphill paths. |
| Uneven watering pattern | Spray arms incorrectly adjusted; clogged nozzles. | Adjust spray arms for desired coverage. Clean spray nozzles. |
| Sprinkler tips over | Operating on a steep slope; uneven ground. | Relocate sprinkler to a flatter area. Ensure hose path is stable. |
| Outomatiese afskakeling werk nie | Stop ramp incorrectly placed or missing. | Ensure the stop ramp is correctly positioned on the hose at the end of the path. |
8. Spesifikasies
- Handelsmerk: Melnor
- Modelnommer: 65193AMZ
- Materiaal: Metaal
- Kleur: Swart/rooi
- Produkafmetings (L x B x H): 18.89 x 9.44 x 8.66 duim
- Item gewig: 14.97 pond
- Maksimum vloeitempo: 26.7 liter per minuut
- Dekkingsgebied: Tot 13,500 vk.
- Spray Diameter: Adjustable from 15 feet to 50 feet
9. Waarborg
This Melnor product carries a Beperkte lewenslange waarborg. For details regarding warranty coverage and claims, please refer to the official Melnor webwebwerf of kontak kliëntediens.
10. Kliëntediens
For any questions, troubleshooting assistance, or replacement parts, please contact Melnor Customer Care. Visit the official Melnor webwebwerf vir kontakinligting en bykomende hulpbronne.
Melnor Official Webwebwerf: www.melnor.com