Inleiding
This manual provides detailed instructions for the safe and effective use of your pxton PX-8S-01 two-way radio. Please read this manual thoroughly before operating the device to ensure optimal performance and longevity.
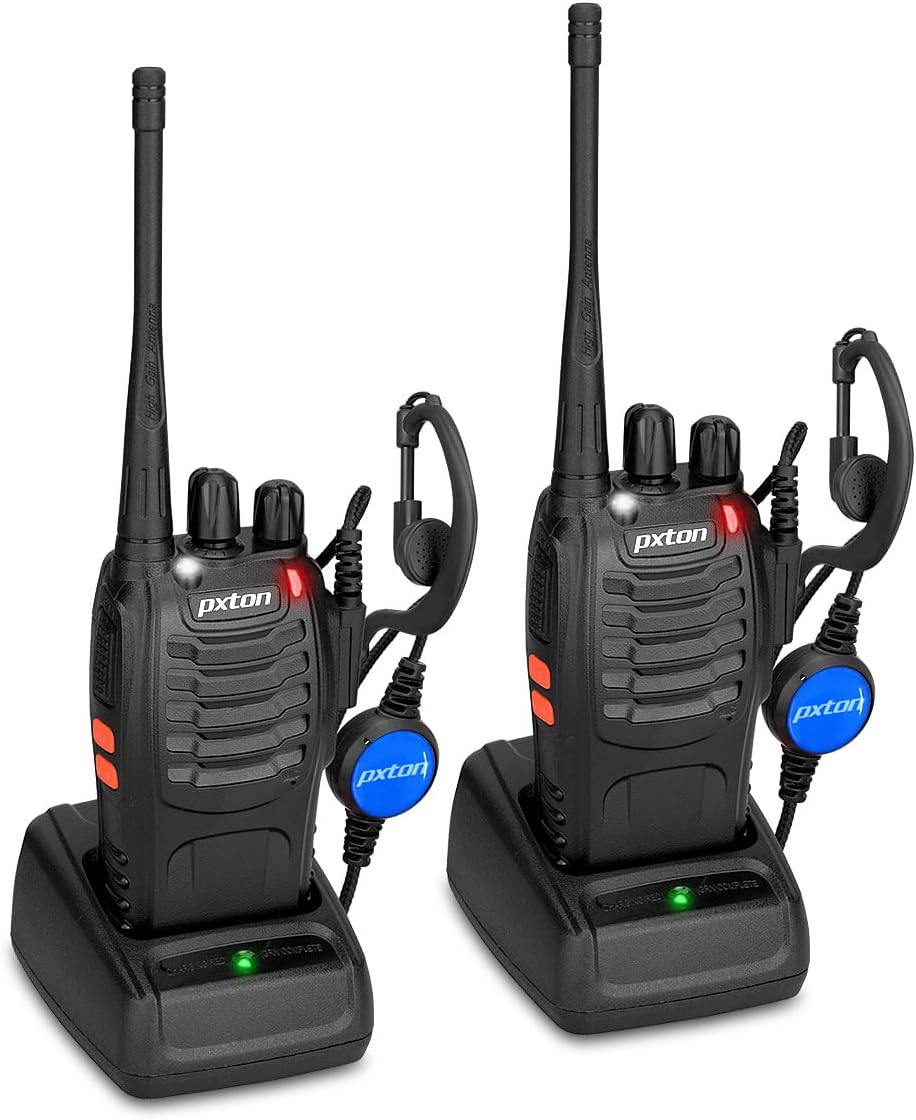
Image: Two pxton PX-8S-01 two-way radios with charging bases and earpieces.
Pakketinhoud
Verifieer dat alle items in jou pakket teenwoordig is:
- pxton PX-8S-01 Two-Way Radio (2 units)
- Lithium-Ion Battery (2 units)
- USB Charger (2 units)
- Upgraded Earpiece (2 units)
- Gordelklem (2 eenhede)
- Wrist Strap (2 units)
- Antenna (2 units)
- Gebruikershandleiding (1 eenheid)

Image: Contents of the pxton PX-8S-01 package.
Produk verbyview
Familiarize yourself with the components of your pxton PX-8S-01 two-way radio:

Image: Labeled diagram of the pxton PX-8S-01 two-way radio components.
- Integrated Sensitive Antenna: Vir die oordrag en ontvangs van seine.
- Kanaalskakelaar: Rotary knob to select one of the 16 available channels.
- Kragskakelaar/volumebeheer: Rotary knob to turn the radio on/off and adjust the volume.
- Flitslig: Ingeboude LED-lig vir beligting.
- LED-aanwyser: Wys radiostatus (bv. uitsaai, ontvang, laai).
- PTT-knoppie (Druk-om-te-praat): Druk en hou om te stuur, laat los om te ontvang.
- MONI Button (Monitor): Druk om die squelch tydelik te deaktiveer en luister vir swak seine.
- Flitslig-knoppie: Aktiveer die ingeboude flitslig.
- SP/MIC Jacks: Ports for connecting external audio accessories like earpieces or speaker microphones.
- Clear Speaker: Uitsette ontvangde klank.
- Ingeboude mikrofoon: Vang jou stem vas vir oordrag.
Opstelling
1. Battery Installasie
- Maak seker dat die radio afgeskakel is.
- Rig die batterypak met die groewe aan die agterkant van die radio.
- Skuif die batterypak opwaarts totdat dit in plek klik.
- Om te verwyder, druk die ontgrendelknop (indien teenwoordig) en skuif die battery afwaarts.
2. Laai die battery
- Connect the USB charger to a power source.
- Place the radio with the battery installed into the charging cradle.
- The LED indicator on the charger will show the charging status (e.g., red for charging, green for fully charged).
- A full charge from 0 capacity typically takes 3-4 hours.
3. Aanheg van bykomstighede
- Antenna: Skroef die antenna kloksgewys met die kloksgewyse hand vas op die konnektor bo-op die radio totdat dit vingervas is. Moenie te styf vasdraai nie.
- Gordelklem: Heg die gordelklip aan die aangewese gleuf aan die agterkant van die radio vas met die meegeleverde skroewe.
- gehoorstuk: Insert the earpiece plug into the SP/MIC jacks on the side of the radio. Ensure it is fully inserted for proper connection.
Bedryfsinstruksies
1. Aan/Af en Volume-aanpassing
- To power on the radio, rotate the Power Switch/Volume Control knob clockwise. You will hear a "click" and a voice prompt indicating the current channel.
- Gaan voort om die knop kloksgewys te draai om die volume te verhoog, en antikloksgewys om dit te verlaag.
- To power off, rotate the knob counter-clockwise until you hear a "click."
2. Kanaalkeuse
- Draai die Kanaalskakelaar-knoppie om een van die 16 beskikbare kanale te kies.
- Die radio sal die gekose kanaalnommer aankondig.
- Maak seker dat alle radio's in jou groep op dieselfde kanaal ingestel is vir kommunikasie.
3. Uitsending en Ontvangs
- Om te oordra, druk en hou die PTT (Push-to-Talk) button. Speak clearly into the microphone. The LED indicator will illuminate red.
- Release the PTT button to stop transmitting and return to receive mode. The LED indicator will turn green when receiving a signal.
4. VOX (Stembedrywige Uitruiling) Funksie
The VOX function allows hands-free operation. When activated, the radio will automatically transmit when it detects your voice, without needing to press the PTT button.
- VOX settings are typically programmed via software. Refer to advanced programming instructions if available.
- When using VOX, ensure the microphone is positioned correctly to pick up your voice effectively.
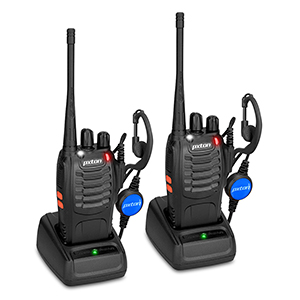
Image: VOX/Handfree function icon.
5. Flitsligfunksie
- Druk die toegewyde Flitslig-knoppie to turn the built-in LED flashlight on or off.
Image: Flashlight function icon.
6. Scan funksie
Die skanderingsfunksie laat die radio toe om outomaties deur kanale te skandeer om aktiewe uitsendings te vind.
- To activate the scan function, typically this is done via a programmed side key or by selecting a specific channel. Refer to your radio's programming guide for details.
- When scanning, the radio will stop on an active channel until the transmission ends, then resume scanning.
7. Noodalarm
The radio features an emergency alarm function for critical situations.
- To activate the emergency alarm, press the designated Emergency Alarm button (if programmed) or a specific key combination. This will typically emit a loud siren sound and/or transmit an alert signal.

Image: Emergency Alarm function icon.
8. Squelch-aanpassing
Squelch suppresses background noise when no signal is being received. The PX-8S-01 has an adjustable squelch feature.
- Squelch levels are typically set via programming software. A higher squelch level requires a stronger signal to open the receiver, reducing static but potentially missing weak signals.
- The MONI button can be used to temporarily override the squelch and listen to all signals, including weak ones or background noise.
Image: Squelch adjustment icon.
9. Privaatheidskodes (CTCSS/DCS)
The radio supports 165 privacy codes (50 CTCSS / 210 DCS) per programmable channel to help filter out unwanted conversations.
- When a CTCSS/DCS code is set, you will only hear transmissions from other radios using the same channel and the same CTCSS/DCS code.
- Similarly, other radios will only hear your transmissions if they are on the same channel and using the same code.
- These codes are typically programmed using specialized software.
Image: CTCSS/DCS privacy codes icon.
Onderhoud
- Skoonmaak: Gebruik 'n sagte, damp lap om die radio se buitekant skoon te maak. Moenie harde chemikalieë of oplosmiddels gebruik nie.
- Batterysorg:
- Vermy oorlaai of heeltemal ontlaai van die battery.
- Berg batterye op 'n koel, droë plek wanneer dit nie gebruik word nie.
- Indien die radio nie vir 'n lang tydperk gebruik gaan word nie, verwyder die battery.
- Berging: Bêre die radio in 'n droë, stofvrye omgewing weg van uiterste temperature.
- Antenna: Moenie die antenna buig of wysig nie, aangesien dit die werkverrigting kan beïnvloed.
Probleemoplossing
| Probleem | Moontlike oorsaak | Oplossing |
|---|---|---|
| Radio skakel nie aan nie. | Die battery is leeg of nie korrek geïnstalleer nie. | Laai die battery. Maak seker dat die battery stewig geïnstalleer is. |
| Kan nie oordra of ontvang nie. | Incorrect channel selected. Battery low. Radio out of range. | Verify both radios are on the same channel. Charge battery. Move closer to the other radio. |
| Swak klankgehalte of statiese klank. | Weak signal. Squelch level too low/high. Interference. | Move to an area with fewer obstructions. Adjust squelch level (if programmable). Check for sources of interference. |
| Kort kommunikasiebereik. | Obstructions (buildings, terrain). Low battery. | Beweeg na 'n oop area. Maak seker dat die battery volledig gelaai is. |
| Earpiece not working. | Earpiece not fully inserted. Faulty earpiece. | Ensure earpiece plug is fully inserted into the SP/MIC jack. Try a different earpiece if available. |
Spesifikasies
- Model: PX-8S-01
- FCC ID: 2AX68PX-888S
- Aantal kanale: 16
- Frekwensiereeks: UHF
- Maksimum praatbereik: Up to 5 miles (unobstructed)
- Privaatheidskodes: 165 (50 CTCSS / 210 DCS)
- Battery tipe: Litiumioon (ingesluit)
- Battery Voltage: 3.7 Volt (DC)
- Batterylewe: 8-96 hours standby, 8-12 hours continuous use (actual time varies with usage)
- Laai tyd: 3-4 hours (from 0 capacity)
- Waterweerstandvlak: Waterbestand
- Produk afmetings: 1.1" D x 1.89" B x 8.34" H
- Item gewig: 1.34 pond (vir die paar)
- Spesiale kenmerke: Rechargeable, VOX, TOT, Emergency Alarm, Battery Low Alert, Flashlight, Scan Function

Image: Size comparison of the pxton PX-8S-01 radio.
Veiligheidsinligting
Your pxton PX-8S-01 walkie-talkie has been granted FCC transmission and reception certification and authorization (FCC ID: 2AX68PX-888S). This device is intended for use only within the frequency points authorized by the FCC certification range.
Neem asseblief die volgende veiligheidsriglyne in ag:
- Moenie die radio in plofbare atmosfere gebruik nie (bv. vlambare gasse, stofdeeltjies, metaalpoeiers).
- Do not modify the radio or its accessories. Unauthorized modifications can void your warranty and violate FCC regulations.
- Hou die radio en sy bykomstighede buite bereik van kinders.
- Use only pxton-approved batteries and chargers. Using unapproved accessories can cause damage or injury.
- Avoid exposing the radio to extreme temperatures, direct sunlight, or moisture for prolonged periods.
- If the radio emits smoke or an unusual odor, immediately turn off the power and remove the battery. Contact customer support.
Waarborg en Ondersteuning
pxton provides lifetime customer service for its walkie-talkies. If you encounter any questions or issues with your PX-8S-01 radio, please contact pxton customer support through the platform where you purchased the product. Our professional team is available to assist you with troubleshooting and support.
For further assistance, please refer to the official pxton webwebwerf of kontak hul kliëntediens direk.