Inleiding
Thank you for choosing the Zwilling Enfinigy Milk Frother. This manual provides essential information for the safe and efficient operation, maintenance, and care of your appliance. Please read all instructions carefully before first use and keep this manual for future reference.
Belangrike veiligheidsinligting
- Lees alle instruksies voordat u die toestel gebruik.
- Moenie die basiseenheid, kragkabel of prop in water of enige ander vloeistof dompel nie.
- Verseker die voltagMaak seker dat die e wat op die toestel aangedui word, ooreenstem met jou plaaslike kragtoevoer voordat jy dit aansluit.
- Hou die toestel buite bereik van kinders.
- Use the frother only for its intended purpose: frothing or heating milk and milk alternatives.
- Do not operate the appliance with an empty milk container.
- Koppel die toestel uit die kragpunt wanneer dit nie gebruik word nie en voor skoonmaak.
- Laat die toestel heeltemal afkoel voordat dit skoongemaak of gestoor word.
Produkkomponente
Familiarize yourself with the parts of your Zwilling Enfinigy Milk Frother:
- Base Unit (with control buttons)
- Removable Stainless Steel Milk Container
- Deursigtige deksel
- Frothing Whisk (for dense foam)
- Mixing Whisk (for stirring or light foam)

Description: An exploded view showing the separate components of the Zwilling Enfinigy Milk Frother, including the base, stainless steel container, lid, and whisks.
Opstelling en eerste gebruik
- Pak uit: Verwyder alle komponente versigtig uit die verpakking. Bewaar die verpakking vir toekomstige vervoer of berging.
- Aanvanklike skoonmaak: Before first use, wash the removable stainless steel milk container, the lid, and both whisks with warm water and a mild dish soap. Rinse thoroughly with clean water and dry completely. Do not wash the base unit.
- Plasing: Place the base unit on a stable, dry, and level surface, away from heat sources and water.
- Whisk Insertion: Select the desired whisk (frothing or mixing) and securely insert it onto the spindle at the bottom of the milk container.
Bedryfsinstruksies
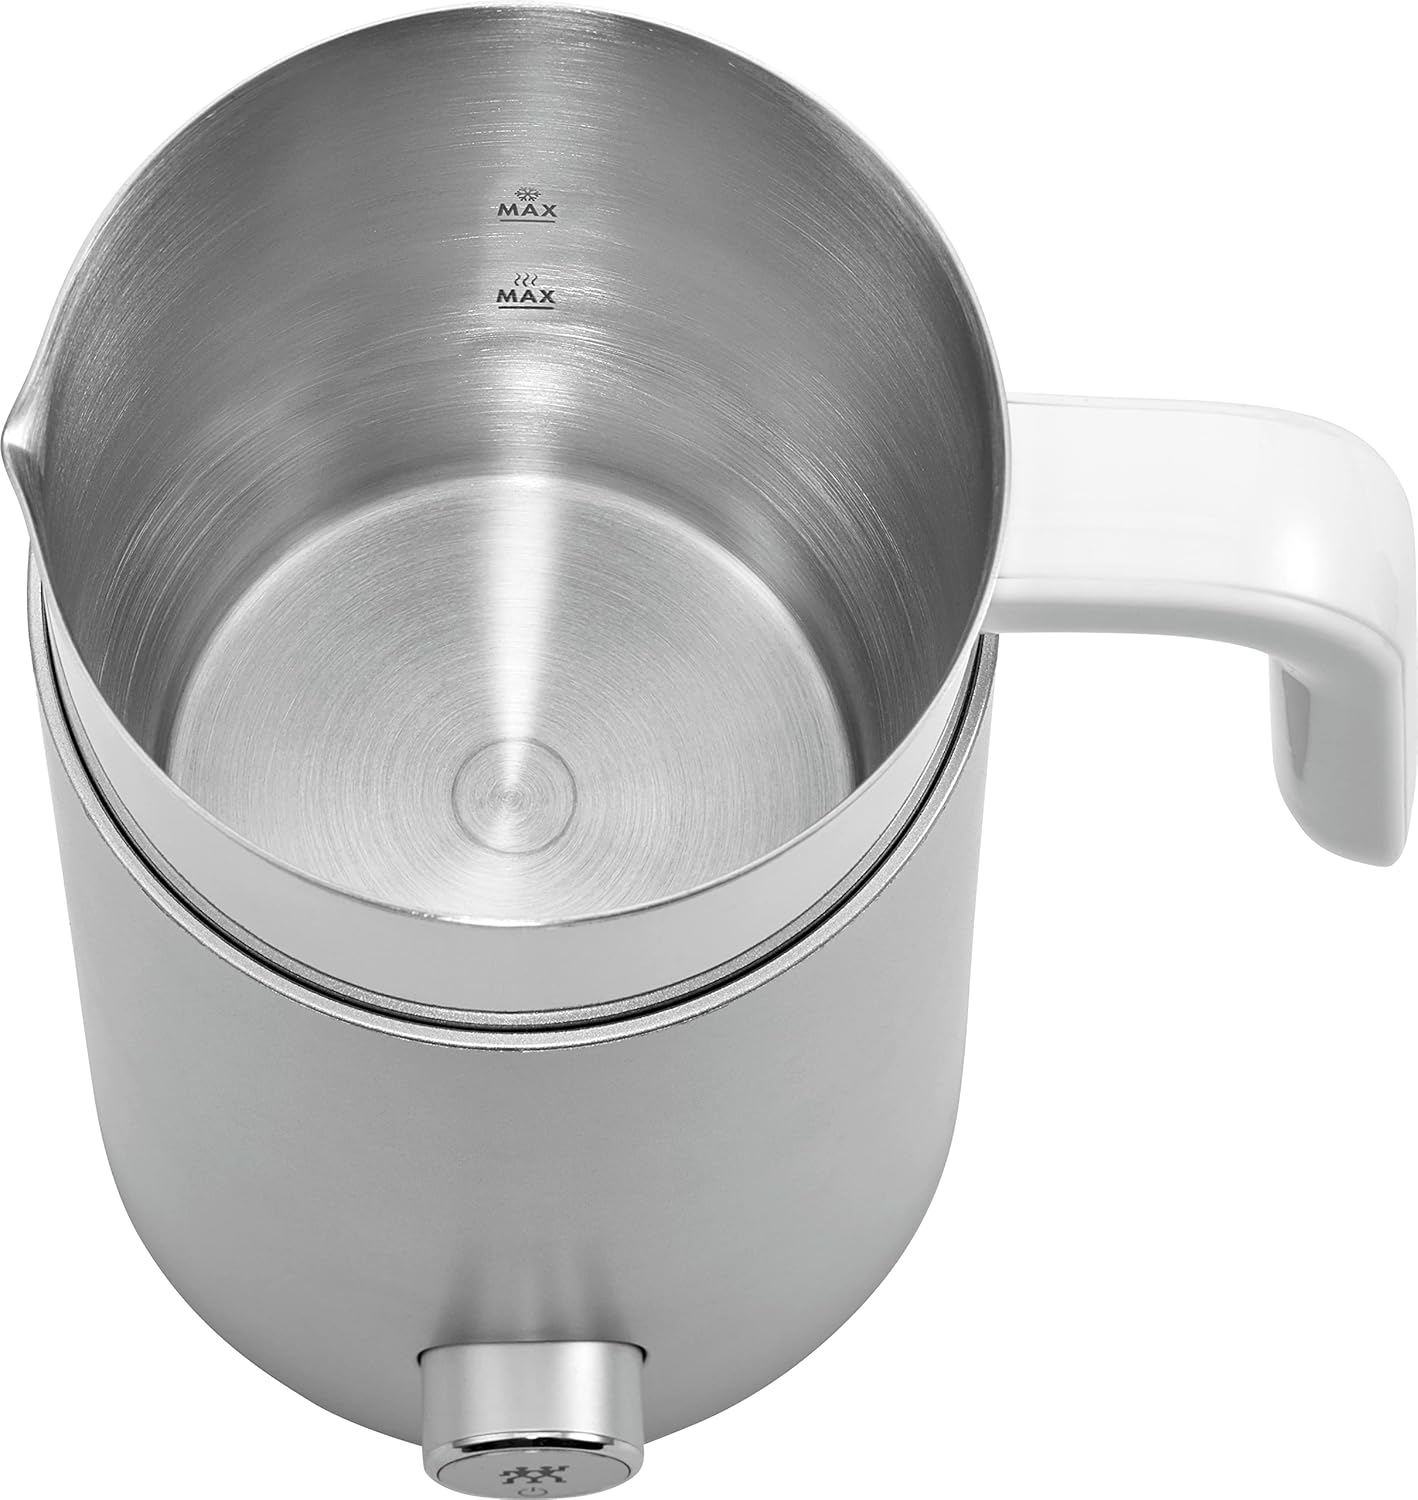
- Fill Milk Container: Pour fresh, cold milk or a milk alternative into the stainless steel container. Observe the internal MAX fill lines:
- For frothing warm milk: Do not exceed the lower "MAX" line (approximately 200 ml).
- For frothing cold milk or simply mixing: Do not exceed the upper "MAX" line (approximately 400 ml).
Description: A hand pours milk into the stainless steel container of the milk frother, illustrating the filling process.

Description: An overhead view of the frother's stainless steel container, clearly showing the two 'MAX' fill lines for different milk volumes.
- Heg deksel aan: Place the transparent lid securely onto the milk container. Ensure the whisk is properly attached to the lid's central spindle for optimal performance.

Description: A hand places the transparent lid, which has the frothing whisk attached, onto the milk container.
- Plaas houer: Position the filled milk container onto the base unit. Ensure it is seated correctly.
- Kies program: Press the desired button on the base unit to select your program (e.g., warm froth, cold froth, warm milk). The indicator light will illuminate.
- Begin skuim: The frother will begin operation automatically. The milk will be frothed or heated according to the selected program.

Description: A close-up view of milk actively frothing inside the container, visible through the transparent lid.
- Voltooiing: The frother will automatically stop once the program is complete. The indicator light may change or turn off.
- Bedien: Carefully remove the milk container from the base unit. Pour the frothed milk into your coffee or beverage.

Description: Frothed milk is poured from the frother's container into a glass cup containing coffee, demonstrating the serving process.

Description: The Zwilling Enfinigy Milk Frother stands on a wooden counter next to a glass of frothed coffee, showcasing the final product.
Skoonmaak en Onderhoud
Proper cleaning ensures the longevity and hygiene of your milk frother.
- Ontkoppel: Trek die stekker altyd uit die stopcontact voordat u dit skoonmaak.
- Afkoel: Laat die toestel heeltemal afkoel voordat dit skoongemaak word.
- Clean Container and Whisks: Immediately after each use, remove the milk container, lid, and whisk(s). Wash them with warm water and a mild detergent. Rinse thoroughly and dry completely with a soft cloth.
- Basis Eenheid: Vee die buitekant van die basiseenheid af met 'n sagte, damp lap. Moenie die basiseenheid in water of enige ander vloeistof dompel nie.
- Veiligheid van skottelgoedwassers: The milk container, lid, and whisks are nie suitable for cleaning in a dishwasher. Hand wash only.
- Berging: Bêre die skuimer op 'n skoon, droë plek wanneer dit nie gebruik word nie.
Probleemoplossing
Indien u probleme met u melkskuimer ondervind, verwys asseblief na die volgende algemene probleme en oplossings:
- Toestel begin nie:
- Ensure the appliance is properly plugged into a functional power outlet.
- Verify that the milk container is correctly seated on the base unit.
- Check that the lid is securely closed.
- Melk skuim nie behoorlik nie:
- Ensure the correct whisk (frothing whisk) is installed.
- Check that the milk level is within the specified MAX lines. Overfilling or underfilling can affect frothing quality.
- Use fresh, cold milk (or milk alternative). Older milk or milk that is too warm may not froth effectively.
- Ensure the whisk is clean and free from any residue.
- Milk overflowing:
- Do not exceed the maximum fill lines for milk.
- Ensure the lid is securely in place during operation.
Tegniese spesifikasies
| Kenmerk | Spesifikasie |
|---|---|
| Handelsmerk | Zwilling |
| Model Naam | Enfinigy |
| Kleur | Silwer |
| Behuisingsmateriaal | Plastiek |
| Houermateriaal | Vlekvrye staal |
| Capacity (Cold Milk) | 400 ml |
| Capacity (Warm Milk Frothing) | 200 ml |
| Produk Gewig | 1020 gram |
| Spesiale kenmerk | Melkskuimer |
| Versorgingsinstruksies | Hand wash only (not dishwasher safe) |
| Ingesluit komponente | Removable stainless steel milk container, frothing whisk, mixing whisk |
Waarborg en Ondersteuning
For detailed warranty information, product registration, or customer support, please refer to the documentation included with your purchase or visit the official Zwilling webwebwerf. Bewaar u bewys van aankoop vir waarborgeise.