
XIAOMI 2C
Xiaomi Robot Stofsuier 2C Gebruikershandleiding
Model: 2C
Inleiding
This manual provides essential information for the safe and efficient operation, maintenance, and troubleshooting of your Xiaomi Robot Vacuum 2C. Please read this manual thoroughly before using the product and retain it for future reference.

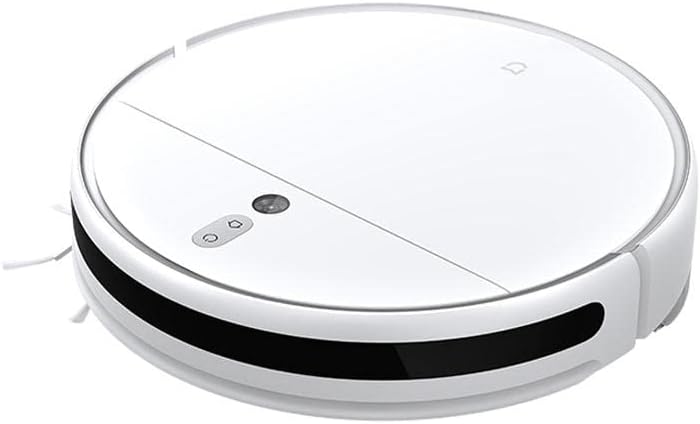
Beeld: Bo view of the Xiaomi Robot Vacuum 2C. This image displays the clean, minimalist design of the robot vacuum, highlighting its main power and home buttons on the top surface.
Produkkomponente
Familiarize yourself with the main components of your robot vacuum:
- Hoof Eenheid: The robot vacuum itself, housing the motor, dustbin, and water tank.
- Laaidok: Used for recharging the robot's battery.
- Syborsels: Three-pronged brushes designed to sweep debris into the main brush path.
- Hoofborsel: Located underneath the robot, responsible for agitating and lifting dirt.
- Asblik: Versamel opgesuigde puin.
- Watertenk en mopblokkie: For wet mopping functionality.
- Kragadapter: Connects the charging dock to a power outlet.
Opstelgids
- Uitboks en plasing:
Carefully remove all components from the packaging. Choose a suitable location for the charging dock. Ensure there is at least 0.5 meters of clear space on both sides and 1.5 meters in front of the dock for optimal navigation.
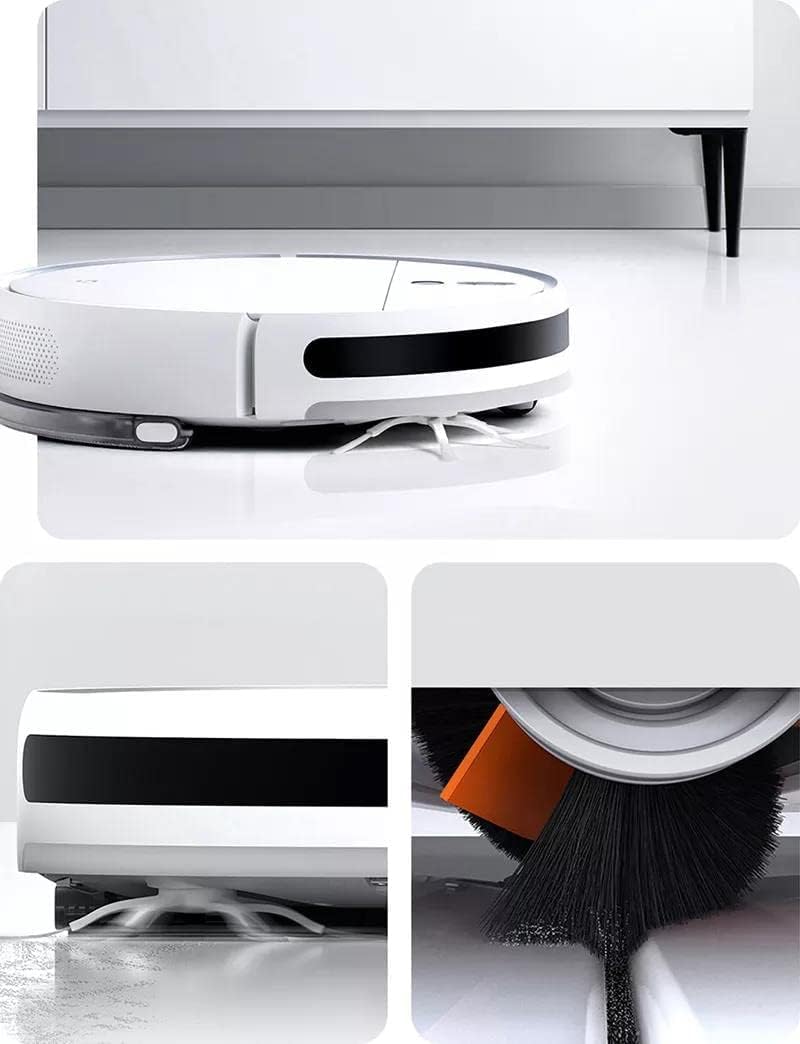
Image: The robot vacuum docked for charging. This illustrates the recommended setup for the charging station, showing the robot connected and ready for use.
- Aanvanklike laai:
Connect the power adapter to the charging dock and plug it into a wall outlet. Place the robot vacuum onto the charging dock. The indicator light will show charging status. Fully charge the robot before its first use, which may take several hours.
- App Installation and Connection:
Download the Xiaomi Home app from your device's app store. Open the app, create an account (if you don't have one), and follow the on-screen instructions to add your Xiaomi Robot Vacuum 2C. Ensure your Wi-Fi network is 2.4GHz for successful connection.
- Water Tank and Mop Pad Installation (for mopping function):
Fill the water tank with clean water. Attach the mop pad securely to the water tank module. Slide the assembled water tank module into the designated slot at the rear of the robot until it clicks into place.
Beeld: Sykant view of the robot vacuum, illustrating the location for water tank insertion. This angle helps users identify where to attach the mopping module.
Bedryfsinstruksies
Your Xiaomi Robot Vacuum 2C offers various cleaning modes and smart features for efficient home cleaning.
- Begin van 'n Skoonmaak:
Press the power button on the robot or use the Xiaomi Home app to start a cleaning cycle. The robot will automatically map your home and plan an efficient cleaning path.
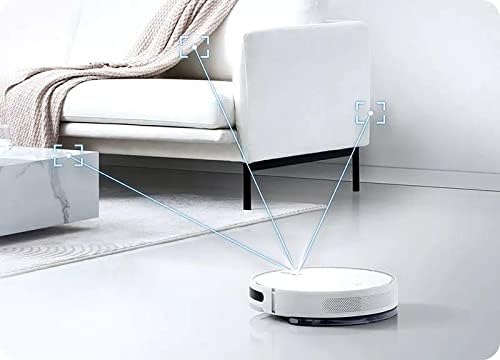
Image: The robot vacuum actively mapping its environment. This visual demonstrates the robot's intelligent navigation and mapping capabilities during a cleaning cycle.
- Skoonmaakmodusse:
Select different cleaning modes via the app, such as Vacuum Only, Mop Only, or Vacuum & Mop. You can also adjust suction power and water flow levels.
- Geskeduleerde skoonmaak:
Set up daily or weekly cleaning schedules through the app to automate your cleaning routine.
- Zone Cleaning & Virtual Walls:
Use the app to define specific areas for cleaning or to set up virtual walls/no-go zones to restrict the robot from certain areas.
- Returning to Charging Dock:
The robot will automatically return to its charging dock when cleaning is complete or when its battery is low. You can also manually send it back via the app or by pressing the home button on the robot.
Onderhoud
Gereelde onderhoud verseker optimale werkverrigting en verleng die lewensduur van jou robotstofsuier.
- Maak die asblik leeg:
Open the top cover of the robot and remove the dustbin. Open the dustbin lid and empty its contents into a trash bin. It is recommended to empty the dustbin after each cleaning cycle.
- Maak die filter skoon:
Remove the filter from the dustbin. Tap the filter gently to remove dust. For thorough cleaning, rinse the filter under running water. Ensure the filter is completely dry before reinserting it into the dustbin and back into the robot.
- Cleaning the Main Brush:
Flip the robot over. Remove the main brush cover and then the main brush. Use the cleaning tool (if provided) to remove hair and debris tangled around the brush. Reinstall the brush and cover securely.

Beeld: Voorkant view of the robot vacuum, highlighting the main brush and side brushes. This view is useful for understanding how to access and clean the brushes.
- Skoonmaak van syborsels:
Regularly check the side brushes for tangled hair or debris. Gently pull them off to clean and reattach them firmly.
- Skoonmaak van die watertenk en mopblokkie:
After mopping, remove the water tank and empty any remaining water. Rinse the tank thoroughly. Detach the mop pad and wash it by hand or machine. Allow both to air dry completely before reassembly.
- Skoonmaaksensors:
Wipe the cliff sensors (located on the bottom of the robot) and wall sensors (on the side) with a soft, dry cloth to ensure proper navigation.
Probleemoplossing
As jy probleme met jou robotstofsuier ondervind, raadpleeg die volgende algemene probleme en oplossings:
| Probleem | Moontlike oorsaak | Oplossing |
|---|---|---|
| Robot skakel nie aan of laai nie. | Low battery; charging dock not connected; poor contact with charging pins. | Ensure the robot is properly seated on the charging dock. Check power connection to the dock. Clean charging pins on both robot and dock. |
| Die robot sit gereeld vas. | Obstacles (cables, rugs, small objects); dirty sensors. | Clear the cleaning area of obstacles. Clean all sensors with a dry cloth. |
| Swak suigprestasie. | Full dustbin; clogged filter; tangled main brush. | Empty the dustbin. Clean or replace the filter. Clean the main brush and side brushes. |
| No water dispensing during mopping. | Empty water tank; clogged water outlet; improperly installed water tank. | Fill the water tank. Check for blockages in the water outlet. Reinstall the water tank correctly. |
| Probleme met programverbinding. | Verkeerde Wi-Fi-wagwoord; 5GHz Wi-Fi-netwerk; robot te ver van router. | Ensure correct Wi-Fi password. Connect to a 2.4GHz Wi-Fi network. Move robot closer to the router or use a Wi-Fi extender. Reset Wi-Fi on the robot if necessary. |
Spesifikasies
| Kenmerk | Detail |
|---|---|
| Modelnommer | 2C |
| Handelsmerk | XIAOMI |
| Kleur | Wit |
| Vormfaktor | Robotagtig |
| Krag (Watt) | 40 watt |
| Voltage | 14.4 Volt |
| Watertenk kapasiteit | 250ml (derived from product title) |
| Suigkrag | 2700Pa (derived from product title) |
| Spesiale kenmerke | Pressurized and Antibacterial Mop |
| Aanbevole oppervlak | Tile, Wood |
| Ingesluit komponente | 3-pronged side brushes |
| Pakket afmetings | 11.93 x 4.4 x 4.4 cm; 1.6 kilogram |
Waarborg en Ondersteuning
Your Xiaomi Robot Vacuum 2C comes with a standard manufacturer's warranty. For specific warranty terms and conditions, please refer to the warranty card included in your product packaging or visit the official Xiaomi support webwebwerf.
For technical support, troubleshooting assistance beyond this manual, or to inquire about replacement parts, please contact Xiaomi customer service or visit their official support channels.
- Amptelike Xiaomi-ondersteuning: www.mi.com/global/support
- Product Page (for reference): Amazon-produkbladsy
Ask a question about this manual
Ask about setup, troubleshooting, compatibility, parts, safety, or missing instructions. Manuals+ will review the question and use this page’s manual context to help answer it.