1. Inleiding
This manual provides essential information for the safe and efficient operation of your Reloop RP-7000 MK2 Direct Drive High Torque Turntable. Please read these instructions thoroughly before using the product to ensure proper setup, optimal performance, and longevity of your equipment. Keep this manual for future reference.
2. Veiligheidsinstruksies
- Kragtoevoer: Koppel die eenheid slegs aan 'n WS-aansluiting van die gespesifiseerde volumetage. Maak seker dat die kragkabel nie beskadig of geknyp is nie.
- Vog: Do not expose the unit to rain, moisture, or excessive humidity. Avoid placing liquid-filled objects on the turntable.
- Ventilasie: Verseker voldoende ventilasie rondom die eenheid. Moenie ventilasie-openinge blokkeer nie.
- Plasing: Place the turntable on a stable, level surface away from direct sunlight, heat sources, and strong magnetic fields.
- Skoonmaak: Disconnect the power before cleaning. Use a soft, dry cloth. Avoid liquid cleaners or solvents.
- Diens: Moenie probeer om die eenheid self te diens nie. Verwys alle diens na gekwalifiseerde personeel.
3. Pakketinhoud
Verifieer dat al die items wat hieronder gelys word, in u pakket ingesluit is. Indien enige items ontbreek of beskadig is, kontak u handelaar onmiddellik.
- Reloop RP-7000 MK2 Direct Drive High Torque Turntable (x2)
- Stofkap (x2)
- Digital Turntable Stylus Scale
- Record Care Solution
- Kragkabel
- RCA-kabel
- Gronddraad
- Slipmat
- Teengewig
- Headshell with Cartridge (pre-mounted or separate, depending on region/bundle)

Figuur 1: verbyview of the Reloop RP-7000 MK2 turntable bundle components.
4. Opstelling
4.1 Uitpak en plasing
- Verwyder alle komponente versigtig uit die verpakking. Bewaar die verpakking vir toekomstige vervoer.
- Place the turntable on a flat, stable, and vibration-free surface. Ensure there is enough space for the dust cover to open fully.
- Attach the dust cover by aligning its hinges with the slots on the turntable's rear.

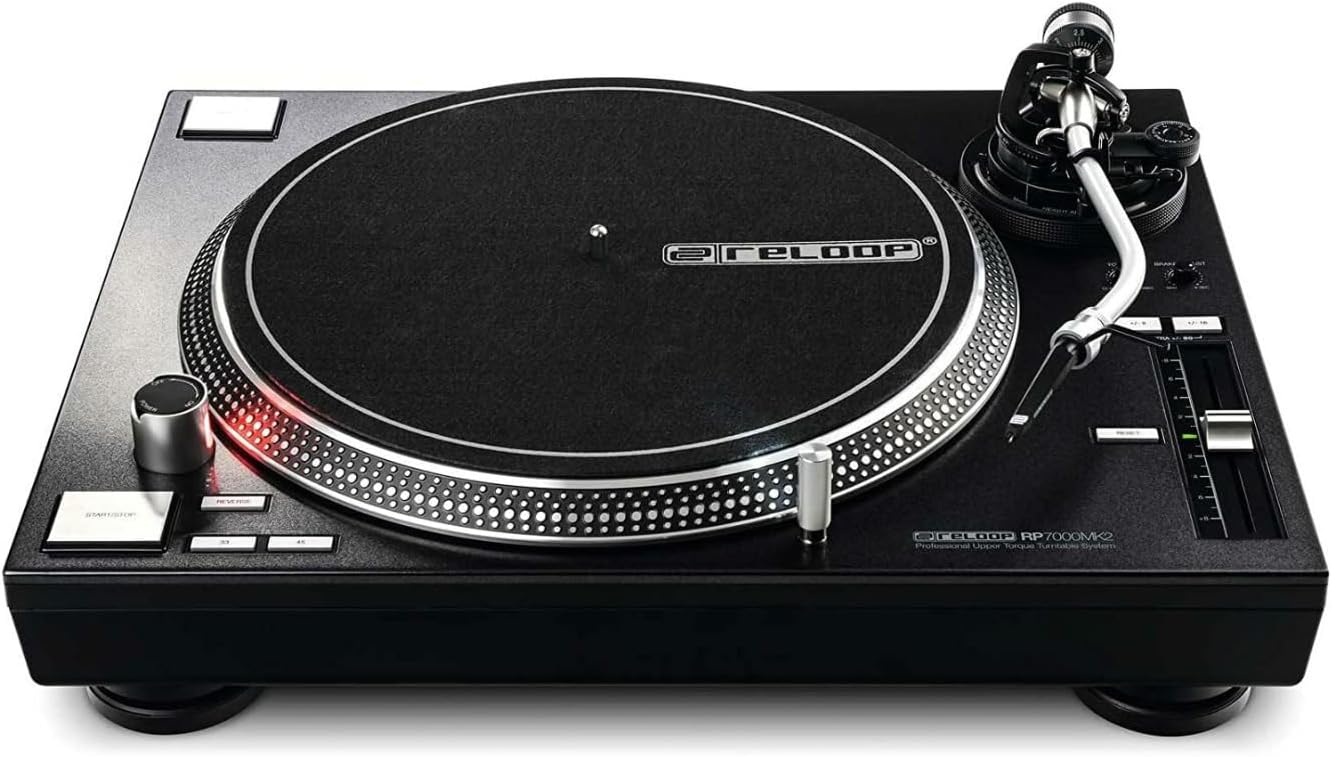
Figuur 2: Turntable with the dust cover in place.
4.2 Platter and Slipmat Installation
- Carefully place the platter onto the center spindle. Ensure it sits flush.
- Place the slipmat on top of the platter.
4.3 Toonarm- en patroonopstelling
- If not pre-mounted, attach the headshell with the cartridge to the tonearm. Secure it by turning the locking ring.
- Screw the counterweight onto the rear of the tonearm.
- Balanseer die toonarm: Laat die toonarm clamp. Adjust the counterweight until the tonearm is perfectly balanced and floats horizontally.
- Stel dopkrag in: Return the tonearm to its rest and clamp it. Rotate the numbered ring on the counterweight to '0' without moving the counterweight itself. Then, rotate the entire counterweight to the recommended tracking force for your cartridge (typically 2-4 grams for DJ cartridges).
- Stel Anti-Skate: Verstel die anti-skaatsskakelaar om by die dopkraginstelling te pas.
4.4 Using the Digital Stylus Scale
The included digital stylus scale allows for precise measurement of your cartridge's tracking force, ensuring optimal sound quality and minimizing record wear.
- Place the stylus scale on the platter.
- Skakel die skaal aan met die kragknoppie.
- Carefully lower the stylus onto the designated measuring point on the scale.
- Read the tracking force displayed. Adjust the tonearm's counterweight as needed until the desired force is achieved.

Figuur 3: Digital Stylus Scale for precise tracking force measurement.
4.5 Verbindings
- Oudio-uitvoer: Connect the RCA cables from the turntable's audio output to the PHONO input of your mixer or amplifier. If your mixer/amplifier does not have a PHONO input, you will need an external phono preamplewendiger.
- Gronddraad: Connect the ground wire from the turntable to the ground terminal on your mixer or ampverligter om hum te verminder.
- Krag: Connect the power cable to the turntable and then to a suitable AC power outlet.
5. Bedryfsinstruksies
5.1 Basiese Terugspeel
- Place a record on the slipmat.
- Select the appropriate speed (33, 45, or 78 RPM) using the speed selector buttons.
- Druk die BEGIN/STOP button to begin platter rotation.
- Carefully lift the tonearm using the cueing lever and position the stylus over the desired groove on the record.
- Laat sak die leidraadhefboom om die stylus versigtig op die plaat te plaas.
- To stop playback, lift the tonearm using the cueing lever, return it to the tonearm rest, and press the BEGIN/STOP knoppie.
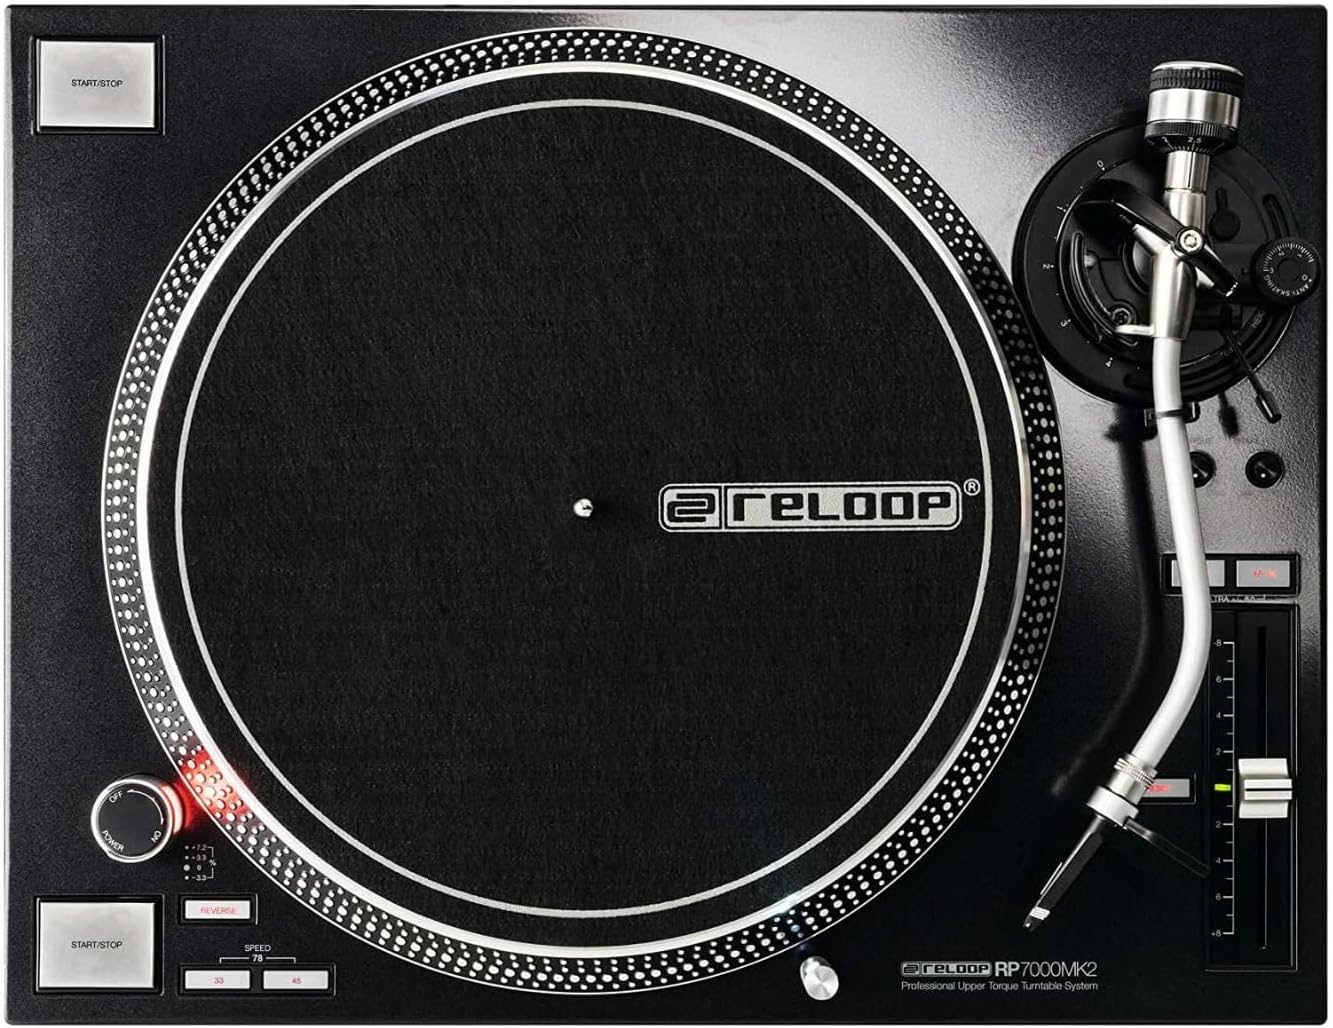
Figuur 4: Turntable platter and control layout.
5.2 Toonhoogtebeheer
The pitch fader allows you to adjust the playback speed (BPM) of the record. Move the fader up or down to increase or decrease the pitch. The pitch range can be selected using the range buttons (e.g., +/- 8%, 16%, 50%).
5.3 Omgekeerde Funksie
The RP-7000 MK2 features a reverse playback function. Press the OMKEER button to change the direction of platter rotation. Press it again to return to normal playback.
6. Onderhoud
6.1 Skoonmaak van die draaitafel
- Ontkoppel altyd die krag voor skoonmaak.
- Use a soft, dry, lint-free cloth to wipe the surface of the turntable and dust cover.
- Vermy die gebruik van skuurmiddels, oplosmiddels of chemiese spuitmiddels, aangesien dit die afwerking kan beskadig.
6.2 Stylusversorging
- Gently brush the stylus from back to front using a soft stylus brush to remove dust and debris.
- Vermy om die stylus met jou vingers aan te raak.
6.3 Rekordversorging
The included record care solution helps maintain the quality of your vinyl records and prolong their lifespan.
- Apply a small amount of record care solution to a clean, soft, lint-free cloth or a dedicated record cleaning brush.
- Gently wipe the record surface in a circular motion, following the grooves.
- Allow the record to dry completely before playing.
Figuur 5: Record Care Solution for maintaining vinyl quality.
7. Probleemoplossing
| Probleem | Moontlike oorsaak | Oplossing |
|---|---|---|
| Geen krag nie | Kragkabel nie gekoppel nie; aansluiting nie aktief nie | Check power cable connection; test outlet with another device |
| Geen klank of lae volume nie | RCA cables incorrect; no PHONO input; ampverligter/menger instellings | Ensure RCA cables are connected to PHONO input; check amplifier/mixer input selection and volume |
| Brummende geraas | Aarddraad nie gekoppel nie; interferensie | Connect ground wire; move turntable away from other electronic devices |
| Springende of verwronge klank | Incorrect tracking force; dirty stylus/record; damaged stylus | Adjust tracking force using stylus scale; clean stylus and record; replace stylus if damaged |
| Skottel draai nie | START/STOP button not pressed; motor issue | Press START/STOP; if problem persists, contact support |
8. Spesifikasies
| Kenmerk | Detail |
|---|---|
| Model Naam | RP-7000 MK2 |
| Handelsmerk | Reloop |
| Motor tipe | Direct Drive DC Motor |
| Spesiale kenmerk | Hoë wringkrag |
| Produk afmetings | 27.9 x 20 x 18.6 duim |
| Materiaal | Metaal |
| Kleur | Swart |
| Versoenbare toestelle | Speaker, Headphone, Personal Computer, MP3 Player, Laptop |
| Seinformaat | Digitaal |
9. Waarborg en Ondersteuning
Reloop products are designed for reliability and performance. For warranty information, please refer to the warranty card included with your product or visit the official Reloop website. For technical support or service inquiries, please contact your authorized Reloop dealer or distributor.
Vervaardiger: Reloop
Eerste datum beskikbaar: 8 Julie 2022