BOMAKER Mini WiFi Projector 10''
BOMAKER Mini WiFi Projector 10'' User Manual
Model: Mini WiFi Projector 10''
1. Inleiding
This manual provides comprehensive instructions for the setup, operation, maintenance, and troubleshooting of your BOMAKER Mini WiFi Projector 10''. Please read this manual thoroughly before using the projector to ensure proper operation and to maximize its lifespan. Keep this manual for future reference.
The BOMAKER Mini WiFi Projector 10'' is a portable 720P HD LCD projector designed for home cinema, gaming, and various multimedia applications. It features WiFi connectivity for smartphone mirroring, multiple input options including HDMI, USB, and AV, and supports projection sizes up to 300 inches.
2. Belangrike veiligheidsinligting
Om brand, elektriese skok of beserings te voorkom, neem altyd die volgende veiligheidsmaatreëls in ag:
- Do not block the ventilation openings. Ensure adequate airflow around the projector.
- Moenie direk in die projektorlens kyk wanneer die lamp is aan. Die helder lig kan oogskade veroorsaak.
- Do not expose the projector to rain or moisture to avoid electric shock.
- Gebruik slegs die kragadapter wat saam met die projektor voorsien word.
- Plaas die projektor op 'n stabiele, gelyk oppervlak.
- Ontkoppel die projektor van die kragtoevoer tydens weerligstorms of wanneer dit vir lang tye nie gebruik word nie.
- Moenie probeer om hierdie produk self te herstel nie. Verwys alle diens na gekwalifiseerde dienspersoneel.
3. Pakketinhoud
Verifieer dat al die items wat hieronder gelys word, in jou pakket ingesluit is:
- 1 x BOMAKER Mini WiFi Projector
- 1 x afstandbeheer
- 1 x kragadapter
- 1 x HDMI-kabel
- 1 x AV-kabel
- 1 x Gebruikershandleiding
4. Produk verbyview
Familiarize yourself with the various parts and connections of your projector.

Figuur 4.1: Voorkant view of the BOMAKER Mini WiFi Projector. This image shows the projector's lens, focus ring, and keystone correction dial, with a smartphone wirelessly connected and displaying content on its screen, illustrating the WiFi mirroring capability.
4.1. Invoer-/Uitvoerpoorte
The projector features a variety of ports for connecting different devices.

Figuur 4.2: Agter view of the projector displaying its connectivity options. From left to right, the ports include AV, USB, Audio Out, VGA, HDMI, and Micro SD card slot, allowing for versatile device connections.
- AV-poort: Koppel aan ouer toestelle met die ingeslote AV-kabel.
- USB-poort: Vir die koppeling van USB-skywe om media te speel files.
- Klankuitgang: Koppel eksterne luidsprekers of oorfone.
- VGA-poort: Connect to computers or laptops with a VGA output.
- HDMI-poort: Connect to devices like laptops, gaming consoles (PS4), TV sticks, etc.
- Micro SD -kaartgleuf: Insert a Micro SD card to play media files.
5. Opstelling
5.1. plasing
Choose a suitable location for your projector. For optimal viewing, place the projector on a flat, stable surface or mount it. The optimal projection distance is between 8.2 and 11.2 feet (2.5 to 3.4 meters) for a screen size of 30 to 300 inches.
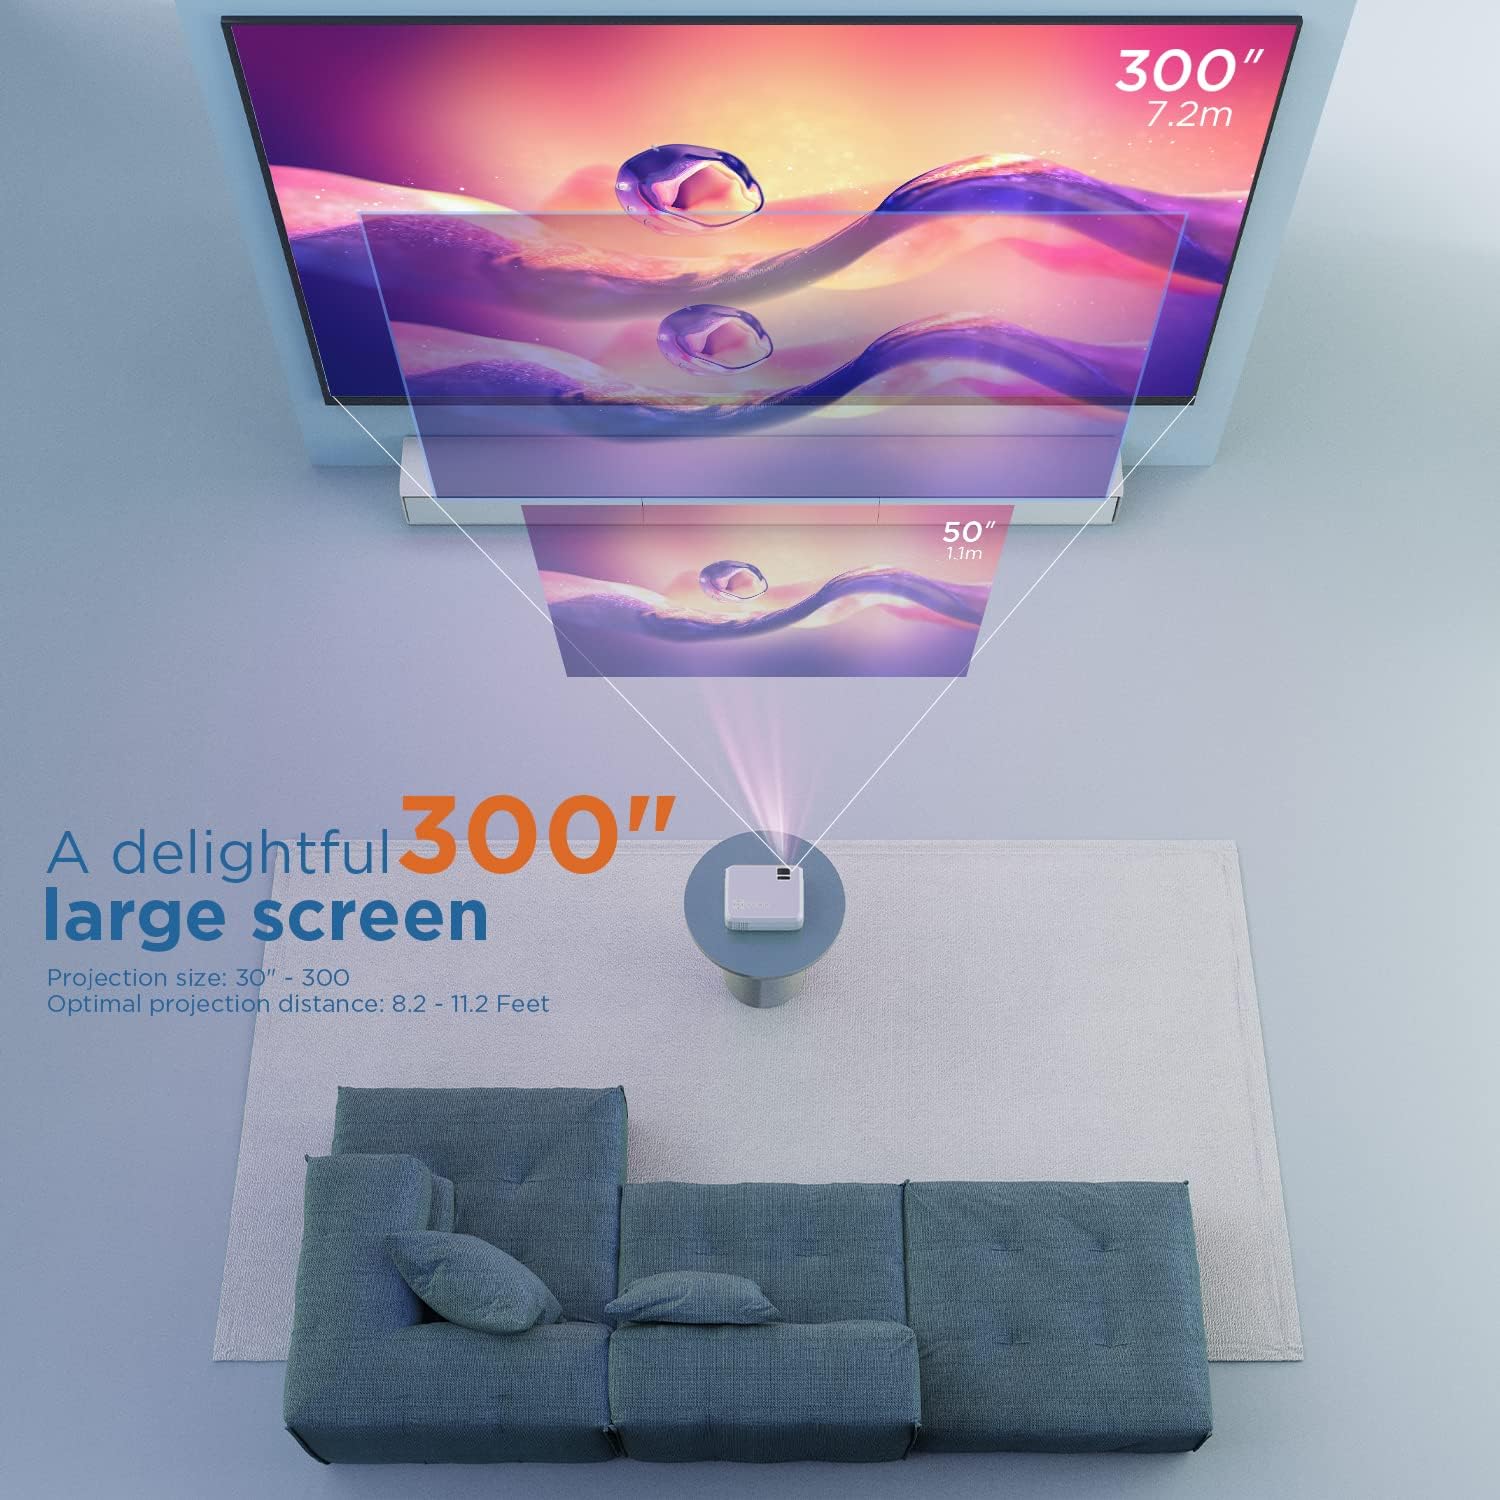
Figuur 5.1: Illustration of projection distances and corresponding screen sizes. The image demonstrates how varying the distance between the projector and the screen affects the projected image size, from 50 inches (1.1m) to 300 inches (7.2m).
5.2. Kragverbinding
- Koppel die kragadapter aan die projektor se kragtoevoerpoort.
- Steek die kragadapter in 'n muuraansluiting.
- Druk die aan/af-knoppie op die projektor of afstandbeheerder om dit aan te skakel.
5.3. Fokus en Keystone Correction
- Fokus: Rotate the focus ring on the projector lens until the image is clear and sharp.
- Sleutelsteen: If the projected image appears trapezoidal, adjust the keystone correction dial (usually located near the lens) until the image is rectangular.
6. Bedryfsinstruksies
6.1. Basiese werking
- Krag aan/af: Druk die aan / uit -knoppie op die projektor of afstandbeheer.
- Invoerbronkeuse: Use the "Source" button on the remote or projector to select the desired input (HDMI, AV, USB, Micro SD, WiFi).
- Volume aanpassing: Gebruik die volumeknoppies op die afstandbeheerder.
6.2. Verbind toestelle
Die projektor ondersteun verskeie verbindingsmetodes:
6.2.1. HDMI-verbinding
Connect your laptop, gaming console (PS4), TV stick (e.g., Roku, Fire TV), or other HDMI-enabled devices using an HDMI cable. Select "HDMI" as the input source.
6.2.2. USB/Micro SD Connection
Insert a USB drive or Micro SD card into the respective port. Select "USB" or "Micro SD" as the input source. The projector will display a menu to browse and play media files (photos, videos, music, text).
6.2.3. AV Connection
Use the included AV cable to connect to devices with AV output. Select "AV" as the input source.
6.2.4. WiFi Mirroring (Smartphone Connection)
The projector supports wireless screen mirroring from smartphones (iOS and Android).
- Select "WiFi" as the input source on the projector.
- Follow the on-screen instructions to connect your smartphone to the projector's WiFi network.
- Once connected, enable screen mirroring/casting feature on your smartphone (e.g., "Screen Mirroring" for iOS, "Smart View" or "Cast" for Android).
- Kies die projektor uit die lys van beskikbare toestelle.
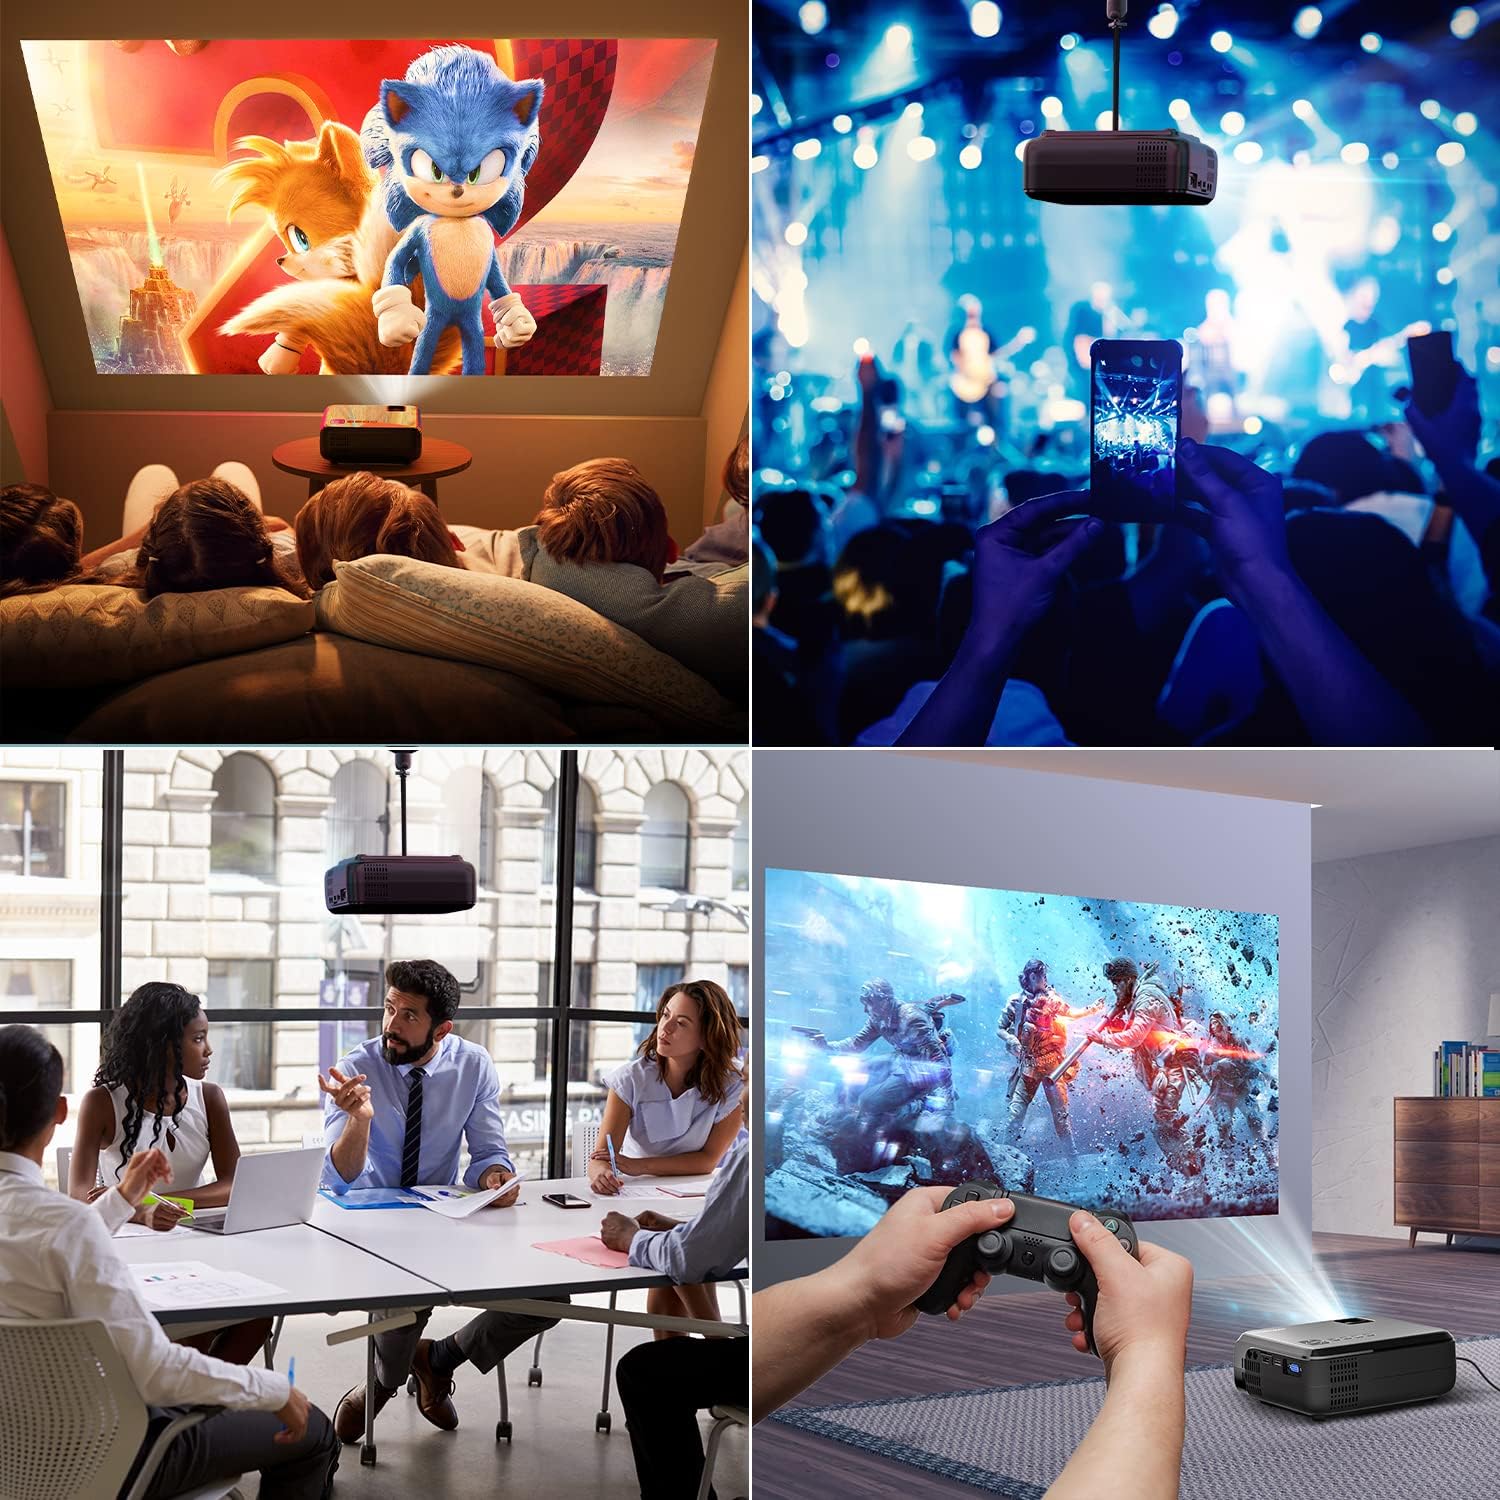
Figuur 6.1: This image displays a collage of the projector in different environments: a family watching a movie, a person using a smartphone to control the projector at a concert, a business meeting with a presentation, and a person playing video games. It highlights the versatility of the BOMAKER Mini WiFi Projector for entertainment and professional use.
6.3. Visual Experience
The projector delivers a native 720P HD resolution, ensuring clear and detailed images. It supports 1080P decoding and features a high brightness output for vibrant visuals.
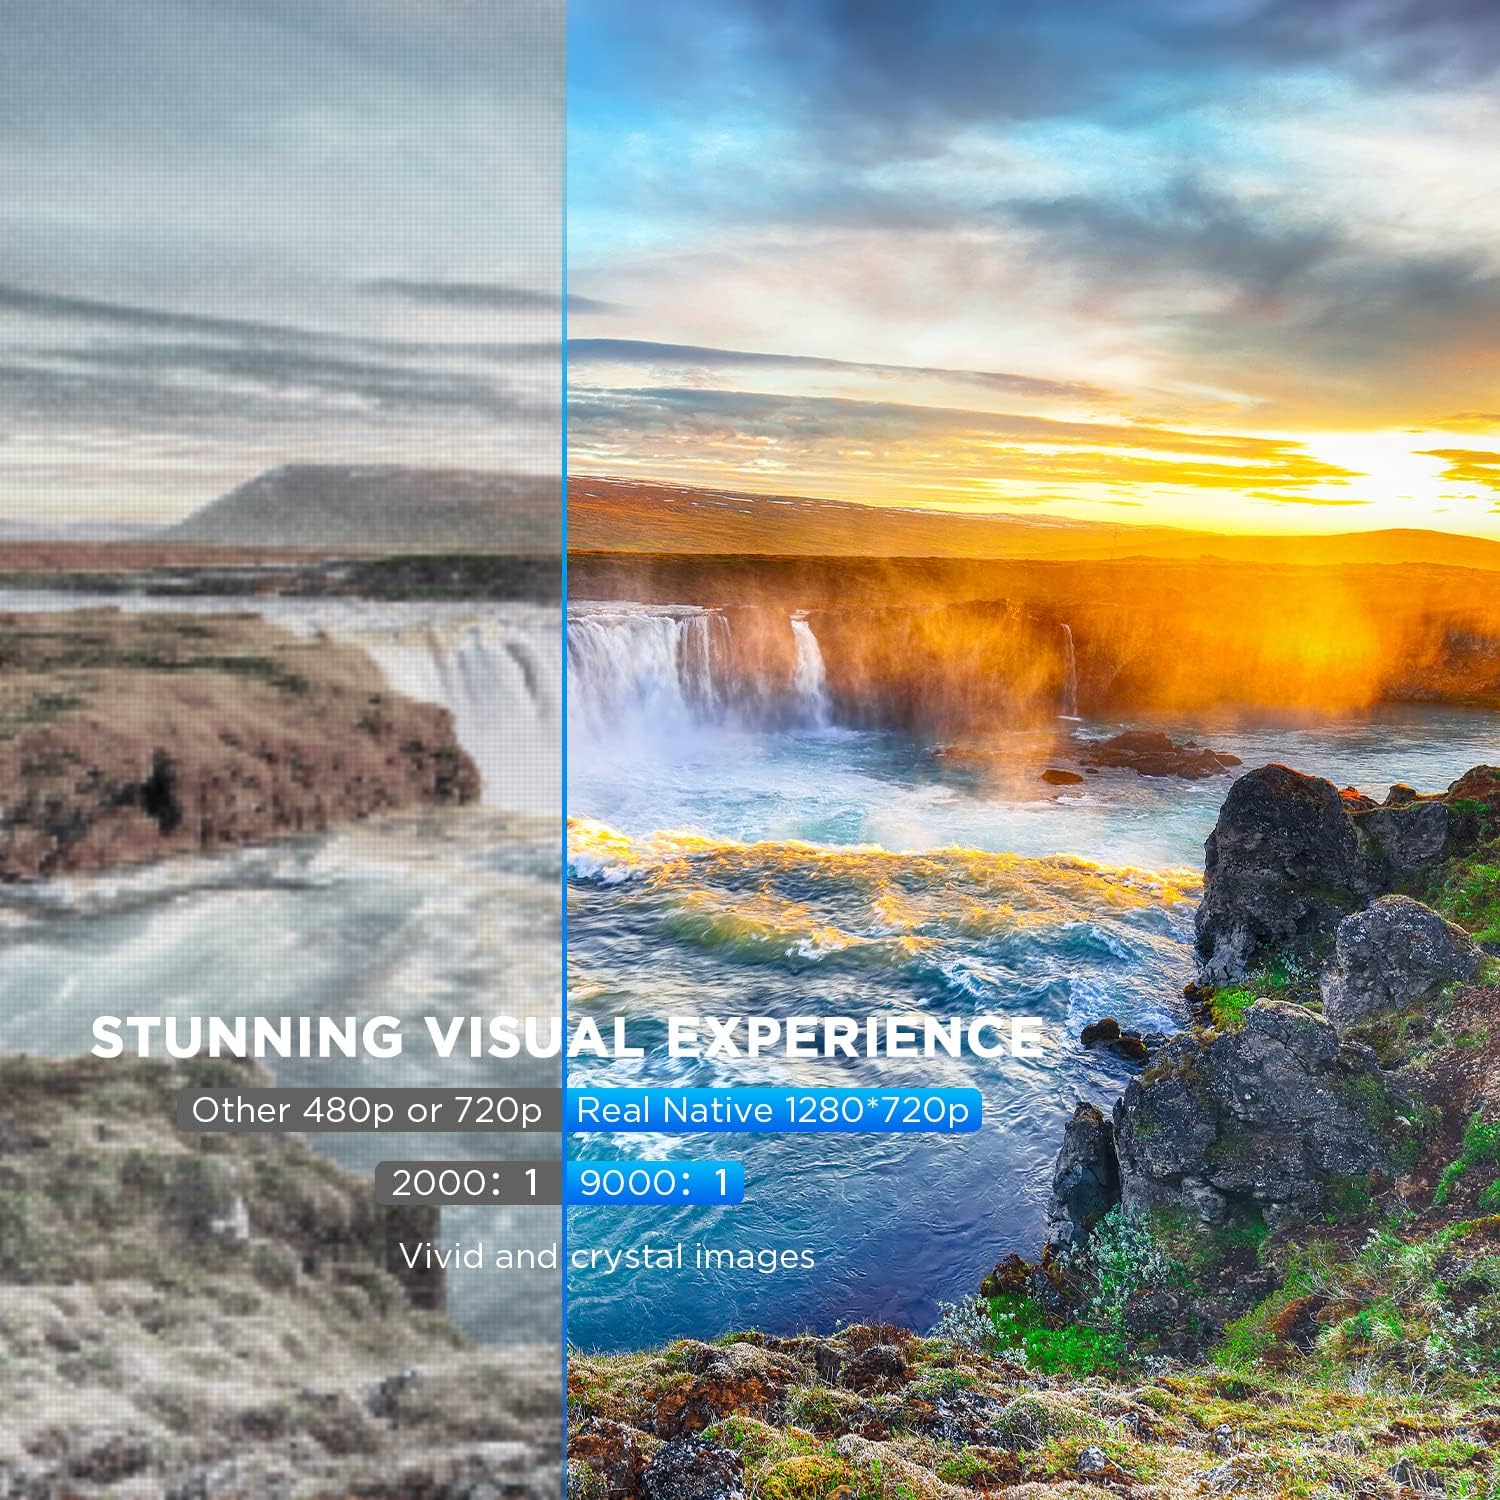
Figuur 6.2: A side-by-side comparison demonstrating the difference between standard 480p/720p projection and the projector's real native 1280x720p resolution. The native resolution side shows significantly sharper details and richer colors in a landscape image, emphasizing the "Stunning Visual Experience" and "Vivid and crystal images".

Figuur 6.3: This image illustrates the projector's "Crystal Clear Picture with Ultra-low Latency" feature, showing a vibrant, high-definition projection of a car racing scene on a large screen in a living room setting. The text highlights upgraded lens settings for a new visual experience with latency less than 30ms.
7. Onderhoud
7.1. Skoonmaak van die lens
Use a soft, lint-free cloth specifically designed for cleaning optical lenses. Do not use abrasive cleaners or solvents. Gently wipe the lens to remove dust or smudges.
7.2. Skoonmaak van die projektorbehuising
Wipe the projector's exterior with a soft, dry cloth. For stubborn dirt, a slightly damp 'n Lap kan gebruik word, gevolg deur 'n droë lap. Maak seker dat geen vloeistof in die ventilasie-openinge binnedring nie.
7.3. Berging
When not in use, store the projector in a cool, dry place, away from direct sunlight and extreme temperatures. Cover the lens with its cap to protect it from dust.
8. Probleemoplossing
Indien u probleme met u projektor ondervind, raadpleeg die volgende algemene probleme en oplossings:
| Probleem | Moontlike oorsaak | Oplossing |
|---|---|---|
| Geen beeld op die skerm nie | Power cable not connected; incorrect input source; device not powered on. | Check power connection; select correct input source; ensure connected device is on. |
| Beeld is vaag | Fokus nie aangepas nie; projektor te naby/ver van die skerm af. | Verstel die fokusring; herposisioneer die projektor. |
| Beeld is trapesiumvormig | Keystone correction not adjusted. | Verstel die sleutelsteen-korreksieskakelaar. |
| Geen klank nie | Volume too low; external speakers not connected; audio settings on source device. | Increase volume; connect external speakers if needed; check audio output settings on source device. |
| WiFi mirroring issues | Incorrect WiFi connection; smartphone mirroring feature not activated. | Ensure correct WiFi network is selected; activate screen mirroring on your smartphone. |
9. Spesifikasies
| Kenmerk | Detail |
|---|---|
| Handelsmerk | BOMAKER |
| Modelnommer | Mini WiFi Projector 10'' |
| Vertoon resolusie | Native 1280 x 720 (Supports 1080P decoding) |
| Tipe vertoon | LCD |
| Verbindingstegnologie | HDMI, Wi-Fi |
| Versoenbare toestelle | Smartphone, TV Stick, PS4, Laptop, USB Drive, Micro SD Card |
| Produk afmetings | 22L x 17l x 9H centimeters |
| Vormfaktor | Draagbaar |
| Aanbevole gebruike | Tuisbioskoop, speletjies |
| Kleur | Wit |
10. Waarborg en Ondersteuning
For warranty information or technical support, please refer to the documentation included with your purchase or contact BOMAKER customer service. Details regarding specific warranty periods and support channels are typically provided on the manufacturer's official webwebwerf of binne die produkverpakking.
Ask a question about this manual
Ask about setup, troubleshooting, compatibility, parts, safety, or missing instructions. Manuals+ will review the question and use this page’s manual context to help answer it.