1. Inleiding
This manual provides essential information for the safe and efficient operation, maintenance, and troubleshooting of your Profile GE Automatic Espresso Machine + Milk Frother. Please read these instructions thoroughly before first use and retain for future reference.

Image 1.1: The Profile GE Automatic Espresso Machine with a prepared espresso and a latte.
2. Veiligheidsinligting
Volg altyd basiese veiligheidsmaatreëls wanneer elektriese toestelle gebruik word om die risiko van brand, elektriese skok en beserings aan persone te verminder.
- Ensure the appliance is connected to a grounded outlet.
- Moenie die masjien, koord of prop in water of ander vloeistowwe dompel nie.
- Trek uit die uitlaat wanneer dit nie gebruik word nie en voor skoonmaak.
- Moenie enige toestel met 'n beskadigde koord of prop gebruik nie.
- Keep hands and cords away from hot surfaces.
- Gebruik slegs die vervaardiger se aanbevole aanhegsels.
3. Produk verbyview
Die Profile GE Automatic Espresso Machine is designed for convenience and quality, featuring an integrated grinder, milk frother, and smart connectivity.
3.1 Komponente
- Beheerpaneel: Touch-sensitive buttons for various drink selections and functions.
- Bean Hopper: Stores whole coffee beans for grinding.
- Waterreservoir: Verwyderbare tenk vir watertoevoer.
- Koffie-tuit: Skei gebroude koffie uit.
- Stoomstaaf: Om melk te skuim.
- Lekbak: Versamel oortollige vloeistowwe.
- Grondhouer: Versamel gebruikte koffiemoer.

Image 3.1: The top control panel with buttons for Espresso, Americano, My Brew, Steam, and Hot Water.

Image 3.2: The integrated bean hopper with whole coffee beans and grind size adjustment knob.

Image 3.3: The removable water reservoir being lifted from the machine.
4. Opstelling
4.1 Uitpak en Aanvanklike Plasing
- Verwyder alle verpakkingsmateriaal versigtig.
- Place the machine on a stable, level surface away from heat sources and direct sunlight.
- Verseker voldoende ruimte rondom die masjien vir ventilasie en toegang tot komponente.
4.2 Aanvanklike skoonmaak
Before first use, clean all removable parts with warm water and mild detergent. Rinse thoroughly and dry. Wipe the exterior of the machine with a damp lap.
4.3 Vul die waterreservoir
- Remove the water reservoir from the machine (refer to Image 3.3).
- Fill with fresh, cold drinking water up to the MAX line.
- Replace the reservoir securely into the machine.
4.4 Koffiebone byvoeg
- Open the lid of the bean hopper (refer to Image 3.2).
- Pour whole coffee beans into the hopper. Do not overfill.
- Maak die deksel stewig toe.
4.5 Powering On and Initial Rinse
- Steek die kragkabel in 'n geaarde elektriese aansluiting.
- Press the power button on the control panel. The machine will perform an initial rinse cycle.
- Place a container under the coffee spout to collect the rinse water.
4.6 SmartHQ App Connection
For enhanced customization and software updates, connect your espresso machine to the SmartHQ app.
- Laai die SmartHQ-app af vanaf jou toestel se appwinkel.
- Follow the in-app instructions to pair your espresso machine.
- Customize drink preferences, volume, and strength through the app.

Image 4.1: Using the SmartHQ app to control and customize the espresso machine.
5. Bedryfsinstruksies
5.1 Koffie brou
The machine offers Espresso, Americano, Lungo, and Hot Water options. The 'My Cup' setting is pre-set to Ristretto and can be adjusted via the SmartHQ app.
- Ensure the water reservoir is filled and the bean hopper contains coffee beans.
- Plaas 'n koppie onder die koffietuit.
- Select your desired drink (Espresso, Americano, Lungo, My Cup) from the control panel.
- Die masjien sal outomaties die bone maal, brou en jou koffie uitdeel.

Image 5.1: The espresso machine dispensing a fresh shot of espresso.
5.2 Aanpassing van Maalgrootte
The integrated conical burr grinder allows for 5 levels of grind size adjustment, from coarsest to finest, to optimize flavor extraction.
- Locate the grind size adjustment knob inside the bean hopper (refer to Image 3.2).
- Turn the knob to select your desired grind setting. Finer grinds are suitable for espresso, while coarser grinds are better for longer coffee types.
5.3 Using the Steam Frother
The steam frother creates various milk textures for cappuccinos, lattes, and more.
- Fill the included stainless steel frothing pitcher with cold milk.
- Plaas die stoompyp in die melk.
- Druk die 'Stoom'-knoppie op die beheerpaneel.
- Move the pitcher to achieve desired foam texture.
- Once finished, press the 'Steam' button again to stop.
- Immediately clean the steam wand after each use to prevent milk residue buildup.
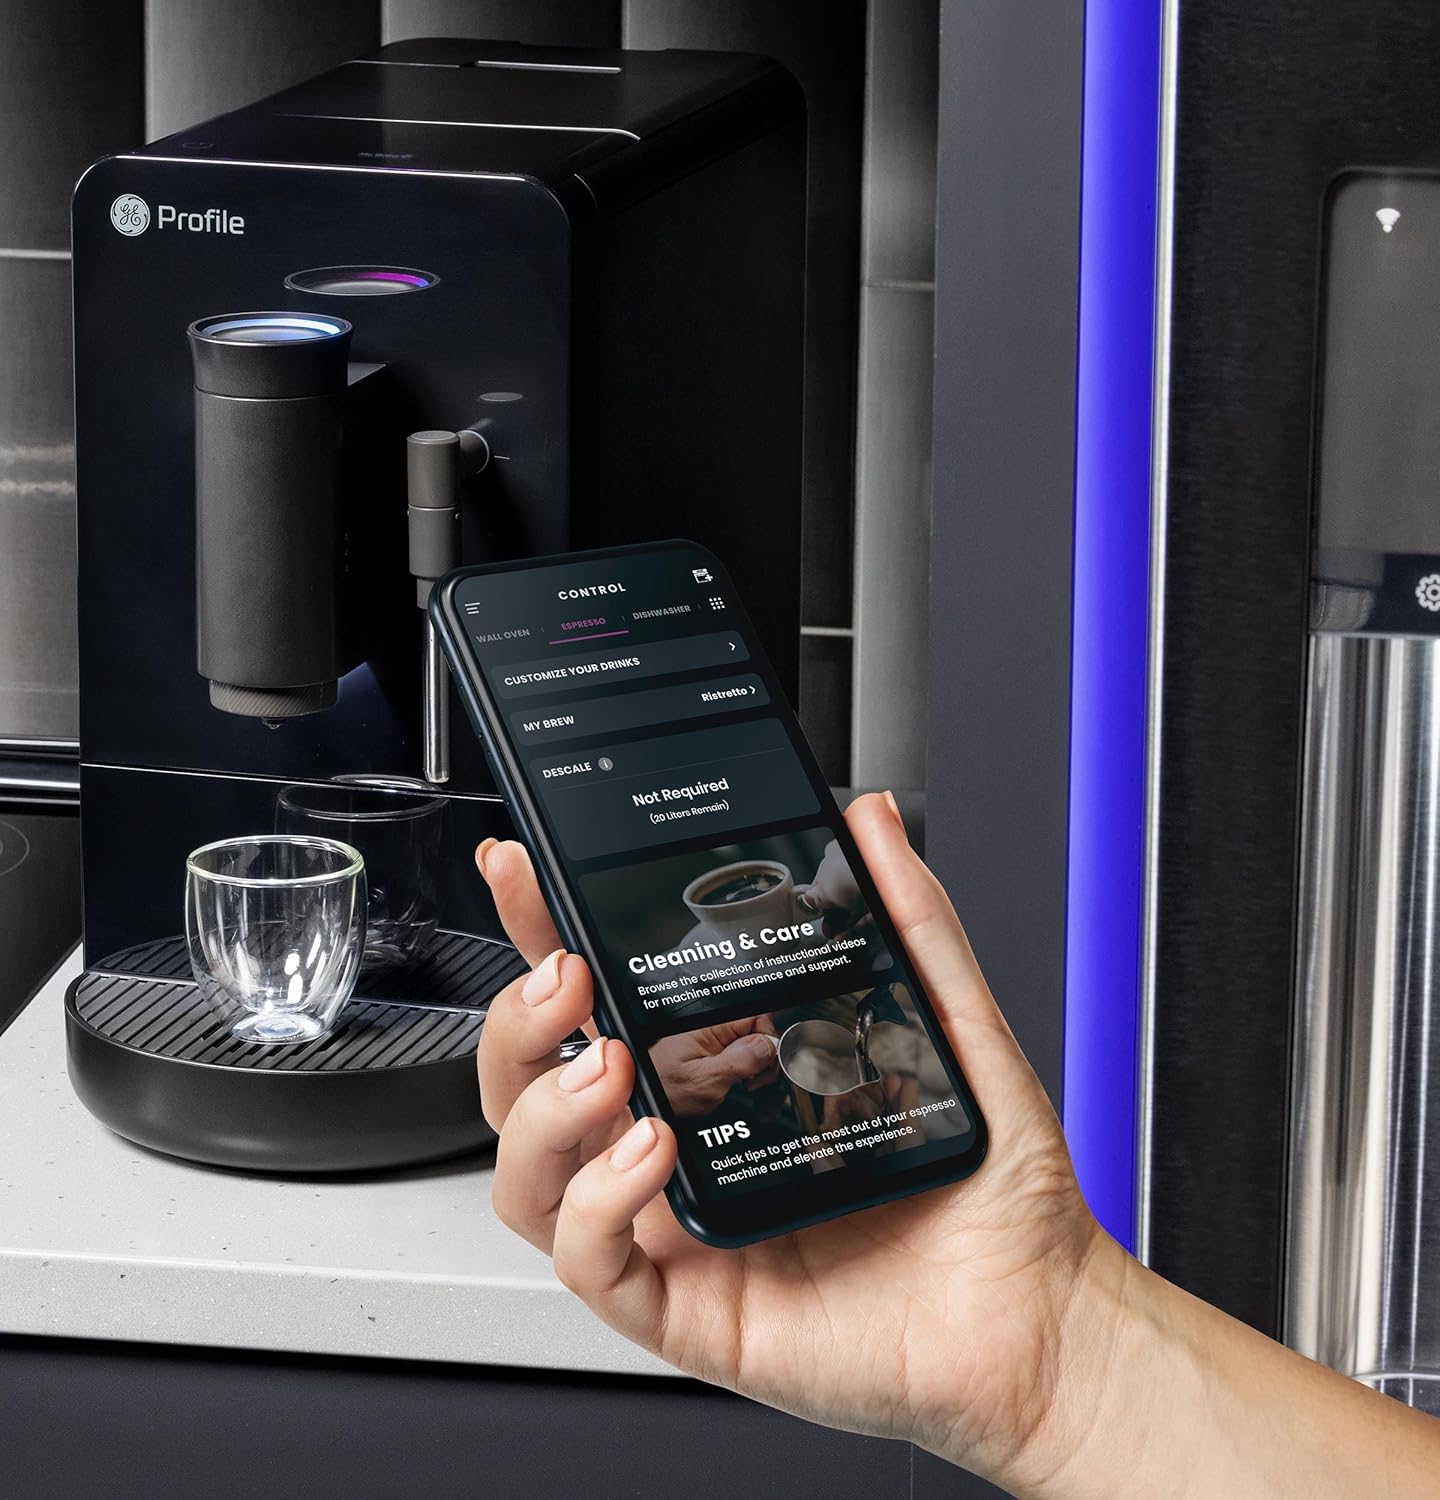
Image 5.2: A hand using the steam wand to froth milk in a stainless steel pitcher.
6. Onderhoud
Gereelde skoonmaak en onderhoud verseker optimale werkverrigting en lang lewensduur van jou espressomasjien.
6.1 Daaglikse skoonmaak
- Stoomstaaf: Vee die stoompyp na elke gebruik af met 'n advertensie.amp cloth. Purge steam briefly to clear any milk residue from the nozzle.
- Druipbak en Gemaalde Koolhidraathouer: Maak daagliks leeg en spoel af. Die masjien sal aandui wanneer die houer vir die koffiedik leeggemaak moet word.
- Waterreservoir: Spoel daagliks af en vul aan met vars water.
6.2 Weeklikse skoonmaak
- Brou-eenheid: The brew unit is typically removable for rinsing under running water. Refer to the included cleaning kit instructions for detailed steps.
- Bean Hopper: Periodically clean out any oil residue or old beans.
6.3 Ontkalking
The machine will prompt you when descaling is required. Use a descaling solution specifically designed for espresso machines and follow the instructions provided with the descaling agent or in the SmartHQ app.
7. Probleemoplossing
Hierdie afdeling bespreek algemene probleme wat jy met jou espressomasjien kan teëkom.
| Probleem | Moontlike oorsaak | Oplossing |
|---|---|---|
| No coffee dispensed / "Add Beans" message | Bean hopper empty or beans not feeding correctly. | Refill bean hopper. Gently stir beans to ensure they feed into the grinder. |
| Koffie is te swak of waterig | Grind size too coarse, insufficient coffee dose, or descaling needed. | Adjust grind size to a finer setting. Check SmartHQ app for strength settings. Perform descaling if prompted. |
| Melk skuim nie behoorlik nie | Steam wand clogged, milk type unsuitable, or insufficient steam pressure. | Clean steam wand thoroughly. Use fresh, cold milk. Ensure machine is heated to steam temperature. |
| Masjien skakel nie aan nie | Nie ingeprop nie, krag aftage, or circuit breaker tripped. | Check power connection. Verify power outlet functionality. Reset circuit breaker if necessary. |
| SmartHQ app connectivity issues | Incorrect Wi-Fi password, network interference, or app bug. | Verify Wi-Fi credentials. Ensure machine is within Wi-Fi range. Restart app and machine. Check for app updates. |
8. Spesifikasies
- Handelsmerk: Profile
- Model Naam: GE Profile Automatic Espresso Machine + Frother
- Item Modelnommer: P7CEBBS6RBB
- Kleur: Swart
- Produk afmetings: 7" D x 16" B x 12.5" H
- Item gewig: 16 pond
- Voltage: 120 V
- Bedryfsmodus: Volledig outomaties
- Spesiale kenmerke: Built-In Bean Hopper, Built-In Conical Burr Grinder & Adjustable Grind Size, Programmable My Brew Setting, Steam Frother & Frothing Pitcher, WiFi Connected
- Ingesluit komponente: Cleaning Kit, Coffee Bean Container, Espresso Machine, Steam Wand, Milk Pitcher, Water Tank
- Koffie-invoertipe: Hele Bone
- Menslike koppelvlak-invoer: Raakskerm

Image 8.1: Product dimensions of the espresso machine.
9. Waarborg en Ondersteuning
This product is covered by a manufacturer's warranty. For specific warranty details, registration, or technical support, please refer to the warranty card included with your product or visit the official GE Profile website. You may also contact customer service through the SmartHQ app for assistance.