1. Inleiding
This manual provides detailed instructions for the installation, operation, and maintenance of your Edge Audio Xtreme Series EDX5000.1FD-E0 Monoblock Amplifier. The EDX5000.1FD-E0 is a high-performance Class D full-bridge amplifier designed for powerful audio output. Please read this manual thoroughly before attempting installation or operation to ensure proper use and to prevent damage.
1.1 Veiligheidsmaatreëls
- Always disconnect the vehicle's battery negative terminal before making any electrical connections.
- Maak seker dat alle bedrading behoorlik gerig en vasgemaak is om skade of kortsluitings te voorkom.
- Gebruik gepaste bedrading vir krag- en aardverbindings soos in hierdie handleiding gespesifiseer.
- Vermy die montering van die amplifier in locations exposed to moisture or excessive heat.
- Raadpleeg 'n professionele installeerder as u onseker is oor enige deel van die installasieproses.
2. Pakketinhoud
Verifieer dat alle items in die pakket teenwoordig is voordat u met die installasie voortgaan.
- Edge Audio EDX5000.1FD-E0 Monoblock Amplewendiger
- Remote Bass Control Unit
- Wiring for Remote Bass Control
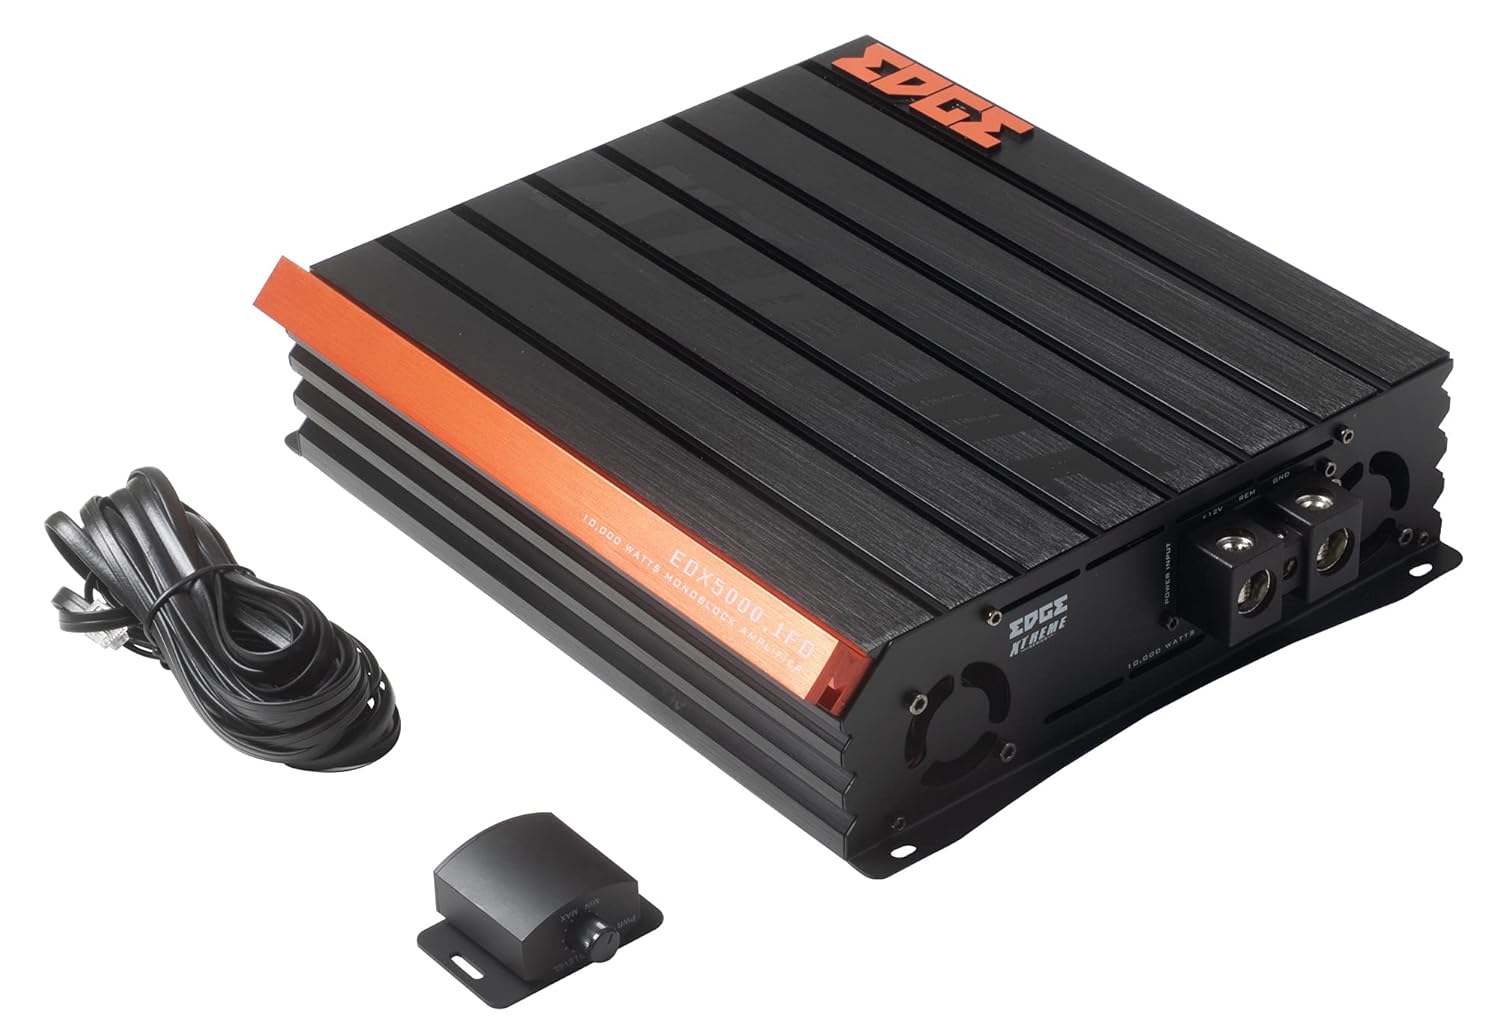
Image 2.1: Contents of the EDX5000.1FD-E0 package, including the amplifier, remote bass control, and connecting cable.

Image 2.2: The retail packaging for the Edge Audio EDX5000.1FD-E0 Monoblock Amplewendiger.
3. Kenmerke
The Edge Audio Xtreme Series EDX5000.1FD-E0 amplifier incorporates advanced features for optimal audio performance:
- Monoblock power amplifier design for dedicated subwoofer applications.
- Max Power: 10,000 watts.
- Built-in active crossovers (High-Pass Filter and Low-Pass Filter) for precise sound shaping.
- Adjustable Bass Boost circuit for enhanced low-frequency response.
- Ultra-efficient Class D topology for high power output with minimal heat generation.
- Wideband frequency response up to 20kHz.
- Full bridge technology for efficient power delivery.
- Compact footprint for versatile installation options.
- Dimensions (H x W x D): 2.5 x 10.4 x 9.1 inches (64 x 264 x 230mm).

Beeld 3.1: Bo view of the EDX5000.1FD-E0 ampverligter, wysasing its compact design and heatsink fins.
4. Opstelling en installering
Behoorlike installasie is noodsaaklik vir die prestasie en lang lewensduur van u amplifier. Follow these guidelines carefully.
4.1 Montageplek
Monteer die amplifier in a dry, well-ventilated area, away from direct sunlight or heat sources. Ensure sufficient airflow around the amplifier's heatsink. The amplifier is designed for surface mounting.
4.2 Bedradingsverbindings
All wiring should be securely connected and insulated to prevent short circuits. Use high-quality, appropriate gauge wiring.
4.2.1 Kragverbindings
Koppel die amplifier to the vehicle's electrical system as follows:
- +12V (Krag): Connect a heavy-gauge power cable (e.g., 4 AWG or larger for 10,000W max power) directly from the positive terminal of the vehicle's battery to the +12V terminal on the amplifier. Install an appropriate fuse (not supplied) within 18 inches of the battery.
- GND (Grond): Connect a heavy-gauge ground cable of the same size as the power cable from the GND terminal on the amplifier to a clean, unpainted metal surface of the vehicle chassis. Ensure a solid electrical connection.
- REM (Afstandbeheer-aanskakelaar): Connect a smaller gauge wire (e.g., 18 AWG) from the REM terminal on the amplifier to the remote turn-on output of your head unit. This wire turns the ampluidspreker aan en af met jou klankstelsel.

Image 4.1: Power input terminals (+12V, REM, GND) on the EDX5000.1FD-E0 amplewendiger.
4.2.2 Oudio-invoerverbindings
Connect your head unit's RCA outputs to the 'LOW INPUT' RCA jacks on the amplewendiger.
4.2.3 Luidspreker-uitvoerverbindings
Connect your subwoofer(s) to the speaker output terminals on the amplifier. Ensure correct polarity (+ to + and - to -) for optimal performance. Refer to your subwoofer's specifications for impedance matching.

Image 4.2: Rear panel of the EDX5000.1FD-E0 amplifier, showing low-level inputs, crossover controls, gain, bass boost, and speaker output terminals.
5. Bedryfsinstruksies
Sodra dit geïnstalleer is, pas die ampverligtingsinstellings vir optimale klankgehalte.
5.1 Beheerpaneel verbyview
Refer to Image 4.2 for the location of the following controls:
- HPF (Hoogdeurlaatfilter): Adjusts the high-pass crossover frequency. For subwoofer applications, this should typically be set to its minimum or off, as a low-pass filter is usually preferred.
- LPF (Laagdeurlaatfilter): Adjusts the low-pass crossover frequency (15Hz - 200Hz). This filters out frequencies above the set point, sending only low frequencies to the subwoofer. Set this according to your subwoofer and system requirements, typically between 60Hz and 100Hz.
- WINS: Pas by die amplifier's input sensitivity to the output level of your head unit. Start with the gain at minimum, then slowly increase it until you hear distortion, then back off slightly. Do not use the gain control as a volume knob.
- BAS HUPSTOOT: Adjusts the level of bass enhancement (0dB - 12dB). Use sparingly to avoid distortion.
- FREQ (Bass Boost Frequency): Selects the center frequency for the bass boost (35Hz - 70Hz).
- AFGELEË: Port for connecting the wired remote bass control unit.
5.2 Remote Bass Control
The included remote bass control allows for convenient adjustment of the subwoofer output level from the driver's seat. Connect it to the 'REMOTE' port on the amplewendiger.
6. Onderhoud
Gereelde onderhoud help om die lang lewensduur en prestasie van u amplewendiger.
- Skoonmaak: Maak die van tyd tot tyd skoon ampVee die buitekant van die ventilator af met 'n sagte, droë lap. Moenie harde chemikalieë of skuurmiddels gebruik nie. Maak seker dat die ventilasievinne vry van stof en puin is.
- Verbindingskontrole: Annually inspect all power, ground, remote, and speaker connections for tightness and corrosion. Loose connections can cause performance issues or damage.
- Omgewing: Verseker die amplifier remains in a dry, stable environment, protected from extreme temperatures.
7. Probleemoplossing
As jy probleme ondervind met jou ampLifier, verwys na die volgende algemene probleme en oplossings voordat u ondersteuning kontak.
- Geen krag:
- Kontroleer die inlyn-lont naby die battery.
- Verify +12V, GND, and REM connections are secure and receiving power.
- Ensure the remote turn-on wire is connected to a switched 12V source.
- Geen klank:
- Check all RCA input and speaker output connections.
- Verify head unit is powered on and outputting audio.
- Adjust the GAIN control.
- Verwronge klank:
- Reduce the GAIN setting.
- Check speaker wiring for shorts or incorrect polarity.
- Maak seker dat die luidsprekerimpedansie ooreenstem ampverligter spesifikasies.
- Reduce BASS BOOST if active.
- AmpOorverhitting van die verligter:
- Verseker voldoende ventilasie rondom die amplewendiger.
- Check speaker impedance; running too low an impedance can cause overheating.
- Verify power and ground wire gauge is sufficient.
8. Spesifikasies
Technical specifications for the Edge Audio Xtreme Series EDX5000.1FD-E0 Monoblock Amplewendiger:
| Kenmerk | Spesifikasie |
|---|---|
| Modelnommer | EDX5000.1FD-E0 |
| Handelsmerk | RAND |
| Amplewendiger tipe | Monoblock, Class D, Full Bridge |
| Maksimum krag | 10,000 Watt |
| Frekwensierespons | Tot 20 kHz |
| Built-in Crossovers | Active (HPF, LPF) |
| Bas hupstoot | Adjustable (0-12dB) |
| Basversterkingsfrekwensie | Adjustable (35Hz-70Hz) |
| Voltage | 230 Volt (Bedryfsvolume)tage Range typically 12-14.4V DC for car audio) |
| Montage tipe | Oppervlakmontering |
| Produkafmetings (H x B x D) | 2.5 x 10.4 x 9.1 duim (64 x 264 x 230 mm) |
| Produk Gewig | 6.61 pond |
9. Waarborg en Ondersteuning
For warranty information or technical support, please refer to the documentation provided at the time of purchase or contact your authorized Edge Audio dealer. Keep your proof of purchase for warranty claims.